Many owners of their personal plots purchase plastic tables and chairs to organize outdoor recreation. The models attract attention with their affordable price and long service life.
However, plastic furniture is standard, so it can be called tasteless and unoriginal. Garden furniture made of wood looks much more interesting - original products that, if desired, can be made with your own hands.
With a little skill and creative imagination, you can create real works of art from wood. Let's look at how to make country furniture from wood, we will provide drawings and assembly diagrams.
How to choose the right material
As a rule, the issue of choosing a material is the easiest to solve. Many garden owners prefer to use wood. Some people make individual elements from pallets, others use improvised materials such as stumps or vines from branches of nearby trees. It all depends on the desired result and the availability of free time.
The greatest success among summer residents is outdoor garden furniture made of wood.
If you pay enough attention to planning, preparing and assembling garden furniture, the result can be no worse than commercial samples.
A distinctive feature of wooden furniture is that it is an absolutely environmentally friendly product, striking in its beauty and variety of textures.
Pair of romantic armchairs made of logs
The happy owner of a log from a log house, as a rule, does not know what to adapt it to. But you can turn it into two good-quality chairs for gatherings with your wife by the fireplace.
We saw off four half-meter logs from the log - these are the legs. Another piece, up to a meter long (as convenient) needs to be split in half lengthwise - these are the seats. We place the legs in pairs parallel to each other and attach the halves of a long block of wood to them with the flat side up. The backs and armrests are made from beautiful thick driftwood. Don’t forget to coat our new furniture with anti-rot and anti-bugs protection.
Wooden chairs
Definition with construction
Before you start creating garden furniture with your own hands, you need to have a clear idea of the final appearance of the entire structure. Even a small sketch is enough to roughly calculate the required amount of material.
Garden furniture is made fairly quickly, the main thing is to use high-quality material for these purposes.
Most often they make it with their own hands:
- tables
- chairs
- beds or loungers
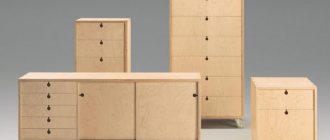
- storage racks and shelves
From idea to implementation
Immediately before making a chair, table, bed or armchair from timber, it is necessary to make assembly drawings of the future product. On the drawings of individual parts we indicate the exact dimensions and mark the places of drilling and gluing. If there are carved designs on the product, before assembly it is necessary to apply its outline to the part and cut it out.
To make doors from laminated veneer lumber, all of the above materials and tools will be useful; in addition, you will need hinges, a lock and a door frame. The hinges must be of high quality, since doors made of timber will be much heavier than those made of plywood or chipboard. When creating a door structure, a drawing is also made for accurate and coordinated production and connection of all component elements.
Cabinetmakers make furniture from bars and wooden panels; this combination allows you to use all the advantages of these materials. The bars will make a chic dining table or chair, headboard and stools or garden furniture.
Necessary tools and additional materials
On the one hand, to make many pieces of furniture you can get by with scrap materials, but to create more reliable and durable furniture you may need a specialized tool:
- jigsaw (or hand saw), circular saw
- Sander
- screwdriver
- drill with a wood drill bit to fit the screws
To create just a piece of furniture, this is enough:
- hammer
- screwdrivers
- self-tapping screws
- sandpaper
- roulette
- pencil
- fastening furniture corners
Tools that will be needed for the job.
That’s the beauty of garden furniture, that even in its wild form it looks quite appropriate. Let alone a professional approach to business - such a homemade garden interior will surprise even the seasoned.
Peculiarities
Garden furniture usually belongs to one of 3 types, which include portable, permanent and folding. The first category includes chairs and tables, some versions of swings. If something happens, there is a place for them under the terrace cover, in the garage, basement or inside the house. Permanent furniture can only be dismantled. The folding type is the most difficult to implement, but the resulting structure can be reduced in size if necessary, sometimes several times. Living up to its name, it is made by movable joints. Folding furniture can be either permanent or portable. If possible, it is better to assemble structures for the garden indoors with a workbench and a large table for work. Then the accessories will be protected from moisture, and the storage of waste materials will be convenient, and there will be better opportunities for recycling.
Design and drawing
When creating garden furniture with your own hands, drawings and diagrams should first of all be based on its appearance. Having decided on the future type of our furniture, we move on to the next important stage - drawing up drawings.
Drawings of garden furniture are necessary for self-production.
Note! The more thoroughly you approach this process, the better the final result will be.
When drawing up a drawing, we carefully calculate every detail, this will not allow us to lose sight of even the most insignificant nuance.
This garden furniture is suitable for both children and adults.
First of all, we draw the frame.
We are working on fastening methods and calculating the amount of fasteners required.
After completing this process, it is recommended to take another careful look at the resulting plan - if you don’t make adjustments to it now, it will be problematic to do so later. Well, if the drawn up scheme is completely satisfactory, we move on to implementing our plans.
Creating garden furniture with your own hands for a summer residence begins with an idea reflected in drawings, sketches and models.
Selection of timber
Which timber is optimal for creating furniture or household utensils? Whole, chamber drying.
Why him?
- Timber with natural moisture requires long-term (up to six months) atmospheric drying. In addition, uneven evaporation of moisture can lead to its deformation or the appearance of deep cracks;
- Using laminated veneer lumber will expose the glue seams, significantly degrading the appearance of your masterpiece. In addition, the price of glued material is at least twice as high as that of solid material.
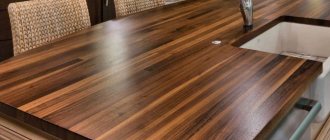
Coffee table. Material – solid oak timber.
What type of wood should you prefer? Unambiguous instructions are impossible here: each option has its own advantages and disadvantages.
| Wood type | Key Features | Cost per cubic meter, rubles |
| Pine | Light, light, resinous with an unexpressed texture. Rot resistance is limited | 8000 – 11000 |
| Larch | Bright, pronounced texture. Does not absorb water, does not rot | 14000 – 18000 |
| Oak | Does not rot, gains strength with prolonged contact with water. Extremely resistant to mechanical stress | 40000 – 80000 |
| Ash | Has all the properties of oak with a more pronounced texture | 35000 – 70000 |
Useful: a special method of surface treatment - brushing - will help to emphasize the texture of pine and make it more expressive. We will talk about it in the corresponding section of the article.
Master classes on making garden furniture with your own hands
As already noted, the process of making garden furniture from wood with your own hands is very responsible and exciting. Next, we’ll take a closer look at the most popular and often hand-assembled interior items.
To make the seats comfortable, it is worth bandaging them with removable cushions.
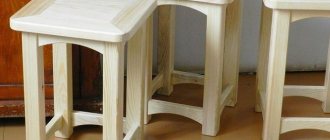
Making a garden chair
A garden chair can be made either in the simplest form of a seat base screwed to a stump, or you can approach this process more thoroughly.
To assemble a garden chair, we use a pre-selected type and size of wood. It is recommended to purchase a beam of at least 40mm on one side. This will provide reliable support for a person with an average weight of 80-90 kg. If it is necessary to place people of larger dimensions on such furniture, we increase the size of the timber to 60 or even 80 mm.
If you have a carpentry workshop equipped by modern standards, making a garden chair from wood with your own hands is very simple.
We mark the material using a tape measure and a pencil according to the drawn up drawing.
Let's move on to sawing. You can use hand tools in this process, but faster and better results can be achieved using a jigsaw or circular saw.
It is customary to use square bars for the frame, and rectangular ones for the back and base.
Additionally, the places where the parts come into contact can be treated with wood glue. This assembly will be more professional.
It is better to sand the surface of the wood well before starting assembly; this will protect you from the risk of getting a splinter under the skin both during the assembly process and in the further use of such furniture.
We mark the fastener landing spots with a drill and proceed to the final assembly.
Note! If you plan to use our furniture outdoors, the wood must be coated with protective compounds against moisture - special paint or varnish.
The cost of a DIY garden chair is less than $10.
Instructions for making a table with benches
The final appearance of such a product directly depends on the intention and capabilities of the person himself. In its simplest form, such a table and benches can be stumps covered with a wooden base. More often, this issue is approached more seriously, because such an outdoor set will be used for large companies, and the more thoroughly you approach the issue of its creation, the better the end result will be.
Making a quick set: a table with two benches is easy.
A very common option is a rectangular table closed on all sides.
To create it, we make a frame from beams, and cover the entire side surface with wood.
We first prepare the material - we grind it and treat it with compounds that allow the furniture to be used in outdoor conditions, which can be purchased at furniture and construction stores.
Such furniture can be assembled in just a few hours and decorate your garden with a beautiful table at which you can have lunch and picnics.
We assemble benches according to the size of the table. Their length should be commensurate with the table, the width can vary depending on the planned budget and the materials at hand. To make it comfortable for a person to sit on a bench, it is recommended to make its width at least 15-20cm.
Your garden tables and benches will look no worse, or even better, than store-bought ones and will last a long time.
Do-it-yourself chaise lounge for a summer house
Before assembling the sun lounger, it is also important to have an understanding of its final appearance. This can be an easy-to-make chair with a wooden base and fabric that acts as a back and seat. Or you can make a monolithic reclining version of the chaise lounge. The first is more acceptable for those cases when it is planned to change its location, while the second, due to its high weight and inconvenience of moving, is installed in a certain place and is rarely rearranged.
A chaise longue is a comfortable and lightweight chair design that is used in relaxation areas: on the beaches, by the pools, and an integral part of the decoration of the dacha.
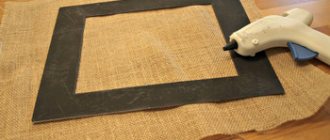
In both cases we make a wooden frame. For a small sitting chair, a 25*30cm beam is suitable. It is necessary to make two long legs and two short ones. We connect them together, if necessary, we leave the structure the opportunity to assemble - in the simplest form, for this it is enough to secure the mounting screws with nuts with lugs. We connect the legs together with slats, and pass fabric through them, it is better if it is burlap - it is more durable for street use. It is recommended to additionally reinforce the upper and lower legs with metal spacers - to do this, just insert a metal rod into both legs on each side.
The idea is very simple and easy to make yourself.
For a large sun lounger, first of all we assemble the base, which we then cover with rectangular slats. We sand the front part of this design and cover it with a protective layer - furniture paint or varnish.
Pallet table
When creating a table, you should pay special attention to the quality of materials. Old pallets look rather unpretentious and are not particularly distinguished by their quality, especially those that have been exposed to moisture for a long time. Therefore, the main advice is to use new pallets.
Wooden pallets are a building material that gives almost unlimited freedom for creativity and the implementation of ideas.
To assemble the simplest possible option, three pallets are enough - two for the legs and one for the lid.
More often, pallets are used as a cover, fastened together, and the legs are made from additional materials - wooden beams, tall stumps, or tree trunks left after being cut down.
The main advantage of such furniture will be its complete environmental friendliness.
The main rule when assembling a table is high-quality grinding of all its parts, especially the surface of the lid. We fasten the pallets together with long self-tapping screws.
It is also recommended to additionally treat the surface of the resulting product with paint or varnish to protect it from the influence of negative environmental factors.
Wicker furniture
Wicker garden furniture without drawings and diagrams is very problematic to assemble. Therefore, if you decide to make such a piece of furniture, first of all you need to carefully think through the drawing, and based on it, calculate the amount of material required.
The advantages of wicker tables and chairs are well known to consumers.
If you have no experience in making such furniture, you can find ready-made diagrams on the Internet and, according to them, purchase the necessary material.
You can use wicker or rattan as the basis for such furniture.
When weaving individual elements together, continuous weaving is most often used - with this method, individual rods are woven into posts perpendicular to them, alternately bending around the rod on one side or the other. The resulting weaving is very reliable and durable.
To make wicker furniture for a summer house, long flexible sprouts are suitable, which can be easily split into long fibers and the bark removed.
It is customary to use openwork weaving for the backrest and seats, as this look is quite beautiful in itself.
By purchasing high-quality material for weaving, you can guarantee high durability of your furniture. As a rule, wicker furniture does not require any additional processing.
Do-it-yourself wicker furniture made from wicker will look much more original than purchased furniture.
Making a bench with a back
A rather unusual and beautiful version of a country bench made by yourself is a transforming bench. Compact and functional design: when folded it is a bench with a backrest, when unfolded it is a table and two benches. When disassembled, the transforming bench is designed for 6 people. It will not be possible to assemble such a bench quickly, but if you are patient, the result will be amazing.
Tools and materials
Materials:
- boards 30x80 mm (for reliability it is better to take hardwood);
- metal corners;
- self-tapping screws;
- liquid nails or special glue;
- bolts size M12;
- nuts, washers and nails.
Tools:
- hacksaw;
- screwdriver;
- drill;
- hammer;
- ruler;
- pencil;
- protractor;
- corner;
- roulette.
Assembly steps
First you need to draw all the necessary templates, and then cut the boards to size. When finished, there will be two benches; it is advisable to assemble the outer one first, and then the inner one. The height of the legs is 44 cm, the distance at which they are located: at the top – 25 cm, at the bottom – 40 cm. This is done for reliability and stability. The crossbar between the legs is located at a distance of 15 cm from the supporting surface; it should be located on the inside. The length of the seat is 138 cm. Before starting assembly, all parts must be sanded and chamfered. The design of the bench is quite simple, all fastenings are made with self-tapping screws and glue, and corners are added for reliability and rigid fixation.
The next step is assembling the inner bench. The height of the legs should be the same as that of the first bench, but here the crossbar is moved outward. The length of the top bar increases from 25 cm to 35 cm. A hole is drilled on the protruding part, 4 cm from the edge, where an M12 bolt will be installed; To hide the bolt head, this hole needs to be slightly enlarged. The seat length should be 144 cm.
Next you need to make brackets from two bars. They are connected in such a way that an angle of 100-105 degrees is obtained. One beam is the width of the tabletop, the second is the distance from the bench to the tabletop. A hole is drilled in the second block (which is responsible for the distance) where an M12 bolt will be installed. Now the finished brackets are connected to the inner bench. To prevent the joint from wearing out and the parts not touching each other, you need to install a washer. The head of the bolt is recessed into the drilled hole, and the same actions are performed on the opposite side.
Afterwards, the brackets are installed in a level, that is, in an unfolded position. Now you can connect the tabletop to the outer bench. This is done using two strips, 75.5 cm long. Holes are drilled at both ends at a distance of 4 cm from the edge. A limiter is needed on both slats so that in the future the tabletop does not move out and is securely fixed. It’s not difficult to make: a small piece of board needs to be cut at a certain angle (the desired degree of angle is selected by trial and error) and connected to the plank using self-tapping screws. The same thing is done on the second bar. One end of the plank is connected to the bracket (with the part responsible for the width of the table top) from the inside using an M12 bolt, the second end is also attached using a bolt to the outer corner of the outer bench. Washers are installed at the joints. The final stage is assembling the tabletop. Pre-prepared boards are screwed onto the brackets. The transforming bench is ready.
Examples of creative and stylish design of garden furniture
In order for the furniture not only to perform its functions for a long time and efficiently, but also to be an aesthetic decoration of the garden, it is often decorated with additional elements.
One of the most striking examples of decor are fresh flowers, wildflowers look especially bright.
Another way to make your outdoor furniture a piece of art is to decorate it with an attractive accessory such as a throw or throw pillows.
It is best to make garden furniture with your own hands, taking into account the opinions of all family members.
Decorating garden tables with glass or plastic tabletops looks no less attractive.
Having studied and carefully applied the recommendations proposed in this article for making country furniture from wood with your own hands, you should not throw away the drawings and assembly diagrams; they may come in handy in the future.. If you also apply the decorating techniques with additional accessories presented earlier in the text, the furniture will become an excellent place for a family recreation.
With such furniture, spending time at the dacha will be pleasant and comfortable.
Adviсe
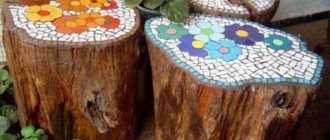
Stump of a garden chair
An old barrel, which in the future will turn into an unusual chair with a back, will help you make a piece of furniture from scrap material. In a short time, you can build a bench using boulders as support legs and a wooden plank as the seat. To build such a bench, you will need the following tools:
- board processing plan;
- drill with diamond tip;
- anchor bolts.
After processing the boards using a plane, the boulders are brought to the required height, after digging a hole and placing a sand cushion on the bottom. It is necessary to drill holes for anchor bolts in the panel and stones.
The final stage is tightening the bolts and coating the surface of the board with a layer of protective varnish.
Is it worth doing?
A reasonable question to ask: should I just go and buy everything at the nearest supermarket, since there is a huge selection today? But, hand on heart, we must admit that the price of furniture made of natural wood can seriously undermine the family budget.
However, let’s not talk about sad things, but just find out why it’s better to do it yourself:
| Manufacturing |
|
| Application |
|
Homemade wooden furniture helps to create the overall style of the garden area. You have the opportunity to create accents on your suburban area and show your individuality in the territory improvement project.
Below we will tell you how to make a garden table for a summer house and a wooden bench with your own hands. These items will always come in handy at any summer cottage.
Do-it-yourself wooden garden furniture allows you to create a comfortable atmosphere on the site
Carpentry lessons
Part connections
All structural parts are connected using glue with additional fixation with dowels. Such a connection is not much inferior in strength to self-tapping screws and differs favorably from them in that it does not force the caps to be masked.
Connecting wooden parts with dowels.
The assembly technology is not complicated:
- Glue is diluted in warm water. Before use, it is aged for 40-60 minutes;
Please note: casein glue must be used within three to four hours. After this period, it loses its stickiness, gradually thickening.
- Holes for dowels are marked and drilled in both parts. The total depth of the paired holes should be slightly greater than the length of the dowel;
- The dowels are lubricated with glue and placed in the holes on one of the parts;
- Both surfaces to be glued and the free parts of the dowels are coated with the thinnest possible layer of glue, after which the parts are connected and placed under pressure.
Attention: squeezed out glue must be removed from the surface of the product immediately. Once it sets, it will be almost impossible to clean it without scratching the surface.
Planing
There are a couple of subtleties when working with an electric planer.
- The knives should protrude beyond the ski by no more than 0.5 millimeters. It’s better to make a couple of extra passes than to ruin the part with a deep groove;
The smaller the layer removed in one pass, the higher the quality of the surface.
- The slower you move the plane over the surface, the less likely it is to get a “wave” from the knives on the planed timber.
Grinding
For rough sanding of wood, you can use not only sandpaper, but also a sanding mesh. It is better to grind only along the grain: with a transverse movement, a coarse abrasive will leave deep scratches that will take a long time to remove with fine-grained paper.
Brushing
This technology allows you to make a cabinet or table from timber with your own hands, giving them the appearance of old products with pronounced surface wear.
The procedure is as follows:
- We process the front surface of the part with a metal brush. The pressure on the brush should be minimal, and its movement should be as uniform as possible. This will remove the softest wood fibers; a relief texture will stand out on the timber;
- Then the stain is applied - in one or several layers until the desired tone is achieved;
- The next stage is sanding with fine sandpaper. The pressure on the sander should be insignificant: our task is not to level the surface, but to grind off the texture protruding above it, highlighting it with color.
The photo shows the brushed surface of the ceiling beam.
Varnishing
The varnish is applied last, after the product is completely assembled. If you try to glue pre-varnished parts, the varnish will interfere with the adhesion of the glue to the wood, severely weakening the joints.
When varnishing, you should follow a few simple rules.
- The coating is applied in 5-6 thin layers with intermediate drying. There is no point in trying to varnish the surface with a thick layer in one go: the total drying time will not decrease, but will increase;
- If possible, the varnish is applied to the surface in a horizontal position. This will avoid drips;
- After drying the first layer of varnish, intermediate sanding with zero paper is required. Humidification raises the lint (fibers of the top layer of wood), which will make the surface rough to the touch.
Intermediate sanding will make the varnished surface perfectly smooth.
Caring for furniture made of wood
When using products that have a folding format, be careful to constantly apply a lubricant to the joints.
Do not leave wooden products exposed to bad weather. To do this, select a dry place with ventilation, and also pack the product in a case or other fabric with high density. Plastic bags are excluded.
Cleaning surfaces should only be done with a damp, lint-lined cloth. After washing, cleaning, processing, you need to let things dry thoroughly.
By listening and following these simple recommendations, you can delight yourself and your loved ones with your own handmade decor for many years to come.
Picnic table: stationary products of this type
It's no secret that a picnic table can be made in two variations - it can be stationary or folding and portable. The last option is ideal only when a person goes for a picnic just outside the city - perhaps into the forest or to the bank of a river, but not to the countryside. For a dacha, the most optimal option for a picnic table is a stationary product of this type - install it in one place, decorate the space around it, thus creating a recreation area, and use it for your pleasure.
You can make a stationary picnic table with your own hands in different ways and from different materials - modern technologies allow you to create such products from almost anything. Let's look at the most common options and get to know them in more detail.
- Wood. This is a classic of the genre. This material allows you to create a picnic table of any size and shape - moreover, through additional processing it can be given colors and structures that are unusual for wood. In general, there are quite a lot of options here, as well as various design solutions - you can make a picnic table on one, three or four legs, or you can even hang it in the air on chains or ropes. This, of course, is not practical, but some people resort to this principle of making tables. In almost all cases, the principle of manufacturing products of this type remains unchanged - the only difference is in the supports. This is a tabletop (to exaggerate, a wooden shield made from boards), which is installed either on several wooden supports, or on one powerful one, all made of the same wood or some other material.
- DIY iron picnic table. The most important advantage of this type of table is its durability and strength. It can be made either entirely from iron or in combination with wood - the latter option is attractive in its appearance. As in the previous case, such a picnic table can be installed on one, three or four supports. In most cases, one powerful support is used, which is concreted into the ground - a special element is created on top of such a support (a plate with holes), to which a wooden tabletop is attached. Another advantage of tables of this type is the fact that the tabletop can be replaced at any time - the iron support remains in place, and the table, when it rots and becomes unusable for some other reason, is simply replaced with a new one.
- DIY stone picnic table. The best option for a stone picnic table is a natural stone support on which a wooden tabletop is laid. There are two ways to make such a support - lay it out of stone using mortar or make it like a gabion. Install a fence made of metal mesh, filling the space inside with stone - this option allows you to get rid of the unsightly appearance of cement in the table support. This way you can make not only a table, but also chairs for a picnic.
To learn how to make a wooden picnic table, watch this video.
In principle, concrete structures can also be considered as options for making picnic tables (their disadvantage is the need for additional finishing). Products of this type made from untreated or roughly processed wood look quite good, for example, logs, branches, thin sections of tree trunks allow you to create tables and chairs for a picnic in the old style. This option, of course, is not for everyone, but if you like to create with your own hands, then it will be the most optimal for you.