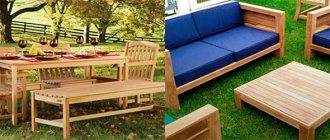
Why veneer furniture or doors?
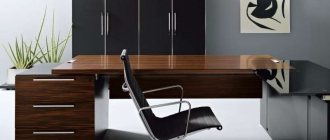
By veneering, an ordinary table or cabinet made of pine can “turn” into oak, and its appearance will not be inferior to furniture made entirely of oak. The price of the finished product will be an order of magnitude lower than when purchasing solid wood items. This is why gluing veneer is so popular among craftsmen.
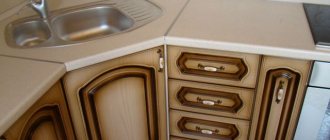
Veneered MDF table
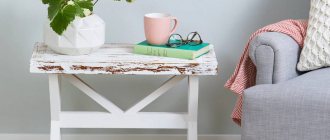
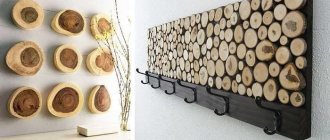
Important! Veneering offers many other benefits. With its help, you can make completely new, beautiful products from old discarded furniture that serve as interior decoration.
Stripped doors can also be restored, as can a peeling window sill. The design possibilities with veneer are very wide: the furniture will fit perfectly into any style - from classic to modern.
Advantages of veneer:
- does not dry out;
- not affected by moisture or temperature changes;
- does not deform;
- has a long service life.
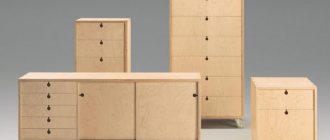
Chest of drawers Valencia oak veneer
Development of marquetry
According to historical sources, the marquetry technique was known back in the times of Ancient Greece and Egypt. However, these were isolated attempts; The greatest expansion from a historical point of view was recorded only during the heyday of the Baroque and Rococo styles.
At that time, marquetry was one of the most common techniques for decorating wood and wooden furniture. Gradually, proven methods and techniques for marquetry production began to develop, the greatest advantage of which was the invention of the veneer cutting machine.
With the use of plywood for insertion, there has been a gradual transition from hardwood to softwood, especially spruce or other softwoods.
- Initially, carpenters were engaged in the production of marquetry; later a separate craft was created.
- Today, carpenters-artists, together with carvers, are again working in this area. Over the centuries, the use of woody plants has also changed.
- At first, fewer types of wood were used, which gradually increased.
In addition to commonly available woody plants, exotic species and combinations with other types of materials such as metal, pewter, mother-of-pearl or brass also began to be used.
Materials and tools
For self-veneering, you can use almost any piece of furniture or door.
Attention! The main thing is that the products maintain their integrity and are not rotten or severely damaged.
To work, you need to prepare the veneer in advance, as well as tools and consumables (depending on the specific veneering method, not all of them may be needed):
- plywood knife;
- plane;
- glue;
- iron;
- wooden roller or hammer;
- sandpaper or sander;
- wrapping paper;
- rag, sponge;
- gummed tape;
- masking tape.
Veneer preparation
Typically, at home, ready-made veneer is used, which is sold in the form of sheets rolled into rolls. They are often deformed and warped, so they must be straightened before gluing.
The material is laid out on the floor, moistened with a damp sponge or cloth and placed under a press between sheets of plywood or gypsum board. Sheets of wrapping paper are placed between the layers, and the structure is pressed on top with heavy objects.
After straightening, they begin cutting the veneer. To do this, the surface of the base is measured, the resulting dimensions are marked on the veneer and a margin of 5 cm is added to the “pattern” on each side. The part is cut out with a plywood knife (you can replace it with a plunge-cut saw).
Individual elements for large parts are joined with gummed tape on the reverse side. When joining, the texture pattern is carefully selected.
DIY veneer
You can make veneer with your own hands, but this requires special tools and work skills. They take the workpiece in the form of a beam, draw it in vertical stripes every 10-12 mm and saw it with a jigsaw, holding it in a workbench. The result is sawn veneer.
You can make sliced veneer from it - you just need to process the surface with a plane, strictly ensuring that all the pieces are of the same thickness. The finished veneer is sanded and any varnishes, stains or paints are applied.
Methods for obtaining sliced veneer
Basic Marquetry Making Process
The starting material for making marquetry is veneer. Today, peeled and planed veneers with a thickness of 0.6 and 0.8 mm are most often used.
However, in the past, technology did not allow this method of producing wood mosaic fragments, so pieces of veneer cut to a thickness of 3 to 8 mm were used.
To achieve the final effect, veneers of different types of wood are used, due to which they differ in color. Color changes can also be achieved by etching.
The making of marquetry is preceded by careful design, assembly of the model and, possibly, the production of cardboard templates for easy transfer to the veneer layers. The decisive step is to cut out the individual parts into the desired shape.
Various carving techniques are used for this:
- Knife cutting - sharp carving knives of various shapes are used to make marquetry. You can also use a classic knife or scalpel. When cutting, do not press too hard on the cutting tool, as the veneer may break. To break the fibers, finer and more repeated cutting is recommended;
- Hand sawing - Power saws can also be used to cut veneer. A favorite is the so-called lumberjack - a saw with fine teeth in the shape of an egg. A high-quality clean cut can also be achieved using a plywood saw, thanks to which you can cut even small curved decorations;
- Electric Butchering - Nowadays, marquetry production also uses power tools. An example is electrical decoupling, which can be used to cut quickly, accurately and evenly;
- Laser cutting - Professional modern marquetry companies use laser for cutting. Thanks to this, individual veneer pieces are cut with maximum precision and ensure a perfect result.
Methods for gluing veneer
Veneering can be done using different methods. Here are the main ones:
- Contact cold. For this purpose, contact adhesive is used, which has a short holding and setting time. The technique is only suitable for small parts.
- Cold followed by pressing. After applying the glue, the surfaces are joined, leveled and fixed with a clamp.
- Hot. As they are gluing, they go over the veneer with an iron, and the glue melts from the high temperature.
Hot veneer gluing
Glue selection
Typically, for the contact method, any quick-setting adhesives such as “Momenta” are used. PVA is suitable for joining smooth parts, but it is only used in conjunction with an iron.
Advice! Titebond glue and epoxy based products are ideal for cold pressing techniques.
Wood glue Titebond II
Transferring marquetry to the surface
After the individual parts of several types of veneer have been precisely cut, it is necessary to assemble them into the desired motif. The pieces must be cut out with maximum precision so that after folding the pattern there are no large gaps left between them.
The assembled pattern is temporarily glued together with paper adhesive tape, which allows you to process the entire part.
- The resulting trim must be transferred to the required substrate - plywood or the piece of furniture itself. You can use glue or epoxy glue for gluing.
- Only apply the required amount of glue, otherwise it will begin to seep through the motif and cleaning it will be difficult.
- After gluing to the base, the tape needs to be pressed. To protect the veneer, the pattern is covered with newspaper on top and properly tightened with pullers. The ideal time to press the binding is several hours.
- After the glue has dried and pressed down, the paper adhesive tape is removed from the marquetry and surface treatment begins. Small gaps between the individual parts are filled with glue mixed with fine sawdust.
- The grinding phase continues until the entire surface is uniform, smooth and without noticeable differences in height. The last stage of marquetry production is surface treatment with paint.
Nitrocellulose varnish is applied with brush strokes in one direction. After applying and drying several layers, the finished work is sanded again with fine sandpaper.
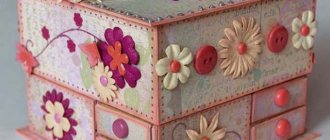
Marquetry making is an impressive craft that is practiced not only by professional carpenters and carvers, but also by amateurs. Interest in marquetry is also manifested in the organization of courses and handicraft clubs for children and adults
. You can also try making your own marquetry at home, other than veneer and basic carpentry tools, you don't need many tools.
Procedure for veneering furniture or doors
The work of veneering furniture is not very difficult. The base is leveled, sanded, defects are covered with wood putty, and then sanded again. Make sure all surfaces are clean and dry before applying the adhesive.
A layer of glue is applied to the veneer strips, allowed to dry a little and pressed firmly to the base. Tap the material with a special hammer or roller to level the position. Afterwards, fix the edges and joints of the veneer with masking tape, clamp the product with a press or iron it through paper along the wood fibers.
After the glue has dried, remove the tape, remove excess glue, cut and sand the edges with sandpaper or a sander. To extend the life of furniture, a protective coating of varnish and oil is applied. If the technology is strictly followed, home furnishings veneered will look amazing and will add a touch of grace and elegance to the interior.