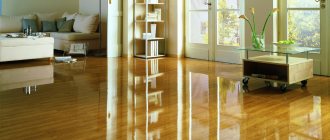
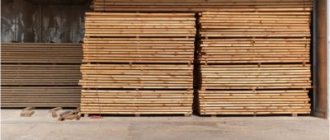
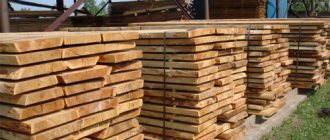
Wooden bases do not lose their popularity for a long time, but the material has a disadvantage - it is not resistant to many external factors, which requires the creation of a protective layer; people often want to preserve the natural grain of the wood. Varnish coating is regularly chosen for different types of wood products; although the process seems simple, it requires certain knowledge to obtain a durable and high-quality result. The types of varnish impregnations and operating rules will be discussed in detail below.
Why do you need to varnish wood?
Before you varnish a wooden surface, you need to understand what problems the application of varnish material solves. The technique is used for a variety of objects: wall coverings, furniture, parquet, countertops, slabs and other wooden structures. Thanks to varnishing wood you can get the following advantages:
- Creating protection from external influences;
- After treatment with the material, the base will retain heat longer;
- The wooden base will remain with the same brightness of color and pattern texture longer;
- You can change the shade of the base to a suitable option if necessary.
The wood base will remain with the same color vibrancy and pattern texture longer.
Which varnish is best for applying to wood surfaces?
Varnishing of wooden surfaces can be carried out with a variety of compositions; a wide range of products is presented on the construction market. When choosing, it is important to consider the operating conditions in order to get a good result. And also you won’t have to redo all the work, for example, due to the appearance of bubbles on the base.
So we can distinguish the following types of varnishes that can be applied to wood; they differ in their constituent substances and technical characteristics:
- Oil-based, wood varnishing imparts a thick layer that has a yellow tint; most often the composition is chosen for processing products inside a building for floor and ceiling coverings, including in the case of brushing the material;
- Alkyd, distinguished by its resistance to moisture and mechanical stress. Therefore, it is used for painting surfaces outside the building, for yachts and ships. Can be used indoors, has no pungent odor, and can be cleaned with detergents after drying. A wet base stands out, which is why it is easy to notice areas that are left unpainted. After drying, the layer will be smooth and shiny;
- Nitrocellulose, creates a durable layer to get better protection, requires a multi-layer coating, withstands moisture, suitable for external work;
- Polyurethane, the composition includes polymer substances that make it possible to create a thin coating that still has strength properties. Typically selected for surfaces of musical instruments;
- Based on acrylic, after application the product remains a colorless layer; some varnishes can be tinted. The protection will be durable and harmless to health; a water base is often used. Designed for interior decoration; you can paint furniture, walls, and floors in residential areas without fear;
- Alcohol, synthetic and natural resins are introduced into alcohol, which creates a product with the property of creating a barrier against moisture; you can even limit yourself to a single-layer application. But they are not durable, so they are often chosen as a primer layer for wood.
When choosing, it is important to consider the operating conditions in order to get a good result.
How to care for decoupage brushes so that they last longer?
1. I strongly do not recommend mixing paints with brushes!
At the same time, paint is collected at the base of the brush, during the work it dries out, and it is quite difficult to wash it out. And as a result, over time, our brush at the base becomes dense, hard, and fluffy in different directions. Of course, it has nothing to do with the even spatula of a new brush... I mix paints with plasticine stacks, as well as with palette knives (paint can be washed off very easily from metal palette knives, even if it has dried on them). It takes a little longer, but the brushes are more intact.
2. Always have a jar of water
. Surprisingly, I didn’t come to this conclusion right away - it seemed to me that I could paint it and then immediately wash the brush. Now I have at least 4-5 jars when I work, and this is very convenient - firstly, if necessary, I can be distracted for a long time, and secondly, I don’t need to change the water often, I just need to put the brush in a new jar. After work, I immediately wash all my brushes and all the jars.
Separately about washing brushes for decoupage: wash your brushes in warm water and always with soap!
Without soap, acrylic is difficult to wash out and the brush becomes harder. You can also wash your brushes with fairy from time to time - they become a little softer.
As for the old hard brushes with dried paint in the base: these old ladies, alas, cannot be resuscitated, only cosmetic repairs))) Namely: an attempt to dissolve the paint in the base using white spirit or acetone has not yet led to anything. The white spirit only softened the paint, but I had to pick it out)) The only thing that was achieved was to put the brush with the paint softened after the white spirit under a press (for example, wrap it in a napkin and put the base and nap under a heavy book) and dry it like that , then from fluffy in all directions it becomes a more pronounced flat spatula. True, not for long...
I want to try car paint remover and solvent 646, but I haven’t gotten around to it yet. If anyone has tried it, please share the result in the comments.
3. It is strictly forbidden to leave thin brushes less than 8 mm wide in water for a long time!!!
Whether flat, oval, beveled or round, the hands are deformed under their weight and bend!!! I generally wash zeros and ones immediately after use (or you can rinse them thoroughly in clean water and put them away, and wash them with soap along with all the others after finishing the work).
In general, while working, I keep my brushes only in water, I don’t allow them to be dirty in the air (in paint or varnish) even for a couple of minutes. If there is still a lot of paint left on the brush, and it is a pity to wet it, but you need to take a break for a while, then you can wrap the brush in a damp napkin (or in a regular paper napkin soaked in water). But, of course, I don’t recommend leaving the brush like that for a long time either...
By the way, if possible, purchase a brush holder and adapt it to store brushes in water, for example, place it near a rectangular tray so that the brushes fall into the water. You can also make a similar design yourself from some elastic material that holds its shape well (for example, you can try to fix the foam rubber on the side of the tray, make a cut from the center of the tray and insert a brush with bristles into the water into this cut).
4. And the last question for today is how to apply non-aqueous varnishes.
Personally, I prefer to deal with odorous materials as little as possible, so I rarely use non-aqueous varnishes, and certainly
don’t use a brush . I stretch thick self-leveling varnishes over the surface with a stick, or a corner of paper, or something else that is at hand
.
I apply liquid varnishes such as tsapona or shellac with a sponge or gauze swab
. This way, the used sponge can be thrown away, and there is no need to wash the brush with odorous solvents...
And how are you? Share in the comments what recommendations you will definitely apply from now on.
Did you like the article? Share it!
You may also be interested in:
Wood varnishing methods that can be used
When deciding how to apply varnish to wood, they are guided by the size of the surface being treated, as well as the chosen design option. You can coat wood with varnish using a brush, roller or spray gun. Each tool has its pros and cons, so you should study these points carefully:
- Brushes. A popular option, it is easy to use and makes it possible to paint the base with a variety of colors and apply patterns, for example, when painting wooden utensils with gouache, which is secured with a layer of varnish. And also to paint all the elements on the object with high quality, convenient for processing hard-to-reach places. It is important to choose the right tool for the base: a flat brush is convenient for covering wood; a small round brush will help paint items with small details; if the objects are small, then they are simply completely immersed in varnish. But the bristles of the brush can remain on the surface, so they monitor the quality of their adhesion;
- The roller facilitates and shortens the process of painting large surfaces. Also convenient for applying varnish on high bases, due to the retractable long handle. For wood, you can choose a roller coat made of foam rubber and velor. But the tool can apply a varnish coating and not bubble only if a defoamer is present in the compound;
- The sprayer makes it possible to significantly reduce the time of varnishing the base. However, the cost of the tool is high, for this reason it is purchased more often by professionals who cover large areas and then the price is justified. Also, use requires the ability to correctly configure the device before operation.
To work with a spray gun, the master must use protective equipment - a mask, gloves, and good ventilation must be provided in the room. In most cases, such measures are necessary; many varnishes contain toxic substances.
The roller facilitates and shortens the process of painting large surfaces.
Secrets of experienced varnishers
Coating a wood surface with varnish is a fairly simple task. But still, there is a significant difference between the work of a professional and an amateur, noticeable to the naked eye. And all because varnishers use a number of subtleties unknown to the average person. Here are some of them:
- If the varnish is intended for interior use, it cannot be used outside. This seems obvious, but many people ignore it, believing that nothing bad will happen. However, “indoor” varnish coatings outdoors can crack and begin to peel off even before they dry. And even if it blows through at first, the very first downpour will ruin the appearance of the coating.
- To paint the floor, you must use the hardest and most wear-resistant preparations. And for furniture (except for the one on which they sit), it is better to take a less durable varnish - it usually looks more beautiful.
- Acrylic varnishes have virtually no smell. If you have to live in a room that is being renovated, it is better to varnish the wood with “acrylic”, then there will be no problems with health and sleep. And other compounds (almost all) have a very pungent odor.
- It is more convenient to varnish small, delicate parts not with a brush, but with a cloth swab (cotton, linen, wool). The main thing is to make sure that when rubbing against wood, the lint does not fall off.
- You can prime the wood before varnishing not with store-bought primers, but with a homemade mixture of paraffin (or wax) with purified gasoline, turpentine or alcohol. It is more effective against parasites than store-bought analogues. First, such a primer is applied with a brush with stiff short bristles, and then it is rubbed firmly into the wood with a piece of coarse cloth.
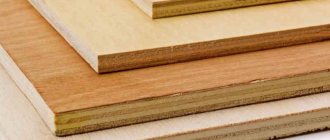
Preparing the wood surface for varnishing
Before coating the wood with varnish, it is necessary to carefully prepare the material for work, then the layer will be beautiful and smooth, and no flaws will be visible. They start with preparing tools and materials. The wooden surface is cleaned; it is important to remove all previous coatings.
It will not be possible to restore wood in separate areas; full coverage is carried out.
The following equipment will be required:
- Brushes for hard-to-reach areas and rollers if the area is large;
- Sandpaper or sander to remove old coatings and level the base;
- Brush or vacuum cleaner to get rid of accumulated dust.
The following options are available for cleaning the surface from previous materials:
- Chemical, special chemicals are used;
- Mechanical, performed with sandpaper or a grinding device;
- Thermal, together with mechanical, after heating the surface, mechanical devices are used.
The wooden surface is cleaned; it is important to remove all previous coatings.
Types of tool pile
When choosing a brush, pay attention to the material of the bristles. She may be:
- Natural - pig or horse hair;
- Artificial - nylon, polyester fibers;
- Combined.
How to varnish wood at home, step-by-step instructions
Knowing how to properly varnish wood will help you carry out repairs at home without involving specialists, which will save money. In general, the process is simple, it just requires step-by-step adherence to the steps, then the result will be attractive and the protective layer will last a long time. After preparation, it is necessary to grind, apply a primer solution and proceed to varnishing.
Knowing how to properly varnish wood will help you carry out repairs at home without the involvement of specialists.
Grinding
Working with a new clean planed base will require the use of sandpaper or a sander attachment with a grit level of 80-100. If the surface has previously been coated with paints and varnishes, then to remove these layers you can choose the 40-60 grain size option.
If the base is large, and in principle, working with wood and removing previous materials from it is a labor-intensive process, so the manual method is undesirable, it is better to use mechanized devices, choosing the tape type.
Afterwards, the vibrating type of sander is selected; it is necessary to grind in the direction of the fibers of the material, then it will be possible to avoid the appearance of scratches that will be noticeable later.
Next, dust formations are removed, which will also disturb the beauty of the varnished wood and interfere with obtaining a high level of adhesion.
Sanding is required in the direction of the grain of the material.
Padding
Applying a primer solution to a wooden surface makes it possible to close small pores in the material, which reduces the consumption of varnish and also increases the protection of wood from external influences. You can choose a liquid wax substance sold in aerosols, or regular type primers.
Any type of primer solution must completely cover the base; when the layer dries, then the treatment is carried out with a fine-grained type of sandpaper. The application tool is usually a roller, or a brush for small parts.
Applying a primer solution to a wooden surface makes it possible to close small pores in the material, which reduces the consumption of varnish.
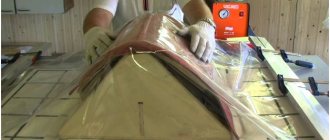
Varnishing
How to properly varnish wood depends on the application tool you choose. We talked above about choosing a tool; you can also add tampons to the list, which make it possible to unusually cover small surfaces. Features of working with different devices:
- The tampon is completely immersed in varnish so that it is thoroughly saturated. Test the application in advance to understand how hard to apply pressure to distribute the varnish. They move quickly along the growth of the fibers, each strip should go without connecting with the previous one, then the shade will be even. A multi-layer coating is made - 2-3 layers, each should dry well;
- You can cover any surface with a brush, it is important to make smooth movements to prevent bubbles from appearing. Periodically it is necessary to squeeze out excess varnish from the tool; the layer should be thin. A 2-3 layer application will be required, with each layer drying. The same technology is used when working with a roller; the roller is rolled in a special ditch;
- When varnishing, it is important to keep the spray gun at the same distance, adjust the flow of the product, and also regulate the pace of movement, which should be the same.
After drying the last layer, sand it and wipe the base from dust. And start polishing. For this stage you will need a specialized paste called polish, as well as tampons. Moving in a zigzag pattern with a swab soaked in paste, treat the surface, obtaining a smooth base and drying the layer. Re-polishing is done after 12 hours. To obtain a mirror-like shine of the base, three layers of polishing will be required.
You can cover any surface with a brush, it is important to make smooth movements to prevent bubbles from appearing.
Round
Round brushes for painting are in less demand, but have the same advantages: they perfectly paint hard-to-reach corners, doorways, and windows. The disadvantage is the strong filling capacity, but the low yield of coatings. That is, too much liquid remains between the tufts of bristles - this reduces the effectiveness of painting work.
The working surface of this type can be large (the so-called flywheel) or small (ordinary). Swing tools are similar to malkovits - they are common when processing large areas. The diameter ranges from 60-65 mm.
To sum it up, we can say that choosing the right brushes and brushes is on par with the choice of paints and varnishes.
Quick-drying, odorless paint for interior work - main types, selection tips and benefits of useThe best aerosol paint in cans - main types, application features and advantages of use
The best water-based paint - ranking of the best manufacturers of 2018
Buying a flat brush for painting or a round one is more of an individual preference than a necessity.
Look at the fibers in the store and definitely buy them if:
- When deliberately pulling out hairs, no more than two pieces remain in the fingers.
- A convenient cut is a long center, shortening towards the edges. This makes it easier to control the distribution of liquids.
- By pressing on the structure of the bristles and then releasing them, they return to their original state.
Finally, just feel the handle in your fingers. The brush will last for many years, which means it is convenient
How many layers should I apply?
How many layers to make when varnishing wooden objects worries many novice craftsmen. In this matter, it is important to recommend the manufacturer of the selected varnish. You won’t be able to get by with a single-layer coating, otherwise the protection will not be reliable.
A three-layer application is standard; it is important to wait for each layer to dry completely so that there are no streaks or uneven spots. The first coat is usually considered a primer.
A three-layer application is standard; it is important to wait for each layer to dry completely so that there are no streaks or uneven spots.
Nylon brush
A nylon brush is considered the best option for beginner artists who prefer acrylic. It is synthetic and comes in many different shapes and sizes.
The main advantages of a nylon bristle brush:
- Elasticity. The material from which the tool is made has high elastic properties, does not break when bent and is quite elastic and elastic. The strokes of paint that such a brush leaves are smooth and clear. The nylon brush is easy to paint even for beginners, as it is a middle option between hard and soft.
- Strength. The main problem with natural brushes in acrylic painting is the need to keep them in water. Because of this attitude, the bristles fall out and deteriorate, which, however, does not apply to this synthetic brush. The tool will not last any less if it stays in water for a long time, so it is suitable for acrylic.
- Easy to care for. Due to the fact that the brush is made of synthetics, it is easy to clean acrylic, which is famous for its quick drying and sticking to the bristles. Natural brushes are very difficult to tidy up, since their structure is not smooth, like nylon. To care for this brush, simply rinse it with running water after use.
It is worth noting that a nylon brush, although very good, cannot be an alternative to all other types of tools. Experienced artists will, in any case, have several other types of brushes in stock, for some specific techniques.
Nylon brush - the best option for beginner artists
How long does it take to dry
When the layer has been applied, sanding is carried out, but sandpaper can only be used on a dry base. The drying period depends on the brand of varnish and is determined by the ingredients used; this information is indicated on the packaging.
The drying period depends on the brand of varnish and is determined by the constituent substances that were used.
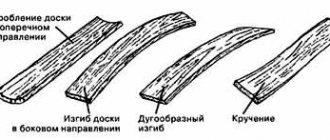
Typical mistakes in varnishing wood
When working with your own hands, it is easy to make mistakes, so it is advisable to study the typical ones in advance. Experts highlight the following points:
- Poor drying of the layer, usually due to a violation of the temperature regime, or when the product was chosen incorrectly. For two-component varnishes, this result is explained by the addition of an insufficient amount of hardener;
- If white stains remain, then the humidity in the room was increased, which caused a similar effect;
- The appearance of bubbles and swelling of the layer is due to improper distribution of the varnish over the wooden surface;
- Uneven coverage and uneven shade. The result is associated with the lack of skills of the master. If the varnish is quick-drying, then you may not have time to apply the layer on time.
Uneven coverage and uneven shade. The result is associated with the lack of skills of the master.
Varnishing wood helps create an attractive shade, as well as a barrier from negative factors and preserve the natural pattern of the material. You need to choose the right varnish that suits the working conditions. The technology of the process includes nuances, ignorance of which can lead to negative consequences; careful reading of the article will help to avoid mistakes.
What brushes are needed for decoupage and how to care for them so that they last longer?
June 2, 2014
Published in: Articles
toolsuseful tricks
One of the first tools we need in decoupage is a brush. But which one? How to choose the right brush from the huge number of brushes in art stores? Or maybe you need a lot of them?
All this will be discussed in today’s article. I’ll tell you about what I use myself (of course, each artist has his own habits, but there are general recommendations), and at the same time I’ll give you a lot of tips on how to keep your decoupage brushes in working condition for as long as possible.
I’m just not going to name the specific numbers of the brushes - they are different for different manufacturers, and the size of a brush with the same number will be different for different companies. That’s why I always give my students sizes in centimeters - and not a single one has ever made a mistake in size. In general, I love brushes - they are comfortable, high-quality, and their handles are not varnished, and they are wooden or coated with a plastic look (and varnished handles are usually varnished , it peels off quickly, so my Conda brushes are completely peeling...)