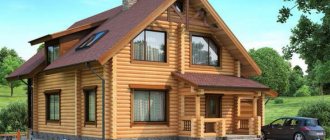
builds bathhouses and houses from hand-cut northern logs. It is selected according to GOST; when laying crowns and building a log house, all technology requirements are observed. One of the main rules is observing the shrinkage time and its correct compensation. Let's consider what the process is, how long it lasts and what to provide to make the house warm and durable.
Shrinkage is a natural process in which, due to a decrease in wood moisture content, the linear dimensions of a wooden structure change. Porous material absorbs and releases moisture, and if this is not taken into account during construction, the building will “lead”, the geometry of the walls will be disrupted, and cracks will appear in them. In addition to the “shrinkage” of the log, all joints are compacted - under the own weight of the elements. If the shrinkage of the log house proceeds correctly, the gaps “close” and the building becomes strong and windproof.
Wooden, log houses change geometry in two directions. With mechanical shrinkage, the upper links put pressure on the lower ones, and with natural shrinkage, the diameter of the log changes due to drying out. However, this is not only shrinkage, which increases internal stress in the elements. The two concepts are often confused, but it is important to differentiate them in order to understand what causes cracks to appear on logs. They are caused not by shrinkage of the house, but by shrinkage of the logs, and it differs for different species - pine, for example, has a higher risk of cracking than cedar.
Reasons for log shrinkage
The main reason for shrinkage is changes in wood humidity. Wood contains water:
- capillary - it is located in cell cavities and intercellular space;
- hygroscopic - it fills the cell walls;
- chemically bound - water contained in the substances that make up wood.
The tree decreases in size due to the loss of hygroscopic water; capillary moisture does not cause shrinkage. All three types evaporate, changing the moisture content of the material. In freshly cut trunks it ranges from 50%, in a tree that has reached the fiber saturation point (in the absence of capillary water) - about 22%. Thus, shrinkage is caused by the shrinkage of the log, but, in addition to it, the compaction of the joints under the own weight of the structure. In this case, the natural process does not cause distortion. The log house may “lead” due to settlement. This is another concept that shrinkage is often confused with. Settlement occurs due to the wrong choice of foundation type, errors in calculation of connections, foundation strength, insufficient quality of wood or other reasons. Because of it, the structures become distorted, the house can “sink” into the ground, and the crowns can bulge. To avoid problems due to settlement, you need to be meticulous in choosing a construction organization.
How are log houses built using classical technology?
If you asked the question: “How are log houses built?” Today you can find a lot of information on websites, social networks and Youtube, where all the methods and techniques of cutting are described in detail, but outright absurdities are often encountered. Here we want to share information directly from professionals - developers of such houses.
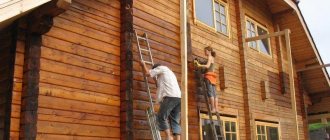
The first point is that the wood should only be harvested in winter. After the wood harvested in winter has been sanded, in the spring it will be better to immediately begin cutting down the walls, without allowing the material to dry in the sun and become rough.
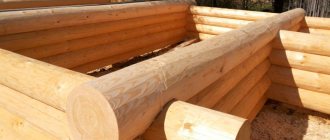
Fitting the logs to each other is done by choosing approximately the same size trunks and laying them “butt to top.” Of course, it would be easier to assemble all the walls from solid logs and cut out openings for windows and doors, but it can be difficult and expensive to find a sufficient number of long suitable trunks (especially if a project of serious size is “laid down”).
The logs in the wall can be made composite along their length, and at the level of windows and doors they can be stacked as short logs, leaving openings according to the pre-drawn house design. This type of adjustment is not much more complicated, but it saves a lot of material and money. It is advisable to make the lower and upper crowns from solid (not composite) logs.
If you want the house to turn out to be of high quality and beautiful, then cutting down the walls should be done with an ax and not a saw, that’s why it’s called “cutting”. The quality of “cutting with a saw” is, as a rule, much lower, since huge gaps often form in the grooves between the logs. At the same time, the speed of wall construction is very high. With a saw you can only make a cut in the middle between two lines on a log. Then you need to work with an ax.
You ask: “But manual cutting takes so long.” Do not believe that the walls of log houses are built quickly. High-quality felling takes a long time; it happens that one log has to be laid for a whole working day. Remember the wisdom “Everything that is done well is done slowly.” If it’s done quickly, then, as a rule, you have to regret the quality or redo it later.
According to classical technology, the “box” is built as follows. When assembling a log house, the logs are laid one after another on moss (tow). It is better to take moss from the swamp and it is long (up to 40 cm). Subsequently, it is squeezed out of the swamp water, transported in bags to the construction site and placed between the logs while still wet. At the same time, with bare hands, the uniformity of the layer in thickness (up to 10 mm), laying density, absence of cones, fragments of branches, etc. is checked.
Dry moss is bad because it is much more difficult to lay (it often breaks, is blown away by the wind, generates dust, and is poorly controlled for uniformity of laying). After a week, the remaining moss hanging from the grooves can be easily chopped off with an ax (cut with a knife).
After the walls are built, they need time to shrink. The roof is already built traditionally, as in all wooden houses. It is worth considering that in the first six months the log house can shrink up to 40-50 mm.
Log shrinkage time
There is a stereotype that shrinkage takes a very long time, and the process is actually endless. This is only partly true. Wood is a living material, and natural changes in humidity occur constantly, thanks to which an optimal microclimate is maintained in the house. However, the main processes affecting the strength, geometry, and thermal insulation of a log house end in the first year or two. Logs release moisture most actively during the first three to five months, when about 70% of shrinkage occurs. Over the next few months, the joints in the structure are sealed, and in general the initial intensive stage takes about a year. Over the next couple of years, minor changes in height or geometry may occur that do not significantly affect the performance characteristics of the log house. Experts talk about almost imperceptible shrinkage within a year and a half from the moment of construction. The exact time of completion of the process also depends on seasonality. If the house is built in the summer, it will “settle down” in about a year. For “winter” log houses, as a rule, eight months of shrinkage are sufficient, after which further work can begin. Therefore, builders consider the cold months to be the most favorable season for the construction of log houses. Due to the low temperature, all metabolic processes in wood, including moisture evaporation, slow down, and the log house shrinks evenly and efficiently. When winter is over, it will be possible to install window and door units and begin finishing. The exact time for the processes must be determined by builders, taking into account all the nuances. It is very important not to artificially accelerate shrinkage. The house should not be heated so that the elements do not begin to crack. This is especially true for timber and rounded lumber. Hand-cut logs are more resistant to temperature changes. It is advisable not to light the stove in the house for about a year from the date of construction. Heating can only be turned on after finishing the final finishing, and the temperature must be increased smoothly and gradually.
Loghouse maintenance
“What other service?” - the economical developer will be indignant. Of course, a log house is not a car that needs regular technical inspection and replacement of consumables. But do not forget that if you do not take control of the process of shrinkage at home, problems will arise that are no less serious than if complex equipment breaks down. And therefore, leading construction companies, which have been building wooden houses for many years, offer after-sales service to their customers. What is this service and what activities does it include?
The essence of maintenance is to ensure proper shrinkage of the structure and prevent possible negative consequences associated with this process. This is what is included in the list of service activities of one of the Russian development companies.
- Adjusting the fastenings of rafter legs to mauerlat logs (at least once every 2 months).
- Adjustment of shrinkage compensators on vertical column supports (at least once every 2 months).
- Inspection of wall material for the presence of biological damage.
- Checking the integrity of the temporary roofing covering (roofing felt). If damage caused by the wind (roofing felt separation) is detected, repairs are carried out.
- Control measurement of log shrinkage at control points.
- Control measurement of the humidity of wall material.
- Analysis of the readiness of the log house for subsequent work.
At the end of the contract, the customer is given a conclusion containing a list of necessary work to prepare the log house for further construction stages and their cost, an indicator of the current moisture content of the wood, an album of facades with elevation marks, etc. The cost of “maintenance” of the log house is 28 thousand rubles. for the entire period of primary shrinkage of the house. During the year, specialists from the company with which the service agreement has been concluded must visit the site at least 4 times and carry out the required work.
Let's go through the list of works and clarify some points. What is the first item on this list? Rigid fastening of the rafters to the mauerlat (the upper crown of the log house) is not allowed, the only exception being buildings with a frame system of pediments. The rafters are rigidly fixed only to the ridge beam. Whereas for attachment to the mauerlat, special supports are used, allowing the rafter leg to slide as the frame shrinks. This is a competent technical solution, which “wild” teams, as a rule, do not know about. The craftsmen of the company with which a service agreement has been concluded will periodically inspect the rafters and adjust the fastenings of the rafter legs to the Mauerlat (they should not be either loose or overly loaded).
What affects shrinkage
It is quite possible to calculate the percentage and end time of shrinkage. To do this, you need to collect data on all the key factors influencing the process. Among them:
- log house materials - species, percentage of humidity, type of wood drying;
- wood processing method;
- climatic conditions in the construction region and location of the site;
- technology for constructing a log house and the method of connecting elements.
Only experienced builders who are well aware of all the features of the natural process can accurately calculate shrinkage and monitor its progress.
Construction materials
Shrinkage is primarily affected by the physical and mechanical characteristics of wood. A denser material evaporates moisture more slowly, so the process takes longer. The densest species are larch, oak, beech, maple and other hardwoods. Most conifers have a lower density (below 1.55 g/cc) and shrinkage occurs faster in them. It is important how the wood dries - naturally or in special chambers. In the first case, you need to know exactly how the logs were dried - the room should be dry, cool, with adequate ventilation. Otherwise, the elements will remain damp inside, which will lead to cracks. They will have to be sealed, covered with sealant, wood chips, caulked or puttied so that the wood does not rot.
Log processing method
The scale of shrinkage directly depends on how the wood was processed. Hand-cut logs release moisture the most - 10-11 cm per three meters of wall. Thanks to this, the shrinkage is stronger, but the changes are smooth, so there is less risk of cracks. At the same three meters in height, other materials decrease in size:
- rounded log - up to 10 cm;
- lumber of natural moisture and profiled (undried) - 4-6 cm;
- profiled timber for chamber or condensation drying - up to 3 cm;
- laminated veneer lumber - up to 2 cm (double up to 3 cm).
Climate and site features
Wood is characterized by active moisture exchange with the external environment, so shrinkage is affected by the amount of precipitation, sun intensity, and wind load in the region. If the climate is hot and dry in summer, the outer layer of the log will dry faster than the inner layer, which can cause the wood to warp and the structure to deform. It is important where and how the log house is located. In a lowland or among tall trees, shrinkage will take place more slowly, in a dry place, or in a windy field - faster. Therefore, it is also necessary to choose the right site for the construction of a log house. On the sunny side, shrinkage will occur faster than on the shady side, but not so much that the house noticeably warps.
Method of constructing a log house
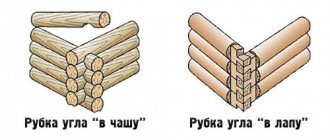
To determine the amount of shrinkage, it is important how exactly the crowns are connected in the log house. There are many ways - dovetail, paw and bowl, Canadian cut, etc. A competent choice of connecting elements, material for inter-crown sealing and other nuances helps to reduce the negative consequences of the process, which is why it is so important that the log house is cut by an experienced and professional team.
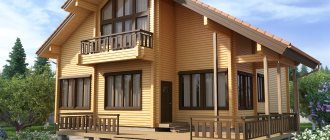
Why is the price of cylinder houses different?
It is generally accepted that a house made of rounded logs is more expensive than other wooden houses. We agree with this partially. The process of making a blank is expensive. A log with natural moisture will be cheaper. Chamber drying is an additional cost for the manufacturer that needs to be compensated. So the price for such a workpiece is higher. Some customers do not want to deal with completing their home themselves and choose a turnkey house. The manufacturer invests absolutely everything into the project:
- foundation;
- carpenter services for assembling the frame, installing the roof and ceilings;
- cost of all materials (possibly with an additional surcharge);
- interior finishing and engineering works.
As a result, you get a house where you can immediately move in and live, and a tidy sum that not everyone can afford. Is it really necessary to give up a cylinder house? Of course not. You can build your dream home for less money. Buy a log house for shrinkage, a house kit made from cylinders of natural humidity, and do all other work yourself. Here is a table of prices for different standard shrink-wrapped boxes and turnkey cylinder houses.
| Box size | Price per box, rub. | |||
| shrinking | Full construction | |||
| eating. ow. | Kam. drying | eating. ow. | Kam. drying | |
| Houses: 3x4 | 550 000 | 870 000 | 1 200 000 | 1 600 000 |
| 4x5 | 700 000 | 1 100 000 | 1 500 000 | 1 800 000 |
| 5x5 | 820 000 | 1 300 000 | 1 800 000 | 2 100 000 |
| 6x6 | 950 000 | 1 450 000 | 2 000 000 | 2 400 000 |
| 7x8 | 1 250 000 | 1 600 000 | 2 450 000 | 3 000 000 |
| Baths: 2x3 | 35 000 | 50 000 | 250 000 | 350 000 |
| 3x3 | 55 000 | 80 0000 | 400 000 | 550 000 |
*Prices shown in the table may vary. It depends on the supplier, delivery distance, locality and order configuration. You can save on building a house or bathhouse from rounded logs if you carry out the installation work yourself. Having experience in felling a log house, buy blanks of rounded logs of natural moisture and assemble your dream house with your own hands, taking into account information about the shrinkage of wooden structures.
Shrinkage compensation methods
Compliance with compensation technologies helps “take control of shrinkage.” Among its main methods:
- break in construction - at least six months must pass between installation under the roof and finishing;
- temporary roofing for the period of shrinkage - it is installed if the roof has a complex shape;
- “sliding” fastening of wall sheathing and structural elements of the roof (to log gables);
- connecting the crowns vertically with wooden dowels;
- installation of compensators for vertical parts on the porch, veranda, terrace, balconies;
- fastening and passages through the roof when installing chimneys;
- filling a gap for shrinkage when installing window and door blocks in the casing;
- treatment of logs with water antiseptics, compounds to reduce moisture evaporation, etc.
When laying logs, you can reduce shrinkage by properly installing a high-quality seal and providing ventilation to the structure during the drying period under the temporary roof. To prevent elements from twisting or falling out, and to prevent the locking joints from moving, wooden dowels are used. For them, holes are made in the logs, strictly maintaining the verticality of the walls. To control the process, special compensators are used - screw jacks with an adjusting anchor, beams for the casing of windows or doors. Longitudinal grooves and tenons in the logs relieve pressure and improve the fit of the elements. There are other ways to compensate for shrinkage - specialists will tell you more about them.
Types of shrinkage: radial, linear, tangential
In modern construction, there are several options for drying wood:
- radial;
- linear;
- targeted.
The radial method of drying wood is carried out perpendicular to the growth rings. The percentage of shrinkage does not exceed 5-7. The linear method is based on shrinkage along the fibers and gives the smallest shrinkage, not exceeding 0.3%. The targeted method of wood shrinkage is carried out parallel to the growth rings and has the most pronounced result, which varies in the region of 8-10%.
The method of shrinkage of the log house must be taken into account when installing vertical supports, since walls settle much more actively than pillars and columns. In such situations, it is necessary to use adjustment mechanisms that can change the height of the support with changes in the amount of draft. A screw jack is used as such a mechanism.
The compensation mechanism is mounted in the gap between the stand and the support element. A screw jack is attached to one element of the structure being connected. The upper or lower position of the jack does not affect its functional effectiveness, but the lower positioning is much more convenient in the process of height adjustment.
In situations where it is necessary to connect a wall made of timber and a wall made of another building material, it must be remembered that unwanted stresses may arise due to different amounts of shrinkage of the materials. In this case, it is advisable to use sliding joints using a tongue and groove. A timber attached to the wall acts as a tenon, and a groove is formed in the wall from a log or beam. An inter-crown seal is laid between the connected elements, which also acts as a shrinkage compensator.
Longitudinal deformations in wooden structures during settlement can be compensated using angle sliders. This type of fastening is used when installing the upper supports of the stairs. Free movement of the bolt in the compensation hole of the angle helps prevent stress on the connected structures. It is also necessary to remember about the shrinkage of a brick wall when placed under a wooden structure. To prevent possible difficulties, it is advisable to leave a gap. To neutralize capillary moisture from a brick structure, the log house is protected with a layer of waterproofing. An angle is rigidly attached to the ladder, and a sliding bolted connection is installed on the support.
If it is necessary to carry out finishing work during the shrinkage of the structure, it is also necessary to use a sliding connection between the sheathing frame and the wall. The gap between the wall and the finishing partition must be at least 2.5 cm, and a compensation gap must be left on top. During the shrinkage period, self-supporting partitions can be erected from brick or other materials.
Builder mistakes: typical and gross
As Alexey Markin notes, the most common mistake when making a log house from chopped logs is the small areas of contact between log and log (small width of the inter-crown groove). The thermal characteristics of such a house will be low. The head of the Domostroy-SK enterprise, Oleg Valuev, adds that in some cases the crowns may not be adjacent to each other at all (photo 1). Huge cracks will have to be caulked regularly, which will require considerable additional costs. However, the appearance and thermal characteristics of the house cannot be radically improved.
Photo No. 2
– The log house cannot sit properly due to incorrectly placed racks.
It happens that builders build a house in such a way that it simply cannot sit down.
As Oleg Valuev explains, if you plan to make a veranda under the roof, then between the upper end of the post and the upper crown you need to install a special jack for shrinkage (photo 3). This will allow the log to sit evenly. Instead of a jack, you can put several planks that will need to be knocked out periodically. By the way, shrinkage jacks are clearly visible in the first illustration (Fig. 1) to our earlier publication.
Photo No. 3
– Jack for shrinkage (photo by Domostroy-SK).
Another mistake that prevents the shrinkage of a log house is an attempt to fasten adjacent crowns with nails. The log lies unevenly on the nail head, and an inter-crown gap appears. Due to a loose fit, the log may begin to “spin” during the drying process.
The problem of poor-quality waterproofing of the lower crown of a log house has somewhat lost its relevance. As a rule, the installation team performs this operation efficiently
However, the customer should pay attention to how the foundation and wooden walls are connected. If the foundation is strip or grillage, then the surface of the strip should be leveled, and between the foundation and the lower crown there should be 2-3 layers of roofing material, or a waterproofing layer of similar effectiveness
However, excess moisture can enter the wood not only through the foundation. If you lay floors and hang ceilings in a house before the frame has settled and dried, this will impede air circulation and lead to “steaming” of the house - mold or mildew may appear on the internal walls.
The head of the Domostroy-SK enterprise, Oleg Valuev, notes that in the washing room there is also no need to make baseboards on the floor. Moisture collects under them and the process of rotting also begins.
Photo No. 4
– Mold on unventilated wooden structures.
Window installation problems
To prevent the walls from crushing the window and door frames when the house shrinks, two techniques are used. First: at the ends of the logs facing the window (and door) opening, a groove with a cross-section of 50 × 50 mm is made, into which the so-called casing block is inserted. It prevents the logs from twisting, and it is to it that the window frame is attached. The second method is technically more complex: a longitudinal tenon is cut out at the ends of the logs, onto which a beam (casing) with a corresponding groove is placed. A gap exceeding the expected shrinkage is left above the frame and casing, and it is filled with elastic insulation. A window or door frame should only be attached to the casing (casing block) using nails or self-tapping screws, the length of which does not exceed the total thickness of the frame and casing (casing block). How many times to caulk? Those who decide to build a wooden house should come to terms with the idea that post-shrinkage repairs cannot be avoided. The cracks will appear in any case - the only question is their number and size. The house should be caulked at least 3 times. The first is during construction, when the sealant is placed in the inter-crown seams and connecting cups. The second - after the main shrinkage (after 1-2, sometimes 3 years). The third, final one, will take place in another 5 years. The second and third caulking should be thorough, when the cracks that appear are sealed. But this process should not be allowed to cause the so-called rise of the log house due to an increase in the inter-crown seams. It is better to re-caulk using materials such as combed flax or red moss. How to “dry” a house? A house built from material with natural moisture must be gradually brought up to standard. Natural drying should occur during the first year. After a year, you can turn on the heating, but in a gentle mode, so that the temperature in the rooms is 5-8°C. With this mode, the wood dries slowly and for a long time. And this is good - there will be less deformation of the structure and the number of cracks in the logs. It is impossible to live in a house at this temperature, so you should come to terms with the fact that you will move into it in 2 years. The problem of complex roofs. Even a gable roof structure can behave inappropriately on a large house. If the roof is hipped or, as is now fashionable, multi-level with a complex shape, then its behavior during shrinkage is almost unpredictable. In general, it is better not to lay such a roof right away - let the house stand under a temporary covering for at least 1-1.5 years, while the main shrinkage occurs (for which, for example, roofing felt is used). And only after this, having carefully examined the rafter system, can the roofing material be installed.
Selection of antiseptics
Wood antiseptics can be divided into two groups:
- preventive;
- medicinal.
Preventative are all compounds that are used to treat healthy wood. The remedy will not only protect the rounded log from biological damage, but will also stop the superficial process of rotting that has already begun and kill the fungus that has penetrated into the deep layers of the wood.
Antiseptics differ according to their area of application:
- for interior work (do not emit toxic substances, have virtually no odor);
- for outdoor use (additionally protect wood from moisture and ultraviolet radiation).
Manufacturers offer both colorless compositions and antiseptics that tint wood. In the second case, you can do without additional treatment with stain to give the walls an attractive appearance.
Also, when selecting an antiseptic, pay attention to the following points:
- There are compositions with an increased rate of absorption into the wood structure; they are used if you need to quickly process the log house and move on to other work;
- in addition to universal antiseptics, specialized compounds against mold, against pests, etc. are sold;
- if metal fasteners were used during the construction of a log house, choose an antiseptic that does not provoke corrosion.
The manufacturer provides detailed information about the properties of the antiseptic on the packaging. If walls are to be treated in a room with a special regime (high temperature, humidity), it is necessary to find a composition that meets the requirements
Also pay attention to the shelf life of the product, it ranges from 5 to 10 years