Among the different options for leveling and finishing the floor, there are the cheapest and simplest ones. One of them is laying fiberboard on the floor. This is a practical and affordable option that will eliminate minor unevenness from the surface. Fiberboard has its own characteristics and contraindications for use - all this, as well as how to properly lay the material, will be discussed in this article.
Fiberboard on the floor
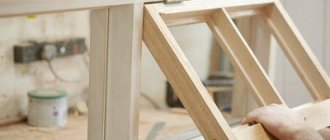
What is fiberboard
Fiberboard as a material is known to everyone. The sheets are used for upholstering the back wall of cabinet furniture and for various other purposes. Fiberboard is a sheet product made from waste from wood processing plants. This waste is steamed, ground, mixed with resins, water repellents and antiseptics, and pressed under high pressure. The result is flat and even, but at the same time quite soft sheets.
Fiberboard sheets
On a note! The abbreviation “Fibreboard” is simply deciphered - it is wood-fiber board.
The dimensions of the fiberboard sheet are standard - 3.2x1700x2745 mm, although the thickness can vary from 2.5 to 4 mm. On the front side the material is smooth, and on the back it is rough to the touch, having a mesh pattern, which appears due to the fact that during production the material is laid and dried on a special mesh with small cells. There is always a demand for fiberboard; you can purchase sheets at any construction or hardware store.
Comparison of chipboard and fibreboard
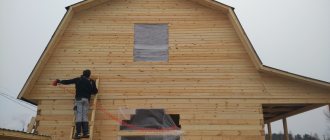
Fiberboard is also used for finishing and leveling floors. It can be found especially often in older apartments and houses, where the subfloor is usually made of wood rather than concrete. Here it acts as a leveling material before laying finishing floor coverings - carpet, linoleum, etc. Fiberboard can also act directly as a finishing material, but requires the application of a final decorative layer - for example, paint.
Fiberboard painting process
Fiberboard board
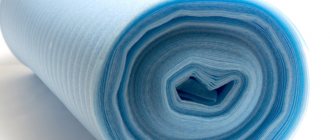
Waterproofing
One of the most important points in laying fiber boards is high-quality waterproofing. Due to its characteristic features, the material often warps from contact with moisture. A small flood is enough for the floor to noticeably swell within six months. In order to avoid such troubles, waterproofing is used.
Upon completion of the process, the cut material should be allowed to rest. This should be done for approximately 4 days - during this time the sheets should be completely leveled. Upon completion of the procedure, you can begin to directly attach them. Depending on the base of the floor, the procedure has its own nuances.
Description and types of fiberboard for floors
There are several types of fiberboard. They mainly differ from each other in terms of density.
Table. Main types of fiberboard.
| Types | Characteristics and description |
| Soft | These types of fiberboard have a low density - it is no more than 350 kg/m3. They do not have good soundproofing properties. Typically, such sheets are used as the back walls of cabinet furniture, used to make the bottom of furniture boxes, etc. Types of soft fiberboard: M1, M2, M3. |
| Semi-solid | The density of these types of wood sheets is already higher - at least 850 kg/m3. Similar to soft types, these fiberboards are used in the manufacture of furniture, but are more durable and less flexible. Marked with the abbreviation NT. |
| Solid | The density of these sheets ranges from 850-1000 kg/m3. They are low-porous and can be used in the production of certain types of doors, as well as for the manufacture of furniture. Types: T, T-S, T-P, T-SP; T has a regular coating, T-S has the outer side covered with wood fibers, T-P sheets are painted, T-SP also has a slight tinting. There are also T-B sheets, which are highly resistant to moisture, and do not have tinting on the front side. |
| Super hard | Sheets with a maximum density of over 1000 kg/m3. Raw materials are necessarily treated with pectol, a substance that increases their strength by 20%. It is these sheets that are used in construction: they are used to create partitions, cover floors or sheathe walls, and are used for various finishing works. Also suitable for making furniture and door panels. The front side can be coated with paint, primer, or varnish. They are marked as ST, which has a standard front side, and ST-S, which has a finely dispersed front layer. |
Characteristics
Fiberboard brands T, T-S, T-P, T-SP may be marked with a quality group (A or B), their front side may be of the 1st or 2nd grade. By the way, T is hardboard, which is produced using the wet method. Hardboard can be used for wall cladding, as a backing for laminate and other floor coverings, for sound insulation and thermal insulation of floors, and room finishing.
Marking and material characteristics
Marking
Today you can find a huge range of fiberboard boards on the market. In order not to get lost in their diversity, you should focus on the following markings:
- T - solid slabs, the front surface was not additionally refined;
- T-P – frontal surface is tinted;
- T-S – the front surface is made of finely dispersed wood pulp;
- T-SP – the front surface is made of tinted wood pulp and painted;
- M-1 – M-3 – soft slabs;
- ST – super-hard slabs, the front surface is not refined;
- ST-S – the front surface is made of finely dispersed wood pulp.
Advantages and disadvantages of fiberboard flooring
Fiberboard is often used to level a subfloor or base and is suitable for almost all surfaces. This material has a lot of advantages, which is why it is in great demand.
Advantages of using fiberboard
Advantages of laying fiberboard on a subfloor.
- Cheapness and availability of material . Prices for fiberboard in any hardware store are not high, which makes it possible for everyone to buy it in the required quantity.
- Easy to install. To lay fiberboard sheets on the floor, you need to make a minimum of effort, and you do not have to buy any additional materials, with the exception of fastening materials. Sometimes, when laying fiberboard on joists, some installation difficulties may be encountered. However, when covering a flat surface, even a beginner will not have any problems.
Another example of a fiberboard floor
- Fiberboard is easy to work with . The material can be cut, if necessary, with any cutting or sawing tool.
- Light weight . This will allow you to work with the material alone, without the assistance of assistants.
- Environmentally friendly material. Fiberboard consists of waste wood processing - a natural material. It does not cause any harm to human health, and therefore can be used even in a children's room.
The material is environmentally friendly and does not smell
- No smell . The fiberboard sheet smells more like wood than some kind of synthetic resin.
- Can be used as an insulating layer.
- Long lifespan . If the slabs are selected correctly in accordance with the load and properly cared for, they will last for many years.
Laying laminate over a fiberboard base
Disadvantages of fiberboard as a floor covering.
- The material is afraid of water . When moisture gets in, the fiberboard begins to deform - it bulges and swells. Thus, the sheet completely loses its appearance, the paint on it and other finishing coatings are also deformed. Fiberboard cannot be used in the kitchen or bathroom.
- Fragility . If there are cavities under the fiberboard sheets, then under strong mechanical stress the material is easily destroyed. It also breaks easily when the sheet is strongly bent.
- High fire hazard . In the event of a fire, the fiberboard will quickly be engulfed in flames and burn.
- The front side wears out quickly . If the fiberboard is not covered with finishing material, it quickly peels off and loses its appearance.
- If fiberboard sheets are laid in an unheated and humid room, they become deformed and begin to peel .
Fiberboard
Cutting couldn't be easier
An example of an electric jigsaw model with a connection for a vacuum cleaner and a special roller to prevent breaking of the material.
Some models of electric jigsaws have a connection for connecting a construction vacuum cleaner to collect scraps.
How to choose the right fiberboard for the floor
In order for the final work to please the owner for a long time and serve without complaints, it is important to approach the choice of material responsibly and buy a high-quality option. There are several criteria that will allow you to choose fiberboard that is ideal in each specific case.
- A high-quality fiberboard must have a certificate stating that the material does not contain harmful components and that it has passed sanitary and epidemiological control. The fact is that unscrupulous manufacturers, trying to improve the quality of the slab, do not care at all about the health of consumers and can add dangerous components to the raw materials during production. Of course, the moisture resistance and density of the material will thus increase, but it will contain dangerous impurities - the same formaldehyde, which, when released into the environment, increases the risk of cancer and respiratory diseases. Such material cannot be laid in residential premises!
White fiberboard
- If possible, you should make a choice only in favor of trusted manufacturers who have won a good reputation in the construction market.
- Fiberboard sheets must be intact, without cracks or other defects. It is important to inspect each sheet you purchase.
Fiberboard is characterized by ease of processing and installation, has increased resistance to fungal infection, and moisture resistance
Attention! Defects include not only mechanical, but also chemical damage. These could be oil stains or paint marks. The permissible size of such a defect is no more than 2 cm in diameter.
- In order to use fiberboard as a floor covering, you should choose a moisture-resistant brand of material that is quite dense and thick. It is best to buy the densest fiberboard sheets.
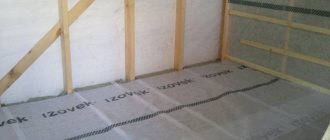
Laying fiberboard on a wooden floor
Tips from professional installers
Experienced builders advise how to properly lay linoleum on fiberboard:
- To reduce the risk of fiberboard swelling due to moisture, treat the sheets with drying oil on both sides before installation.
- To glue linoleum you will need glue with a special composition. You will choose from water-dispersible, polyurethane, one- and two-component. All linoleum adhesives are designed for better adhesion of materials and take into account their properties, as well as possible temperature changes in the room.
- Laying the material starts from the far wall in relation to the front door.
- If the room is large and there will be a seam between the parts of the linoleum, buy it taking into account the need to select a pattern, that is, with a margin. It is advisable to place the joint along the daylight line, that is, perpendicular to the wall with windows, so that it is invisible.
Now you know how to lay linoleum on fiberboard and you can do it yourself. But despite the simplicity of the work, there are a lot of pitfalls and nuances known only to experienced craftsmen. Therefore, if possible, entrust linoleum flooring to professionals.
Fiberboard on a wooden floor: installation features
Installation of fiberboard has its own characteristics. The material is characterized by certain contraindications for use, knowing which you will be able to avoid mistakes. For example, fiberboard cannot be installed in rooms with high levels of air humidity and rough foundation, since the material tends to absorb moisture and, because of this, lose its external and operational characteristics.
Laying fiberboard on the floor
Also, the sheets are not used in rooms where the floors inside are subject to severe mechanical stress. These are garages, production workshops, warehouses, shops, etc. Installation of sheets must be carried out at a temperature of at least +10 degrees and in a dry room (humidity level - no more than 60%).
Advice! Before installation, the fiberboard must rest on the prepared base for at least 7 days. If the sheets are stacked on top of each other, then you can press them down with something heavy on top. Thus, the material will “get used” to the microclimate of the room and fit better. It is especially important to observe this measure if the fiberboard was delivered in cold weather.
The material should rest for a week
It is very important to properly prepare the base of the subfloor before laying fiberboard sheets, because if there are irregularities, protrusions, or depressions on it, then the sheets will lie unevenly.
Attention! Fiberboard is usually not installed on concrete floors. In this case, it is best to level the floors using self-leveling mixtures.
Fiberboard sheets are used extremely rarely as a finishing material, as they require additional finishing. They are best used to level the base under other types of floor coverings.
Painting fiberboard floors
Choice of linoleum
Before properly laying linoleum on a concrete floor, you need to pay serious attention to the choice of coating, paying attention to both the appearance (design, pattern, shade) and properties (material of manufacture, safety, performance characteristics, resistance to various influences and etc.). In addition, linoleum may differ in cost, thickness, purpose
All linoleum options that exist today can be divided into two categories: natural and artificial material. Natural coating is created from a variety of components - oak bark flour, pine resin, wood, etc. Artificial is usually made from polyvinyl chloride, the thickness of which can range from 1 to 6 layers.
Artificial linoleum is cheaper and more durable, but can be toxic, emit a bad odor, and shrink over time. According to the scope of application, this type of coating can be: household, commercial, semi-commercial, and also specialized. Each category assumes certain characteristics of wear resistance and thickness.
Types of linoleum based on:
- PVC - polyvinyl chloride can be single/multilayer, without a base, with fabric and special heat and sound insulating coating.
- Glyphthalic - made from various types of alkyd resins with fillers and dyes.
- Colloxylin - this type of linoleum belongs to nitrocellulose materials, without a base.
- Relin (rubber) – with a base of two layers.
- Natural – from various types of environmentally friendly raw materials.
Here the choice is simple: for residential premises with not very high load (rooms) choose budget options, for places with high traffic (corridor, for example) - semi-commercial, for furnishing offices and public premises - commercial or specialized.
Linoleum may have a base or be without it. A base material made of fabric, jute, felt, polyester, foam has the best heat/sound insulation characteristics, which is why it is often chosen for residential premises. Linoleum without a base is durable and strong; it is laid in areas where there is high traffic.
Choosing the color of linoleum for different rooms:
- Small room - covering with a small pattern.
- For several rooms, the same colors or well-combined shades will visually expand the space.
- A dark coating will add intimacy and comfort to the room; it is better suited for large rooms.
- Light-colored coating looks great in small rooms, making them feel more spacious and freer.
- For modern interiors, plain coatings are often chosen.
- For classic decor, imitation of natural wood, stone, etc. is suitable.
- Avant-garde rooms can be decorated with linoleum with unusual patterns and original designs.
Before choosing and laying linoleum, you need to decide on the technical characteristics that the material labeling demonstrates:
- The first digit is the type of room: 1 for rooms with minimal traffic, 2 for living rooms, 3 for offices, 4 for industrial premises.
- The second digit is the load: 1 indicates the lowest, 4 the highest.
So, for the bedroom and office you can choose linoleum of class 21; for the kitchen or corridor it is better to take class 23 or 24, but better - 31-33.
Choosing linoleum for different rooms:
- Corridor, kitchen - it is better to choose a coating with a thickness of at least 3 millimeters; a semi-commercial durable one will work well.
- Living room - the thickness should be up to 1.5 millimeters: even low-cost polyester household linoleum and PVC-based coating are suitable.
- Bedroom - you can lay a thin covering 1.2-1.5 millimeters thick: household type based on foamed polyvinyl chloride.
- Children's - there is a high risk of mechanical damage, so you need to choose a semi-commercial coating with a top protective layer of at least 0.25 millimeters.
- Balcony - it is better not to lay linoleum, as it can be destroyed under the influence of ultraviolet radiation and precipitation.
The procedure for preparing the base
The rough foundation for fiberboard necessarily requires proper preparation. To do this, it is imperative to remove the baseboards along the walls so as not to interfere with the work. Wooden floors are carefully inspected for strength and integrity - it is important to pre-fix any loose boards. Significant unevenness in the floor is corrected - they are planed. This procedure is not easy, and it is better to use special equipment, which you can rent or call a specialist who has it.
Alignment by scraping
Also, measures to prepare the base include careful removal of construction debris, sweeping of dust, and sealing cracks in the floor with putty.
Advice! In old buildings, wooden floors are additionally treated with antifungal mixtures.
Old wooden floors need to be properly prepared
Conclusion
Fiberboard is excellent for preparing the base for linoleum; it is important to choose high-quality material and carry out the installation work correctly. The video in this article will clearly show the workflow, and if anything is unclear to you, then ask questions in the comments below the article.
Did you like the article? Subscribe to our Yandex.Zen channel
June 1, 2016
Linoleum, Flooring
If you want to express gratitude, add a clarification or objection, or ask the author something, add a comment or say thank you!
Correct cutting of fiberboard
During installation work on laying fiberboard, it may be necessary to trim the sheets. This can be done right in the store, but for this it is important to know the exact dimensions of the room where the work will be done, as well as the dimensions of all angles, how much they deviate from the norm of 90 degrees.
It’s easier to trim the fiberboard yourself and on the spot. To do this, you can use a jigsaw, a machine tool, a circular saw with discs for woodworking, etc. If there are small uneven edges left, they can even be removed with metal scissors.
Cutting fiberboard with a jigsaw
Also, the fiberboard will be trimmed in the area of niches, water supply and sewerage pipes, heating systems, etc. In this case, it is most convenient to use a jigsaw and a template, according to which the necessary markings will be applied to the fiberboard.
Attention! It is better to cut the fiberboard sheet a little larger than necessary - small gaps can be hidden under the baseboard. But it will be more difficult to get rid of the excess. Moreover, it is important to leave deformation gaps along the walls - under the influence of environmental parameters that will change periodically, fiberboard can expand or contract. If there is no deformation gap, the sheet will be deformed.
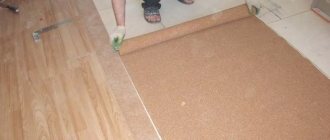
The process of laying fiberboard on the floor
Preparatory stage
Work cannot begin immediately after moving materials to a new location. The fiberboard structure must adapt to humidity, a process also called acclimatization. When preparing slabs for an unheated room, they are covered with warm water using a brush, then stacked. Gaps are arranged between the sheets for free air circulation. In this state, adaptation takes a day. If the room is heated, then you can do without soaking it with water, but in this case the acclimatization period will be two days.
The material “gets used” to the humidity of the new room when folded
To apply water to the sheets, you can use a spray bottle instead of a brush.
Methods for attaching fiberboard decking
There are several ways to attach fiberboard to a base. This is gluing the material to glue/mastic or fixing it with nails. Fiberboard can also be laid on logs. By the way, if the fiberboard is mounted on a concrete floor, then the sheets can be attached using drying oil or tar.
Logs - fiberboard floor
When using the glue method, it is important to place a weight on all seams and joints so that they do not rise while the glue is drying. The easiest way is to simply nail or screw the fiberboard, and the main disadvantage of the method is only the occurrence of unevenness at the fastening points.
Advice! You can avoid the appearance of unevenness if you make small recesses in the places where the screws are attached to the surface of the fiberboard, where the fastener heads will fit. After laying the material, these places are sealed with putty.
Fastening fiberboard with glue
Installation of fiberboard with glue
In this case, everything is simple - fiberboard sheets are completely covered with adhesive and dried for half an hour. During this time, the glue is applied to the surface of a carefully prepared and primed base. Next, sheets are placed on it and pressed tightly. During installation, sheets should be checked with a level for the presence of irregularities - the latter should be corrected before the glue sets. When laying fiberboard, the joints should move sideways by 50 cm relative to each other - thus, the coating will be stronger.
How to attach fiberboard with glue
Installation of fiberboard on mastic
The method is often used when covering concrete screeds with fiberboard sheets. The base is pre-primed, then dried and a layer of mastic no more than 0.6 mm thick is applied to it. Before this, the mastic is applied to fiberboard sheets and slightly dried. The sheets are laid on the treated surface and pressed. The method is almost no different from the previous one.
Attention! If hot mastic is used, it is applied immediately before laying the sheets and is not exposed to air.
Concrete floor covered with mastic
Functions
Linoleum underlay is used to mask minor irregularities, dents, and cracks in the flooring. If the surface is slightly uneven, and there is no time or opportunity to level the floor, then the underlay will be a suitable solution to solve the problem. If you lay a gasket, it will help to visually make the floor even, especially with thin linoleum.
To protect the outer covering from dampness, the cold of the concrete screed and unheated rooms of the lower level, an insulating bedding is placed. It will cope with humidity and keep the room warm. The backing serves to protect the linoleum from premature wear.
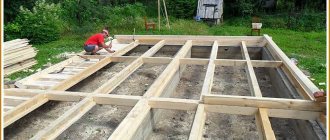
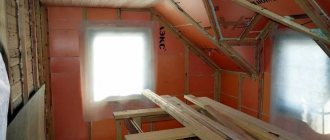
Technology for installing fiberboard on logs
Logs are wooden blocks laid on a rough base. Fiberboard sheets will already be attached to them on top. It is important to choose the right material for the logs - then the final work will be as reliable as possible. The advantage of this method of laying fiberboard is the ability to make the floors warmer. This will also allow you to get rid of some unevenness in the rough foundation.
Adjustable joists are one of the possible options
Recommendations for choosing timber for joists:
- The material only needs to be well-dried; it cannot be purchased in advance and stored in damp areas, for example, a basement or garage;
- the timber should be treated with an antiseptic or bought already treated;
- there should be no rot, mold, or mildew on the surface of the timber;
- the wood must be without cracks, knots, coniferous;
- the cross-section of the bars should be within 4-7 cm;
- the timber is chosen even. You can check this using a plumb line or a cord stretched along the edge of the product.
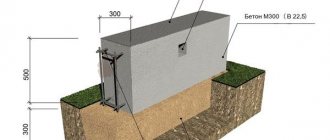
The logs are attached to the rough base in the same way as shown in the figure below.
How to attach joists to a rough foundation
The rough foundation should already be prepared. The logs can be connected to each other using locknuts with a nylon ring - this type of fastener will not allow the structure to become loose.
Fiberboard sheets are attached to the logs so that their edges and joints fall directly on the edges of the bars. They are nailed to them with small nails in increments of about 10-12 cm. There should be a small gap between the fiberboard sheets and the wall - about 5-10 mm.
How to calculate the required distance between joists
Instructions: fastening fiberboard with nails
Step 1. Thorough preliminary preparation of the base is carried out.
Preparing the subfloor
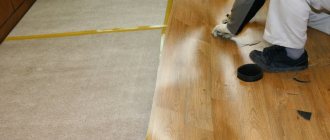
Step 2. The material is preliminary laid out on the floor, adjusted to the individual dimensions of the room, and cut.
Material cutting
Step 3. The fiberboard is laid from the far corner of the room towards the exit from the room. The sheet is fastened with nails with a diameter of 1.1-1.6 mm and a length of 20-25 mm, and nailed to the rough wooden floor. The sheets are fastened from the middle of the room. It is important that the fastener heads do not protrude above the surface of the sheets.
Fiberboard is laid on the floor
Fastening fiberboard with nails
On a note! Fiberboard can be fastened using a construction stapler.
Construction stapler
Step 4. In the same way, the second and subsequent sheets of fiberboard are adjusted, laid and fastened.
Laying the remaining sheets of material
Step 5. The deformation gap along the walls is closed with a plinth.
Installation of floor plinths
Video - How to cut fiberboard?
Video - fiberboard on the floor
Step-by-step installation instructions
After preparing the wooden base of the floor and linoleum, they begin laying the finishing coating.
- After curing, unrolled linoleum rolls are smoothed from the middle to the edges.
- An allowance of 70 mm in the length and width of the linoleum strips allows you to extend the coating onto the walls by 2–4 cm and make an overlap of the same size at the junction of the panels.
- Linoleum is cut along the walls, leaving a gap of about 5 mm. The overlap at the joint is cut in the middle.
- Cut the covering along the outer and inner corners of the room.
- Each canvas is folded to the middle.
- A layer of adhesive is applied to the freed base of the floor with a notched trowel. For dispersion glue, a spatula with a tooth height of 0.6–0.7 mm is used, for bitumen mastic – 0.4–0.5 mm, for rubber compounds and synthetic resins – 0.3 mm.
- The glue is applied to the back side of the baseless linoleum.
- The same operation is carried out on the second side of the canvas.
- The laid panels are rolled with a special roller. You can put any sheet material and load it with suitable items.
- When gluing, you need to ensure that no air in the form of bubbles remains under the coating. It needs to be squeezed out.
- In the places where the doorway trims are installed, linoleum is placed under them.
- At the bottom of the doorway, at the junction of the panels of two rooms, a threshold is installed in the form of a smooth strip. To prevent the heads of the screws from coming out, choose a threshold model with an internal track for the screw heads.
- Dowels are inserted into the drilled holes in the wooden floor. The screws are pushed into the threshold track with their heads. Then, by lightly tapping with a rubber hammer, the threshold is nailed so that the screws fit into the dowels.
- A plinth is attached around the perimeter of the floor. It is installed so that there is a narrow gap between it and the linoleum.
- For better fixation of the joints of the panels, the seams are welded with a polymer cord. For this, a special welding machine is used. It is a hair dryer attached to a nozzle from which a welded cord is supplied.
- When laying the underlay, first glue it to the floor, and then glue the linoleum.
Fibreboard flooring finishing
Fiberboard may not always serve as a floor finishing option. Or rather, it can be left as the final version, but such a coating looks ugly. Typically, fiberboard sheets are covered with some type of finishing material.
Types of flooring
Before work (especially if painting is planned), the material is carefully prepared:
- Remains of glue are removed, nail heads are masked;
- the remaining gaps between the sheets are puttied;
- all garbage is swept away;
- all stains are treated with a degreaser;
- only after this the front side of the fiberboard can be painted or varnished. Without this preparation, the floor may turn out unsightly and with defects.
Finishing will help extend the service life of the material. Paint or varnish is applied in two layers.
Painting fiberboard floors