Carrying out installation work with standard window structures and in the “Euro” style (Finnish, German) is based on the developed rules defined in GOSTs.
Wooden windows are considered a sought-after product, and in recent decades they have been produced using modern technologies, high quality, and improved double-glazed windows.
Environmental friendliness, strength, density, good bending moment, variety of types, frost resistance, good sound insulation and heat protection - these are the points that fully characterize modern wooden window systems.
We suggest you find out what standards are used when installing windows, conditions, diagrams, consumables, possible errors, costs and other important nuances from this article.
Standards
The conditions for the use of regulatory rules in the documents are provisions on installation work, window sizes developed according to the customer’s drawings, operation, and requirements for wood.
Any rules regarding wooden structures indicate the quality of consumables and the absence of defects in the processing of the timber. Attention is also drawn to the gaps in the rebates, which should not be larger than (2 mm) and the condition of the seams that require mandatory sealing.
There are many documents regulating the installation of wooden structures (there are more than 18 of them in the Russian Federation). The main ones are:
GOST 23166-99.- GOST 34378-2018.
- GOST 24699-2002.
- GOST 11214-2003.
- GOST 30972-2002.
- GOST 24866-99.
- GOST 5087-80.
- GOST 5090-86.
- GOST 10174-90.
The presented regulatory documents provide information about window structures, describe the scope of their application, talk about the types, conditions of production and installation, explain in detail the main terms, and provide references to other GOSTs and SNiPs that regulate the quality of the resulting products.
Compliance with regulated installation technical standards will allow all work to be carried out efficiently, to obtain a safe design, without loss of its operational characteristics.
Step-by-step instructions for installing wooden frames
Specialized companies usually accept orders for the production of expensive frames with three-chamber double-glazed windows along with installation. It is unrealistic to make such a design at home. Therefore, it is rational to consider the installation of simple glazing of balconies with wooden frames.
In terms of installation methods, installing sash with single or double glass differs little, but will save household financial resources (up to 20 - 30 percent of the cost of the window unit).
Tools and preparatory work
For installation operations you will need a small set of tools:
- plumbing tools (hammer, screwdriver, wrenches or socket bits);
- measuring instruments (tape measure, metal ruler, construction square, level, plumb line, laser plane builder);
- rubber mallet;
- carpentry tools (for finishing, sanding, varnishing, polishing windows);
- power tools (wrench, air chisel, screwdriver, electric drill, grinder);
- mounting guns for foam, driving dowels.
To glaze a balcony or loggia with wood (if the loggia was glazed), you will need to dismantle the old frame. To do this, unscrew the screws from the hinges of the doors and cut the box into pieces with a saw or grinder. Remove old fasteners. The railings are removed and timber is installed in their place along the perimeter of the fence. Instead of a support beam, you can use a thick board protruding inside the perimeter. It will serve as a window sill for the window block.
The process of dismantling the old structure in this video:
Strictly horizontal installation of the timber is required, which is controlled according to the building level. The fence is covered with wooden and plastic panels. Only after installing the support beam do they take the dimensions of the box to order or independently manufacture a window unit.
Fastening brackets or a corner are screwed to the finished frame, and they begin to try on the box necessary for marking the fasteners in the balcony opening. To install glazing on balconies with wooden frames, use direct through fastening of the frame with anchor bolts or fastening with bent brackets and a solid corner.
Compliance with the vertical installation of the box is controlled by a plumb line or a laser plane builder. Since the support beam is already installed horizontally, double wooden (plastic) wedges are used to adjust the vertical, which are installed in the upper part of the box. On loggias, adjustment with wedges is carried out on three sides of the box (on the sides and on top).
For three-sided glazing of a balcony with wooden frames, adjustment wedges are driven between the frame and the base plate of the upper balcony. Having installed the box vertically (with a discrepancy of no more than 2 - 3 mm), mark the holes for fastenings. With the direct fastening method, the box is drilled through (in increments of 300 - 700 mm), and the placement points of the anchor plates are marked through the holes with a pencil.
Basic installation
Before installation of through fastenings, recesses are punched in the upper base plate, side partitions of loggias, and building walls for installation of anchor plates. The operation is easier to perform with a pneumatic chisel or electric chisel; the manual method of knocking out concrete with a hammer and chisel is difficult. Anchor plates are walled into the recesses in cement mortar. Before installation, remove the window sashes by unscrewing the hinges or knocking out the rods.
During installation, perform the following operations:
- Re-expose and orient the box.
- Attach the frame to the parapet support beam. For fastening, use long construction screws or self-tapping screws.
- When fastening with anchors, tighten the bolts.
- When fastening with an angle or brackets, dowels (self-tapping screws for concrete) or dowels are used. Labor-intensive operations are made easier by using electric screwdrivers and mounting guns.
- Remove the side and top mounting wedges.
- Seal the gaps with polyurethane foam. When glazing loggias with wooden frames, the gaps between the side concrete walls and the upper support plate are sealed. Three-sided glazing of a balcony will require sealing the installation joints with the base plate and two walls of the house. On top of the mounting foam, the gap is sealed with polymer compounds or PSUL tape.
- Hinged doors are hung on hinges.
- Double-glazed windows are inserted into blind sashes and the glass is secured with glazing beads.
- Screw on decorative strips to mask the installation seams.
After installation is completed, the operations of grinding, varnishing, and polishing the wooden elements of the window block begin.
How to install correctly?
The basic rules for replacing or installing standard and Euro-windows, regulated by numerous GOSTs, include:
- Mandatory drawing up of a diagram and measurements of the opening to establish the design. The opening must be fully prepared, clean, plastered, without chips or cracks.
- The dimensions for the opening are formed in such a way that they exceed the window frame by up to 2 (cm) on three sides along the perimeter, except for the lower part, which should be larger (up to 6 cm).
- The installation must be controlled by the building level.
- Indicators of deviations from the geometric level cannot be more than 1.5 (mm) per 1 (m) of the total length of the window system, and more than 3 (mm) in height.
- The formation of seams should include several layers (3-4), with protection from external atmospheric phenomena.
- The protective function of the installation seam must include insulation, vapor and waterproofing.
- Additional sealing at the seams can be done using tapes such as sealing tape, polyurethane foam. You can also add strips of mineral wool.
- Polyurethane foam can be used as a sealant.
- It is advisable to treat the surface of the window span and the wood structure itself with an antiseptic and a polymer substance. This prevents the appearance of fungi and strengthens the wood's defenses.
- The permissible length between fastening elements is no more than 80 (cm).
- The installation depth of the window structure depends on the material of the wall, the number of its layers, and is, on average, 1/2 in practice (the middle of the load-bearing wall).
- The room should have a comfortable temperature – 20-23 °C. At the same time, the recommended humidity is 55-60%. This way the windows will not form condensation and fog up.
- Fastening and auxiliary elements must comply with technical standards, be marked, certified and guaranteed by the manufacturer.
The dew point for the location of the window system is determined, in accordance with the wall pie , according to the following principles:
- for single-layer walls – +10 °C (middle part of the wall);
- for two-layer – +10-12 °C (along the border of the wall surface with the heat insulator);
- for three-layer ones – +10-13 °C (with a shift towards thermal insulation).
The ideal dew point for all windows is +10 °C. The calculation is made between external (outdoor) and internal (room) temperatures. The indicator is recorded in the documents in the form of an isotherm.
Compliance with regulatory rules is a necessary circumstance , since poor-quality installation of a window can lead to loss of thermal insulation qualities (up to 25%) and disruption of the functionality of the structure (difficulty in opening and closing, the appearance of condensation, failure of various elements, including shut-offs) .
Without simple carpentry skills, it is not recommended to do the installation yourself. It is better to entrust the installation to specialists from a construction company who will carry it out, according to the calculations, without violating state standards, in a short time.
Final insulation and installation of slopes and ebbs
After installing the window frame, the window sill and slopes around the window are installed. During installation, the window sill is placed under the frame, placing several bars underneath. Using a level, level its position and remove it to treat the surface underneath with polyurethane foam. Then the window sill is inserted into place, filling the voids underneath with sealant. To fix the position, place a weight and leave it for a day.
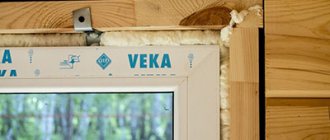
Then all seams are carefully sealed. Various sealing materials are used, most often foam is used when installing window frames. The slots pass several times from the middle inward and from the middle outward. It is necessary to ensure uniform pressure when the sealant swells, so as not to disturb the fixed position of the frame.
It is necessary to leave the work for a day after applying the foam to harden.
Foam that has hardened and increased in volume must be cut off. To minimize the thermal conductivity of the window structure, you can cover the foam-treated seams with foil-reinforced tape around the entire perimeter, photo below:
The ebbs on the outside of the window protect the wood of the frame from the negative effects of atmospheric moisture. Durable, moisture-resistant materials are used for their manufacture: aluminum, galvanized metal and PVC. Wood flashings for wooden window frames look harmonious. It is advisable to choose a tree for the slopes of the same type as the frame. You can use moisture-resistant and durable FSF plywood. Wooden slopes are coated with polyurethane varnish to eliminate subsequent release of resin.
Aluminum castings are durable and strong. When powder coated, their range pleases with an abundance of colors, including brown and beige (to match the color of wood). Galvanized materials are sold with a polymer coating in different colors. They are preferable to aluminum ones, as they do not create noise effects when exposed to atmospheric conditions.
Plastic ebbs have a long service life, but require proper installation because they emit unnecessary noise in the wind.
The material for the casting is cut to the required length, taking into account a margin of 30 mm on each side (the excess can then be folded). The ebb is attached from the outside to the bottom of the frame with self-tapping screws, and is fixed inside with mounting foam.
A day after installing the window frame, window sill and insulating the seams, you can finish the window opening with slopes.
First you need to moisten the material for the slope and the surface of the wall opening with water, then apply mounting foam to one of these parts and press the finishing material to the wall. The slope that is being installed must be secured using mounting tape.
When finishing slopes, materials such as plasterboard, wood, cork and plaster are used. It is advisable not to use PVC for wooden frames. To make panels, you can take various materials, but the most popular are: plastic, plaster, drywall, cork and wood.
Plaster is an inexpensive method of interior and exterior finishing. The walls are pre-primed and a plaster mixture and reinforcing mesh are applied in several layers. The process is completed by sanding and painting the surface. The disadvantage of plaster slopes is their low thermal insulation properties. The use of plasterboard for slopes is also characterized by a simple technology, but it also does not retain heat well. Cork materials are expensive, but high-quality products in a wide range of colors.
Wood block installation diagram
The installation diagram for standard and Euro windows is a document in the form of a detailed drawing, which describes the sequence of actions of the master, indicates the dimensions of the wall opening, the structure itself, pays attention to the nodes of the vertical and horizontal sections, as well as the number of layers and elements related to the window system. Approximately, the diagram may look like the photo below:
The diagram details all consumables and layers (in mm), the sequence of assembly of the “spike-az” system, and pays attention to slopes and window sills.
It is best to entrust the drawings to professionals , as they will describe the steps in detail in the diagram:
- window fastenings;
- sealing seams;
- installation of window sills and slopes;
- formation of moisture removal.
Correct drawing up of the diagram will help prevent the formation of condensation and cracks at the joints with the frame, mold and mildew in the corners of the structure and in the house, determine the dew points and the installation depth of the window system.
Fittings and locking elements are also indicated on the diagram. When working with a plan, this helps to quickly prepare and drill places on the wood, making markings in advance using a construction tape measure and a simple pencil.
About fixed windows
Windows are ready-made for installation in homes. Making a good and beautiful window is not an easy task even for an experienced carpenter. But sometimes - in an attic, in a barn, a garage or in a country house - you need to make a small blind window. You can make such a window yourself by making a frame from beams and slats.
What the profile of the window frame should be can be seen in the figure. Note the highlighted protrusions at the bottom that are the lightest. These are teardroppers. Their purpose is to prevent water from flowing into the frame. They must be made on the lower cross member of the frame, but in no case should they be done on the top: there they will turn into moisture traps. But they are useless on the sides.
***
So, now you know how to install a wooden window in any window opening of any building. As you can see, the work itself is not complicated or difficult, but it requires preliminary consideration of many different factors, and when performing it, intelligence and accuracy.
External conditions for replacement
Despite the fact that modern double-glazed windows are produced in such a way that their surface is reliably protected from atmospheric changes, according to technical regulatory recommendations, craftsmen do not install windows in rainy weather and at temperatures below - 3°C, with the exception of rare force majeure situations ( man-made or seismic accidents, hurricanes, etc.).
At the same time, attention is paid to the condition of the seam, the sealing of which is characterized by resistance to atmospheric fluctuations , frost and UV rays. According to the standards, the joints between the window, the opening and the street must withstand -35°C - +70°C.
Much attention is paid to the layers of the wall pie around the perimeter on which the window structure will be installed. The layers must include vapor barrier and waterproofing material. In regions with harsh winters, layers of insulation are also added, which are cut in the form of strips.
The heat insulator reliably insulates not only the joints, but also the surrounding surfaces. Mineral wool is best suited for these purposes. Mineral wool slabs with one foil side are especially in demand.
All installation work must be carried out in dry weather. Then, in the room, after installing the window system, you will need to maintain a comfortable temperature (+21-23°C) so that condensation does not form. Despite the fact that modern polyurethane foams can withstand low temperatures down to –10°C, it is also advisable to use them down to 0°C.
An indicator of high-quality installed wooden windows is the absence of condensation and cold bridges in the cold season, as well as in rainy weather.
Features of wooden blocks, differences in types of wood
Blocks for windows, accordingly, must be wooden. It's better to stop at pine needles. You can also choose hardwood. Both the first and second must be pre-treated with a special composition.
Oak is the strongest, but it also has a lot of weight - it is not suitable for every foundation. When deciding to use oak, it is important to know what soil the house is on, what the walls are made of, whether they are strong, and whether there will be many wooden windows.
The most popular material is pine. It is lightweight and low in cost, while its strength is practically equal to any other type of wood. You can figure out how to properly install wooden windows using the general instructions. It is applicable for all types of material.
Consumables and tools
The main consumables and tools used in installation are presented in the following list:
A hacksaw, a regular hammer, a rubber mallet, a drill with attachments, a screwdriver.- Grinder with attachments, grinder.
- Chisel, fasteners of different sizes (screws, dowels, anchors, angles, plates, nails), pliers.
- Tape measure, level, pencil, screwdrivers, construction knife.
- Polymer composition, antiseptic solution, brushes.
- Putty, polyurethane foam, any sealant and accessories for them (gun, spatula).
- Sealing vapor-tight, diffuse and waterproofing tapes, mineral wool insulation.
The list may be added by other consumables or tools, but the list listed is considered the main one.
When ordering window systems of any type (standard, euro) and their installation, all materials are provided by the construction company, which attaches a price list for them to the existing contract. Their prices can be much lower than market prices, as they are purchased directly, in bulk, from manufacturers. The builders have their own tools, so there is no need to buy them specially.
How to blow out a crack with foam
Polyurethane foam is blown into the holes using a mounting gun. If you do not have such a device, you will have to buy or rent one from the nearest hardware store. The holes are filled with foam in two or three layers, and the main thing is that from the inside to the outside, but not vice versa. This is explained by the fact that with this blowing method, the pressure from the foam growing during the hardening process will be distributed equally along the entire perimeter of the installation, and the frame will remain intact and unharmed.
Rice. 4. An example of how to properly blow in cracks with foam
Options for fastening structures
The general principles for installing conventional windows and euro windows, when preparing surfaces and assembling, are completely the same. The differences concern only some nuances. following options are used :
- using mechanical fasteners (screws, nails, rivets, metal plates, bolts, anchors);
- with nodal stops (notches, tenons, dowels);
- on an adhesive joint (grades of glue with non-toxicity ratings 1, 2 3).
The connection of nodes for structures occurs by splicing according:
- length;
- width;
- verticals.
For standard windows, with a completely finished opening (insulated, with steam and waterproofing, plastered), the following steps are performed:
- A box is made from boards (4 pcs.), with a cross-section of 15 x 5 (cm), which is then inserted into the opening.
- L-shaped grooves are made, with a depth of 1.5 (cm). The resulting parts are connected with wood glue.
- Holes are drilled in the required elements of the window structure at a depth of 3 (cm). The pins are fastened at right angles, and the inserts for them are well coated with carpentry adhesive.
- Preparing places for fittings. Then the frames are inserted, followed by the glass into the grooves. The frames are fastened with squares after the glass is placed and secured with prepared wooden structural elements (6 x 4 cm bars).
- Then they put on the fittings and check the operation of the window structure.
All other installation work consists of further sealing the seams. To do this, the joints are foamed with mounting balloon sealant, the excess parts of which, after hardening, are removed with a carpenter's knife.
Euro-windows are manufactured with ready-made double-glazed windows, according to the specified dimensions of the drawing, so their installation is quick and without any particular difficulties.
In order to install or replace windows, perform the following steps :
- the opening with the finished frame is inserted through the end-to-end method;
- fix and compact it, observing the geometric line;
- existing irregularities are removed, and double-glazed windows are secured with self-tapping screws;
- then the joints are sealed.
When installing any type of window system, the block is of great importance. The larger it is, the thicker the finished lumber is taken for it.
Installation using metal plates
It is recommended to install windows in skewed openings using the anchor method. Anchors are metal plates with holes that you can buy or make yourself from tin or galvanized strips. Sometimes small fastening strips are attached to the frame before installation, but more often they are used by professionals for large volumes of work. Installing one or two windows does not require such fasteners.
Anchor strips are attached to the outer part of the frame with the same position of the holes as with the through method. Then the frame is installed in the opening and leveled using blocks. Mark (through holes in the anchors) the locations of the fasteners on the window opening. Dowels are driven into the walls, and the window is installed in the opening using anchors.
Having finally installed the frame, the blocks must be removed from the opening so that the window is held only by anchors without rigid connections. The anchor installation method involves installing the window sill after installing the frame.
How to install it in an apartment or house with your own hands?
The process of installing wooden windows with your own hands consists of the following steps :
Removing the old window.- Cleaning the opening, if necessary, applying putty, sanding with sandpaper and leveling the surface.
- Apply a primer (preferably 2 layers) to close the pores into which dust can enter.
- Carrying out measurements of the opening, checking with the drawn up plan and the old structure.
- Installing the window and fixing it, using the necessary fasteners, and then foaming the seams.
- Creation of insulation, adjustment of fittings.
- Installation and finishing of slopes.
In brick houses, they use an installation with a “through-and-through” fastening method. To do this, the frame needs through holes on both sides. The anchors used for such walls are always 8 (cm) larger than the frame, taking into account the resulting gap, so fasteners are not carried out in the lower parts near the window sill. The window is always installed halfway through the opening (standard).
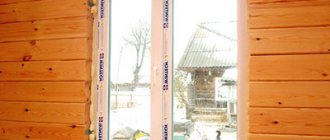
In wooden houses, simple window systems are installed using liquid nails and screws screwed deeply into the walls of the log house. Before installation, the openings are leveled with a hacksaw or chainsaw. Platbands for the structure are attached from the outside. During the work, the master needs to think about how the window will open, what the length and thickness of the frame will be.
A new window is always smaller in size than the opening in the wall, regardless of who or what material the load-bearing walls are built from.
How long (“thickness”) does the frame need?
The length (“thickness”) of the frame must be such that the so-called dew point is between the glass panes. Simply put, fogging up the interior glass is unacceptable. Approximately, the length of the frame in centimeters can be equated to the annual average subzero temperature in degrees of the coldest month (January - February) in your area, but in any case no less than 12 cm and no more than 22 cm.
If the length of the frame is more than 22 cm, you need to provide additional thermal insulation in the opening during installation, or triple glazing, as is done in the Far North. There is no point in installing a thin double-glazed window into a long frame: then it is better to install traditional glass with glazing beads and putty. But you can install two thin double-glazed windows: you get four-fold glazing, and you don’t have to think about the dew point at all. True, it will cost a lot of money.
It is also necessary to coordinate the length of the frame with the thickness of the wall: the internal slope must be at least 17 cm; external - at least 10 cm. If the masonry of the opening is with a quarter, and this does not allow making the internal slope of the required width, then the frame can be made shorter: the quarter itself already provides additional insulation.
How long does it take to work?
Installation of window structures is carried out quickly only by specialists. Within 1-2 hours they prepare the window surface and dismantle the old window. A team of two people can complete installation within 2 hours. Total: the entire work process will take professionals 3-4 hours . Balcony windows may take 1 business day (up to 8 hours) due to the nature of the design.
But this is provided that the dimensions of the structures are made correctly, and there are no errors during the installation process that need to be eliminated. In this case, the surface to which the structure will adhere must also be free of defects.
After installing the window, the joints are sealed with polyurethane foam and given time to harden (up to 12 hours). Then the remaining foam is carefully removed with a special knife. The slopes are installed 1-2 days after the installation of the main window structure.
The independent window installation process can take up to 5-6 days. This option is suitable for those people who want to save money on installation services.
Advantages of wooden windows
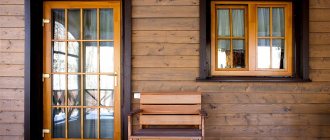
How to install wooden windows correctly? Why is it better to choose them for a private home? Natural shades in most types of interior look stylish and simply beautiful. This design is appropriate in an apartment or in a house; it is combined with a variety of wall decorations.
In order to select a good tree, which will not cost much to create a window yourself, it is enough to calculate the size of the structure, its color, shape and select the appropriate fittings.
Bugs and difficulties
Possible difficulties and errors can arise only if low-quality consumables were used in the work, the technology according to the accepted drawing was violated, the diagram was not followed, or the installation was carried out in unsuitable weather conditions.
Errors are detected during operation of the window system. They consist of the following points :
Insufficient preparation of the contact surface.
Before installation, the old window is dismantled, debris and remnants of the previous structure are removed, the surface is rubbed and cleaned, leveled, and primed.If necessary, they putty.
- The system was installed with beads facing outwards. This is wrong, since they can be pulled out, the structure can be easily opened and the entire glass unit can be removed.
- Violation of the geometric proportions of the system. During work, be sure to use a level so that opening and closing window elements is not difficult.
- Work in frosty weather leads to the fact that the glue and polyurethane foam change their structure, expand and improperly seal the window openings. The same applies to the use of insulation, as well as waterproofing.
- The frame must be securely secured to the walls with anchors so that they do not deform or vibrate.
- Violated installation rules. In a brick wall (single-layer), the window is installed in the middle of the opening, in a two-layer wall - closer to the outer surface (behind the heat insulator). For three-layer openings, installation is carried out in the plane of the insulating material.
- When using sealants, it is necessary to ensure that direct sunlight does not reach the surface of the window, as this will lead to rapid destruction of the joints and surfaces of the window.
Many experts recommend that before inserting blocks, the window structures should be left to stand for some time, so that the wood can adapt to the conditions and gain the required humidity. This method will extend its service life.
To prevent low-quality materials from reducing all costs and work to zero, you need to monitor what you purchase. If the wood or components (fittings, seals, glue, foam, fasteners, etc.) do not have markings, accompanying documents, hygienic conclusions, guarantees, certificates, then you should think about it. Purchasing products from trusted companies is the key to successful work of the master.
Before dismantling old windows, be sure to measure them in order to compare them with the dimensions of the new ones and avoid installation errors.
Advantages and disadvantages
You can install wooden windows yourself, but this is associated with some difficulties:
- an assistant is needed for the work, since it will not be possible to cope alone;
- if you have no work experience, you can get the frame dirty or make mistakes that will lead to its distortion;
- It may take several days to measure, dismantle old ones and install new ones, while professional builders do it in a few hours.
Installing a wooden window yourself means significant money savings. If you carry out the work, paying attention to every detail, you can do everything efficiently and without the involvement of builders.
Wrong device - what to do?
Improper installation can lead to errors. This is due to the incompetence of the specialist, violation of technical rules for laying window elements that do not meet standards and do not have certifications, and were initially poorly assembled.
and the step-by-step process of installation work, breakage of fasteners and fittings, as well as the use of low-quality materials or work under unfavorable conditions are also important
Improper installation of windows also includes the formation of large linings for double-glazed windows (remote), much larger than the supporting ones, which leads to disruption of the functionality of the entire structure, geometric deformation and sagging of the sashes.
The matching of the fittings strips, the joining of elements and moving pins are also important so that the tightness of the sealing gaskets is not disturbed and the moving parts do not break.
During installation, you need to correctly select and fasten PVC amplifiers; they must be present. If they are not there, this will lead to deflection of the window block beam. If there is a discrepancy in dimensions, for example, the length and width of wood profiles, then the technology of joints along the edges of the tongue-and-groove, as well as glued elements, will be disrupted.
Also, you cannot deviate the vertical beam from the vertical by making a bend . Because of this, there will be obvious problems with closing and operating the windows, their loose fit, and as a result, hardware will periodically break down.
If a horizontal beam with a bend is deviated, there will be a problem with the accumulation of precipitation (rain, snow) in the drainage system of the structure, which will lead to its flow into the room. Incorrect installation can occur if the technology of using polyurethane foam is broken, the opening is not prepared, or debris is not collected, which will prevent good adhesion and tight fit of the surfaces of the block and the wall.
It is advisable to involve specialists in working with window openings and correcting defects, who will perform installation or remove errors in a short time, providing guarantees.
Opening: cleaning, measurements, preparation
What's up there?
First of all, if the house is made of stone, we knock down the slopes and plaster along the top of the window opening. Purpose: to find out whether there is a lintel in the opening, or whether a section of the load-bearing wall lies simply on the window casing; This is a common construction hack.
If the house is made of stone and there is no lintel, alas, you cannot continue to work, but you need to consult with the builders about correcting the defect. Living in such a house is simply dangerous, especially if it has two or more floors. But do not be alarmed if in a very old house there is a castle made of bricks or stone instead of a lintel: this is in the order of things, it is quite reliable, and work can continue. Also, in block houses, as a rule, there are no lintels: reinforced concrete slab monoliths are already made using reinforced concrete concrete with window openings.
As for wooden houses, they are either assembled on a frame or made from a log house. In them, window openings either do not carry loads at all, or are lightly loaded, and you don’t have to think much about the lintel.
Mortgages
Now you need to knock down the slopes around the entire perimeter of the window, inside and outside, and remove the window sill. If a quarter is provided in the opening - the flow of masonry from the outside onto the opening, this is very good. But now we need to check the presence and condition of the mortgages: wooden beams embedded into the masonry wall specifically for window installation.
If the mortgages are in place, we check their condition: we stick an ordinary shoe awl into the tree a third of the length of the rod and pull it back. If it doesn’t go in a third of the way when pressed by hand, or it’s impossible to pull it back out without swinging or grabbing the rod with pliers, that’s good, the mortgages are strong. If not, they will have to be replaced.
What if there are no mortgages at all? It’s also okay; it’s possible to insert wooden windows into openings in a stone wall without them.
Measurements
The window opening, cleaned before laying (or before casing in a wooden house), must be carefully measured. If you plan to replace several windows, clean and measure all openings. The goal is to determine the configuration of the opening, and from it - the dimensions of the new window.
Even a house built by the most conscientious builders shrinks over time, and it is never absolutely uniform. The new window should be slightly smaller than the rectangle inscribed in the opening. The gaps that must be maintained are indicated in the figure: 15-25 mm on the sides and top and 40-60 mm at the bottom.
Measurements must be made based on true horizontal and vertical lines. Without any extra hassle, it is done with a laser tape measure. If it is not there, on the wall above the opening we draw a horizontal line along the level, and on the side along the same level or plumb line - a vertical line.
To guarantee, you can cut off the second horizontal line at the bottom, the second vertical line on the other side, and measure the diagonals of the resulting rectangle. If they are equal, everything is in order, the measurements will be accurate. You can now order windows using them.
Average prices
The cost of installing windows does not depend on seasonality, but is determined by the complexity of the work and depends on the region. The center of the Russian Federation (Moscow and St. Petersburg), as well as the northern regions, are always at prices higher than other regions. The price for installation is indicated in the companies’ price list, which can be studied on the official websites.
The price includes only the cost of work, taking into account the consumables used, without loading and unloading.
On average, in the Russian Federation, it is:
Dismantling an old window without preserving the frame - 180-220 rubles/m2, and with preservation - 480-550 rubles/m2.- Preparatory work for openings (cleaning, putty, primer) – 580-800 rub./l.m.
- Installing a window in a new building or cottage – 2000-2800 rubles/m2.
- Installation of structures in “Stalinka” buildings – 2200-3000 rubles/m2.
- Creating a box for wooden houses - 1250-1550 rubles/p.m.
- Low tides - 950-1100 rub./rm.
- Window sills – 720-910 rub./rm
- Finishing slopes from the inside - 820-1100 rub./rm.
- Wooden slopes – 1250-1520 rub./running meter.
- External slopes – 610-750 rub./l.m.
- Cleaning the place of work, including garbage removal – from 1200 RUR/1 piece.
Many companies offer discounts on a number of their services in order to attract customers. You can save money if you dismantle and prepare the surfaces yourself and clean up construction waste.
Preparing the opening for installation
If this is not a new building, but you need to replace an old window with a new one, then the first thing you need to do is get rid of the unnecessary frame. It is not difficult. Then clean all slopes from plaster. You also need to remove the old window sill. Wooden inserts remain in the opening into which self-tapping screws are screwed. Next, take measurements of the opening; it must be slightly larger than the window itself.
Tip: For accurate measurements, use a laser tape measure or construction thread.
It can be attached with anchors right through to the wall, which allows you to open the window in any direction without increasing the load on the frame. When choosing a frame, it is important that the inner glass does not sweat. The width should be from 12 to 22 cm.
All cracks must be blown out with foam from a gun. To ensure that the foam is distributed evenly and there is no pressure on the frame, you need to blow it out in several stages.
Glazing of a loggia using an aluminum profile
Lightweight aluminum construction is most popular today due to the low cost of a fairly durable product. The high-strength structure chosen for the cold method of glazing the balcony space will last at least 80 years if it is installed correctly:
- we install the prepared wooden frame, seal all the cracks;
- We dismantle all sliding elements, remove glazing that is not tightly secured;
- We fix the canopy on the top plate with special fastening fittings, and also install ebb linings on the parapet;
- along the perimeter of the wall panels we attach mounting plates to the frame at pre-marked places;
- we return the previously dismantled elements of the balcony system, filling all the voids with polyurethane foam.
Video instruction:
Thanks to its modern design and wide range of colors, the aluminum profile can easily be adapted to any home interior. A significant disadvantage of aluminum structures is low noise insulation and a high probability of negative consequences associated with changes in ambient temperatures.
Vertical settlement of the house structure
It may seem that installing translucent structures in a wooden building is a “trifle matter.”
But the vertical settlement of the building creates many difficulties and problems. Shrinkage of the structure has several reasons. The most significant thing is that a house made of wood gains moisture or dries out depending on external conditions, as a result the size of the logs becomes smaller or larger:
- Shrinkage of a log house is within 10 - 15 mm for each log 25-30 cm in diameter.
- Shrinkage for a log frame is within 7 - 10 mm, each beam is 150x150 mm.
- This parameter varies depending on the technological production conditions.
There is another option for calculating the shrinkage size of log houses - 10-15% of the cross-section of a unit of material is accepted.
But in reality, the shrinkage of log houses depends on:
- Depending on the type of material used.
- Depending on the period of cutting the material (in summer or winter).
- Harvesting places (wood grew in a field, in a swamp, etc.).
- The density of the material and the amount of resin in it.
- Dimensions of the material.
- Humidity.
- Dimensions of the house.
- Method of assembling a log house (types of felling,).
- Used to seal insulation crowns.
- Type of wood.
- Construction season.
Maximum shrinkage occurs in buildings made of simple logs, followed by rounded logs and various types of timber. Even if a wooden building was erected many years ago, when installing windows in it, it is still necessary to take into account the vertical movements of the enclosing structures resulting from changes in temperature and humidity.
For centuries, special decks (jambs or casings) were created in wooden buildings; making them is not easy. Nowadays, many construction organizations are trying to avoid the costs of this work - they install boards or timber in the opening.
This partially makes it possible to protect against jamming of window sashes, but you need to remember that the decks must have high strength and be airtight; they must reliably keep the frame from moving horizontally and at the same time not interfere with vertical shrinkage. When performing installation, you must not forget about these features of installing windows in wooden buildings.
Installation of wooden window sills
Installation of wooden window sills is carried out according to the following rules:
- The length of the window sill should not exceed 3 m (longer structures should be assembled from several panels).
- The length of the window sill is calculated using the formula: installation clearance parameters −4 mm length for gaps. This value is calculated on both sides of the window for each meter of length.
- Heating appliances must be at least 8 cm away from the window sill.
Necessary materials:
- silicone sealant;
- two-component foam;
- 1 mounting bracket for every 500 mm length;
- combination mortar with metal terminals.
Work progress:
Clean the landing base.
We try on the canvas and adjust it according to the calculated dimensions.
We place the canvas on a cement screed without fixing it with an adhesive composition.
We set the beacons according to the level (remember the mandatory tilt of 3 degrees!).
We install the window sill on the beacons.
When installing a window sill, a waterproofing substrate is used.
The window sill board must be placed under the base of the window, but the edges of the window sill should not lie flush against the window structure.
If installing a wooden window sill with your own hands is more acceptable to you than calling a professional, remember the golden rule: “Measure twice and cut once.”
The window installation process is completed by installing the slopes and fittings.
When purchasing or ordering a wooden window, make sure that its fittings have a quality certificate, and the fittings manufacturer guarantees at least 10 years of service without breakdowns (for example, fittings from ROTO and MACO have such a guarantee). The cost of good fittings, of course, is higher than ordinary Chinese ones, however, the guarantee of reliable service of a window system lies in high-quality fittings and good installation. So the high price of components is completely justified.
Wooden window installation process
It is practically no different from installing plastic windows. Before installation, all options are thought through in advance, as well as possible problems that may arise during the installation process.
Installation of wooden windows
- simple, but requires accuracy of calculations and accuracy. Therefore, it is better to entrust it to professionals. However, knowledge of the rules for installing windows will make it possible to perform this work efficiently.
First rule
The specialist performing the measurements must have personal installation experience and be well acquainted with the design of the window being installed. If an incorrect calculation is made, then all costs will be lost, and additional work will require much more time and material investments. Therefore, it is important to monitor the accuracy of this stage of work.
Second rule
The measurement of the window that will be installed is carried out both from the inside of the room and from the outside - from the street. These measurements are necessary in order to determine the depth of the quarter of the initial window opening.
Of course, the window should not be smaller than the external dimensions of the opening. This will prevent the structure from falling out. How much more it should be depends on many different factors.
When installing windows made of wooden material, certain rules must be followed. This article provides a continuation of their descriptions.
Third rule
It is imperative to take into account the fact that the opening that exists can be quite skewed. This is typical for panel houses. In this case, this factor leads to the need to increase the window size by the size of the skew.
Or otherwise, so that there are no through gaps between the edge of the window frame or the edge of the opening, the size of the window must necessarily be larger than the size of the external window opening by at least 30-40 mm in width and 15-20 mm in height.
This is achieved in two ways. You can increase the size of the window frame. Or you can expand the window using special additional profiles that snap onto the frame.
Fourth rule
From the street side, there should be a clear idea regarding the appearance of the window, since some people like the entire frame of the window to be inserted into the wall and not be visible from the outside. Others prefer to show the window in all its glory.
If the first option is chosen, we must not forget about possible distortions, so as not to hide the edge of the glass unit inside the wall, and not just the box itself. The second option is preferable. In this case, the likelihood of errors is less, as is the severity of their consequences.
Fifth rule
We must never forget that on the outside of the window, sometimes at the top, but mostly at the bottom, there must be a specially installed ebb line to drain rainwater. Therefore, no matter how the ebb is installed, the lower edge of the window should not be lower than the outer edge of the opening.
This is necessary in order to ensure that the special openings for draining water from the window frame from the outside are not blocked. In addition, the joint between the frame and the ebb, as well as between the frame and the window sill, must be sealed, for example, with silicone.
Of course, it is best to install the ebb under the window. This will eliminate the possibility of water leakage in the place where the connection is located. Also, do not forget about the window sill. It is installed not at the joint to the window, but under the window.
It also needs to be sealed with silicone. This will prevent moisture from seeping under the window sill through the joint. On the other hand, it will increase the strength of the connection. When installed, the window sill has a slight downward slope, according to SNIP - 3 degrees. This is done to prevent condensation from flowing under the window.
Sixth rule
After accurately determining the dimensions of the future window, they must be compared with the control internal dimensions of the opening. Such a comparison will make it possible to timely detect a mechanical error in previous calculations. This will also allow you to assess exactly how thick a layer of plaster needs to be laid on the internal slopes.
Seventh rule
We must strive to ensure that the joint width between the window frame and the wall does not exceed 3 cm. This is especially important when the window size is large. This is absolutely not difficult, since manufacturers of window profiles, in addition to the main set, necessarily produce additional profiles that make it possible to increase the width of the window frame without changing the dimensions of the glazing. Such profiles are specially designed and designed specifically for such cases.
Eighth rule
There are generally accepted methods for attaching a window frame
. This is fastening through the box, which is done directly or fastening using a metal anchor plate clinging to a plastic lock on the outside of the box. Each of these methods has both its advantages and disadvantages.
In the first case, it is necessary to remove all double-glazed windows and sashes from the frames during installation. But at the same time, the window is mounted in almost any opening, which guarantees the load not on the plastic, but on the metal internal reinforcement of the window. The second method simplifies the leveling process in terms of plumb and level.
It does not leave marks on the end surface of the plastic. Both methods pay off in practice. Which one to choose is determined more by personal taste. Next comes the installation process. The window is freed from hinged sashes and double-glazed windows.
The empty frame is inserted using wedges using a horizontal level and a plumb line very carefully into place. Holes are drilled around the perimeter of the window in the frame and wall for future fasteners. The frame is secured using collet bolts.
After this, the sashes and double-glazed windows
are inserted into place. Then the joints between the wall and the window are sealed. This is done using polyurethane foam. Then the protective film is removed from the profiles, only after which the fittings are finally adjusted. In the process of performing these actions, you need to take into account rule 9, which will be described in the next part of the article.
The previous parts of this article talked about the rules for installing windows. The rules that will be described in this article are additions to the eighth rule of the third part of the article.
Ninth Rule
double- glazed window
, it is necessary to mark the glazing beads. This is necessary in order to subsequently put them exactly in the same place. During the window production process, the dimensions of the glazing beads are determined very clearly locally using a special measuring ruler. And although the glazing beads themselves are the same at first glance, their length is different. The difference can be no more than 2 mm, but in the place where the vertical and horizontal beads meet, even such a small detail is clearly visible.
Tenth Rule
It must be remembered that it is better to install the window on the lower supporting blocks. They are not removed after installation. Under no circumstances should the window be left hanging on dowels. The weight of a metal-plastic window with a double-glazed unit reaches 150 kg.
Therefore, neither dowels nor polyurethane foam will certainly hold it in place. The pads, of course, need to be placed next to the vertical elements. Under vertical partitions-imposts and in the corners of installed frames.
The next part will cover the rules covering anchorages and plumbs.
Eleventh rule
When it is set vertically, it is necessary to use a plumb line with a sharp tip and absolute axial symmetry. The level bar is in no way suitable. She doesn't give accurate readings. When leveling the horizontal, experts recommend using a water level. It is he who gives an accurate reading.
Twelfth Rule
When tightening the mounting screws, there is no need to tighten them. Otherwise you may not notice, but the window will take on a somewhat barrel-shaped appearance. After tightening the screws, in any case, it is advisable to once again check that there are no deflections in the profile in the places where the fastenings are made, as well as the general leveling of the window.
When sealing windows, the joints between the wall and the window frame, with a variety of building materials, are usually filled with polyurethane foam. It is relatively cheap, easy to use, capable of accepting and evenly distributing wind loads and mechanical stress.
For her, the unevenness of the compacted surfaces does not matter. But you need to use foam skillfully and thoughtfully. It must be protected with sealant, plaster or paint. And, of course, rigid fastening in the window opening should be provided not by foam, but by special profiles.
How to install wooden windows - video:
Wooden windows are not only beautiful, but also environmentally friendly. And how long the window will serve you directly depends on how well the installation is done. Of course, it is better to hire a qualified specialist to carry out this work, but you can carry out the installation yourself, having thoroughly studied the technology. Also, owners of country houses often resort to installing windows themselves, since installing windows in a wooden house with your own hands significantly saves the overall costs of building and repairing the house.
Described in another article. To clearly understand how to install a wooden window with your own hands, watch the video.
Isolation measures
Wooden window installation diagram.
Polyurethane foam is used to fill gaps when installing wooden windows. The material is considered the most technologically advanced for carrying out this type of work. It is distinguished by ease of use and the ability to be evenly distributed throughout the volume. The sealed surfaces do not require special preparation.
The foam is applied using a gun in a zigzag motion, densely filling the gaps, but taking into account its subsequent increase in volume. The material expands with significant pressure after application, and if it is in excess, the box may be deformed. To strengthen the shape of the structure, temporary horizontal struts made of beams are used.
Polyurethane foam as insulation has disadvantages when used. It becomes brittle after prolonged exposure to moisture and sunlight. The material does not have sufficient waterproofing properties, and when installing windows, subsequent coating of the seams with a layer of sealant, plaster or painting is required.
When the ambient temperature changes, the thick layer of heat insulation changes in volume, putting pressure on the structural elements. This can lead to some deformation of the frame elements and peeling of the plaster.
