Some creative experiments of parents are repeated with interest by their children. Only the name of the hobby may change. “Wood burning for beginners” was the name of a popular circle in the Pioneer Houses in Soviet times, but today such a circle may be called “Fundamentals of Pyrography.” But the essence of the direction is still the same: wood burning, obtaining unusual pictures on the wood structure.
In this article you will learn what materials and tools are useful for a beginner, how to choose a suitable image and what stages the burning process itself consists of. We will tell you how to format the finished work and how to properly organize your workplace.
What is wood burning
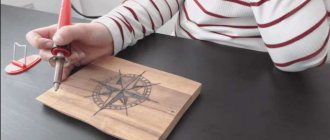
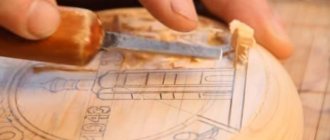
Wood burning is the application of images, drawings or inscriptions to wood using hot tools. For this purpose, pyrographs, burners or other electrical devices are used.
It is believed that spending time doing this activity has a very relaxing and calming effect, and also brings positive emotions.
A few rules
Before you start work, you need to familiarize yourself with some rules that will allow you to do the work quickly, easily and without damage.
- Make sure the board you will be working on is dry.
- Heat up the pyrograph. The tip of his pen must be dark red in order for the pyrograph to “write” well on wood. You can regulate the temperature of the pen using a special regulator located on the pyrograph.
- Have a support for the hand in which you hold the device. This is important so that the pen does not come off, ruining the drawing or damaging your hands or clothing.
- For beginners, it is better to choose simple photos or pictures that you want to transfer to the board.
- It's best to hold the pyrograph like a regular pen, this will allow you to apply as much pressure as you need.
- To get a fine line, run the burner quickly over the wood. To obtain a thick line, the pyrograph should be moved slowly.
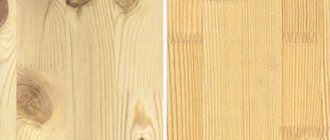
- It is much more convenient to use light and soft wood; it is easy to burn on it. These species include linden, chestnut, and birch.
Related article: Large knitting with patterns for hats and blankets
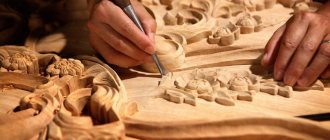
Types of wood burning
There are several ways to burn wood. As a result of technical processing, either flat or three-dimensional designs can be obtained.
Burning types:
- Using a pyrograph. In turn, this method is divided into: contour and silhouette burning.
- Outline. This method is very good for beginners. Does not require special skills or abilities. Only the outline is burned.
- Silhouette. The technique involves complete shading. In other words, the background is burned out, but the image remains untouched.
- With the help of alternative options. It consists of other methods of applying an image to a wooden base, for example, using: acid, laser, electric discharge, friction, pyrotyping, or even sunlight and a magnifying glass.
Variety of options
The very first way is to process the image in Photoshop. The image is processed so that it is all in small strokes. Then the drawings are printed on parchment paper. They attach it to the wood and begin to burn it.
Read this: DIY cat house: photos of the best options for a pet
The second method is when an image of a person is printed on a laser printer in a schematic extension. For this, it is best to use special thin photo paper. It is attached to the board with the wrong side and burning begins.
Please note that the heating temperature of the burning apparatus must be as low as possible, otherwise the paper may ignite.
This method will not take you much time. Because of this, he is the best in portrait burning not only for experienced craftsmen, but also for beginners. After burning, you need to remove the pieces of paper. To do this, it is necessary that the portrait is completely cooled. Then take a cotton pad, moisten it with water and wipe the finished work.
The third way is to use a special-purpose laser machine. This method is not cheap, but it also does not require much time and effort. This laser is attached to a personal computer. It performs the function of the brain. We load the photo into it, process it and send it to the laser to complete the work. Then the laser itself begins to burn out the image it received. You just need to varnish the finished portrait.
Read this: DIY Birthday Cards for Family and Friends
Now let's look at several master classes on burning portraits.
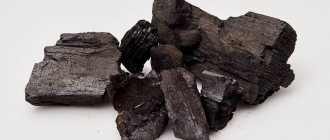
Wood for burning
The wooden base for burning should have a uniform structure, fine porosity, and should not have chips, scratches or cracks.
It is also necessary to make sure that there are no mechanical defects so that there is no resin.
- The wooden base must be light, otherwise the image will not be visible.
- Tree species that are suitable for the base: linden, poplar, alder, aspen and birch.
- A properly selected foundation guarantees a successful result.
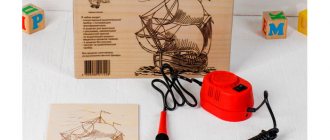
For a beginning craftsman, it is recommended to use ready-made wood burning kits. Sheets of plywood are also the best option for starting out.
Create an angel
This master class will describe the step-by-step process of creating a scorched picture, which we will call “Angel”.
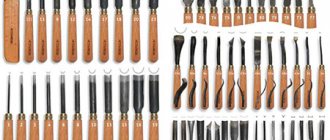
The following tools and equipment are required for work:
- Plywood or wood;
- Burnout apparatus;
- Ready drawn template;
- Copy paper;
- Drill;
- File;
- Jigsaw;
- Varnish;
- Stain;
- Frame;
- PVA glue.
First of all, you need to make a template. We look for a suitable picture on the Internet and print it in the size you need. Next, we cut out or buy a sheet of plywood, which will later be the base.
Article on the topic: Vest for a newborn with knitting needles: diagrams with description and video
We transfer the printed template to the base.
Then you need to cut out the necessary parts. To do this, first we use a drill and use it to make holes. In the future we will insert a file into them and cut them out. First of all, we cut out the smallest parts, gradually moving on to larger ones. After that, we take a burning device and make touches around the office.
The substrate for the finished work is covered with stain. The color is chosen at your discretion. We glue the finished parts with PVA glue. Then we insert the finished picture into the frame and after that apply a layer of varnish.
That's it, the painting “Angel” is completely ready.
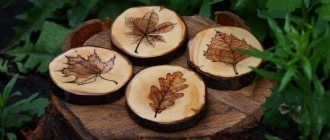
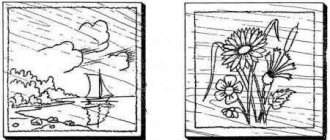
Image selection
The only condition when choosing an image is that the drawing must have a clearly defined outline.
- Drawings can be found on the Internet and printed. Or you can come up with it yourself.
- But the first time, it is recommended to use simple images in order to understand the principle of operation and get the hang of it.
- Each time you will hone your skills and your work will look better and better.
The image is applied to the base using carbon paper or manually.
Let's start with a portrait
Burning out a portrait is not so easy. The most important thing is to correctly and efficiently transfer the drawing from the photo to the base.
As already mentioned, first you need to transfer the portrait from a photo or from life to wood. He should look like the person you decided to paint a portrait of.
Then we begin the burning process itself. All thick tips were used for this portrait. In the end, this is what happened:
Safety precautions
When working with a burning tool, you should adhere to the following rules:
- When the tool is turned on, only grip it by the handle to avoid burns. The device is very hot. Avoid touching the tip to other parts of the body.
- Place the instrument only on a special stand.
- Nozzles cannot be changed with bare hands. Use pliers for this.
- Do not allow the tool to overheat, otherwise it will quickly break. While working, turn off the tool for a while and rest.
- Do not leave the device turned on unattended, even for a couple of minutes.
- If exposed wires or other damage appears on the device, it is recommended to replace the device. Such damage is very dangerous and can lead to fire.
If your child is engaged in such an activity, always keep an eye on him, do not leave him unattended, and always check that everything is fine. Of course, before starting work, tell him the safety rules.
Pyrography is a great hobby
Thanks to the advent of the electric pyrograph in the second half of the 20th century, burning became a mass hobby, and not just the lot of craftsmen, because anyone can buy a pyrograph device and use it. Pyrography differs from other types of fine art in that it is not necessary to have drawing skills to practice it. Perseverance, accuracy and patience are much more important. To create your own patterns, a developed imagination will be useful.
Another significant advantage of this hobby is that it does not require significant financial investments , and if you master pyrography at a sufficient level, you can begin to make a profit from this activity. Currently, handmade jewelry and interior items, especially those made from environmentally friendly materials, are very popular. In addition, you can always pleasantly surprise your loved ones with a unique gift made by yourself.
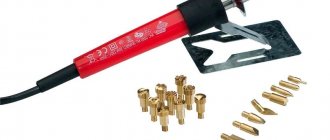
To practice burning, first of all you should choose a high-quality and convenient pyrograph . You can start with a simple Russian-made device, familiar to everyone since childhood. These burners are reliable and easy to use, and come with several replacement needles. The price of such devices is usually low, and they are easy to find in any children's store or in a craft supply store.
Tips for Beginners
To ensure that the first point does not stand out and the lines are smooth, blow lightly on the tip.
- Follow the outline with one line. Work slowly. You can help yourself by moving the base with your other hand.
- Fill with medium heating temperature of the device. Perform slow circular movements.
- Using a metal scouring pad, clean the tip several times as you work.
- It is impossible to erase an already scorched line, so work carefully and focused.
- Thick lines can be obtained by moving the tool very slowly across the surface. And thin ones are the opposite - draw lines quickly.
- The higher the temperature of the device, the darker your lines will be.
To get smooth tonal transitions in one line, use a small table fan. It will cool the tip and the lines will be smooth. But be careful and attentive!
Bath sign
For work we will need the following tools and materials:
- Burnout apparatus;
- A piece of plywood of the required size;
- Sketch;
- Scotch;
- Scissors;
- Clear varnish;
- Brush;
- Empty ballpoint pen (no ink).
Step-by-step operating instructions are presented below.
First, we decide what the drawing will be. Afterwards we prepare the board and level it. Then we attach our sketch to it with tape.
Take an empty ballpoint pen and trace the outline of the drawing. In this case, you need to press lightly. Then we check how our drawing was printed.
Next, we remove the sketch itself and the tape and move on to the burning process. If during the burning process your imagination awakens, then you can add new and different elements to your base.
Cover with a layer of colorless varnish. Place it out of reach to dry completely. That's all, the sign for the bathhouse is completely ready. This concludes the master class for beginners.
Step-by-step instructions for burning
Prepare the wooden base. You should use fine sandpaper and rub it with a chalk-water solution. Wait for it to dry and get to work.
- Apply a sketch to the prepared surface using carbon paper, manually or using a stencil.
- Turn on the device and wait until it heats up to the desired temperature. Don't forget about the safety precautions mentioned above.
- Conveniently place the base on your desktop. Move the device along the contour with the same pressure and speed.
- Start your drawing with the outer lines, and after working them out, proceed to the main part of the picture. Secondary parts of the work are burned last.
- Once you have drawn all the lines, you can consider the painting to be ready.
- Turn off the device.
- If you want to get a color picture, then color it with paints. Acrylic is best.
- Cover the painting with acrylic varnish.
Registration of the finished work. The picture has already turned out beautiful, but you can put it in a frame. A frame made from sawn wood or homemade baguettes will look very original. By the way, you can also pre-burn patterns on them.
Wood burning is a type of art that is accessible to every person. By purchasing a pyrograph, you get a great opportunity to plunge into the world of art with your children. The paintings that you make in this way will be an excellent holiday gift, as well as a good business idea.
Making cartoons
For work we will need the following tools and materials:
- Plywood sheet;
- Sketches (pictures);
- Burnout apparatus;
- Paints;
- Tassels;
- Clear varnish;
- Copy paper;
- Sandpaper.
So, let's get to work. First, let's prepare the base. To do this, smooth the plywood sheet with sandpaper. Then we transfer the prepared sketch through carbon paper to the base.
We begin to burn the design along the contour.
Related article: Braid patterns with knitting needles for 9 loops with photos and videos
After completing the action, we begin to paint the finished craft. We wait until it is completely dry.
Apply varnish and remove until completely dry. The picture with cartoon characters is ready!