History of wood burning
In Russia, rich in forests, wood has always been loved and used by many generations of craftsmen.
Decorative decoration of wooden products was known in Rus' back in the 9th – 10th centuries. Already at that time, craftsmen knew how to see and reveal the beauty of wood, and use its plastic properties.
How do we know burning?
Man is so constructed that in addition to satisfying his natural needs for food and shelter, he has always strived to realize both his creative potential and his vision of beauty. This is where, probably, such a technique of decorative and applied art as burning, which is organically woven into almost every culture of seemingly completely different peoples of the world, originates.
This is evidenced by artifacts discovered during excavations on various continents. It is interesting that the age of some household items decorated with a burnt pattern and found on the territory of modern Peru is about seven hundred years BC.
But the ancient Chinese traditionally used burning to decorate bamboo sticks, depicting hieroglyphs or elements of the surrounding nature on the latter. According to one of the legends, the founder of this technique in China was master Wu Tian from Yunnan province, who lived during the Qing Dynasty, who one day, being slightly drunk near the stove, for the first time (and completely by accident) used burning to apply images of flowers, birds and animals.
From folk crafts to deep artistic images
Further, burning becomes an invariable ethnic attribute of folk crafts, with the help of which various cult symbols were applied to clothing, household items and elements of the home. At the same time, wood burning itself was just a unique branch of an entire artistic movement (including burning on leather, as well as silk).
Initially, the main tools for this technique were metal needles, rods (up to pokers and swords in the Middle Ages) or specially sharpened brands, heated in the fire of a fire, brazier or (somewhat later) an alcohol or gas burner.
Since the Middle Ages, wood burning has taken a serious step from purely folk crafts towards high art. It was then that many famous masters of painting (for example, Rembrandt) began to use this technique in their work as an artistic technique. But wood burning gained particular popularity in mass art in the twentieth century, after the invention of a thermal cautery (created to cauterize damaged blood vessels) by the French doctor Paquelin, which gave rise to the emergence of modern electric burning devices.
Wood burning today
Today, wood burning is available to almost everyone who wants to master this fascinating technique, conventionally divided into pyrography and pyrotyping. Pyrotyping is a kind of branding of a wooden surface, most typical for the mass decoration of various wood products. And pyrography is the name given to direct burning on wood in the form of a design, done manually.
As a rule, artistic burning looks better on light-colored wood of deciduous trees that are not characterized by bright growth rings (for example, linden, alder, maple, aspen). The surface of such a workpiece should be smooth and matte, so wood burning is carried out on a plane previously sanded with sandpaper. As you can see, everything is quite simple, but only in the hands of real masters are amazing works of decorative and applied art that evoke genuine admiration produced!
Business risks
According to statistics, up to 13% of clients refuse work for one reason or another. The main reason for refusal is dissatisfaction with the resulting image, which often occurs due to an unsuitable source photograph. The photo may be sent of low quality or very dark. To reduce this risk, it is recommended that you have minimal knowledge of Photoshop in order to make preliminary images overlaid with wood grain. This way the client will see in advance how his image will look on a wooden surface. You will either get another more suitable photo, or save time and material on making a portrait.
How to choose the right burning tool
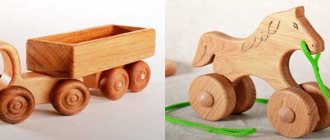
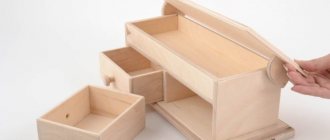
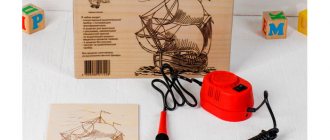
The first step in mastering the art of burning is to purchase a burning device, ideally if such a device will be powered by electricity. You also need small planks or pieces of plywood, cut to the desired shape. You don’t have to cut them yourself; it’s enough to purchase several options in specialized stores. By the way, they also sell wooden figurines of various sizes and shapes, ready-made boards in frames, with sketches printed on them from the most basic to incredibly complex images.
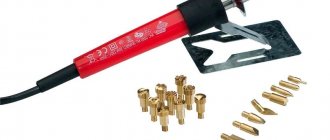
When choosing a burning device, many people wonder whether it is possible to burn wood with a soldering iron? Our answer is, of course you can! This is the easiest way to burn wood patterns at home, accessible to everyone. The only difficulty in finger burning is that you need to use soldering irons of different diameters. But if you decide to purchase a specialized device for wood burning, rather than a soldering iron, remember that for beginner burners, the ideal option would be a pen-shaped burner, with which you will simply draw according to a template. Such a tool is usually accompanied by brackets and pins, which are placed at the base of the burner handle; they then form lines of patterns of different thickness and color.
The wood burner should be heated to the maximum immediately before work, this will be indicated by the tip being hot to a dark red color. Carrying out burning on wood comes down to constantly changing the inclination and heat, and sometimes the size of the pen, which allows you to achieve different depths of the burnt line, which means it will differ in color. Shades of different line depths range from light brown to rich dark brown.
Table of contents
Introduction Chapter 1. History of wood burning. 1.1. How do we know burning? 1.2. From folk crafts to deep artistic images. 1.3. Wood burning in our time. Chapter 2. Panel manufacturing technology. 2.1. Preparing material for burning. 2.2. Tools and accessories. 2.3. Various types of burning. Chapter 3. The benefits of burning. Chapter 4. Safety precautions. Conclusion Used literature.
Choosing a wooden base for the first work
At first, it is better to choose boards made of soft, light, homogeneous wood , which must be sanded for a perfectly even and smooth state. Birch, linden, alder, and poplar trees are rich in such wood. It is easier to burn on such blanks and there is no need to adapt to the structure of the wood.
Typically, newbie burners use plywood, which is easier to process, a commercially available and fairly inexpensive material. Once you get the hang of it and learn how to work with wood, you can start working on wood with a heterogeneous structure, which will help focus attention on certain details such as clouds, water, trees, or, for example, stripes on the skin of a zebra and tiger.
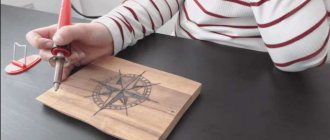
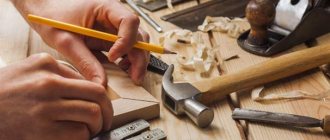
The design for burning can be drawn by hand with a simple pencil or transferred to a board using carbon paper. The disadvantage of this method is that the lines drawn using carbon paper blur when heated and are difficult to erase if necessary. The ideal option for transferring designs to boards is black graphite paper for light wood and white graphite paper for very dark or pre-burnt wood.
In addition, you can glue tissue paper with a pattern onto wood and burn an image onto it, without the surface of the board getting dirty, and the paper will melt when heated. Using a burning machine, you can burn out various pictures, inscriptions, patterns, and logos. Beginners should not choose complex drawings and patterns at first; first, it is better to get their hands on simple, medium-sized images made up of a miniature number of lines and strokes.
Staff
As in any business, it’s better to do pyrography yourself at the start until you set up all the processes. Further, as necessary, work can be delegated to an assistant. The beauty of this type of business is that you can do it without leaving your main job - you can call a client during the day, and complete the order in the evening or next weekend. This may be especially interesting for those who are afraid to start a business after quitting their job, especially in times of crisis when the number of vacancies in the labor market has decreased.
Various types of burning
There are several types of burning depending on how and in what manner the design, ornament or pattern is applied to the surface of the wood.
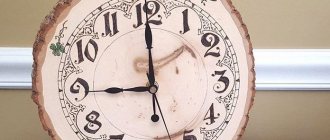
The most common and simplest is contour burning, when only the contours of objects are burned with lines.
Burning along the contours.
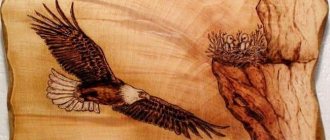
Silhouette burning is often used, in which silhouettes of people, animals, plants, geometric shapes, letters, or the background on which the silhouettes are shown are burned out completely.
Silhouette burning.
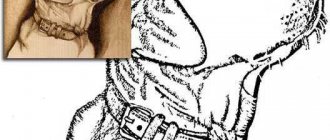
Fans of burning often use the so-called decorative burning, in which the contours are richly burned and the shadows are just as richly shown.
Decorative burning
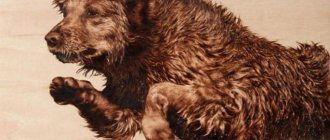
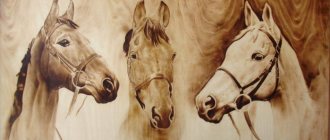
The greatest picturesqueness is achieved when burning with the transfer of shades of chiaroscuro. This is the most difficult type of burning, requiring the ability to draw well and extensive experience in burning.
Burning with the transfer of shades of chiaroscuro.
How is wood burning beneficial for children? Wood burning has several useful functions. Firstly, the child is busy. Secondly, the creative process with an obvious result brings satisfaction. Thirdly, a child can make a gift with his own hands to his parents, grandparents, friend, teacher. Such a gift will contain a piece of the child’s soul, which gives it even greater value.
Fourthly, wood burning exercises develop perseverance, accuracy, attention and even dexterity in children. Fifthly, the child realizes what real work is and how sweet its fruits are. Step by step he polishes his skills. Gradually, banal cutting boards with fish or a Christmas tree are being replaced by real masterpieces: original photo frames, luxurious boxes, etc.
Safety rules when working with a burner
Special caution when working with an electric burner:
- work in a ventilated area;
- check the insulation condition of conductive parts;
- When finished, do not forget to unplug the electric burner from the outlet.
Advantages
This business has a low level of sunk investments. So, you won’t need to make special repairs, pay rent and a deposit for the premises, stock the warehouse, etc. This is a definite plus compared to traditional types of business like a retail store, which requires significant investments in the goods and appearance of the store itself. And if the product can somehow be sold or resold at a reduced price to another store, then the costs of repairs, signage, rent, etc. will no longer be able to be recovered.
Also, the low barrier to entry into such a micro-business makes it attractive compared to many other small businesses, which require much more investment for the same profitability.
Introduction
Wood burning , or pyrography, is a very beautiful and ancient form of decorative and applied art. This is a very interesting creation! It brings joy to both children and adults. Many people become so passionate about this art that they become professional pyrographers.
Working with a burning device and working out precise lines develops fine motor skills and perseverance, which is especially important for the development of a child. Modern burning devices are very convenient and absolutely safe if the operating rules are followed.
Wood burning is a whole philosophy! A master pyrographer, with the help of the elements of fire and wood, expresses the state of his soul, his thoughts and feelings and embodies them in the material world in the form of works of his art.
Using wood burning, you can create not only a wonderful picture, but also decorate any wooden object - a box, a photo frame, a cutting board and even pieces of furniture - a stool, shelf, table.