Wood is easy to process. Using simple tools, you can create things of amazing beauty and functionality.
Separately, it is worth noting products that have the shape of rotation figures: tool handles, staircase balusters, kitchen utensils. To make them, an ax or chisel is not enough; you need a lathe.
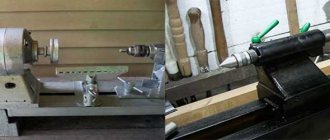
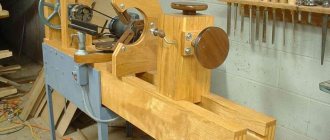
Buying such a device is not a problem, but a good machine is expensive. It’s not difficult to acquire such a useful tool and save money, because you can make a wood lathe with your own hands.
Why is it needed and how does it work?
A lathe is designed for the manufacture of wooden products that have a cylindrical or similar shape. This is an indispensable thing when renovating a country house with a wooden staircase, a carved porch, but not only.
If you have some experience, a turning tool will allow you not only to save on purchased decorative elements, but also to earn money, because handmade wooden products are highly valued.
Whether such a machine is needed in a home workshop is up to the master to decide.
Of course, if you need several handles for chisels, it is easier to buy them, but if you want to make an all-wood staircase, then a set of balusters will cost a very large sum. It is much cheaper to make them yourself. By the way, you don’t even have to spend money on buying equipment - a simple machine can be made in your own workshop using scrap materials.
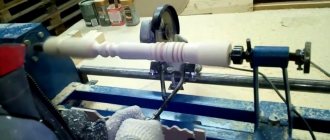
The operating principle of a wood lathe is not particularly complicated. The cylindrical workpiece is fixed along the axis of rotation. Torque is transmitted to it. By bringing various cutters or grinding tools to the workpiece, it is given the desired shape.
Main parts of lathe:
- a frame on which all components are fixed;
- electric drive;
- headstock;
- tailstock;
- handyman
For ease of operation, schemes for changing the rotation speed are used. In professional equipment, this is a real gearbox, a system of gears that allows you to regulate speed within a very wide range. This is difficult; it is enough to equip a homemade wood lathe with a belt drive with several pulleys of different diameters.
Manufacturing of the bed
The bed is a frame that combines all parts of the machine into a single whole. The strength of the structure as a whole depends on its reliability, therefore the best material for the frame is a steel angle. You can also use a rectangular profile pipe.
First of all, the dimensions of the future unit are outlined. This indicator largely depends on what specific products the machine is needed for. The average bed size of a home lathe is 80 cm. Using a grinder with a metal circle, cut two identical workpieces.
Laying wooden blocks, the angles with the shelves up and inward, are laid on a flat surface, their upper edges should create an ideal plane. The same distance is maintained between them, approximately 5 cm. To orient them correctly, use a strip of appropriate thickness.
The longitudinal parts of the base are fixed with clamps. Cross members are made from the same square. There are three of them. Two are attached to the edges of the structure, the third, which is a support for the headstock, is approximately twenty centimeters from the left edge. The exact dimensions depend on the type of motor used and the parameters of the pulley that could be found.
All that remains is to weld the frame into a single whole. The seam must be reliable and of high quality; it can be welded manually or using an automatic machine.
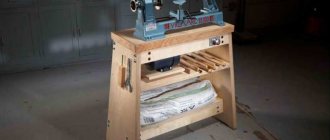
It is important to immediately decide how the machine will be used. Desktop installation or production of a stand-alone unit is possible. In the second option, it is necessary to provide legs. They can be made from the same square, or they can be cut from timber of suitable thickness. The use of wooden legs will allow you to save on material, in addition, the machine can be made collapsible.
Drawings of a device for sharpening drills with your own hands
If you constantly deal with sharpening hard workpieces, the surface of the drill will very quickly become unusable. It will become dull, become very hot and eventually lose its former strength. All this is a consequence of “letting go” of the metal. That is why such a tool needs periodic sharpening using special devices .
How to make homemade devices for sharpening drills, what templates exist for this and what you need to prepare for work, you will learn from our article.
Electric motor for machine
The basis of the lathe drive is the engine. When choosing this unit, it is important to pay attention to its main characteristic – power. For a home machine, models with a power from 1200 to 2000 W are suitable. The type of connection is important; there are single-phase and three-phase motors.
In a low-power table lathe, you can use a motor from a washing machine. It is unlikely to cope with the processing of large workpieces, but it will help produce small decorative elements and kitchen utensils.
How to properly make a tool for sharpening drills with your own hands: training video
To make such a device yourself, you will need a control tool (template). No matter how the drill is sharpened, the accuracy is checked with a special template.
Simple ferrous metal drills have an edge angle of 115 to 120 degrees. If the metal is different, then the sharpening angles will also be different:
- for carbide bronze, steel or cast iron it is also from 115 to 120 degrees;
- for soft bronze or brass alloys - from 125 to 135, respectively;
- for red copper 125 degrees;
- for aluminum and soft aluminum alloys, granite, ceramics and wood – 135 degrees;
- for magnesium and its alloys – 85 degrees;
- for plastic, textolite and silumin - from 90 to 100 degrees.
Direct drive or belt drive
There are several ways to transfer rotation to the workpiece. The simplest is direct drive. In this case, the workpiece is attached directly to the motor shaft. A distinctive feature of this design is its simplicity. With all this, direct drive has a number of significant disadvantages.
First of all, a direct drive machine does not allow you to adjust the rotation speed, which is critical when working with hard material. It is also worth considering the load on the electric motor, especially when working with large workpieces. No matter how well it is centered, it cannot do without vibration. Motor bearings are not designed to withstand longitudinal loads and will often fail.
To protect the engine from damage and provide the ability to adjust the speed of rotation of the workpiece, it is worth considering a belt drive. In this case, the engine is located away from the axis of rotation of the workpiece, and torque is transmitted through pulleys. Using pulley blocks of different diameters, it is easy to change the speed within a fairly wide range.
It is advisable to equip a machine for your home with pulleys with three or more grooves, which will allow you to process wood of any species with equal success, and, if necessary, work with soft alloys.
Drill sharpening angle
If we talk about those drills that are used by craftsmen at home, their cost in stores is low.
But even in this case, you should not use them as a consumable for one-time use. After all, updating the drill to the best working condition will not be difficult if the master has the skill or special tools. There are factory-made machines that are designed for sharpening, but this is a separate expense item, so most often craftsmen create such devices with their own hands.
Most of the problems are caused by drills for metal, and wooden blanks do not quickly reduce the sharpness of the cutting edges.
To make a machine for restoring the sharpness of cutting elements, the necessary control means (template) are used to check the tool.
Typically, tools for ferrous metal, carbide bronze, steel or cast iron - with an edge angle of 115-125 degrees. The length of another material, these parameters are different.
for soft bronze, red copper – 125, for brass alloys – 135;
for aluminum and soft aluminum alloys, granite, ceramics and wood – 135 degrees;
for magnesium and its alloys – 85 degrees;
for plastic, textolite and silumin - from 90 to 100 degrees.
Masters, if necessary, make templates in accordance with the above data. By the way, theoretically, a single drill can be suitable for all these metals and other materials, if you sharpen different working surfaces each time.
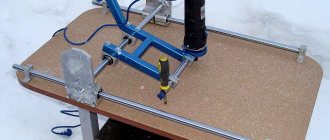
An elementary handicraft device that is often used, bushings attached to the base. There are many drawings on the Internet for self-production. It is necessary to take into account that the tool must be well clamped, the accuracy depends on 1 degree.
If desired, you can make a large-sized holder by using aluminum or copper tubes corresponding to the standard characteristics of drills, or drill many holes in a soft metal workpiece. It is necessary that the sharpener has a comfortable hand rest to move the device and hold the stop.
This primitive sharpening machine is easy to install on a workbench or table.
A practical example of working with a drawing
The essence of the problem: there are drills, they need to be sharpened. We will use one of the sharpening methods, close to the factory ones. Too lazy to catch with your hands. Better than the monkey method - set it and you're done. It took approximately 1 hour to manufacture the device according to the finished drawing.
A little welding work according to the template. A corner was made. We put the washer on, it’s just pressed on.
Let's try the first sharpenings, if everything is assembled correctly, we will refine and refine it, make a quick adaptation.
After sharpening the drill, we carry out a test. Two casting chips are visible, which means that sharpening was carried out correctly.
The only drawback is that one chip is longer than the other, which means they missed the length of the edges. It is necessary to make a stop that will regulate the sharpening length and ensure the symmetry of the edges. To do this, we will make a thrust washer that will be aligned and machined. Or we’ll cut it to make it possible to process shorter drills.
Video of the channel “Anton Fomenko”.
Headstock and tailstock
The workpiece being processed is clamped between two devices called the headstock and tailstock. Rotation from the engine is transmitted to the front one, which is why it is a more complex unit.
Structurally, the headstock of a homemade lathe is a metal U-shaped structure, between the side faces of which a shaft and one or more pulleys are mounted on bearings. The body of this unit can be made of thick steel; bolts of sufficient length are suitable for assembling it into a single whole.
An important part of the headstock, as well as the machine as a whole, is the shaft, a spindle with three or four pins designed to fix the workpiece. This shaft is passed through the bearing of one of the cheeks of the U-shaped housing, then pulleys are mounted on it. To fasten them, a key or a means for fixing cylindrical parts is used, the second cheek is put on last, and the structure is securely tightened with bolts.
The tailstock's job is to support the long workpiece while allowing it to rotate freely. You can buy a ready-made part from a factory machine, or you can use a powerful electric drill chuck mounted on a square of suitable length. A shaft with a pointed end is clamped into the cartridge itself.
The headstock and tailstock are installed on the bed. It is important to understand that the axes of rotation of both shafts must completely coincide. Otherwise, breakage of the workpiece, failure of the machine, and possibly injury to the turner are likely.
Tags: mobile workbench
Comments 29
Thanks for the detailed description, I’ll take it into account in my work
According to safety regulations, you cannot use fluorescent lamps with rotating parts! only incandescent!
There is no strobe with epra,
According to safety regulations, you cannot use fluorescent lamps with rotating parts! only incandescent!
Can you explain what the real danger is compared to incandescent lamps?
Inspired by posts about safety precautions I’ll tell you a story told by the director of a technical college, who taught a subject with us, the name of which is difficult to even pronounce.
Further from his words.
When I was young, I worked at a factory in a workshop where repairs had recently been made and new machines, in particular milling machines, had been purchased. The renovation was by no means cosmetic; Ilyich’s old light bulbs were replaced with fluorescent lamps that were then common among the masses. Bright, beautiful, everyone was happy. Until one moment.
Let's delve a little deeper into physics. The frequency of alternating current in our country (yes, in some countries it is different) is 50 Hz. That is, roughly, 50 times per second it changes from plus to minus, naturally passing through zero. Some physicists call Ilyich’s light bulbs inertial, because the spiral, when pricked, begins to glow, and during the time of changing the polarity of the voltage in the electrical network, the spiral does not have time to cool down, therefore, the light bulb does not “blink.” But fluorescent lamps are designed completely differently. There is a gas between two electrodes in a sealed tube. When voltage is applied to the electrodes, the current causes the gas to glow. There can be no “inertia” here. Such light bulbs blink at the same frequency as the voltage changes.
Tool support: tool rest
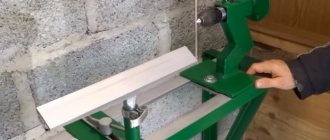
A tool rest is a table on which the tool rests during operation. In principle, it can have any configuration, the master can choose, the main criterion is convenience. One of the best options for a tool rest is a trapezoidal turntable made of thick steel, mounted on a platform that allows you to move it in all directions. It will allow you to process any workpieces and produce products of various sizes and shapes.
The simplest tool for turning work is a square welded to the base. The height of its upper edge must correspond to the level of the axis of the headstocks.
Wood cutters
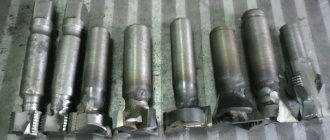
Cutters are used as cutting tools for a lathe. You can buy such a tool at almost any hardware store. Individual cutters and entire sets are available for sale.
If there is no store nearby, but you have the opportunity and desire, you can make the necessary tool yourself. To do this, you will need a metal-cutting machine, as well as a sheet of tool steel; it can be replaced with an old tool. A high-quality turning tool can be obtained, for example, from an old Soviet file.
Mini machine for small jobs
Often there is a need to turn several small wooden parts, in this case it is not at all necessary to make a full-fledged machine; you can get by with a mini-wood lathe. Its production does not require much labor and will not take much time.
The design of such a machine is extremely simple. A motor from an old tape recorder, powered from an external power supply, is ideal as an electrical component. The bed of the mini-machine will be a piece of board of the required length.
The engine must be secured. Of course, a belt drive is not suitable for a small machine; the workpiece will have to be mounted on the motor shaft. The best device for this is a faceplate. The drive housing is a U-shaped plate, in the center of which a hole is drilled for the shaft. The engine in the housing is mounted on the frame using self-tapping screws.
The main part of the machine is ready, all that remains is to make the tailstock. Its body is made of a block of suitable size. A hole for the shaft is drilled in it exactly at the height of the engine; a dowel-nail of suitable length is used as it. The headstock is attached with glue and several screws.
Using a power source with the ability to adjust the output voltage, you can create a machine with variable rotation speed. It is convenient to regulate the speed using the foot control pedal. The design of this device can be very diverse, it all depends on the available parts.
Device for sharpening drills at home
The quality and accuracy of drilling depends on the sharpness of the working tool. In addition, unlike a table knife, the drill must be sharpened correctly. Experienced mechanics can straighten the cutting edge on a regular sharpening machine by simply holding the drill in their hands (at least according to them). But this method requires skill and many years of experience. Even if you have a steady hand and an excellent eye, without understanding the process, you will simply ruin the instrument.
