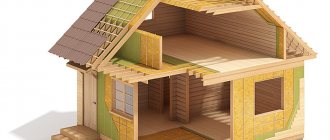
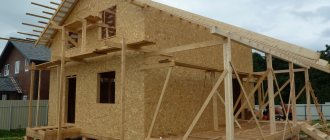
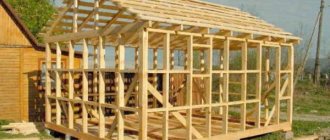
One of the important stages in creating a partition cake is ensuring that the structure is perfectly dry. In such cases, vapor barrier of the walls of a frame house comes to the rescue. Such a structure, like no other, requires the creation of a water-repellent layer. This is exactly what we will talk about in today’s article, and also consider the features of this insulator and which one will be better in a particular case.
Walls in a frame house that need vapor barrier Source eco-kotly.ru
Do you need a vapor barrier for a frame house?
Yes. The technology of frame house construction requires the presence of vapor barrier materials in the walls, floors and ceilings! We must create a complete vapor barrier circuit, which is why frame houses are often called “thermos houses.”
Why do you need a vapor barrier film:
- prevents the insulation from getting wet (does not allow moisture to reach it)
- stabilizes the climate in a frame house
For this, a special vapor barrier material is used; spunbond and other films are not suitable.
Expert advice
Experts draw attention to the fact that the installation of hydro- and vapor barriers must be taken responsibly. The quality of installation determines the safety of materials inside the frame structure and the level of thermal conductivity of the insulation.
To save money, you can install a thicker vapor barrier on the external walls, on the floor of the first floor. Cheaper - in interior ceilings.
Vapor barrier for interior floors
You should not skimp on thermal insulation of rooms with high humidity. Good forced supply and exhaust ventilation with steam and water barriers will ensure a long service life.
Installation of ventilation ducts in the building
Although membrane materials, unlike film materials, do not require the installation of a ventilation gap, its presence will become an additional safety element in the structure of the house. Watch the video on how to make a smart vapor barrier for a private home.
Which side should the vapor barrier be laid?
But you take a regular vapor barrier film, then you won’t need to look at either side. But if you have already taken a specialized vapor film, then look at the instructions. EVERYTHING is written there. Just don't be lazy or force the builders.
Apart from the manufacturer, no one knows how to properly install a vapor barrier from his production; each of them has its own notes. But it’s logical that the part with his brand should be inside and we could see it, they tried their best for us!
With Izospan-B everything is simple. The surface is rough inside, moisture remains on it, the smooth side of this vapor film is placed against the insulation. This is where the questions about how to install a vapor barrier end. You can go to the website of the manufacturer of the vapor barrier film and look at the exact information there, for example, on the Yutafol website (isospan does not have a normal website).
Steam or hydro?
Let's start with the fact that the main mistake is to confuse steam and moisture into one concept. Steam and moisture are completely different things!
Formally, steam and moisture are water, but in different states of aggregation, respectively, having a different set of properties.
Water, aka moisture, aka “hydra” (hydro from ancient Greek ὕδωρ “water”) is what we see with our eyes and can feel. Tap water, rain, river, dew, condensation. In other words, it is a liquid. It is in this state that the term “water” is usually used.
Steam is the gaseous state of water, water dissolved in the air.
When an ordinary person talks about steam, for some reason he thinks that it is necessarily something visible and tangible. Steam from the nose of a kettle, in a bathhouse, in a bath, etc. But actually it is not.
Steam is present in the air always and everywhere. Even now, as you read this article, there is steam in the air around you. It is the basis of that same air humidity, which you have probably heard about and more than once complained that the humidity is too high or too low. Although no one saw this moisture with their eyes.
In a situation where there is no steam in the air, a person will not live long.
By taking advantage of the different physical properties of water in liquid and gaseous states, science and industry have been able to create materials that allow steam to pass through, but not water to pass through.
That is, this is a kind of sieve that can let steam through, but will not let water in a liquid state.
At the same time, particularly smart scientists, and then manufacturers, figured out how to make a material that would conduct water only in one direction. How exactly this is done is not important to us. There are few such membranes on the market.
So, a construction film that is impermeable to water, but allows steam to pass equally in both directions, is called a waterproofing, vapor-permeable membrane. That is, it allows steam to pass freely in both directions, but water (hydra) does not pass through at all or only in one direction.
Vapor barrier is a material that does not let anything through, neither steam nor water. Moreover, at the moment, vapor barrier membranes - that is, materials that have one-way permeability to vapor - have not yet been invented.
Remember as “Our Father” - there is no universal “vapor-hydro membrane”. There is a vapor barrier and vapor-permeable waterproofing. These are fundamentally different materials - with different purposes. Using these films in the wrong places and in the wrong places can lead to extremely tragic consequences for your home!
Formally, vapor barrier can be called vapor barrier, since it does not allow water or steam to pass through. But using this term is a recipe for making dangerous mistakes.
Therefore, once again, in frame construction, as well as in insulated roofs, two types of films are used
- Vapor insulating - which do not allow either steam or water to pass through and are not membranes
- Waterproofing vapor- permeable membranes (also called windproof, due to extremely low air permeability, or super-diffusive)
These materials have different properties and using them for other purposes is almost guaranteed to lead to problems with your home.
FAQ. Frequently asked questions about vapor barrier of a frame house
Vapor barrier. Inside or outside?
Inside of course! Steam goes from heat to cold.
Which vapor barrier to choose for the walls of a frame house
For walls and in general, the best vapor barrier for a frame house is a regular polyethylene film 200 microns thick (not thinner).
But if you really want it, you can buy Izospan or Yutafol vapor barrier, but for me it’s a waste of money. Americans usually use polyethylene without any brands.
Is it possible to have a frame house without vapor barrier?
In some climates, such as southern ones, it is indeed possible to build frame houses without a vapor barrier film. But these options are individual and you need to very clearly calculate the pies and dew point. I wouldn't experiment like that
Polypropylene and polyethylene film
The cheapest option of all the above materials are thin polyethylene and polypropylene films. However, low cost does not mean poor quality and low efficiency; such materials provide controlled release of steam from the room.
Reinforced polyethylene film can be of two types: perforated and multilayer foil. Both options are used with great success to create a vapor barrier layer in houses with wooden ceilings. The foil material simultaneously performs a heat-reflecting function. As a result, heat remains in the room, which allows for some savings on heating costs.
Polypropylene film contains hygroscopic fibers, so it simultaneously allows steam to pass through and absorbs moisture. Thus, moisture penetrates the fibers and, gradually evaporating, comes out.
Films made of polyethylene and polypropylene are presented to the consumer in roll form, which determines the method of their installation. Solving the question of how to make a ceiling vapor barrier involves performing the following steps:
- The film is cut into pieces of a certain length.
- Lay the canvases on the ceiling, making an overlap of about 15 cm.
- The joints are hermetically sealed with wide self-adhesive tape.
- Fix the edges of the vapor barrier material using a metal profile or construction staples.
Izospan V has the best vapor barrier characteristics in this group of materials. However, despite the excellent vapor permeability, this isospan for the ceiling in a wooden house has a rather significant drawback - the lowest strength characteristics. This property greatly complicates installation work.
When using Izospan B, you should be careful and careful.
The material “Izospan B” is a two-layer polypropylene non-woven fabric. Its top layer has a smooth surface, the bottom layer is fibrous and rough. It is the villi that prevent condensation from penetrating into the insulation and the ceiling. When choosing this material for arranging a vapor barrier layer, you should know one feature: its installation is carried out before the insulation. When vaporizing a ceiling in a wooden house, first of all, lay the Izospan B film, pointing its smooth side down.
The process looks like this:
- The roll is unpacked and the canvas is rolled out. Measure and cut pieces of a certain size.
- The strips are laid with an overlap of 15-20 cm in the horizontal and vertical directions.
- Elements for fixing the canvas are selected depending on the material from which the decorative ceiling will be made. For example, for a plasterboard ceiling, metal profiles are used, for a ceiling covered with clapboard, wooden slats are used.
- Regardless of the material used, it is recommended to purchase self-tapping screws with an anti-corrosion coating.
- The joints of the canvases are sealed with adhesive tape, and this must be done tightly enough.
- The insulation is attached to the ceiling using plastic disc dowels or galvanized self-tapping screws.
- Another layer of Izospan V vapor barrier is installed on top of the thermal insulation.
- Finally, the finishing material is installed. In this case, a free space of about 4 mm should be left between the vapor barrier material and the decorative structure.
Vapor barrier of roof and walls. Where is it installed and why is it needed?
Let's look at another situation. Steam has entered the structure and moves outward through the layers. I went through the first layer, the second... and then it turned out that the third layer was no longer as vapor-permeable as the previous one.
As a result, the steam that gets into the wall or roof does not have time to leave it, and a new “portion” is already supporting it from behind. As a result, before the third layer, the vapor concentration (more precisely, saturation) begins to increase.
Remember what I said before? Steam moves in a direction from warm to cold. Therefore, in the region of the third layer, when the steam saturation reaches a critical value, then at a certain temperature at this point, the steam will begin to condense into real water. That is, we got a “dew point” inside the wall. For example, at the border of the second and third layers.
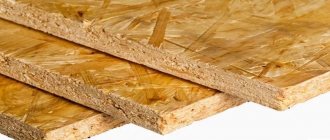
This is exactly what people often observe when the outside of their house is covered with something that has poor vapor permeability, such as plywood or OSB or DSP, but there is no vapor barrier inside or it is made poorly. Rivers of condensation flow along the inside of the outer skin, and the cotton wool adjacent to it is all wet.
Steam easily enters the wall or roof and “slips through” the insulation, which usually has excellent vapor permeability. But then it “rests” on the outer material with poor permeation, and as a result, a dew point forms inside the wall, right in front of the obstacle to the steam path.
There are two ways out of this situation.
- It takes a long and painful time to select materials for the “pie” so that the dew point under no circumstances ends up inside the wall. The task is possible, but difficult, given that in reality, the processes are not as simple as I am describing now.
- Install a vapor barrier from the inside and make it as airtight as possible.
It is along the second path that they go in the west, making a hermetically sealed obstacle in the path of the steam. After all, if you don’t let steam into the wall at all, then it will never reach the saturation that will lead to condensation. And then you don’t have to rack your brains over what materials to use in the “pie” itself, from the point of view of the vapor permeability of the layers.
In other words, installing a vapor barrier guarantees the absence of condensation and dampness inside the wall. In this case, the vapor barrier is always installed on the inner, “warm” side of the wall or roof and is made as airtight as possible.
Moreover, the most popular material for this “they have” is ordinary polyethylene 200 microns. Which is inexpensive and has the highest resistance to vapor permeation, after aluminum foil. Foil would be even better, but it's hard to work with.
In addition, I pay special attention to the word hermetically sealed. In the west, when installing a vapor barrier, all joints of the film are carefully taped. All openings from communication wiring - pipes, wires through the vapor barrier - are also carefully sealed. The installation of overlapping vapor barriers, popular in Russia, without gluing the joints, can result in insufficient tightness and, as a result, you will get the same condensation.
Untaped joints and other potential holes in the vapor barrier can cause a wet wall or roof, even if there is a vapor barrier itself.
I would also like to note that the mode of operation of the house is important here. Summer country houses, in which you visit more or less regularly only from May to September, and maybe several times in the off-season, and the rest of the time the house is without heating, can forgive you some flaws in the vapor barrier.
But a house for permanent residence, with constant heating, does not forgive mistakes. The greater the difference between the external “minus” and the internal “plus” in the house, the more steam will flow into the external structures. And the greater the likelihood of getting condensation inside these structures. Moreover, the amount of condensate can ultimately amount to tens of liters.
What is the danger of the term vapor and waterproofing?
The danger lies precisely in the fact that under this term, as a rule, two materials are mixed, with different purposes and with different characteristics.
As a result, confusion begins. Vapor barrier can be installed on both sides. But the most common type of error, especially in roofs and the most terrible in terms of consequences, is when the result is the opposite - a vapor barrier is installed on the outside, and a vapor-permeable membrane is installed on the inside. That is, we calmly let steam into the structure, in unlimited quantities, but do not let it escape. This is where the situation shown in the popular video comes into play.
Moreover, this can happen both with the ceiling, and with the wall or roof.
Conclusion: never mix the concepts of vapor-permeable waterproofing membranes and vapor barriers - this is the right path to construction mistakes that have very serious consequences.