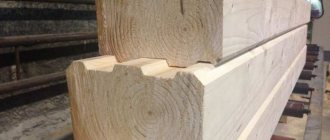
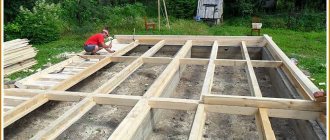
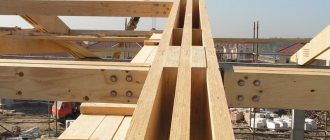
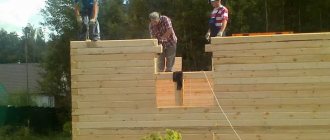
When building a log house or other structure made of wood, it is necessary to take into account the reliability of its installation to the base. Let's figure out how to secure a beam to a concrete foundation or a pile foundation grillage. You also need to take into account all types of preparatory work that needs to be done before installation. The beam can be attached not only to the foundation, but also to a wall made of various materials, for example, brick or aerated concrete.
Anchoring to the foundation Source domsovetov.by
Why you may need to attach a beam to a foundation or wall
Most often, fastening the timber to the foundation is required when building a log house. To ensure that the entire structure does not fall apart, the lower crown must be firmly attached to the base. Also, installation of logs may be required to decorate the room or create an additional support point.
In some rooms that are decorated in an antique style, beams are attached to the ceiling in a horizontal position or in the form of columns in a vertical position. There are different types of material to which the beam may need to be attached. For example, concrete, brick, aerated concrete or wood. Therefore, you need to know how to attach a beam to a foundation or wall so that it does not damage the structure or cause injury.
The door frame can also be classified as a wooden structure that requires additional fastening. Some types of insulation use a timber frame in the form of wall sheathing. When building a veranda or other structure that will be adjacent to the house, it may be necessary to install logs or wooden piles to the outside of the living space.
Log house made of timber Source yandex.net
Tools and materials
Any construction work cannot be completed without the help of tools and materials. To mount the timber to the foundation you will need the following components:
- Level
- Cement
- Sand
- Antiseptic solution
- Ruberoid
- timber
- Anchor studs
Materials and tools
The beam is installed on a foundation that is already more than a week old.
Methods of attaching timber to the foundation
There are several types of foundations, which are made from different materials. Therefore, it is important to understand how to secure timber to concrete, metal or other structures. For each of them there is a specific installation method. There are also two main installation schemes:
- Rigid is the most reliable method of securing wood to other structures. It is done using clamps, bolts or other fastening devices.
- An invoice is a simpler, but less reliable way to install timber. It is based on the weight of the structure, which will hold all elements in a secure position. It is most often used when building a log house, since it does not require much effort for installation.
For structures of small size and with a simple shape, you can use an overhead scheme, since it is simpler and less time- and resource-consuming. For residential premises and complex structures, it is recommended to use rigid installation. It will increase the service life of the building and its reliability.
Rigid installation Source www.greengo.house
Slab and strip
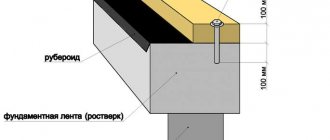
There is a reliable way to attach a beam to a concrete wall or foundation. This requires the use of anchor bolts or other fastening systems, such as dowels. To reliably install a wooden base on a slab foundation, you need to carry out certain preparations:
- When pouring the foundation, it is necessary to install anchor bolts in liquid concrete at a distance of 50 cm from each other. The base of the fastener can be curved or cone-shaped.
- Before the foundation dries, it is recommended to prepare the timber. To do this, you need to drill holes in it at a distance similar to the bolts.
- When the concrete has dried, you need to check the beam and foundation using a level for any bulges or depressions to get rid of them. Under high loads, they can damage the wooden base or lead to distortion of the entire structure.
- The timber should be cut into pieces for easy installation. An outlet should be left at its edges, which will then be connected using metal corners.
Ready-made log houses for baths
How to assemble a log bath? Making a log house yourself from scratch is a difficult job that requires refined carpentry skills, and it is better to entrust it to professionals. The highest quality processing of corner joints will be required: Russian, Norwegian or Canadian cutting can be used, but in any case the joints must be smooth and of the highest quality.
Then the log house is disassembled and the logs are delivered to the site itself. This option has several advantages:
Preparing for the construction of a bathhouse
How to assemble a bathhouse from a log house yourself? A number of works must first be completed. Construction begins with a project. If you want to order a ready-made log house, any organization can offer various options for baths.
The classic option is a rectangular structure 4x6 meters. In such a bath there will be space for a dressing room and a washing room, which will serve as a steam room. If the bathhouse has a large area, the space of the soap and steam room can be divided.
How to assemble a bathhouse from a log house with a dressing room? The layout should take into account the location of doors and windows: they are usually made small in order to maximize heat savings in the room.
The standard door height is 160 cm, width is 60-80 cm. The owner must determine the location and size of the windows in accordance with personal lighting preferences.
It is important to choose the right place for the bath. In a small area it is usually located in the opposite corner from the building to ensure compliance with fire regulations
If the size of the plot allows you to choose, the place for the bathhouse is chosen away from the gate and the house itself; it should be located so that you can relax near the bathhouse without disturbing anyone.
Video description
The video shows the installation of the lower crown:
- After all checks, you need to lay the roofing material on a concrete base. This type of waterproofing cannot be left in an open space for a long time, so it is necessary to immediately install a beam on top of it.
- After laying the beam, you need to put a wide nut on the anchor bolt. A nut and a locknut are screwed on top of it. To avoid skew or unevenness, they are twisted 2-3 turns parallel to each other, and not in turn.
The timber is attached to the strip foundation in the same way as to concrete walls - using dowels. To do this, a hole is drilled in the structure of the lower crown (or log), as well as in the solid base, using a Pobedit drill. To do this, you need to attach the wood to the concrete and make a hole for the dowel.
Installation to a strip foundation Source remontidei.ru
Pile
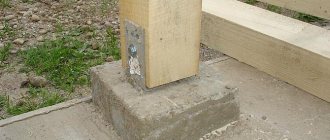
If you need to mount a wooden beam on a pile foundation, then there is a difference from other fastening methods:
- A hole must be made at the base of the pile to install a U-shaped fastener. The walls of this element must have perforations in order to firmly mount the timber.
- After this, you need to insert the wooden frame and secure it with bolts or self-tapping screws.
- When the beam is fixed, the metal part of the head is welded to the pile using an angle.
This method is suitable for a metal grillage. If the pile is made hollow and concrete will be poured inside, then you can use a method similar to the slab one. This requires inserting an anchor bolt into liquid concrete. Instead of such fasteners, you can produce reinforcement, for which appropriate holes will be made in wooden structures. After this, the frame is installed on the base and seated tightly using a hammer or mallet. The upper ends of the reinforcement need to be cut off, and then continue installing the entire floor structure.
Work order
In some cases, in order to protect the first row of wood from the cold concrete of the foundation, you can lay beds (backing slats). Whether to do this or not is a controversial issue and each builder decides it individually. But if it is decided to lay it, then both the logs and the logs must be carefully treated with an antiseptic and protected from moisture penetration.
The next stage is laying the embedded (longitudinal) logs of the first row. To ensure stability, the lower part is cut off. Next, the transverse logs are installed, the markings of which must exactly match the marks on the longitudinal ones. Only if these requirements are met will the log house be smooth. During the installation of the first row, the dimensions of the building perimeter and the correctness of the diagonals are checked.
The next task that definitely needs to be solved is to seal the gap between the foundation and the first row. Craftsmen often use for this purpose small trunks of trees of the same species that were used for the first crown. They are adjusted to the dimensions of the gap and sealed with insulation specially designed for this purpose. Sizing is done by cutting off excess wood from the top and bottom of the log.
We recommend watching a video on how to process log corner notches.
The procedure is very important, since it determines whether the house will be warm and dry or not. Therefore, if during the process of sealing cracks there is no access to all the necessary places, then the transverse logs are dismantled. Eliminate all cracks and gaps between the logs in the longitudinal direction, then return the cross members to their places. In some cases, ordinary cement mortar or polyurethane foam is also used to seal cracks instead of tow or moss.
Video description
Installation of timber to piles in this video:
See also: Catalog of companies that specialize in foundations and decorative forms.
Screw
Installing timber on a screw foundation is considered the fastest and not very difficult. Before installing the first crown, some preparatory work is required:
- You need to measure the width of the entire foundation and check it for unevenness using a building level.
- Before installation, it is recommended to treat wooden surfaces with an antiseptic and let it dry.
- Next you need to drill holes in the beam and foundation. Logs should be drilled with a drill whose diameter is 2 mm larger than that of the fastener. This is done so that the timber does not burst after drying.
After all the work, you need to lay the frame on the base and secure it with bolts or other fasteners. Before installing the first crown, it is recommended to let the wood dry thoroughly to avoid damage during further use.
Installing timber on a screw foundation Source stroykarecept.ru
half-timbered house
It is these buildings that have absorbed the best qualities and technologies of residential and commercial construction. When building a frame house, the consumption of basic and auxiliary building materials is reduced. New materials have also become widely used, for example, aerated concrete and laminated veneer lumber.
half-timbered house
In addition, building a half-timbered house with aerated concrete core is much cheaper than, say, a brick or block house. And in terms of construction time, a house with aerated concrete filler benefits. It is noteworthy that such a structure can be easily disassembled and can be moved quite simply from one place to another.
Only the foundation remains stationary. Frame buildings made of laminated veneer lumber and fillings made of aerated concrete, glass, blocks and other materials are resistant to precipitation, rot and fungi, and do not get wet. They are not subject to shrinkage, cracking, and are warm in themselves. And if the filling between the posts, cross members and braces is made of aerated concrete, then the house turns out to be relatively light in weight and does not require a powerful foundation of blocks.
If you wish, you can build such a house with aerated concrete core with your own hands. You just need to stock up on materials, tools and carefully study the project and technology.
Internal walls and partitions in a frame house can be made of aerated concrete - a lightweight, durable and warm material.
Installation of timber to brick
To clad external walls using wooden panels, you need to understand how to attach the timber to a brick wall, as this can speed up the process and save the entire structure from destruction. To do this, you need to determine the position of the log in which it will be attached.
After this, you need to make holes for fasteners, for example, dowels. The distance between them corresponds to the width of the beam. For wooden elements with a size of 5 by 5 cm it will be from 20 to 30 cm and the larger the size of the log, the smaller the distance.
To hide the head of the fastener, you need to countersink the hole. To do this, it is drilled out to a diameter that corresponds to the top of the screw or bolt. You also need to understand how to secure a beam to a brick wall if you need to secure beams under the ceiling. This can be done using a hole made in the wall to a depth of at least 15 cm.
Fastening with dowels Source fischerdubel.hu
After this, it is recommended to carry out preparatory work with the wooden element:
- Cut the ends of the logs at an angle of 60 degrees.
- Soak them with antiseptic and let dry.
- After this they need to be treated with resin.
- Before laying, the ends of the beams are wrapped with roofing felt.
In order for the beams to fit well into the grooves, it is necessary to level their bottom and lay 2-3 layers of roofing material there. When installing, place the timber at a distance of 4 cm from the walls of the niche, since the remaining space in it must be filled with concrete.
You can also attach the beams using an anchor. It is recommended to install it at the time of laying the wall. It must be at a distance of at least 120 mm from the outside and protrude into the room by 200 mm.
You need to make a cutout in the beam for an anchor of the same diameter. Also, the thickness of the wooden beam should be 2 times greater than the brick, and the wooden element itself should be well dried so that the fastening does not move.
Installation in a niche Source i.imgur.com
Insulation used for laying between the crowns
As mentioned above, flax-jute fabric is the most optimal material for providing insulation between the crowns. Now you can buy it at any construction supermarket. This insulation is available in rolls of different widths, depending on the size of the selected log or beam, which greatly simplifies the choice, and it is also very easy to cut into strips according to the selected length. This material is made from natural fibers of jute and flax, the composition is maintained in strict proportions.
During the production process, a fabric of high density and uniform thickness is obtained, in which the fibers are fastened together using special barbed needles.
By laying flax-jute fabric between the beams as insulation during the construction of walls, you will save yourself from the need for additional caulking, and after the shrinkage of the timber is completed, the walls will take the form of a solid monolith. Such a fabric will not unravel due to the loads imparted by the crowns, will provide uniform insulation along the length of the seam, and is resistant to moisture, wind and dust, temperature changes and other climatic disturbances.
Connecting timber to a concrete or wooden wall
If the interior of the house is not made of brick, then you should know how to attach the timber to a concrete wall or tree. Some installation methods are suitable for both types of material. To connect the concrete and the beam, you need to make a hole in the wall using a hammer drill, as well as a drill with a Pobedite or diamond tip.
After this, you need to insert a wooden plug into it. It should be lubricated with glue that is not water-based. After drying, timber or other elements can be screwed to it. The wooden plug can be replaced with a screw on which a wire is wound. To do this, a hole is made in the beam at a distance similar to the wall.
Before installation, concrete is poured into the wall niches and before it dries, all fasteners should be quickly installed. There is a way to secure the beam to the concrete vertically. It uses a U-shaped metal mount. To perform such fastening, these brackets are attached to the wall, and a beam is mounted in them. There are holes in the side parts of the metal through which the entire installation process is carried out.
Fastening with a cast bolt Source www.vsecuplu.ru
Installation of timber to wooden planes can be done using a metal angle and self-tapping screws. To do this, the fastening elements are cut into the tree using a drill. The connection can also be made using polyurethane foam.
Doorways, window sills or other elements that do not require reinforced fixation can be fastened using this inexpensive material. The foam has low price and thermal conductivity, as well as sound insulation and hydrophobic properties. Elements made of wood that are light in weight can be secured with glue or “liquid nails”.
Installation using foam Source prodomostroy.ru
Finishing
After completing all the activities described above and laying the roof, the log house must stand until it shrinks completely. The standing time ranges from one and a half years (for raw, even timber) to six months (if glued dried raw materials were used).
After the required time has passed, you can begin finishing:
- Houses made of profiled material do not require cladding either inside or outside. To ensure their durability, it is enough to treat the walls with an antiseptic or paint them with a composition for external use.
- In buildings made of even timber, cracks inevitably form during the shrinkage process. These cracks must be sealed, after which it is necessary to provide cladding that protects against blowing.
The durability of the future construction depends. This is a fundamental, basic issue, and it must be taken with the utmost seriousness, because the cost of error is too high.
