And today we again found something to focus on - the type of frame for the lining. We also discussed this issue, but somehow in passing. Today we will devote more space and time to it, and will tell everything in detail, without hiding any nuances.
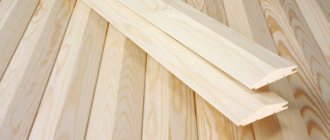
Classification of lamellas
The most common types of wood used to make lamellas are:
- conifers, mainly pine;
- Linden;
- cedar;
- aspen.
According to the type of profile, the material classification is as follows:
- imitation logs or block house;
- imitation timber;
- American;
- eurolining;
- standard canvases with standard sizes from domestic manufacturers.
Attention
Eurolining, when manufactured at the factory, is coated with fire retardants and antiseptics, which increases fire resistance and protection against microorganisms. Domestic products must be treated with protective coatings separately.
Instructions for laying lining on drywall
- easy installation;
- sheets can be mounted on walls and ceilings;
- Various structures can be constructed from the material;
- sheets can be used in different rooms, as they have moisture-resistant and fire-resistant properties;
- environmentally friendly;
- high strength;
- soundproofing qualities;
- availability.
Today, such material is made from several types of tree species: alder, spruce, pine, linden, larch. On a balcony or loggias, it is best to install lining made of pine, linden or alder. Since the installation of the strips is also carried out on the frame, it is also advisable to use socket boxes here. Despite the abundance of advantages, this material also has a number of disadvantages, which are more significant than those of drywall. The disadvantages of lining include: Therefore, the question of the combined use of plasterboard sheets and lining in modern repairs will be logical. First, let's look at the advantages of each material separately. This finishing material also has a number of advantages that allow it to still maintain its brand and use lining in modern renovations.
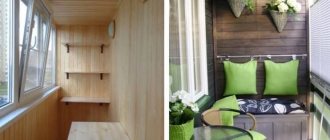
It is especially often used for cladding balconies, loggias, as well as hallways and corridors. The lining has the following advantages:
- high fire hazard;
- threat to human health in case of fire (if the lining was varnished);
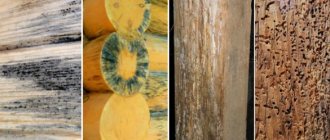
- the possibility of rotting and susceptibility to natural destruction.
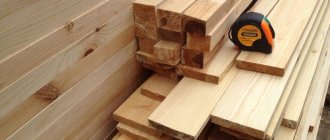
Preparation of tools and materials
To install wooden panels you will need the following tools:
- a regular or special construction pencil for marking wood;
- tape measure or construction metal ruler, corner;
- plumb line on a long cord (along the height of the wall);
- level with alcohol capsule;
- hammer drill or impact drill;
- screwdriver;
- hammer, if fastening will be done with special finishing nails.
Most often, the following set of consumables is required to install the lining:
- lining sheet of selected length (2, 3 or 6 m);
- bars or metal profiles for forming the sheathing - the structure to which the finishing material will be attached;
- dowels for fixing the sheathing frame to the wall or ceiling;
- gluers, finishing nails with small caps or self-tapping screws approximately 3-3.5 cm long.
—
Advice
If the tools or materials are not completely available, then you can start installing the lining from the existing arsenal, since this is not a paint coating or finishing the walls with plaster, which does not require a continuous process.
Marking the surface for the frame
At the initial stage of installing the frame, it is necessary to mark the walls for installing a metal profile or wooden slats. For this, a pencil (chalk) and a building level are usually used. First, the location of the lining is determined; it can be horizontal or vertical. In accordance with the chosen method of fastening the planks, a method of fixing the frame is selected. In any case, the guides are mounted perpendicular to the fixation of the trim.
Now you need to treat the wooden slats and walls with antifungal drugs and mark the base surface. The pitch of the frame guides is selected as a multiple of 40...60 centimeters. The more elements there are in the sheathing, the stronger the structure.
To obtain a high-quality, perfectly leveled frame, a building level is used. This device allows you to accurately align the slats along the marking lines. To align the guides in one plane in the lower and upper parts of the wall, pull the fishing line according to the readings of the building level. Subsequently, the bars are adjusted to fit the cord; in places where the products sag, wooden wedges are installed, which are attached to the base with self-tapping screws.
Algorithm of actions for securing canvases
Wood paneling can be done on any surface of the room, even on the ceiling. The peculiarities of fastening lie in the choice of the direction of laying the lamellas, since the design of the lathing and the method of fixing the sheets are fundamentally different.
On the wall
Most often, the lining is attached in a vertical direction. This allows you to slightly visually raise the ceiling and create a feeling of space in the room. To correctly install the panels on the wall vertically, you must adhere to the following operating procedure:
- Measuring the perimeter of the room and the height of the ceilings. It is assumed that the amount of material has already been calculated and purchased, so these measurements are needed for installing the sheathing (for what you need lathing for the lining and how to make it, read this material).
- The frequency of arrangement of vertical bars along the surface is calculated. In order for the structure to be strong and the material not to be overused, it is necessary to fasten the bars at a distance of 0.6-0.8 m. The number of linear meters of the frame beam or metal profile is calculated based on the measurements obtained and the number of lines (the first and last planks are attached at a height of approximately 0.1 -0.2 m from the floor and ceiling). All lumber is cut according to calculations.
- Using a building level, a horizontal line is drawn, relative to which marks will be applied for all sheathing lines. It is necessary to take into account the “play” of the floor and ceiling, if there is one, so all the lining must be carefully measured and cut along the line of the floor and ceiling, but attached along the horizon line.
- Using a hammer drill or impact drill, you need to drill holes for the dowels in the block attached to the notches. This is done one by one with each line so as not to confuse them. The hole frequency should be approximately 0.4-0.7 cm depending on the type of wall. The most convenient frequency of fastening is determined by the situation.
- After creating the frame, measurements of the lining panels are made for each subsequent element. If the height of the ceilings, as well as the floor level, are the same, then you can cut the material according to one template.
- The first element is attached with a comb to the corner (read about how to make corners from lining here). The horizontal line is checked with a plumb line on the thread. The longer the thread, the more accurate the result of deviation from the horizon. According to this indicator, the canvas is leveled and fixed.
- All subsequent planks are fastened by placing the ridge of the next element in the grooves of the previous one.
Attention
The choice of fastening method does not determine the procedure or principle of laying the canvases. But when choosing self-tapping screws, it is necessary to additionally drill the lining at the point of attachment to the sheathing. This will prevent chips or cracks from appearing in the material.
With horizontal fastening, the essence of the technique is similar. The location of the sheathing bars is different - they must be attached vertically. Installation is performed as follows:
- After selecting a plank of suitable length, it is laid horizontally, pressing it tightly to the floor so that the ridge “looks” upward.
- The beginning of installation is from the corner of the room farthest relative to the entrance.
- The first board must be attached strictly horizontally, so its location is recorded and secured with a building level.
- All subsequent planks are inserted with grooves onto the ridge of the previous ones.
Corners and plinths are installed after the room has been completely covered with clapboard.
Read more details about how to decorate the walls of rooms and houses with lining in another publication, but here we talked about the types and methods of attaching lining to walls.
To the ceiling
Sheathing the ceiling with wooden panels is somewhat more difficult, since it is impossible to get rid of it without help.
It is difficult to accurately position the lamellas and securely fix them, taking into account the significant weight of one canvas if its length is more than 5 m. Using a similar scheme, as for walls, the required material and the length of the structural components are calculated. Special finishing nails are used less often; self-tapping screws are used more often, which will ensure more reliable fastening of the cladding. It is recommended to leave a greater distance between the individual bars than when installing the structure on the walls. When constructing a metal sheathing, the frame will be mounted on special hangers with a guide profile secured.
Important
Ceiling finishing must be treated responsibly, since the possibility of a massive structure falling due to poor-quality fastening can lead to dire consequences. Therefore, it is better to enlist the help of experts.
We offer you to watch a training video on the topic “How to sheathe a wall or ceiling with clapboard without visible fasteners”:
More details on how to line a ceiling with clapboard are described here.
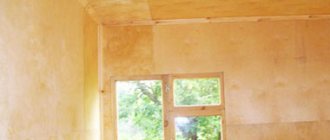
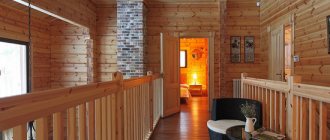
We decorate the walls and ceilings of a wooden house with plasterboard
A warm, oxygen-rich wooden house provides an environmentally friendly microclimate and an aesthetically pleasing appearance. Walls made of wood, even after final shrinkage, continue to “breathe”, changing in size. This property of natural material is associated with some difficulties in interior decoration. The best option for a wooden house is to cover the walls with plasterboard. Light weight, simple installation and availability of pressed sheets allow you to level the surfaces of walls and ceilings without the involvement of specialists.
Mounting options
For fastening wooden panels the following are used:
- Screws fix each board on the front side, and due to their decorative appearance they are invisible, which ensures attractiveness of ceilings and walls.
- Finishing nails are special materials with small heads up to 2.5-3 cm long.
- Self-tapping screws - needed for reliable fixation of the canvas. To prevent the board from cracking, it is recommended to drill a small hole before screwing it in.
- Clayers are mounting devices that are placed in the groove of the product and secured with special pins to the sheathing. The surface of the canvas remains undamaged and clean.
- Mounting stapler - drives staples into the grooves of the lamellas for good tying of adjacent planks.
Advice
The choice of mounting method depends entirely on the preferences of the owner.
No nails
Installation without damaging the cladding fabric is only possible when using gluers. It is recommended to use fasteners No. 5 when decorating a room with imitation timber or a block house, and No. 4 is suitable for eurolining, American and domestic materials.
Clayers can be purchased at hardware stores. They are packaged in packs of 100 pcs. complete with the appropriate number of mounting pins.
Instructions on how to secure the material without nails:
- Based on the parameters of the room and the frequency of location of the sheathing bars, you need to calculate the number of necessary elements. To do this, multiply the number of canvases around the perimeter by the number of vertically or horizontally located planks.
- When the panels are vertically oriented, the location of the fasteners is unimportant, but when the panels are horizontally oriented, they must be located at the bottom of the panel.
- Fasteners, which are inserted into the corresponding points between the groove and the bar, are nailed to the latter with special pins. To make the work convenient and to avoid accidentally damaging the cladding material with a hammer, you need to use a spacer.
- All subsequent elements are fastened in the same way, inserted into the grooves of the previous panels.
Advice
To increase the rigidity of the fastening, ordinary self-tapping screws of standard size 3x20 mm are used instead of studs.
To metal profile
The use of a metal frame for sheathing under the lining is rarely chosen. If, however, the structure of a false wall or a sealed niche is made of this material, you need to perform several procedures:
- To secure the material, horizontal or vertical jumpers are required. The metal profile structure is usually carried out vertically and does not require additional jumpers when choosing horizontal fastening of the lining. Otherwise, it is necessary to attach additional horizontal guides at the top and bottom, as well as 1-2 in the middle of the frame.
- Only self-tapping screws for metal sheets are suitable for fixing. They are easy to recognize because they are distinctively black.
- Open fastening can be performed using clamps at an angle at the base of the ridge.
We offer you to watch a training video on the topic: “Wooden lining on metal sheathing!”
On drywall
To fix wooden panels with a groove joint, choose one of two possible installation methods:
- At the base of the ridge. This technique is used for products of the “calm” or “standard” type with long ridges. When fastening at an angle of 45°, the body of the cladding sheet is stitched with self-tapping screws, and the head is hidden by the next panel.
- Straight or open. In the central part of each blade, small holes are drilled at approximately the same pitch, the thickness of which is slightly less than the self-tapping screw for installation. After screwing in the fasteners, their heads are recessed so as to be flush with the surface of the lining. You can mask the marks with wood putty.
Important
In order for the holes to be of a sufficient size for self-tapping screws, ensuring strong fastening of the blades, the drill is needed an order of magnitude smaller than the diameter of the fastener.
For more detailed information about the methods of attaching the lining to the surface, including how to nail the panels with nails, read separately.
Requirements for interior finishing
Before deciding on the material for cladding the interior of a frame house, let us understand that both rough and final cladding of rooms is carried out only after the final installation of electrical communications and water supply. Otherwise, all work will be nullified. By rough finishing of a frame house we mean covering the frame of the walls with a material suitable for the subsequent unhindered application of decorative cladding. Finishing is the final decorative design of the walls in accordance with the chosen interior design of the cottage. And in order for the work to proceed without a hitch, you should adhere to the basic rules:
- The walls are covered with rough material from the back room of the house, moving towards the exit. In this case, installation is carried out from the ceiling, along the walls and then to the floor. Finishing is carried out in the same order in order to be able to close the already decorated room and prevent construction dust from getting on the surface of the finished walls and ceiling.
- It is better to cover window blocks and other parts of the premises not involved in finishing with a protective film.
- Before carrying out work, it is necessary to calculate the exact amount of wall material in order to avoid downtime in the work. In addition, it is recommended to buy materials with a 10% reserve in case of cutting, etc. There is a principle here - the more complex the wall cladding is (complexity of the configuration), the more you can increase the percentage of the reserve.
What is the best way to do installation in a bathhouse?
The peculiarity of this room is that it often maintains very high temperature and humidity. To ensure that the wood does not deteriorate, retains its quality and lasts a long time, it is treated with special compounds. It is necessary to understand that high temperatures lead to heating of all surfaces and substances in the bath, including metal nails. Contact with such points can cause burns.
Therefore, the best way to fasten the lining in a sauna and bathhouse is to fix it with wooden nails. Claimers are used less often because they do not provide the required strength of the facing coating, because wood tends to bend under the influence of temperature fluctuations and moisture.
More details about how to line a bathhouse with clapboard are described in another publication.
Work technology
Cladding the balcony with clapboard is done in a certain sequence. You just need to follow all the tips in order to cope with the job even without experience. It is important to remember a simple rule: you need to use only high-quality materials, since the attractiveness of the final result directly depends on this.
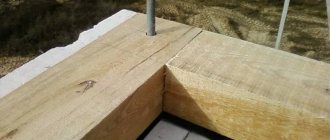
The metal frame maintains ideal geometry throughout the entire period of operation
Useful tips
In order to avoid the most common and common mistakes that are possible when installing clapboard surface coverings, you should listen to the following recommendations:
- You should not install a newly purchased canvas, since as a result of the lack of an acclimatization period, the panels may change shape and spoil the appearance of the coating. It is necessary to keep the material for several days in the usual microclimate of the room whose surfaces will be sheathed.
- Installation work must be carried out at temperatures above 5 °C.
- The varnish coating is applied to the canvas after the installation of the cladding is completed (how to properly varnish the lining?).
- In a bathhouse or steam room, you need to use lining made of alder or birch, since high temperatures in conifers will cause a more intense release of resins, which is harmful and significantly complicates breathing.
Wooden lining is one of the simplest finishing materials. Depending on the type of room and its operation, different tools and consumables will be required for installation. Each panel must be fastened with a comb into the grooves of the previous panel. This method of fixation allows you to finish large areas in a short time.
What is the best way to sheathe the inside of a frame house?
When the frame house is fully assembled, sheathed on the outside and equipped with all the necessary communications, all that remains is to complete the interior finishing of the building in order to obtain the finished look of the house. But at this stage, developers are often lost and don’t know how to cover the inside of a frame house. After all, the variety of modern building materials often drives the master into a stupor. In our material we will understand what types of material are suitable for rough cladding of a frame house from the inside, what materials are used for finishing and what are the general principles for performing finishing work.
Reply to reader
Great question. You can immediately see a person who is used to working not only with his hands, and this is always pleasant. Let's tackle the task together.
What you need to know about drywall
Those who have ever worked with drywall know for sure that this material is quite fragile and it is practically impossible to hang anything on it without organizing preliminary mortgages. The exception is light objects, such as paintings or mirrors, which can be held by special dowels that open behind the material, like umbrellas.
How is it possible to attach the lining to such a surface?
Not really! The fact is that wood is a fairly mobile material that reacts to the slightest changes in humidity and temperature, especially if the lining you have chosen has not undergone normal drying. This reaction is expressed in a change in geometry - the lining, as they say, leads.
There are often cases when this material swells when mounted even on a full-fledged wooden frame. We frankly don’t understand what kind of talk there is about mounting on brackets, with the sacred hope that the structure of the material is not disturbed. The person who posted such information on the Internet clearly does not fully understand the meaning of his words.
You can limit yourself to such measures, perhaps by installing plastic lining, which does not react to humidity at all, and even then, you should think carefully before doing this.
So, such a solution cannot exist? In fact, implementation is possible, and we will now tell you how to do it correctly.