How to saw off chipboard smoothly and without chips at home?
It is used in various branches of construction, because all technologies for working with this material are very clear and accessible.
Anyone who has ever dealt with chipboard knows how to cut this material. But the apparent simplicity of cutting this material requires knowledge of all the subtleties in order to avoid damage to the sheets. If cutting technology is violated, irreparable difficulties may arise, so you need to know how to avoid them during the work process.
https://www.youtube.com/watch?v=tG0elOFcRS8
A jigsaw is one of the most convenient tools for cutting circles, ovals and other complex shapes.
Jigsaw device.
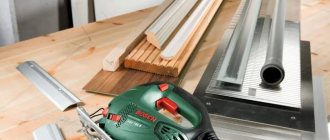
So how to cut correctly and evenly with a jigsaw? You must follow the instructions, and for this you will also need:
- protective glasses;
- machine oil;
- gloves;
- jigsaw
Types of saws for jigsaws.
- Before starting work, it is necessary to strengthen the material with maximum strength. It is strongly not recommended to cut along the grain, as in this case it is very difficult to achieve evenness. In this regard, it is best to use a circular saw; if such a tool is not available, you can use a rip fence. Such a parallel stop must be attached at one end to the jigsaw, and the other end must rest against the edge of the workpiece. This is how the most even cut is made.
- If it is necessary to make a cut inside the workpiece, then first make a hole in the circle. Then you should insert a jigsaw into the hole made and begin moving in the direction of the marking. After the desired hole has been cut, the corners of the workpiece can be easily adjusted on both sides.
- In order to cut correctly with a jigsaw, you should not use force when pressing the tool. Otherwise, the blade will heat up quickly, which may lead to damage. You should not use one file for a long time, as it becomes dull quite quickly. And such a file makes burrs on the edges of the material, which significantly impairs the quality of the work. If we are talking about cutting materials of increased hardness, then the blade must be lubricated with a small amount of machine oil. This will make it easier to work with the file, and the service life of the file will be significantly extended.
- When working with a jigsaw at low speeds, the jigsaw needs a break, since in such a process the engine often overheats. At the same time, it is necessary to strictly observe safety precautions; the presence of protective glasses and gloves is simply necessary. After the work is completed, the tool must be cleaned and lubricated.
Scheme of a homemade jigsaw.
The electric jigsaw comes with pendulum and conventional stroke. When the stroke is normal, the blade must be moved vertically, and the material is cut as it moves upward. The operating speed is quite high, the blade wears out significantly less.
As for working with a jigsaw with a pendulum stroke, the principle of operation is the same, but you need to take into account that it is best to work with soft wood and plastic, but it is better to avoid cutting steel sheets with such a tool.
If you need to cut a round hole, then an initial hole is drilled in the workpiece, then you need to insert a file there.
Then you should cut along the mark. If you want to make a hole in the form of a square or rectangle, then you need to cut in a straight line. Then the cut out area is removed and the remaining parts, which have the shape of a triangle, are cut out.
If it is not possible to make an initial hole in the workpiece, it is advisable to plunge cut. In this case, the electric jigsaw tilts forward until the file reaches the workpiece. Thus, the file makes a through-type hole in the workpiece. You can use a jigsaw to cut bevels.
When working with a jigsaw, it is necessary that the table is stable, the material is securely fastened and the correct saw is selected.
Sawing with a jigsaw so that everything is even is not at all difficult. A guide is attached to the tool, which is then guided over the edge of the workpiece.
If everything is done exactly this way, then the movements of the file are carried out smoothly and without much effort. If the edge is curved, you need to cut out according to the markings that should have been made before.
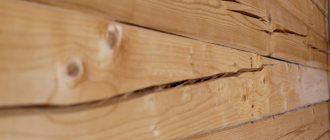
If you need to cut a sheet of wood that is small in thickness, chips may appear.
In order to prevent this phenomenon, the workpiece should be positioned face down.
To operate this tool with maximum efficiency, there is no need to use anything else. Nevertheless, to increase the “working capacity” of a jigsaw, there are some additional devices.
When small-sized workpieces are processed, it is very important that the work is carried out with maximum precision. To do this, it is recommended to have a special table that is designed for sawing.
In order for a jigsaw to easily process any surface, it is permissible to use one more additional device - a replaceable plate (a variety of materials are used in its manufacture). This replacement plate is neatly attached to the support sole.
It must be taken into account that there are materials that need to be pre-cooled and only then begin to be processed. Therefore, it is necessary to have a tank filled with cold water. To make using such a tool easy and convenient, you must regularly use a lubricant. It is used for cooling and lubrication, as a result of which the life of such a tool will be significantly extended.
In the process of making furniture yourself, the contractor may need to cut or trim the laminated chipboard for subsequent use. Of course, it is best to perform this operation by sawing, but if necessary and to reduce labor intensity, it is quite possible to cut laminated chipboard at home (using a jigsaw). Moreover, it is very important to implement this procedure in such a way as to minimize the number of chips and thereby create an even cut.
In order to make a stop pad for a jigsaw, it is enough to cut out a rectangle from any dense material (for example, laminate) with dimensions identical to the dimensions of the sole of the power tool.
Then, along the larger center line, you should make a notch and secure the resulting equipment to the sole of the jigsaw using insulating tape or double-sided tape. All modifications are ready and finishing work can be carried out in compliance with certain recommendations.
If the volume of work is large enough and the quality requirements are low, some craftsmen advise sawing chipboard at home using a grinder (angle grinder, commonly called an “grinder”). In doing so, they use a disk designed for working with wood. To make cutting easier, a guide bar is secured along the cutting line using clamps. Cutting chipboard using a grinder can sometimes be seen in the video.
Features of using a jigsaw
Despite the fact that the principle of operation of a jigsaw is quite simple, there are nuances that you need to know. They relate to cutting modes and materials
I will try to focus on the most common questions that arise for those who pick up a jigsaw for the first time
What can you cut with a jigsaw?
The jigsaw is able to work with materials of varying hardness, while effectively coping with their sawing
It is important to choose the right equipment and cutting modes. Saw blades differ in purpose for cutting steel, aluminum and non-ferrous metals; they are made of tool steel; for sawing wood - from chrome-vanadium or high-carbon steel; for plexiglass and ceramics - from harder materials, for example, an alloy of carbide and tungsten
There are universal files that are used for wood materials and plastic.
If there is a large amount of work to be done with a specific type of workpiece, for example, laminate, it is better to choose specialized equipment specifically for this task. The right choice is the key to quality work. It is worth noting that files are only suitable for working with homogeneous material. You cannot make a cut in a wooden workpiece with metal inclusions - nails or screws, as you can damage not only the equipment, but also the jigsaw itself.
Jigsaw cut thickness
For each tool, the maximum permissible values for the thickness of the workpieces to be cut are determined, and the rules for operating a jigsaw do not allow exceeding the recommendations specified by the manufacturer. For example, the parameters may be 75 mm for wood, 15 mm for metal.
How to cut smoothly with a jigsaw without much difficulty?
To get the best results from your work, you need to know how to cut with a jigsaw correctly.
- The material being processed must be securely fastened. Poor workpiece fastening is one of the main causes of errors when cutting. The jigsaw can jump off, go off the markings, or even go in an arc. By the way, if the jigsaw cuts crookedly, check whether the direction of the cut coincides with the direction of the fibers. If this is the case, then it is better to make the cut with a circular saw.
- When it becomes necessary to make a cut on the inside of the workpiece, you should first drill a hole at the starting point.
- When working with the tool, do not use much force. An electric tool cuts wood quite well and without excessive pressure. If you apply serious force to advance the jigsaw, the saw and motor will become very hot and the risk of damage increases. In addition, excess pressure is the main cause of chipping.
- When cutting hardwood, it is advisable to add a little machine oil to the blade.
- Sometimes you have to work at low speeds. In this case, it is necessary to take frequent breaks from work, as the saw becomes very hot.
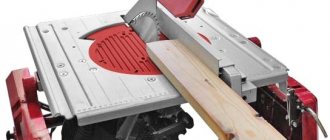
With a standard hand-held circular saw it is extremely difficult to make precise cross-cutting of boards. A simple homemade device, easily made from scraps in your home workshop, allows you to get the perfect cut in accordance with the markings.
The saw is designed for perpendicular cuts of boards ranging from 100mm to 250mm wide in 50mm increments, but can be easily modified to suit your needs.
Currently reading: Airplane with a jigsaw
The device in question is extremely simple and consists of only a few parts: a base for the saw, a guide rail, a thrust block and an eccentric clamp that ensures reliable fixation even on lumber that has been loosened with slight deviations in width.
Diagram of a device for a hand-held circular saw.
The homemade product is very easy to use. First, markings are made on the board.
Then a homemade device is installed on top, the lower stop of which is pressed against the edge of the workpiece, and the right edge is aligned with the mark.
Photo of a device for a circular saw.
Next, the plywood base is securely secured by turning the lever of the eccentric clamping mechanism.
Photo of the device - view from the bottom.
Now all that remains is to place the circular saw on the base and make the cut, pressing the edge of the sole against the guide side stop.
Cross cutting of boards using a manufactured device.
The result will be a perfectly even cut that exactly follows the markings.
With this device it is convenient to make many cross cuts when you need to frequently move the tool to a new cutting line, for example, when making grooves in beams. It is also useful if it is necessary to reduce the length of the workpiece by several millimeters, and it will cope with this task no worse than a miter saw.
In this lesson we will show you the basics of working with a regular hand jigsaw. Of course, there are also electric jigsaws, but they cost a lot of money, and working with them is a pursuit of speed, and not a calm, moderate creation of beauty.
For work we will need: a hand jigsaw, a file, a table stand, a clamp for attaching the stand to the table, an awl, a pencil, two paper clips, a sheet of tracing paper, a sheet of copy paper, sandpaper and of course a piece of plywood of the required size. We will cut out a Christmas tree; in this work, in addition to the cutting technique, we will also master the technique of assembling plywood parts into a three-dimensional Christmas tree shape and the easiest way to finish the finished product, using ordinary watercolor paint.
The size of the plywood should correspond to the pattern you have chosen; try to arrange the cut parts more compactly, closer to each other, since everything that remains after cutting, as a rule, can no longer be used in further work due to its fragility. And so we clean the selected piece of plywood with sandpaper, trying to move it along the fibers, since transverse scratches will be very visible on the finished product and are very difficult to remove later, and the treated plywood looks velvety and soft.
The sandpaper should be medium-grit to reduce scratching of the plywood.
Secure the sheet of tracing paper and the drawing using clamps, then use a pencil to copy the drawing onto the tracing paper. This operation is necessary in order not to damage the original drawing when transferring it to plywood.
It should be noted right away that with the current level of distribution and availability of copying machines, for large-scale and complex drawings, it is good to use a copying machine for cutting and the required drawing simply needs to be copied onto a blank sheet of paper and then transferred from there to the plywood.
Having transferred the entire drawing to plywood, we carefully check whether all the lines of the drawing are clearly visible on the plywood.
At the next stage, it is very important to check the future joints of the herringbone parts.
To do this, a piece of plywood of the same thickness as we are using needs to be attached to the drawn groove of the Christmas tree part and make sure that it fits exactly within the drawn boundaries. If the dimensions of the groove and the thickness of the plywood do not match, the width of the groove is adjusted - it is drawn equal to the thickness of the plywood used. Otherwise, when assembling finished parts, they will dangle or simply not fit into each other. This way all grooves in all part drawings are checked.
We take the stand and insert its clamp into the central hole.
We fasten the stand with a clamp to the edge of a table, window sill or workbench.
If your file is not inserted into the jigsaw, then we do this in the following sequence. We loosen the thumb of the lower clamp of the jigsaw (after turning the handle down to the working position). Insert the file into the lower clamp.
The direction of the saw teeth should be as in figure “b” - this is very important.
Then, having loosened the knob of the upper clamp, insert the upper end of the file into it and placing the jigsaw on the stand, press it firmly and screw the knob tightly. The file should be taut. But excessively strong tension can lead to breakage of the file when cutting shapes, and weak tension on the file will also lead to the same. So everything should be in moderation.
The position of the body when cutting should be as in the figure.
When cutting with a jigsaw, you need to smoothly move your hand up and down, up and down, monitoring the position of the file so that it does not tilt from the vertical position.
Factors affecting the accuracy of the cut and the angle of inclination of the formed edge
The most important factor is the saw blade clamping and guiding system. As a rule, in most jigsaw models, it is represented by a pendulum clamp. Under the influence of forces arising during operation, it may deviate from its original position. Some models, such as the Festool PS300 EQ-Plus, are equipped with an additional guide that increases the quality of the cut.
Jigsaw with additional guide
In addition, the following factors influence sawing accuracy:
- thickness of the material being cut. As the area of contact between the saw and the material being processed increases, the friction force increases, which heats the blade, increasing its deformation;
- structure of the material. The uniformity of the material being cut has a direct impact on the cutting accuracy. Internal stresses in it constantly strive to deflect the jigsaw blade from the straight direction;
- quality of the file. The material of manufacture, adherence to hardening technology, angle of inclination and sharpening of the teeth directly affect the result of the work;
- speed of work completion. When cutting a workpiece, many users press too hard on the jigsaw in an attempt to speed up the cutting process. As a result, he leaves the given trajectory.
Subtleties of cutting chipboard at home
The first problem that many who deal with cutting face is the presence of a large amount of fine wood dust generated while working with chipboard. How can this be avoided?
In large industries, special technologies are used to solve this problem, but it is not always possible to apply them at home. For example, if you need to cut about 20-30 sheets of chipboard, then it is very difficult to remove all the resulting construction waste.
The best solution that many people resort to today is cutting chipboard at the stage of purchasing sheets. But there are those who still prefer to carry out the cutting with their own hands, that is, on their own.
But remember, in this case you will have to solve all the problems yourself during cutting. To avoid them, listen to our advice!
Precision and quality
Accurate cutting is the key to success
Format cutting machines for sawing laminated chipboards and chipboards have a high quality cut, which allows you to reduce subsequent costs for processing the cuts (grinding, removing chips and burrs, and so on). That is why such machines can be used to cut any complexity and configuration, which means almost inexhaustible possibilities in furniture production. Fancy children's furniture, comfortable table tops for computer tables, figured through carved decorations in the doors of kitchen facades - all this is possible when using machines.
There are two types of panel cutting machines:
- vertical, which are a strong, rigid, vibration-resistant welded bed (frame), installed vertically with a backward deviation of 50°, with guides located above and below, along which the saw beam moves. It is a bracket for the saw unit, which moves up and down along the beam, and also rotates 90°, which allows you to make both vertical and horizontal cuts. The cutting precision is amazing. A special scoring unit is used for sawing laminated chipboard, as well as hard, corrugated or porous boards. The rotation speed of the saw reaches 15 thousand revolutions per minute;
- horizontal, consisting of a table for the stove, a carriage for moving the saw along the saw mechanism and the saw mechanism itself, consisting of one or two cutting units. The cutting units themselves are equipped with a main and scoring saw. The principle of operation is simple: the main saw deeply cuts through the chipboard, and the scoring saw accurately and clearly cuts the bottom edge (veneer or laminated surface). The saw unit can also be tilted up to 45°.
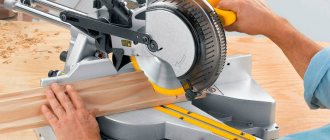
The miter saw is a “domesticated” and greatly reduced copy of the horizontal saw. It will not be possible to cut a wide sheet of chipboard or laminated chipboard on it, but it can handle small parts quite well.
Accuracy problems
Let's look at how to cut smoothly with a jigsaw:
- The object to be processed must be securely fastened. Moreover, in such a way that it would be convenient to make the cut.
- In cases of particular uncertainty or for greater guarantee of accuracy, it makes sense to use guides. When making a straight cut, you can use a wooden block fixed along the marking as a guide. If the cut shape is complex, then the situation becomes more complicated. In this case, you can use patterns, if any, or you will have to reduce the speed of work by more carefully guiding the jigsaw.
- One of the options why a jigsaw cuts crookedly is problems with the saw. It may be dull or have chipped teeth. If you notice that the jigsaw literally turns itself wherever it likes, inspect the saw.
- Jigsaw failure. For example, if the motor runs jerkily, the likelihood of a crooked cut increases sharply. Likewise, other mechanism failures can lead to a decrease in accuracy. Such problems are difficult to eliminate on site, as they require diagnostics and, possibly, repairs.
- Finally, the accuracy of the work is greatly influenced by the skill of the performer. If you are a novice carpenter, do not be discouraged by periodic failures: accuracy comes with experience.
Currently reading: Cut it out with a jigsaw
Why do you need a plywood circle?
Before you think about how to cut a circle in plywood with a jigsaw, you need to clearly understand why it is needed.
Subsequently, either the resulting round-shaped blank itself or a plywood sheet with a hole of the correct shape can be used. Where a round piece of plywood can come in handy:
- for making various crafts and templates for them;
- used as a base for a wall clock;
- used for subsequent figure cutting or decoupage;
- act as the seat of a stool, the top of a kitchen or coffee table, etc.
- for creating various souvenirs, for example, boxes, etc.
You may also need to cut out the correct circle from plywood for subsequent use of a sheet with a hole:
- installing a mortise sink into the countertop;
- obtaining a ceiling with a cutout for round-shaped lighting fixtures (spotlights or one chandelier);
- for the production of furniture with decorative facades and other elements, etc.
Tips for cutting chipboard at home
To carry out high-quality and accurate cutting, we suggest using several recommendations from experts.
For example, it is advisable to make cuts at home using the most ordinary carpentry saw, with small sharp teeth. When using such a tool, you can get an even, clear and high-quality cut of chipboard. To do this, the saw must work tilted at an acute angle to the surface of the chipboard sheet.
To provide additional protection, you must use the following method: stick adhesive tape on the cutting line; this method is ideal when cutting laminated chipboard.
During work, you must adhere to strict technology and be as careful as possible with the material, as well as be consistent in your actions and not rush anywhere. If you do everything very quickly, then chips may appear on the surface of the building material, which will worsen the appearance of the finished sheet.
If everything is done correctly, then after completion of the work a perfectly smooth edge will be formed, and there will be no need for additional processing of the sheets. If it was not possible to do everything as carefully as possible, then in this case it is necessary to level the uneven edge using a plane, rasp or file.
Rules for straight cutting
Thus, in order to make a cut correctly and evenly, you must adhere to the following rules:
- Carefully select a file that is suitable for your source material.
- Prepare all necessary auxiliary items.
- Carefully secure the workpiece.
- Take into account the correct positioning of the workpiece so that you do not have to correct flaws - in some cases the canvas is positioned face down.
- Practice the technique of operating the device with the help of professionals or through a training video.
- Follow safety precautions carefully.
In fact, processing products with a jigsaw is not such a difficult task that any novice carpenter can do. Even if an even and neat cut does not work out right away, you should not despair: you need to soberly assess what nuances you may not have paid attention to. And you shouldn’t ignore the advice of professionals who can speed up the process of mastering the art of sawing with a jigsaw and reveal some secrets. Try and improve!
First stage
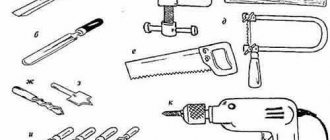
First you need to prepare the necessary tools:
- clamps;
- pencil;
- bar or beam for guide;
- jigsaw;
- measuring tool.
When starting work, you should secure the workpiece as firmly as possible. It is not at all advisable to use a jigsaw to cut along the fiber, because in this case it will not be possible to cut straightly. But if such a need still exists, then you can use a parallel stop, one end of which is attached to the jigsaw, and the second rests against the edge of the workpiece material. In this way it will be possible to saw off extremely smoothly.
If you need to cut with a jigsaw in the inside of the workpiece, you should first drill a hole in it. After this, a saw blade is inserted into the drilled hole, and the jigsaw is moved exactly along the marking line. Once the cut is complete, adjust the corners on each side of the workpiece.
Sawing should be done using a guide, which can be a straight bar or block. You will need several clamps into which the workpiece material and guide should be placed. Cut smoothly with a jigsaw
It is necessary to place something under the workpiece so as not to rest when working with a jigsaw. Next, using a measuring tool, measure the width of the area that needs to be cut.
Then a line is drawn along the ruler connecting the marks. After this, the guide is secured with clamps at the required distance from the edge of the cutting line.
Then the jigsaw is placed with the blade against the cutting line. The guide is pressed against it and also secured with a clamp.
You need to fix it motionless, but you shouldn’t clamp it too hard. Next, everything is done in the same form on the opposite side.
So, the measures necessary to make the cut smoothly have been taken.
Next, after turning on the jigsaw, you need to set the speed to the maximum and adjust the movement of the pendulum, setting it to one. The jigsaw is placed with the blade against the cutting line, the platform is pressed sideways against the guide, and you can start sawing.
Second phase
When working with a jigsaw, you should avoid applying excessive pressure on the tool. The device is pushed forward with a slight movement, also exercising control over the platform.
The edge of the sole should be pressed against the guide so that it does not move. At the end of the cut, when a couple of centimeters remain to the edge, it is necessary to hold the sawn fragment to avoid breaking.
In order to achieve higher cutting accuracy when working with a jigsaw, and to cut small parts more evenly, an auxiliary method is the use of a sawing table. It is attached to the main work table using a clamp. The cutting process on this table is done in reverse. In this case, you have to move not the jigsaw, but the part itself. As a result of this cutting, the lines come out more evenly. How to cut smoothly with a jigsaw?
To improve the quality of movement of the saw on the workpiece, you can use an auxiliary device in the form of a replaceable plate, which can be made of various materials. The plate is attached to the main support platform of the jigsaw. The adapter and guide bar allow you to cut more evenly.
When cutting some materials with a jigsaw, there is a need to cool them. Therefore, before you start cutting, you need to install a container with cold liquid on the support platform, designed specifically for this.
If you have at least once tried to cut chipboard at home, then you know for sure that this work is by no means easy and requires not only skill, but also the availability of a good tool. Laminated chipboard is especially difficult to process; when cutting it, many chips often form.
Chipboard sawing is carried out using precise format-cutting machines, which will help obtain workpieces of a given size and shape.
In addition to cutting sheets, they will help you calculate and provide in the form of a visual video file several options for competent and economical cutting of sheet material (using special computer programs) and, if necessary, perform edging. However, if for some reason you prefer to do this work yourself, you will have to do some preparatory work before cutting the chipboard.
Methods of working with a jigsaw without chipping on different materials
An electric jigsaw is suitable for processing a large number of products (metal, wood, tin, plastic surfaces). For each type there are certain methods and options for setting up the tool - frequency, smoothness of movement of the device, pressure force.
Wood canvas
When choosing a saw, be sure to remember that the wood should be sawed with standard attachments (those with teeth on top). The size of the teeth should be medium, and the step interval should be from 0.25 to 0.4 cm. The length of the file will depend on the thickness of the surface being cut. The stroke frequency should be set to the maximum value.
When you start sawing, you should press the electric jigsaw against the material and carefully, slowly, control its direction of travel. In addition, you should not push the electric tool, because it moves perfectly along the canvas even on its own.
Chipboard and laminate
When choosing a file, you should definitely choose a variety such as a reverse-cut file. Even with the level of vibration characteristic of this type, the quality of the final result will not be reduced. Using the most common saw, you can perform the action on the back side of the canvas.
To cut with a jigsaw without chipping, the stroke rate, as in the case of a wood blade, should be at maximum. To avoid chipping, it is imperative to turn off the pendulum mechanism. While performing work, the electric jigsaw must be pressed firmly and slowly, gradually inserted along the blade (you do not need to press the tool hard).
By the way, chips often appear on the side that faces the instrument. In this regard, when using the most ordinary saw, you should select the front side in advance and cut on the back. Moreover, you can even buy a specialized anti-splinter liner - this is a small element with a cut that is installed in the desired guides. The best option for an insert is considered to be one with a cut that exactly matches the thickness of the file.
Metal
Please note that if it is necessary to make curved cuts on a thin sheet of metal and place the cut line tightly to the support, it is necessary to place the metal between two fiberboard sheets, and it is necessary to mark the top fiberboard layer, because this will interfere with the formation of burrs. Tile
Tile
You will need to prepare a file without teeth and apply a layer of abrasive to it. The pendulum stroke must be turned off and the speed reduced to minimum. In this case, an electric jigsaw will be one of the most effective devices for cutting out curved elements on the surface of the tile material.
Plastic
For this material, it is worth choosing a file with small teeth, because this will improve the quality of the work. You should set up an electric jigsaw based on what type of plastic you plan to cut. The evenness of the cut will only be with a minimum (or better yet, complete absence) of pendulum stroke. The stroke rate should be no more than 40% of the maximum value.
Tin
To easily saw tin material, you will need to attach its blade. You should lay the canvas off the edge of the workbench or even place it on a backing. In this case, the cutting line must be at the minimum distance from the provided support. The material should be pressed down with a beam so that nothing hinders the freedom of movement of the electric jigsaw. “Swap” needs to be set to o or “1” maximum.
The nail file used must be designed exclusively for metal. If the fabric you are processing has a thickness of more than 0.2 cm, then in this case it is best to lubricate the cut area with oil (machine oil). For excellent results, the tin sheet should be laid between thin plywood
This can make it possible to work far from the support line, and this is extremely important in curved cutting conditions
Disadvantages of cutting chipboard at home
Also, one of the disadvantages of cutting is the exposure of the inner layer of chipboard, which can also be deformed in case of unprofessional work. To avoid this, use adhesive plastic tape. The adhesive coating and veneer will protect the chipboard from sagging.
As you can see, the process of cutting chipboard is labor-intensive; it requires obtaining certain skills and experience in working with this type of material. Therefore, if you are not sure that you can cut chipboard yourself, seek help from specialists who will do everything efficiently and quickly.
If you decide to do everything yourself, then we will be glad if the materials in the article help you with this, and you can cut the chipboard yourself beautifully and accurately.
Mistakes when working with a jigsaw
If the carpentry work did not bring an acceptable result, it is worth considering how correctly the sawing procedure was carried out and whether all conditions were met.
Among the main mistakes that arise when working with a jigsaw, it is worth highlighting:
- Lack of experience with the device. In this case, only practice can help.
- Insufficiently reliable fixation of the material. When trying to cut a workpiece, the sheet begins to move out of place, which causes a crooked cut.
- Cutting too quickly.
- Using a homemade device. If you cut material with such a tool, it will be difficult for the master to achieve a good result.
- The use of a heavy unit. Against the background of a significant mass, the tool begins to move to the side during carpentry work.
Crooked cuts can occur when a craftsman uses a faulty tool.
It is important to check the functionality of the jigsaw before cutting.
When starting to cut any material, it is important to familiarize yourself with information on how to set up a jigsaw for a straight saw. This will make it possible to make a workpiece with the correct geometric shape and attractive appearance.
To prevent thin sheets from deforming during work, you can use a backing. By using life hacks when working with a jigsaw, you can learn how to use the tool professionally.
Tools and materials
If possible, it is best to cut chipboard with a hand router using homemade guides. This method is not very convenient when cutting large sheets, because when working with this tool you need a table. In addition, with this method it is necessary to change cutters frequently. But as a result, you will get cleanly processed, “trimmed” edges.
An electric jigsaw is the most popular tool for cutting chipboard.
Some craftsmen use a jigsaw in their work, however, in the absence of skill, it is difficult to make an even cut, and chips may form.
If such methods do not suit you, then to cut chipboard at home, we will prepare for work:
- a hacksaw with fine teeth (the one designed for metal work is best). In this case, the teeth must be set apart by 1/2 the thickness of the blade and be hardened;
- paper adhesive tape;
- file for roughing the cut line;
- sandpaper to finish the cut line.
Methods of working with a jigsaw without chipping on different materials
Using a jigsaw you can process a large number of products (wood, metal, tin, plastic). When working with each type of material, you need to follow the recommendations of specialists and adjust the tool correctly, changing the pressure force, stroke frequency and smooth movement of the unit. Below you can find the answer to the question of how to properly cut various materials with a jigsaw.
How to cut metal
The teeth of the saw for cutting metal sheets should be small. The recommended pitch of the teeth is within 1-2 mm. The pendulum mode on the unit is turned off, the stroke rate is set to the lowest level.
Do not lean on the tool while sawing metal. It's worth moving smoothly. The cutting line on the pre-fixed blade is placed as close as possible to the support.
How to cut wood, chipboard, plywood
To work with chipboard and wooden blocks, you should choose saws with medium teeth. The step interval should reach 3-4 mm. The stroke frequency is set to the maximum value. If there is a need to increase the speed of cutting the board, you can turn on the pendulum function.
To avoid damage, it is best to saw the blade from the back side. During operation, the tool is pressed against wood/plywood/chipboard. You need to move slowly.
When sawing wooden materials, you cannot push the tool; it must move independently along the workpiece
How to cut metal tiles
How to make an even cut with a jigsaw on metal tiles? If you are cutting short pieces of this material, it is worth considering that against the backdrop of the reciprocating movements of the unit, there may be a slight straightening of irregularities in the areas where the sheet makes a wave.
The length of the saw for sawing metal tiles must be at least 11 cm. It is advisable to use jigsaws with rubberized guides, which will make it possible not to tear off the paint from the surface of the sheet at the cut points.
How to cut plexiglass, plastic
A file for working with plastic and plexiglass at home should have small teeth. To ensure the smoothest possible cut, experts advise setting the pendulum function to the lowest setting. The recommended stroke rate is less than 40% of the maximum permissible value.
How to cut ceramics, porcelain tiles
To cut a ceramic product, you will need carbide files, but you can only work with porcelain stoneware using diamond files. To make a straight cut, you should use wide blades with carbide tips. If you can’t make holes with a jigsaw, you should use special pliers. The pendulum turns off. During work, it is unacceptable to push the tool.
How to cut laminate
In order to cut holes on the laminate, you will need to use reverse cut files. If the master has only ordinary files in his arsenal, it is better to carry out cutting work from the back side of the blade.
The stroke frequency can be set to the maximum permissible value. To avoid chipping, it is best to turn off the pendulum mode. During work, it is permissible to lightly press the power tool against the blade.
When sawing porcelain stoneware, it is worth installing a plastic pad on the sole of the tool.
How to cut chipboard without chipping?
Before we start cutting chipboard, especially laminated chipboard, we cut a line along which we will cut with a sharp tool and glue paper tape with an adhesive layer along it. This will help minimize damage to the decorative chipboard layer.
If chips still cannot be avoided, we process the cut first with a file, working in the direction from the edges to the center, and then with fine-grained sandpaper. You can also mask all defects by using, where possible, a flexible profile.
Currently reading: Inverted Jigsaw
Reasons for chipping
When sawing material from bottom to top, the teeth of the file catch and a break occurs. When wood blanks are sawed off, adjacent fibers become entangled. When sawing laminated chipboard , chips appear and the material is destroyed. If you cut 2 layers of a slab at once, the bottom one will be able to be sawed well due to the fact that the top one will not allow chips to appear. Processing accuracy can be increased using the “ Soft Start ” function. With this option, the electric jigsaw gains speed gradually. He moves quietly. The master needs to control the position of the cut point relative to the intended line.
The Soft Start function will help you make more accurate cuts.
How to cut laminated chipboard at home?
When cutting along a curved line, turn the plywood rather than the jigsaw during the sawing process - this will reduce the likelihood of breaking the file.
When cutting sharp corners, make movements of the saw in place, gradually turning the plywood.
You should have a free space - a hole in which the file will turn, now continue sawing in the desired direction.
Make free space for turning the saw on the part of the plywood that will be thrown away and you will get sharp corners without much difficulty.
After you have cut out the entire outline of the design, the sawn part will be freely removed from the plywood.
Now, in order not to break the file, insert it into the cut from which you started cutting out the part and smoothly moving the jigsaw up and down, but only pull it out of the plywood with the back of the file.
Similarly, cut out the second part of the Christmas tree.
Sand the resulting parts with sandpaper.
Now we have two Christmas tree parts ready for assembly.
We collect them into one structure.
Now let's paint the Christmas tree with watercolors or gouache.
Our Christmas tree is ready.
And at the end of the lesson, we will show you the sequence of cutting out internal holes in parts. Let's say we need to cut out part of a circle.
In the middle of the part to be removed, use an awl to make a hole. Do not try to make the hole close to the drawn line, this may cause the plywood to chip, which will be quite unsightly.
Having loosened the upper clamp of the jigsaw and freed the file, we insert its upper end from below into the punctured hole.
We clamp the file into the upper clamp of the jigsaw and cut out the part of the pattern to be removed.
Then release the file from the upper clamp again. And we repeat this operation with each internal hole in the pattern.
The Christmas tree turned out to be stable and quite strong; for greater stability, the joining parts of the parts can be coated with some kind of glue that does not leave marks on the wood - this is PVA, carpentry or casein glue.
Basic tool malfunctions
How to determine whether a jigsaw needs repair or preventive measures? There are a number of signs that you need to pay attention to:
- the case began to heat up too much during operation;
- when turning on and further operation, uncharacteristic sounds are heard;
- commutator brushes spark;
- the engine cannot be adjusted, other problems are observed.
Replacing jigsaw rod guide bushings.
When the listed signs are detected, you must immediately turn off the jigsaw, then inspect it to determine the malfunction. All types of such breakdowns can be divided into 2 large groups.
Electrical failures:
- Factory defect in the form of rotor breakdown (cannot be repaired, you must contact a service center).
- The stator or rotor becomes very hot during operation, and melting of the insulation is observed. The reason is dust, contamination, improper load.
- The brushes wear out (replacement is being carried out).
- If the speed controller does not work, it needs to be replaced. It is best to contact a specialist.
Failures of the mechanical part of the jigsaw:
The internal structure of a jigsaw.
- The gear has worn or deformed teeth. It is possible to repair a jigsaw; a complete replacement of the gear is required; in the future, it is necessary to carefully monitor the loads and the correct choice of blade.
- The rod breaks and there are kinks on it. It is necessary to repair the jigsaw by replacing the rod, and then choose the right files according to the type of material. For example, for wood or metal, use only specially designed devices.
- The balancers that guide the rollers are worn out. The balancers need to be replaced, and the loads need to be monitored in the future.
- If the bearings are worn out, they are replaced. It is best to contact a specialist.
Other types of breakdowns may also occur. For example, if there is a strong impact, the case may crack. Do not drop the jigsaw; in this case, other parts may be damaged. It is best not to fix engine breakdowns yourself, but to immediately contact a service center. You can handle replacing worn parts yourself. To do this, the manufacturer provides instructions; following them, you can easily cope with the work yourself.
Breakage of the support roller and fixation unit: prevention, repair
Main characteristics of household jigsaws.
How to repair if problems are found? The support roller may break if the load on it is too great, i.e. cutting technology is broken. The file is attached specifically to this roller; if it is broken, the file will not be able to be used. To prevent damage from happening:
- Use only high-quality hacksaw blades.
- Do not use dull files.
- Hacksaw blades should be selected only in full accordance with their intended purpose. For example, for metal, only the blade that is intended specifically for this material is used.
If the roller is not replaced when it breaks, the equipment may jam during operation. The repair will begin not with replacing the roller, but with cutting it with another tool and then replacing it. The repair itself is not too complicated. The support roller with signs of damage must be removed and then replaced with a new one that matches the jigsaw model used.
The working blade fixing unit usually breaks when it gets covered in large quantities of dust. During operation, dust is not uncommon, so for prevention it is regularly necessary to clean the surface of the fastener. Over time, the situation will get worse and the equipment may completely fail. The repair usually consists of completely replacing the retainer.
It consists of performing a number of actions:
- The unit must be constantly cleaned and then lubricated.
- During operation, you should use a dust collector, which will prevent large amounts of dust from getting onto the tool.
Why do chips appear?
Before cutting laminated chipboard or laminate using a jigsaw, it is advisable to understand why chips form when cutting sheet material. And the answer here is simple: everything lies in the design of the jigsaw, or rather in the design of the nail file.
So, during the cutting process, the file receives return movements (up and down). And if when the saw moves along the teeth (usually downwards), chips practically do not form, then when the tool moves in the opposite direction, the teeth seem to tear out the top layer of material, thereby forming an unpleasant chip. That is why you can observe an almost perfect cut on the bottom side of the chipboard and a chipped cut along its upper edge.
Methods for cutting laminated chipboard without chipping
Sawing of laminated chipboard at large woodworking enterprises is carried out on a special format-cutting machine. Small workshops that produce furniture also purchase one, but it is expensive, therefore, it is not practical as a household tool. If the question arises of how to cut laminated chipboard without chipping, then as an alternative cutting method, you can choose sawing using a hacksaw, circular saw, chipboard cutter or jigsaw.
Using a hacksaw
Sawing chipboard without chipping with a hand saw is not as easy as sawing laminated chipboard with a jigsaw. Although this is a cheap and accessible way.
First you need to cut the cutting line with a knife, draw it with a nail or an awl, and then stick on masking tape to protect the top laminated layer. Then, at an angle of 30 degrees, carefully, without pressing too much, cut the material. The selected hacksaw file should have fine teeth so that the cut is as even as possible.
A hacksaw can leave damage, which can be eliminated by using a belt sander set perpendicularly for subsequent edgebanding.
At the final stage, it is worth treating the cuts with fine sandpaper and covering them with a flexible profile.
Jigsaw
Often a jigsaw is used to cut laminated chipboards. The main condition for accurately cutting a slab is small teeth.
A jigsaw cannot replace a circular saw, since it is mainly used as a cutting tool for small areas of slabs. They need to work without strong pressure, smoothly and not too fast. If the laminated chipboard sawer is inexperienced, small chips may appear on the reverse side, but with practice the quality and appearance of the cut will improve.
Circular saw
If the question arises about what to use to cut chipboard and which tool to choose, then a circular saw is quite suitable. It is also often called a circular saw. This is a disk tool mounted on a table. Many people are interested in which circular saw blade to use. You will need a circular disc with fine teeth. The cutting quality is better than when using a jigsaw.
For greater accuracy, it is worth marking the guides, and also not working at too high speeds.
Cutting to format using a saw
The use of a sawing machine guarantees accurate cutting and complete absence of chips. Such machines are used in production and are considered specialized equipment.
Its main components:
Carriage. Allows movement of the movable table, but the plate is fixed in the desired position. Saw unit. It has two flat metal disks: the first one does preliminary sawing, the second one does final sawing right through. Bed. The mechanism rests entirely on it
Eliminates vibration and adds stability, which is important for the quality of the cut.
Three desktops: 1st: node location. 2nd (movable): feeding slabs for cutting. 3rd: maintaining the sawn parts.
Types of sawing machines depend on the time of continuous operation:
- light – 5 hours;
- medium – no more than 10 hours;
- heavy – no more than 20 hours.
When setting up the machine, the following matters: depth of cut; plate position; cutting angle.
The cutting occurs as follows:
- the plate is fixedly fixed to the table (movable carriage);
- the workpiece is positioned according to the size ruler and the saw unit is started;
- when the disk reaches the required speed, the table will move forward along with the workpiece plate and fall on it.
The use of format-cutting machines is advisable for mass production, and not for isolated cases. For one-time independent use, you can choose a simpler tool or order cutting from specialists.
Sawing with undercut
Cutting with trimming is performed as follows:
- tire - the ruler is fixed to the plate using clamps on the marking line;
- a cut is first made along the line on one side with a depth of about 0.1-0.3 cm;
- then, on the other side, the slab is finally cut through.
If everything is done carefully, no chips will appear.
How to make a device with your own hands
The cutting device is made for a specific model of power tool. On your circular saw, measure the distance from the engine to the bottom plane of the sole and subtract 5 mm. The result obtained is the height of the guide stop.
Removing the required dimensions of the circular saw.
Prepare a plywood base with right angles and wooden slats with parallel edges according to the dimensions.
Blanks for assembling a device for cross-cutting with a circular saw.
Measure the distance from the cutting blade to the edge of the sole.
Add an allowance of 6–10 mm and install a guide rail at this distance from the right end of the plywood. Secure the plank with countersunk screws, ensuring its strictly perpendicular position.
Screw the stop block on the back side and fix the device on the workbench.
Cut the plywood to the final width with a circular saw, creating a reference edge for precise positioning of the jig along the markings.
Draw a template for the cam clamp cam on paper.
Drawing of an eccentric clamp.
Mark the piece on 10mm plywood and use an awl to mark the center of the drill hole for the bolt.
Cut the workpiece with a jigsaw.
Make a washer with a diameter of 50 mm from the same plywood using a ballerina extendable wood drill.
Sand the workpieces and select an M6 or M8 furniture bolt with a mustache (or with a square headrest), a handwheel nut, a washer and a bushing. The latter can be made from a tube of suitable diameter. The length of the sleeve is the total thickness of the base, lever and plywood washer.
Ready-made plywood eccentric.
Make holes in the base with a drill according to the diameter of the bushing, which serve to rearrange the eccentric clamp according to the width of the board being cut.
Hole drilling diagram.
Assemble the eccentric mechanism: insert a bolt with a sleeve on top, and install a wooden washer, the cam itself and a steel washer from below. Tighten the parts with a nut.
Stick a strip of sandpaper on the inside of the stop to prevent slipping when the eccentric is locked, which can happen when the device is fastened to a smoothly planed workpiece.
The clamping system of this device has a stroke that ensures fastening on boards with a spread of approximately 10 mm in width. If you need to cut or trim pieces of a different size, simply place a wooden block in front of the stop beam.
An example of using a device for cross-cutting a board of smaller width with a hand-held circular saw.
If desired, the potential of the considered device can be expanded by adding a cutting angle of 45°. To do this, you will need to slightly increase the dimensions of the support platform and install a second thrust block at a given angle.
An additional reason for the formation of chips may be misalignment of the saw teeth. Therefore, the first thing you need to do is purchase a tool with a straight cut (often Bosh files). However, it should be taken into account that during prolonged use, such files overheat and may even bend during the cutting process. Therefore, it is necessary to take breaks from work to cool the cutting tool.
However, just replacing the saw blade is not enough and in order to cut laminated chipboard (laminate) with a jigsaw without chipping, you need to make minor modifications to the power tool. Namely, make sure that when the saw moves against the inclination of the tooth, the material does not pull out. For this purpose it is enough to make a persistent platform. You can come to this conclusion by trying to cut two sheets of chipboard at the same time. So there will be practically no chips on the lower element.
Technique 1. Cutting along the guide
We install a guide (rail) on the workpiece, set the sawing depth and make the cut. As you can see for yourself, even on the outside of our chipboard workpiece there are no chips or explosions. The cut itself was smooth with no signs of scoring or side waves. Why such difference?
What is the merit of the guide?
When we saw with a disk, we inevitably move the saw, the so-called “iron movement” is obtained. That is, when we move our hand, we constantly move the saw to the right and left. A guide that has a hard edge allows you to avoid this.
Accordingly, when we guide the saw along the guide, it does not move and the saw blade itself works smoothly, without changing its position. The result is an ideal line parallel to the guide.
What to do if you don’t have a hand-held circular saw and guide?
You need to make the guide yourself. We find a regular profile, you can take the rule, any smooth slats, the main thing is that its geometry is smooth.
We measure the distance from the saw blade to the edge of your chipboard blank. We attach the guide to the workpiece using any clamp and begin cutting.
The main thing in the process is to constantly press the saw against the guide. That is, your hand should always guide the saw towards the homemade tire.
After cutting, you will get an almost perfect cut, the cut line is barely visible. We performed the cut very well, the cut itself is clean, no side marks are visible on it. With the exception of a small pile on the back side of the workpiece.
Where did this lint come from, since we were working with a guide (tire)?
The purchased cutting bar has a special plastic protective tape. This tape prevents the pile from rising and the saw cuts it. In this case, we didn’t have this tape, so we got this lint on the surface.
What to do with the pile in this case?
There are two options:
1. Take regular masking tape. It is glued to the place of the cut, markings are made on it and sawed together with masking tape. The tape holds the ingrown in place and when cutting we get everything clean.
2. Just drive the saw blade more slowly. That is, if you do the same thing with a slower feed, then there will be much fewer chips.
Build quality and wear of jigsaw parts are the reasons for curved cutting
What to do in a situation when a jigsaw cuts crookedly, the cost of which is no more than 2-3 thousand rubles? In this case, you need to thank the manufacturer for the quality of the build. However, there is a compromise here, since manufacturers of household jigsaws indicate recommendations that such a tool can be used for no more than 20-30 minutes. Working hours should be alternated with long pauses. In addition, household tools are not designed for long and hard work, so if the device begins to malfunction, then it is, first of all, the fault of the owner himself.
It’s another matter when a malfunction in the form of curved cutting of material occurs on professional-type jigsaws, the price of which is at least 5 thousand rubles. Rushing to take your instrument to a workshop is the last thing you need to do. To begin with, we begin to independently diagnose and repair them.
- Check for play in the rod on which the head or saw holder is attached.
If the amount of play is more than 1 mm, then it is necessary to look for a breakdown in the rod design. The rod moves along guides, which wear out over time. To reduce backlash and return the tool to normal operation, you should replace the guides or the entire mechanism - Unreliable fixation of blades in the saw holder - this type of malfunction is often associated with wear of the fastening mechanism.
If, after installing and securing the blade in the tool chuck, there is play, it means that you need to check the head and, if necessary, replace it. If the saw holder malfunctions, a breakdown occurs such as blades falling out of the tool, which is associated with wear of the mechanism parts - Malfunction of the guide roller - if it dangles and vibrates, then naturally the jigsaw will not cut smoothly.
It is easy to fix the breakdown by replacing the roller, but first make sure that this is the cause - Blade defect - if the file has a slight bend, then it will no longer be able to cut straight.
The presence of a defect in the canvas may not only occur from the factory, but may also arise during operation. For example, if you press it hard against the workpiece when working with a jigsaw, the blade may jam and bend. The curvature of blades is sometimes difficult to determine by eye, so a new file is installed and the quality of sawing is checked. The choice of blades will require an appropriate approach, so it is strongly recommended not to buy the cheapest blades from unknown manufacturers. After all, this affects not only the quality of the work performed, but also the safety of the master.
This is interesting!
The cause of a curved cut may also be dullness of the cutting teeth of the blade. Make sure that the teeth of the blade are not worn out, otherwise it is dangerous to continue sawing in this way.
Wood instead of plywood
With all the advantages of plywood, this material has its drawbacks. This is an industrial material, and not completely natural, like pure wood. Additionally, plywood is made primarily from birch, which does not have the beautiful texture, grain patterns, and colors that some other woods have. Therefore, even highly artistic products made from plywood do not have the same attractiveness and charm as purely wooden ones.
In this case, you must be prepared for the fact that the workpiece will crack or warp during work or immediately after it. To avoid this, you should use only well-prepared wood:
- completely and evenly dried throughout the entire massif;
- maintained in a period sufficient for all internal stresses to manifest themselves in the form of cracks and warping.
How to choose a canvas for a specific task
The file is selected taking into account all the markings described above. (Wood – tree, etc.).
A few more basic rules:
- A short, thick file bends less and moves less to the side.
- A large tooth cuts faster, but rougher.
- A small tooth will tear the surface less.
In addition, to make selection easier, manufacturers sometimes put additional verbal markings on the files:
- basic – basic, standard files,
- speed – speed, fast rough cut,
- clean – thin clean cut,
- progressor - files with floating teeth of different sizes, most often universal,
- flexible – wavy layout for sawing metal,
- special – blades with super-hard coating without teeth for ceramics, some types of plastic, etc.
Which saw to choose for cutting out a tabletop
Countertops made of laminated chipboard and MDF are sawed with saws of sufficient length to cut, but not longer. Long files tend to move to the side. Fine tooth files are used for hard wood (Hardwood) or metal (Alu, Metal).
For quick rough cuts, saw blades with additional speed markings are suitable. A more accurate cut can be made with basic (basic standard) and clean (thin cut) files.
Depending on the characteristics of the material and the jigsaw itself, files can perform differently in their work. A more accurate selection of saw blades is carried out by making trial cuts on an unnecessary piece of material.
For wood
For wood, saws marked Wood (wood) and Hardwood (hard wood) are used. Files with large teeth will provide a quick, rough cut, while files with fine teeth will provide a cleaner and more precise cut.
In some cases, wood is effectively sawed using soft and ferrous metal saws. It is better to cut thick wood with long saws with large teeth. For example, with the marking T344C.
For sawing laminate and chipboard
To avoid chipping surfaces, use fine-tooth files. When sawing, the pendulum motion is turned off. The difficulty is that laminated sheets or slabs are heterogeneous and consist of pressed sawdust, shavings, wood, plywood, coated with laminite.
Laminate is plastic, the base is fiberboard or MDF, in the case of parquet, wood. Therefore, different files are used, including for wood, plastic, soft and ferrous metal. The most effective option is selected by trial sawing on a piece of material.
For figure sawing on wood
For figured cutting, narrow blades with fine teeth are used. The narrow blade allows you to make turns while sawing without breaking, bending or jamming the blade. The fine tooth makes a precise cut and also does not interfere with the rotation of the file when sawing.
For cutting drywall
Drywall, despite its loose structure, is an abrasive material. That is, it is able to quickly grind down the teeth of a saw, for example, on wood. Therefore, special files with a hard coating, straight or wavy, are used for it. As a last resort, files for ferrous metal, but they will not last long, since the plaster quickly wears off the teeth.
For sawing chipboard
For sawing chipboard, short saw blades (up to 75 mm) with a medium tooth (pitch 2-3 mm, marked A or B) are used. Chipboard consists of sawdust and shavings that can easily be cut through by regular wood or hardwood saws.
However, the resins with which they are glued can be hard, which leads to rapid wear of the files.
Therefore, for chipboard saws, the quality of the steel is important. Better if it's HSS
For sawing plywood
Plywood can be sawed with wood saws with medium and fine teeth. A large tooth (for quick cutting) tears out pieces of plywood and saws with noise and vibration of the sheet. In practice, plywood is also sawed with fine-tooth metal files. This gives a high-quality, even cut.
Disadvantages: sawing with such files is slower and they can overheat during operation due to friction; clamps are possible due to a small gap. Severe overheating should not be allowed, as this will cause the material to turn black (burn), and the metal of the file may loosen (lose its hardening).
How to cut out patterns?
The most difficult, but beautiful thing is the artistic cutting of patterns. To create an ornament, you need to transfer the stencil to plywood. To make a stencil, use whatman paper, paper or leftover wallpaper. Large pieces of furniture can be placed on whatman paper or a piece of wallpaper; for small pieces a simple A4 sheet is suitable. You need to create a drawing on a sheet of paper using a pencil or take a ready-made one, then you need to duplicate it with a brighter pencil or felt-tip pen to make it easier to transfer the drawing to a wooden blank. In order to make a pattern or ornament using a manual and electric jigsaw, you must:
- draw or find a drawing on the Internet that you will translate and cut out;
- transfer this pattern to the workpiece;
- cut out the design - large elements can be made with a jigsaw, small elements only with a hand jigsaw;
- remove any remaining paper if you glued the stencil to plywood;
- process the edges;
- clean the product from dust and shavings;
- cover with varnish, stain or paint.
There are the following options for transferring a design to a workpiece:
- simple drawings can be transferred with an awl, and then connect the lines with a pencil;
- You can use carbon paper;
- stick the design onto the plywood with glue or double-sided tape, and after work remove the remaining paper.
Artistic carving with a jigsaw requires training and skills that require patience and hard work to learn. Start with simple patterns, gradually increasing the complexity of the patterns. Openwork products are very elegant and beautiful, and also provide an inexhaustible space for creativity and imagination. Figure cutting will require more work with a hand jigsaw than with an electric one, as mentioned above. A hand jigsaw allows you to make small elements in a drawing
Particular attention should be paid to corners, which can cause cracks or chipping of a corner.
Marking the cut line
To cut the material evenly with a jigsaw, you need to correctly mark the cutting line and securely fix the workpiece on the surface. If you have to work with a long blade, you should use a flat rail as a guide and two clamps to secure it and the working material. It is necessary to act in a certain sequence.
First you need to make markings on the chipboard using a ruler. To do this, the required distance is measured on both sides, the marks are connected, forming a cut line. To make a curly line, it is advisable to draw it on paper and then transfer it to wood using carbon paper, having previously sanded the surface.
To cut a circle with a jigsaw, markings are applied with a construction pencil or black marker to the surface using a pre-made stencil made of thick paper or cardboard. In this case, cutting the material begins by drilling a hole in the center. The blade should move from the center to the marking line, and then along the perimeter of the circle.
Important! A jigsaw is inherently designed for curved cuts; cutting it exactly in a straight line is quite difficult. You must constantly monitor the line and point the tool slightly to the side.
To avoid chips on the finished surface, the file during work is not guided along the mark, but near it. The laser guide on the jigsaw will help you cut smoothly.
Features and Recommendations
Experts and experts advise performing this kind of work using electric jigsaws simply because a regular hand saw is too rough. It does not allow cutting the material evenly enough. The correct sequence of steps is:
preparing tools (ruler, jigsaw, measuring tape, awl or other sharp device for drawing on chipboard);
supplementing these tools (if necessary) with a square for laying right angles;
measuring the required part (with a reserve of 0.2 cm so that it can be adjusted);
drawing a line along a ruler;
actually, cutting along the laid line;
refining the cut area using sandpaper;
if the quality of the end is very poor, rub it with chalk, similar in tone to chipboard.
What material is best to work with?
The most suitable material for figured cutting is plywood, 3-10 mm thick. Durability and ease of cutting make it the best option for creating decorative elements with complex patterns. The average price of a sheet of plywood (1500x1500x6) is approximately 300 rubles, and you can find it at your nearest building materials store. Accessibility, aesthetics and ease of processing are the main qualities that the material used for figure sawing should have.
For cutting thin patterns, it is better to use thin, sanded plywood, 3-5 mm thick. Sawing such material is much easier, even for those who do not know how to use a hand jigsaw on wood, and the chance of damaging the product is significantly lower.
Another interesting material suitable for sawing with a hand jigsaw is sheet polystyrene (not to be confused with expanded polystyrene). It is essentially a durable plastic that comes in all colors and sizes. In order not to complicate manual sawing, it is better to work with sheets up to 5 mm thick. The beauty of polystyrene crafts is accompanied by the high price of the material (from 700 rubles per sq.m.) and limited availability. If you are confident in your cutting skills and are ready to create an original glossy craft, you can start your search at local construction markets.
Why does a jigsaw cut crookedly?
In some cases, the craftsman may end up with a crooked cut. This kind of trouble arises due to:
- using a dull file;
- lack of marking line;
- too much pressure on the tool during work.
When working with materials that are too thick, it is difficult to achieve an even cut.
Troubleshooting solutions
To get an acceptable result, you need to be patient and work with the tool correctly. Don't put too much pressure on it or push it forward. This will only worsen the quality of sawing and cause chips to appear on the material.
It is important to apply a marking line to the workpiece
Sawing metal panels, wooden tabletops and other products requires a device with a well-sharpened saw blade.
Anti-splinter liner
This is a special pad for a specific brand of jigsaw. It is simply inserted between the jaws of the jigsaw and is not secured in any way. The insert is adjacent to the file, so it does not allow the pile of the top layer to rise (which is what causes chips), so the saw is smooth. Craftsmen advise using files from the same manufacturer as the jigsaw - the quality of the cut will be better with the use of an insert.
The inserts are sold in sets of 3-5 pieces. They are not eternal - they have to be changed periodically.
For example, an insert for a Bosch jigsaw costs about 400 rubles.
If you haven’t found an insert for your jigsaw or don’t want to buy one, then there is a small life hack from the craftsmen - stick ordinary tape in the place where you will be sawing. After this, you need to iron the tape well with your fingernail. Then saw directly on top of the tape. After that you delete it. The result will be similar to the liner.
You can also make such a sole yourself. Here is an example of how our client made a jigsaw pad from a thin sheet of tin.
But it is more convenient to make such a platform from a sheet of plexiglass. And stick it to the bottom of the jigsaw using double sided tape.
With a homemade insert you will also get a clean cut.