Have you tried and built a beautiful steam room hut? Now we need to finish the inside of the bathhouse, which requires no less attention than exterior work. High humidity and elevated temperatures place special demands on materials, because not all of them are able to withstand difficult operating conditions. The choice of cladding determines how long the structure will last and how comfortable the procedures will be. Different rooms in the bathhouse require their own approach to finishing, but the most difficult is finishing the steam room in the bathhouse.
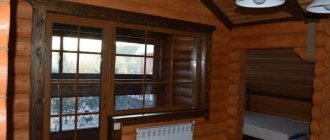
Design of a steam room in a bath Source et.aviarydecor.com
What material is suitable for a steam room?
There are a lot of finishing materials for interior work. To make it easier for you to choose what kind of finishing will be done for the steam room in the bathhouse, each designer has photos and pictures of ready-made solutions. It is worth remembering that even if you made your own choice, it is better to coordinate it with a specialist, because not all materials are suitable for installation inside the hottest room.
Taking into account the specific operating conditions, the following requirements are imposed on the finishing:
- moisture resistance;
- heat resistance;
- durability;
- hygiene;
- environmental friendliness.
Important! For the interior decoration of the bathhouse, you should choose natural materials.
When the temperature rises, plastic becomes deformed and begins to emit an unpleasant odor, and ordinary tiles crack after heating. Therefore, the use of such finishing is unacceptable in the steam room.
The best option is wood. The finishing structure depends on financial capabilities. For example, lining is cheaper than timber; it is chosen if it is necessary to meet a certain budget. Basically, bathhouse owners prefer deciduous wood. Below is an example of what the interior decoration of a bathhouse might look like, a photo of the classic version.
High-quality wood for interior decoration of a bath Source stroy-block.com.ua
There is an opinion that you should not sheathe the inside with steamed coniferous wood, since it releases resin when the temperature rises. But this statement is controversial, because resin has a beneficial effect on health, cleanses the respiratory tract, and strengthens the heart.
Whether or not to sheathe the interior with coniferous wood is up to you - maybe someone in your household doesn’t like the smell of pine needles or vice versa...
If lining was chosen for cladding the bathhouse, then it must be of high quality. Particular attention must be paid to the external processing of the material - there should be no chips, knots, or cracks on its surface. The lining should not deform: swell when heated or dry out at normal temperatures.
If wood is not suitable for you as a material for interior decoration of a steam room for some reason, you can give preference to heat-resistant tiles; they have proven themselves well under significant temperature changes.
Experts recommend laying the walls of the steam room with terracotta flagstone - this material is resistant to high temperatures and humidity.
Features of wood cladding
Wood is the best material for walls, ceilings and floors in a bathhouse. In turn, a rich assortment of wood-based finishes can be confusing.
Sometimes simple boards are used to cover walls. Of course, you should choose only products of the highest quality, without mechanical defects and traces of mold. The lamellas are fastened at an angle of 90 degrees on a wooden crate, also pre-treated with antiseptics and anti-feathers. However, it should be borne in mind that the cost of such material is quite high, and therefore it is rarely used for these purposes.
Combining shades of wood in the interior of a steam room
It is better to choose a material specially designed for wall decoration - lining . They are easy to install, they do not weigh much, unlike boards, and have all the positive qualities of natural wood.
The advantages of lining include the following:
- A wide range of shades and textures - different types of wood are used to make lining.
- The slats are equipped with a tongue and groove, which allows them to fit tightly to each other and greatly simplifies installation.
- Visually, this finishing makes the walls smooth and aesthetically attractive.
- The design of the lamellas assumes natural air exchange between the sheathing and the wall.
A bathhouse usually consists of several rooms: a dressing room, a washing room, a steam room, and sometimes a relaxation room. For finishing, you should use different types of wood, based on the purpose and operating conditions in the room.
Wood goes well with stone on the floor
Where the temperature remains at the same level and humidity is minimal (dressing room, rest room), choose pine trim. It is characterized by low cost, stability, low thermal conductivity and a beautiful natural pattern. Pine contains phytoncides, which, when released into the environment, have a beneficial effect on the body. The aroma that such cladding exudes is especially expressive. Due to the presence of resin in the composition and natural antiseptics, this finish is not susceptible to the formation of mold and mildew. But this wood is not suitable for a steam room, since when heated strongly, it begins to release resin and a pungent odor.
pine paneling
Steam room materials
For the walls in the steam room, lining made of aspen, oak, linden, birch or cedar is used. As a cheaper material, you can use edged boards made from the same types of wood. The surface of the boards must be sanded to a perfectly smooth state and treated with protective compounds. If they are to be installed in the dressing room and rest room, then the top can be varnished. Planed boards are almost twice as thick as lining, so they provide high-quality thermal insulation, but you should not give up insulation.
Boards as wall decoration
Washing material
The washing room has a comfortable temperature, since it is most often located in front of the steam room. There is high humidity here, so the materials are subject to requirements regarding moisture resistance. Often the walls are sheathed with clapboard made of larch - a stable, moisture-resistant material that dries quickly and does not deform.
Larch paneling
larch paneling
Material for the rest room
When decorating a relaxation room, decorativeness and creating a cozy atmosphere come to the fore. There are the following options for wall cladding made of natural wood:
- You can cover the walls with pine wood boards. This is the most affordable material with excellent performance properties. Pine is not subject to rotting, it contains natural antiseptics, the wood dries quickly, and has a beautiful natural pattern and shade. Scandinavian pine has the greatest durability, so it is worth choosing it. The shade of pine is light pink, over time it darkens a little and becomes deeper.
- Another inexpensive but high-quality material for walls is spruce lining. During its manufacture, heat treatment is used, due to which the lining becomes very durable and moisture resistant. This type of wood does not contain as much resin as pine, has a pleasant aroma and a unique natural pattern with knots.
Rest room (dressing room)
Note! If the bathhouse is made in the form of a log house, then all finishing measures are carried out only after its complete shrinkage.
spruce lining
The process of covering walls with clapboard: step-by-step instructions
Covering walls with clapboard involves installing insulation. For example, you can use a material with a fiberglass base of the URSA brand together with a vapor-proof layer of foamed foil polyethylene on top.
First the walls need to be prepared. They are cleaned of contaminants, primed, dried and markings are applied - the places where the timber is attached.
Table. Sequence of actions when installing the sheathing
| Illustration | Description |
| Installation of guides is carried out at intervals of 60 cm. If we take into account the width of the beam, the distance between adjacent elements will be 56 - 58 cm. Dowels are used to fix the beam. The caps are recessed so that they do not protrude above the surface (flush). Thermal insulating material is placed in the formed niches between the guides. An important point: the thickness of the sheathing should be the same as the thickness of the insulation. Mats with a thickness of 60 cm, when choosing this step of guides, will fit tightly, without forming gaps and without requiring additional fixation. |
| Fixing the vapor barrier | Foamed polyethylene with a foil front covering is used as a vapor barrier. Material no more than 2 mm thick is fixed around the entire perimeter of the room on top of the insulation. It is attached to the guides with brackets. For joints, use foil-coated moisture-resistant tape. |
| Fixing slats | Horizontal wooden slats measuring 2 x 4 cm are attached to the vertical guides through a vapor barrier foil material with self-tapping screws at a distance of 40 - 50 cm. |
| Alignment of slats | When fixing the slats, it is important to maintain their even position in space in the horizontal and vertical plane. If during fastening you find uneven areas, then you can place a piece of plywood or thin lath under the slats. It is important that the plane of the wall is level. |
| Fastening when aligning slats | If an additional leveling element is placed under the rail, then it is attached to the sheathing using a longer self-tapping screw (5-6 cm), through the plywood. |
| Attaching the bottom rails | The height at which the bottom rail is fixed is 3-5 cm from the floor level. This will make it easier to fix the lining at the bottom of the wall. |
| Attaching additional rails | Additional slats are fixed in corners, as well as around windows and doors. The installation method (vertically, horizontally) depends on the location of the element’s fixation. |
Table. Cladding walls with clapboard
| Illustration | Description |
| Fixing the first lamella | Attaching the first lamella begins in the corner. Its position is strictly leveled in the plane using a building level. Additionally, you can apply pencil marks to the slats. |
| The first lamella is attached in the corner | The panel is secured with self-tapping screws to each rail on the corner side. If you first make thin holes in the lining with a drill of a smaller diameter, then when attaching it to a self-tapping screw, the likelihood that the lamella will crack is reduced to zero. |
| Fixing the clamp on a nail | At the opposite end, the lamellas are secured using clamps. It is pushed inside the groove at the end of the panel so that it rests. It is fixed to the rail with a small nail or a stapler. If a nail is used, it must be held by the leg with pliers so as not to accidentally damage the lining. |
| Fastening subsequent lamellas | To fix the next panel, its groove is placed in the tenon of the fixed lamella. On the free side, the fixation also occurs: the clamp is inserted into the groove and secured to the sheathing batten. |
| Padding of lamellas | If you cannot get the slats to fit tightly, then most likely the tenon has not fully entered the groove and you need to “help” it. To do this, apply the lath to the locking part of the lamella and gently tap it with a hammer. |
| There should be a flat wall | All subsequent panels are fixed in the same way. The sheathing should create a flat plane with recesses, depending on the profile of the lining. |
| Fastening the corner | When all the walls are sheathed, to complete the finish, install overhead elements at the corners and at the joints between the ceiling and the wall, as well as baseboards. Small nails are used to secure these elements. |
| Tinted lining | To tint the lining, protective substances with anti-foam and antiseptics are used. This treatment will not only add aesthetics to the wooden finish, but will also protect it from negative external influences. |
How to make proper ventilation in a bathhouse and prevent rotting? Read in the special article.
Ceiling protection
Before finishing, you should protect the ceiling from hot steam. To do this, use aluminum foil or a construction membrane.
Important ! Do not use foil with mineral wool or polypropylene foam glued on it. When heated, these materials release toxic substances.
Protecting the ceiling in a bathhouse using aluminum foil Source ko.aviarydecor.com
Rules for visual inspection of boards and assessment of their condition
The following must be taken into account:
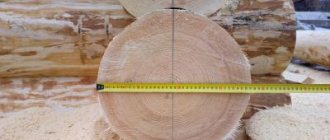
- Pay attention to the quality of the chips. The boards must have a flat and smooth surface. This directly affects the economic benefits of finishing work. If the front side of the lining is rough, finishing will be complicated by the increased consumption of antiseptic and paint materials.
- The moisture content of the boards should not exceed 12-16% (GOST requirement). It is visually impossible to determine whether the material offered by the manufacturer meets this criterion. Therefore, it is necessary to request documents confirming compliance with GOST. If the wood is not dry enough, there is a high risk that it will suffer during the first years of operation of the finished premises.
- Pay attention to the depth and evenness of the groove. These indicators determine the quality of installation. And it doesn’t matter how it will be done: using clamps, nails or staples. If the groove is shallow, there will be nothing for the fasteners to grab onto.
An important characteristic of boards is width. Often there are lamellas on sale that are wider than standard ones (more than 88 mm) and managers assure that it is more profitable to buy such lining. This is not true, since such a finish will be less durable and there is a high risk of wide boards bending when exposed to moisture.
Using lining - rational or not
Definitely yes! Lining made from linden, aspen, cedar, and abashi has become popular due to its properties. It tolerates temperature changes well, high humidity, is aesthetically pleasing, and does not absorb moisture. Cladding made of clapboard has low thermal conductivity - it does not heat up, but transfers heat to the air.
Bath lining is not covered with varnish, antiseptic, or paint; it is used in its natural form.
See also: Catalog of companies that specialize in finishing materials.
Expert recommendations
In order for a log bathhouse to serve its maximum service life, it is important to properly and carefully maintain the premises.
- Natural ventilation of the premises must be organized. Fresh air will help quickly dry wooden materials that are most exposed to moisture.
- In the washing and steam room, after all procedures have been completed, cleaning must be done (everything needs to be swept, washed, put away) and then thoroughly ventilated. If possible, it is advisable to move all furniture outside.
- To provide additional protection, wooden materials periodically need to be treated with protective impregnations. They will prevent rotting, the appearance of fungi and mold. But the compositions must be intended specifically for the bath, without containing harmful and dangerous substances in their composition.
Any finishing materials for the bath can be used at the request of the owners. But the main thing is that they are natural, safe, moisture-resistant, not afraid of temperature changes and retain heat well.
Preparing the walls for finishing
When starting to finish the walls, they solve the issue of insulation and waterproofing. Without such measures, the bathhouse will not last long, and healing procedures will be reduced to simple hygienic ones. For insulation, the walls are covered with mineral or basalt wool. The second one is more resistant to high temperatures, so it lasts longer.
Insulation of walls in a steam room with mineral wool Source hvylya.net
Experts consider cork to be the best thermal insulator for bathhouse walls. This agglomerate does not burn, does not rot, and is resistant to fungi and mold.
Lathing - to do or not to do
Craftsmen prefer to install the sheathing and attach the interior trim to it. The popular base size is 50x50, less often they make 70x70. The pitch is not standard and varies depending on the size of the blocks being strengthened.
The sheathing is made of wood, less often of metal. Considering the operating conditions, the metal must be treated with moisture-resistant compounds. The lining or logs are secured with self-tapping screws and nails. They must be copper or brass. The installation of the base is done perpendicular to the sheathing.
Lathing walls in a steam room under clapboard Source seattlehelpers.org
Stages of clapboard finishing
- A beam is fixed along the perimeter of the wall and ceiling . Fastenings should be every 80–100 cm.
- Cut pieces of insulating wool are placed between the wood without compacting.
- The top is covered with a waterproofing agent . The joints are sealed with aluminum tape, paying special attention to the corners.
- Provide ventilation . To do this, fill the distance rail. It will provide a small gap (2–3 cm) through which air will be vented.
- They make separate upholstery for doors and windows.
- They fasten the lining . You need to start from the corner, fixing each part vertically. This position will ensure free flow of water. If a horizontal arrangement of blocks is planned, make sure that the spikes are at the top. This will protect the lock from moisture.
- The lining located in the corners or near the walls is cut to the required size . It is especially important to cut the corner block correctly. It is necessary to accurately calculate the angle of inclination so that the adjacent block is correctly fixed.
Insulating the furnace using a metal sheet Source interistroy.ru
Next, install insulation from the furnace. For this use:
- metal - stainless steel or profiled iron is mounted on the wall behind the stove;
- red brick - placed between the wall and the fire;
- tiles resistant to high temperatures (kaolin);
- mineralite is a heat-resistant board made of cement and special components.
Insulation of wooden baths
Problem areas in a wooden structure are always the same. The problem can be solved either the way it has been done for centuries, or with the help of modern technologies. Below is a list of problems and ways to solve them.
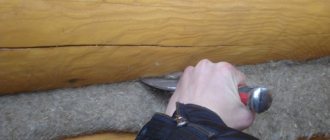
Inter-crown insulation and sealing of cracks
Over time, wooden buildings inevitably shrink, which causes gaps to appear between the crowns. Those, in turn, open the way for drafts, so the first stage of the fight is to seal them.
The initial stage of interventional insulation occurs during construction. Timber (including profiled) and round timber are laid with tow tape or jute. Subsequently, this will be internal interventional insulation.
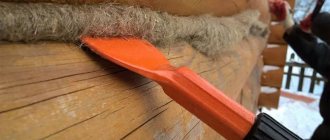
In addition to the internal, there is also an external one, which has to be periodically updated. The resulting cracks can be filled with tow, jute, natural moss, or you can use modern materials, but only those designed for wood.
IMPORTANT! Plumbing sealants, putty and polyurethane foam are not suitable for sealing cracks in a bathhouse made of logs or timber. They are inelastic, designed for a constant gap size (while wood changes), they have poor adhesion to wood, insufficient heat resistance, harmful emissions, etc.
flaws. Over time, they crumble out of the cracks.
The cracks on the outside of the beams or logs are sealed with wood sealants in such a way that the sealants will dry from 2 to 5 weeks, and the walls must be protected from the sun and rain during this time.
Insulation of window and door openings
Windows in bathhouses are usually made low so that the heat accumulated under the ceiling does not escape. All openings - both window and door - must be carefully sealed with tow or foam. For ordinary windows, the junction of glass and frames is insulated with putty, but it is even better to install special double-glazed windows for baths - made of wood.
High thresholds and low doors
Bathhouse builders have long developed design features that help retain heat. And even in our time there is a reason to take advantage of their findings. However, there are several doors in the bathhouse; should they all be low and the thresholds high?
The principle on which this works is that warm air is light and accumulates at the top, so the higher the doorway, the more heat will escape when the door opens. A high threshold prevents drafts from moving across the floor - it also effectively saves heat.
But today this rule is more often followed for only one room in the bathhouse - the steam room (about insulation for the steam room here). The calculation is simple: you need a pair from the ceiling 60-80 cm down, at this level you can already make a door lintel. Or you can use another rule: from the floor to the ceiling the door is 160 cm in height. From this height you still need to subtract 20 cm per threshold.
By the way, a high threshold is a guarantee that you won’t hit your head, because a person automatically ducks when he steps over it. And if you make the doorway wider, it will become comfortable even at this height.
IMPORTANT! The door to the steam room should open outward, not inward. You never know, maybe you’ll have to knock it out from the inside... It’s better to make the door to the washing room narrow, about 60 centimeters, so that less moisture leaves the room
Another thing: due to the swelling of the wood, the gap between the door and the frame is increased to 5 mm, so that the swollen door can still close. This does not apply to glass and plastic doors.
It is better to make the door to the washing room narrow, about 60 centimeters, so that less moisture leaves the room. Another thing: due to the swelling of the wood, the gap between the door and the frame is increased to 5 mm, so that the swollen door can still close. This does not apply to glass and plastic doors.
The entrance door to the bathhouse can also be ordinary in size, but in terms of material it is better to be metal with wooden lining, so as not to accidentally freeze to the metal in the cold. But the wooden one usually swells and leads.
Making the floor in the steam room
Not only comfort, but also safety depends on the choice of raw materials for the floor. Moisture on smooth tiles or linoleum leads to falls and injuries. Installation of such materials will turn the floor into a skating rink. In addition, when heated, linoleum emits an unpleasant odor containing substances harmful to health.
The optimal choice of floor for a steam room is wood. It does not require a special coating, and with this design the room will be designed in the same style. It is worth noting that the wooden floor in the bathhouse is not made of oak. This wood becomes stronger when wet, but at the same time its surface begins to slip.
Concrete works well. A floor made of such material will be strong and durable. Tiles are laid on top of it, but the structure of the surface of such a coating is important. It should not be glossy; a pronounced relief is necessary. The floor is laid at a slight slope towards the water drainage.
Laying tiles on the floor in a bath Source seattlehelpers.org
The tiles are laid from the corner, placing crosses between the blocks, tapping with a mounting hammer. After 2-3 days, the seams between the tiles are rubbed down. Wooden grates are placed on top to prevent you from stepping on the cold floor and provide additional safety in case of possible slipping.
Cold water rinse tub
The interior arrangement may also include elements such as a hanging tub for rinsing (photo). It needs to be hung in a washroom higher than a person’s height so that an adult man can use the tub as a shower. It works very simply: you just need to pull the rope attached to the tub, after which the container tips over and water spills onto the person standing under this stylized shower.
Please note that the tub must be secured at a sufficient distance from the wall so that the bucket can completely rotate 180 degrees without the bottom resting against the wall. It also needs to be equipped with a simple device for supplying cold water.
And now the shelves
A very important point is the shelves in the bathhouse. Since constant tactile contact is assumed with them, increased requirements are put forward for these elements:
- they should not get very hot ;
- it is better if they cool slowly ;
- must be environmentally friendly ;
- do not slip or be very rough;
- have no external damage ;
- easy to wash.
Again, wood is most suitable for this purpose. Carefully cleaned, without knots or nicks, it has served people in bathhouses and steam rooms for centuries. Shelves should not have sharp corners that could cause injury. They are not made solid, leaving a small distance between the wooden boards.
What is a chopped log?
Chopped logs are a wood material for the construction of a bathhouse, which is least subject to mechanical impact during processing. After cutting the log to dry, only the rough layer of bark is removed with an ax, thereby laying down the fibers and leaving a protective thin layer of wood. Such a log usually does not have ready-made cuts, locks and grooves, so during construction all this is done manually, based on the design. Due to such a small impact on the log, it has a natural appearance and a thin surface protective layer. Even after grinding, a chopped log looks natural, which cannot be said about a rounded log, which requires grinding even after machine processing.
Setting up a dressing room
The main function of the dressing room is to preserve heat. The temperature in the room is not high, so it is good to use coniferous trees to decorate walls in a traditional style.
Design of the waiting room and rest room “under the tree” Source koon.ru
The interior decoration of the bathhouse made of logs creates an atmosphere of antiquity and ancient fairy tales. A light aroma created by pine, fir, and spruce is appropriate here. The wood of these species resists fungus and mold well. It does not crack after drying and is durable. When heated, fir releases almost no resin.
If hardwood is preferred, experts advise finishing the room with birch. The lining can be laid out not only in even rows, but also in a pattern. It is important that the walls in the room are covered with the same type of wood.
Bathroom and washroom
These rooms do not have very high temperatures, although the humidity is as high as in a steam room. The choice of finishes in the bathroom and washroom is more extensive. Fans of bath procedures recommend using natural raw materials for such rooms - wood or stone. Among wood, pine is the leader - it is an affordable material, however, it darkens with prolonged use.
An example of a washing station design Source profstroiplotnik.ru
Plastic is acceptable since there is no high temperature, and it tolerates humid air well. You can use regular tiles for the shower.
Content
The interior, made in the Russian style, is a classic.
Beautiful interior inside the bathhouse
In fact, everyone is provided with such familiar attributes as brooms, hats, buckets, gangs. Only by adhering to the integrity of the overall style and competently choosing the necessary accessories can you make your sauna unique and its interior special.
Design depends on the choice of material
Video description
For interesting ideas for interior decoration of a bathhouse, watch the video:
Decorating a relaxation room in a bathhouse, in addition to traditional wood, can be done:
- glass wallpaper;
- porcelain stoneware;
- natural stone;
- decorative plaster.
Important! The tree is not installed immediately after delivery to the construction site. It is brought into the room and allowed to stand for a couple of days so that it “gets comfortable” in the bathhouse. After this procedure, the wood is not subject to deformation when heated and high humidity.
Room interior
There is no more suitable place where you can simultaneously relax after a busy work week, imbue yourself with harmony, and cleanse your body than a sauna or bathhouse, which is closer in spirit to the Russian spirit.
For many, visiting it is a tradition that is supported by every generation, and is often instilled in families from early childhood, so it is not surprising that our compatriots want to have their own bathhouse in the backyard.
Great place to relax
The environment inside should give harmony and tranquility. This atmosphere is achieved by the combination of all parts of the interior. You should not think that the type of Russian baths is a standard steam room with a stove and the same type of shelves. A designer interior is always distinguished by original details and decor; only by implementing an individual project can you get a stylish room for couples and relaxation.
Stylish room in oriental style with your own hands
Quality, thoughtful finishing and accompanying accessories are three pillars of internal content that will never cause you any inconvenience. For information on how to equip the interior, I will tell you today. These ideas can be used both at home, for your own needs, and for business.
Thoughtful finishing is the key to success