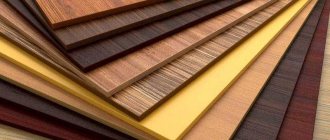
Plywood is a universal sheet material used in construction, modeling, furniture production, container manufacturing and other areas. For each case, a material with certain parameters is selected. It matters what degree of moisture resistance the plywood has, the size of the sheet, the thickness, and the method of surface treatment. Not only the quality of work and the appearance of the finished structure, but also the ease of transportation and installation and the amount of waste depend on the right choice.
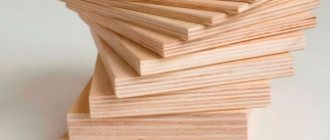
Choosing the optimal size sheets reduces waste and saves Source siakandaris.gr
Standard plywood sheet sizes
The dimensions of plywood are regulated by GOST. There are different standards for softwood and hardwood materials. In addition, there are regulations with additional requirements. Main categories:
- Small-sized plywood: width and length are 1220 or 1525 mm. It is in demand when finishing small areas; it is convenient because the master can do it himself, without an assistant. This results in more joints than when using large fragments.
- Large format. Typical dimensions of plywood sheets: width from 1830 mm (anything smaller is considered small) to 3000 mm. The larger the finishing area, the more convenient it is to use large sheets.
- Non-standard plywood sheets. Produced in accordance with GOST 3916.1-2018. Length: from 1200 mm to 3660 mm. Material with a length of 3000 mm or more is ordered mainly for production purposes. You should think about transport for transportation in advance.
- Moisture resistant plywood. There are 2 types: square (with sides 1525, 1475, 1270, 1220 mm) and large format: 1830x1525, 2440x1220, 2500x1250, 3050x1525 mm.
State standards provide for a permissible deviation of sizes from nominal to 4 mm. Most enterprises produce a limited list of standard sizes or work according to their own specifications.
Along the sheathing
There are many ways to level plywood floors. When sheets are used in work, logs are most often installed, and elements are fixed to them. But here, too, there are two main ways to get rid of surface defects on a concrete floor:
- Installation of strip supports.
- Point supports.
In each case, there is a sequence of work that will contribute to obtaining an ideal, even floor.
Belt supports cannot do without transverse and longitudinal components. Regarding the longitudinal ones, we can say that they should not fit tightly to the walls. A distance of approximately 30 mm must be maintained, which is necessary for deformation movements. The sheets used to level the floor under the plywood affect the distance between the joists. Usually the distance is selected within 40-50 cm.
For this method there is a sequence of actions, which include:
- Initially, plywood is laid out on the floor surface. In this case, you do not need to attach it, but simply try it on, determining the required number of sheets. The staggered arrangement of sheets of material must be observed.
- The installation locations of the longitudinal elements of the sheathing are drawn from the sheets.
- It would be a good idea to number each sheet of plywood so that there are no problems with installation in the future.
- The floor joists are laid out according to the marks. To begin with, they are fixed near the walls, and then between them. Even cut plywood can be used as a material.
- To level the floors, the sheets are screwed to the joists using self-tapping screws. You can additionally use metal corners.
- According to building codes and regulations, wooden blocks or metal wedges should not be placed under the joists if it is necessary to raise the level. The best option here is to add sand, or lay down roofing felt.
- To improve the quality of leveling the floor with plywood, all voids between the joists should be filled with thermal insulation material. An alternative is sawdust mixed with PVA glue.
When there are significant differences in height in the room, you can use the technology of leveling the concrete floor with plywood mini-joists. But few people can cope with such a task on their own. To do this, it is better to invite specialists who can do everything efficiently.
Now let's get back to using point supports. This option involves the use of OSB boards, wood or plywood elements as supports around the perimeter of the room. Their height should correspond to the difference in plywood thickness and level difference on the base. Since the reliability of such a design is much less, the number of supports should be increased.
We must not forget about underground ventilation. After installation, holes are drilled at pre-marked points on the plywood sheets. They are perfectly hidden by decorative elements (ventilation grille).
Plywood thickness
In accordance with the generally accepted classification, the following types of plywood are distinguished:
- Aviation: from 1 to 3 mm. The thinnest has a thickness of 1 mm (peeled). It is in demand in modeling and is also used in the manufacture of furniture, musical instruments, packaging, souvenirs and gift products. Roughness - up to 100 microns. Variety - first or second.
- Thin plywood FC, FSF (moisture- and super-moisture-resistant construction). Thickness 3, 4 or 6 mm. If flexibility is a priority, the choice is clear - 3 mm; in all other cases, a material with a thickness of 4 or 6 mm is preferable. Area of application: manufacturing of containers, souvenirs, automotive industry, furniture production.
- FC and FSK of average thickness: 8/9/10/12/15 mm. Materials of the first and second grades are often used as decorative materials, while the third and fourth grades are used for rough finishing. Scope of application: construction and repair, mechanical engineering, production of advertising structures, roofing.
- Thick plywood: 18/20/21/24/30 mm. Increased strength allows it to be used for the manufacture of load-bearing elements and frames. It is extremely rare to find material with a thickness of 40 mm (formwork installation, construction of carriages, as part of interfloor ceilings).
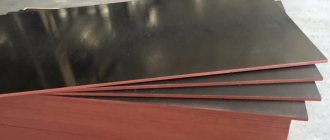
The most popular thicknesses of laminated plywood are 18 and 21 mm. It differs from construction film in the presence of a lamination film, which protects the material from the destructive effects of aggressive environments.
The maximum permissible deviation of plywood thickness from the nominal thickness is 2 mm. Actual figures differ and range from 0.3 to 1.7 mm. The problem of sheets not joining at the joints is solved by using a substrate.
What it is?
The name USB cannot be considered official - rather, it is a distorted version of OSB, which is how oriented strand board is labeled. USB plywood is sometimes called its universal variety, but the characteristics of the material are no different from the regular version. OSB is produced in the form of large-format sheets or, as they are also called, boards. This type of plywood does not have a solid structure, but consists of wood chips joined together in layers using glue based on natural or synthetic resins.
USB sheets are characterized by high density and strength. Usually the slab consists of 3-4 layers, in each of which thin chips are glued together and with the previous layer. For the connection, resins mixed with boric acid and synthetic wax are used. These materials are called oriented because their layers have a multidirectional structure: the outer layers are directed longitudinally, the inner layers are directed transversely.
USB sheets have certain characteristics.
- High moisture resistance. Material completely submerged under water will increase in volume by no more than 10% after 24 hours.
- Resistance to biological damage. Neither insects, nor mold or mildew are harmful to the stove.
- Improved fastener retention rate. Compared to particle board and softwood plywood, the superiority is about 25%.
- High quality. The selected raw material contains no knots or voids, and the likelihood of delamination is minimal.
This is the basic information you need to know about the material known as USB board. In addition, it is inexpensive, visually looks quite attractive even without coating, and is stable in its composition and chemical properties.
Areas of application for plywood of different thicknesses and sizes
The size of the slabs affects the number of joints, the thickness affects strength, flexibility, and load capacity. In fact, this is the main parameter that is taken into account when choosing plywood. Options for using the material:
- 3 mm. Suitable for the manufacture of lightweight structures. The main area of application is modeling.
- 4 mm. Used primarily as cladding. The most popular size is plywood 1525x1525 mm.
- 6 mm. Suitable plywood thickness for flooring, furniture making. Sheets 1525x1525 and 2440x1220 mm are in high demand.
- 8-10 mm. The best option for construction and renovation, including as a floor covering.
- 12-15 mm. From 9 layers provide high load capacity. Such plywood is in demand in the manufacture of furniture, warehouse equipment (shelves/racks) and similar structures.
- 18-30 mm. The slabs are used for the construction of low-rise structures (gazebos, decorative structures), as well as interfloor ceilings. This is a popular material for making formwork for strip foundations.
- 35-40 mm. The main option for the production of countertops, auxiliary elements (for stairs and other structures). Most often, the width varies between 1220-1525 mm, length - 2440 or 3000 mm.
The minimum thickness of laminated plywood is 6 mm, the maximum is 40 mm. Slabs with a thickness of 18 and 21 mm are used mainly in the construction of strip foundations, floors, architectural elements such as columns and the like. Plywood with 24 mm lamination is in demand in monolithic construction (formwork is made from it), mechanical engineering (sides of trucks, trailers). 30 mm slabs are used in the construction of dams and load-bearing elements.
How to choose?
When building a house, plywood is most often used, consisting of 3-5 layers of glued veneer. Veneer layers can be arranged in different ways in the sheet material; they are assessed based on the outer layers of the sheet. If the wood fibers are located in the direction of the length of the sheet, then such plywood is called longitudinal. If the fibers are located in the direction of the width of the sheet, then such plywood is considered to be transverse. Longitudinal sheet plywood is used where high flexibility of the sheet is required when performing work. Transverse plywood is used in cases where good rigidity is required, which occurs when this material bends.
Due to the impregnation of the layers with glue, plywood sheets are highly resistant to humidity and water. The most common are several brands.
FC - is a moisture-resistant sheet, the veneer inside of which is impregnated with glue consisting of a mixture of resin and formaldehyde. If plywood has an E1 impregnation class, it means that the degree of release of formaldehyde vapor into the external environment is low, and such material can be used in residential premises.
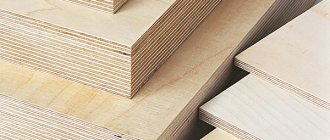
Finished sheets of pressed plywood are sanded.
There are two types of plywood products.
Sanded - if only one side of the sheet is sanded, then the code Ш1 is added to the nomenclature of the plywood grade. If both sides are sanded, then the product is marked with the code Ш2.
Plywood, sanded on both sides, is used for the production of furniture products. If you are choosing a material for construction work, then it makes no sense to overpay for sanded sheets - you can get by with a cheaper unsanded option.
Plywood sheets are divided into 5 grades. The best grade is marked with the letter E, which denotes elite and high quality products. Then, as they deteriorate, varieties are divided into I, II, III and IV. The grade is determined by the appearance and quality of the front sides of the material. Each side is evaluated separately, and the result in the nomenclature is written using a fraction sign. For example, plywood marked I/II will indicate that one side of this material corresponds to grade I, and the second side of the sheet has only grade II quality.
To correctly determine the amount of material needed for work, you need to make preliminary calculations before purchasing:
- determine the area of the plywood sheet;
- calculate the working surface area;
- divide the area of the working surface by the area of the plywood sheet, rounding the result up to whole numbers upward.
When purchasing material, you need to take a small supply, which will be needed in case of an unforeseen cut.
Experienced specialists recommend taking into account the following important nuances when purchasing plywood material:
determine the purpose of plywood and select the appropriate grade of material for this purpose, and also take into account the composition of the adhesive base; check with the seller what material the plywood sheets are made of - birch and pine wood are considered the most suitable for interior and exterior work; pay attention to the quality of the sheet surface - there should be no chips, bubbles or foreign inclusions on it.
For the manufacture of furniture products, plywood sheets are used, the thickness of which does not exceed 9-10 mm, while for construction purposes they take material with a thickness of at least 12 mm. Finishing work is carried out using sanded plywood of grade E or category I with mandatory sanding of the outer side. For other work, the appropriate class of material is also individually selected and the need for grinding is determined. The cost of a plywood sheet directly depends on its grade, size and thickness. The larger the dimensions of the sheet and its thickness, the more expensive the material is.
Which plywood is better, see below.
Plywood sheet weight/calculations
The characteristics are required to determine tariffs for processing, transportation and storage of goods. Mass depends on volume and density. Weight is calculated using the formula: m=V (volume) * p (density). The volume, in turn, is calculated as follows: V = Length * Width * Thickness. Density is usually indicated on the packaging. Possible options:
- 600-700 kg/m3 - grades FK, FSF, laminated, and also from birch.
- 450–550 kg/m3 - coniferous wood.
Let's give an example of how to calculate the weight of a sheet of plywood. To do this, we will take birch plywood FSF 6 mm 2440x1220 mm.
- Determine the volume of the sheet in meters: 0.006 x 2.44 x 1.22 = 0.0178 m³
- The number of sheets in a cube is determined by dividing one cubic meter by the volume of the sheet: 1 / 0.017 = 56.179 (number of sheets in m³)
- To determine the weight of a sheet, you need to divide the density by the number of sheets: 680 / 56.179 = 12.1 kg (weight of one sheet).
Plywood weight 1525x1525
| Thickness, mm | 3 | 4 | 5 | 6 | 8 | 9 | 10 | 12 | 14 | 15 | 18 | 21 | 25 | 30 |
| Number of sheets per m³ | 143,33 | 107,50 | 86,00 | 71,67 | 53,75 | 47,78 | 43,00 | 35,83 | 30,71 | 28,67 | 23,89 | 20,48 | 17,20 | 14,33 |
| kg/sheet Birch | 4,7 | 6,3 | 7,9 | 9,5 | 12,7 | 14,2 | 15,8 | 19,0 | 22,1 | 23,7 | 28,5 | 33,2 | 39,5 | 47,4 |
Plywood weight 2440x1220
| Thickness, mm | 4 | 6 | 6,5 | 8 | 9 | 12 | 15 | 18 | 21 | 24 | 27 | 30 | 35 | 40 |
| Number of sheets per m³ | 83,98 | 55,99 | 51,68 | 41,99 | 37,33 | 27,99 | 22,40 | 18,66 | 16,00 | 14,00 | 12,44 | 11,20 | 9,60 | 8,40 |
| kg/sheet Birch | 8,1 | 12,1 | 13,2 | 16,2 | 18,2 | 24,3 | 30,4 | 36,4 | 42,5 | 48,6 | 54,7 | 60,7 | 70,8 | 81,0 |
| kg/sheet Needles/OSB | — | 10,36 | 11,22 | — | 15,54 | 20,72 | 25,90 | 31,08 | 36,26 | 41,44 | 46,62 | 51,80 | — | — |
Plywood weight 1525x3050
| Thickness, mm | 4 | 6 | 6,5 | 8 | 9 | 12 | 15 | 18 | 21 | 24 | 27 | 30 | 35 | 40 |
| Number of sheets per m³ | 53,75 | 35,83 | 33,08 | 26,87 | 23,89 | 17,92 | 14,33 | 11,94 | 10,24 | 8,96 | 7,96 | 7,17 | 6,14 | 5,37 |
| kg/sheet Birch | 12,7 | 19,0 | 20,6 | 25,3 | 28,5 | 38,0 | 47,4 | 56,9 | 66,4 | 75,9 | 85,4 | 94,9 | 110,7 | 126,5 |
Installation work
After cutting the plywood into sections, they will need to be laid out on the floor surface to adjust to the area of work
It is extremely important to take into account the gaps (between the sheets inside - up to 10 mm, between the sheet and the wall - up to 20 mm)
Screed flooring is carried out on both wooden and concrete floors. The flooring should be slightly offset to avoid grouping all four seams in one place.
After preparing the plywood sheets for the floor, each one is numbered - installation will be faster and more convenient.
For better installation, a plywood sheet 1.25 m X 1.25 m should be cut into pieces of 0.60 m. If, when cutting the sheets, a large number of delaminations are observed - the first sign of poor-quality material, the floor should not be laid with such plywood.
Working with rough coating
One of the fastest and most effective types of work with plywood. Has several types of styling:
On a concrete type screed.
Plywood up to 12 mm thick must be glued onto the screed. The flooring is smooth. Expansion joints - 4 mm between sheets, 3 mm - between the wall and the plywood sheet.
Installation of plywood on a screed
If there is a difference in level in the room, special fasteners will be required, which will be located under the sheet. Such floors do not require logs.
Fastenings that allow you to adjust the level of the flooring
Laying on joists
Before the flooring, a base of logs is installed. The sheet thickness must be more than 12 mm. Working with this type of installation is difficult, time-consuming, and durable. Required for insulation and raising the floor to the required height. The correct placement of logs and plywood sheets will allow you to cover differences in the height of the room.
Laying flooring on joists
Leveling the floor with plywood
In 90% of cases, floors made from a wooden base lose their appearance over the many years of their existence, but do not lose their evenness and do not require tearing off the floor. There is a solution in this case - laying a covering on top of the wooden floor.
In order not to worsen the condition of the finished floor, plywood sheets (intermediate covering) are laid on top of the wooden covering, which is used to level the floor for subsequent finishing work.
Leveling the floor with plywood sheets
Laying plywood on a wooden floor using self-tapping screws is simple, cheap, quick, and without much effort or investment.
If the finished floor is not made of wood, then you should adhere to the rules of overlay:
- When cutting the material, during installation, each one should be numbered, and the laying should be done with a shift.
- During installation, the sheets must be firmly fixed and not “walk” on the floor.
- Deformation gaps should be taken into account.
- It is good to “drive” the screw heads into the plywood so that the surface is smooth.
- Fill the identified depressions with putty.
- Use a backing.
Plywood finished floor
Wide-ranging specialists can create an indescribable beauty of finished flooring from plywood. To do this, only first grade plywood is taken for the floor, and the surface is sanded to perfect condition.
If desired, for a better appearance of the coating, it is covered with varnish, stain, and all kinds of patterns and designs.
Here are some installation options for your finished floor
Decorative plywood floor
Installation technology
Do-it-yourself laying of multilayer material along joists is carried out in a certain order.
Preparing the base
Work technology:
- The surface is cleaned of all excess. If there are remnants of the old coating, complete dismantling is carried out.
- Cracks and crevices are sealed with putty.
- Antiseptic treatment is carried out, the base is thoroughly dried.
- The surface is waterproofed. This can be done using a special covering material or thick polyethylene film. If the product sheets are joined, then the overlap distance is at least 10 cm. It is mandatory to lay the edges of the waterproofing on the walls.
Waterproofing is laid only on a dry base; if it is impossible to dry the base properly, then a vapor barrier membrane is used instead of polyethylene. A wooden beam is also prepared: it is impregnated with an antiseptic and fire retardant and dried well.
Creating a sheathing
The procedure for setting lags:
- The parts are cut to size. It is taken into account that wooden fragments must be located with a distance of at least 15 mm from the walls.
- The height is formed. To do this, the greatest curvature of the floor is determined.
- To speed up the work, a cord is pulled along both sides of the room. An alternative solution is to use a laser level.
- Laying begins from the edge with a gap of 10–15 cm from the wall. A substrate (pieces of plywood or boards) with a sufficient support area is placed under the exposed timber. The leveling parts are attached directly to the base. If the opportunity and skills are available, a special bolt system is used for the job.
At the amateur level, installing wooden joists on supports is easier and cheaper than installing a base on adjustable metal studs - The pitch is selected individually from 35 to 70 cm. It is recommended to adhere to the rule: there should be three logs per sheet with a width of 1525 mm and a thickness of 10–12 mm. The beam is attached to the substrate using screws, and jumpers are used for additional reinforcement.
- All parts are checked by level, a single plane should be obtained.
Protection, operation, storage
In order for plywood to serve for many years, you should know some of the nuances of working with it:
- The material should be acclimatized. 24 hours - with minimal temperature deviation in the store and the room for working with it. 4-6 days – with a difference of 9-12 °C, taking into account the humidity in the room. More than 7 days - with significant differences in temperature conditions, with defects in sheets, and high humidity.
- The damp atmosphere will destroy the material. Use in a damp area is prohibited.
- Laying is carried out only at 19-29 °C.
- Auxiliary processing of the material improves wear resistance and protection against fungi. The use of varnish improves strength, and the use of glue improves moisture resistance.
According to the above data, we can say with confidence that this is the best material for laying on the floor.