Beams in a wooden house. Flooring with boards 200 by 50 and other common sizes
These are the types of beams on a span of 4 meters that are allowed by the standards.
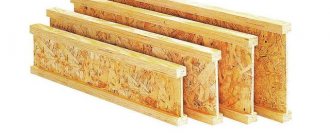
Most often, in the construction of wooden floors, boards and timber of the so-called running sizes are used: 50x150, 50x200, 100x150, etc. Such beams meet the standards (after calculation) if it is planned to cover an opening of no more than four meters. For floors 6 or more meters long, the dimensions 50x150, 50x200, 100x150 are no longer suitable. Wooden beam over 6 meters: subtleties
A beam for a span of 6 meters or more should not be made of timber and boards of standard sizes.
You should remember the rule: the strength and rigidity of the floor depend to a greater extent on the height of the beam and to a lesser extent on its width.
A distributed and concentrated load acts on the floor beam. Therefore, wooden beams for large spans are not designed “end-to-end”, but with a margin of strength and permissible deflection. This ensures normal and safe operation of the ceiling.
50x200 - overlap for an opening of 4 and 5 meters.
To calculate the load that the ceiling will withstand, you must have the appropriate knowledge. In order not to delve into the strength of strength formulas (and when building a garage this is definitely redundant), an ordinary developer just needs to use online calculators for calculating wooden single-span beams.
Leo060147 FORUMHOUSE user
A self-builder is most often not a professional designer. All he wants to know is what beams need to be mounted in the ceiling so that it meets the basic requirements for strength and reliability. This is what online calculators allow you to calculate.
These calculators are easy to use. To make calculations of the required values, it is enough to enter the dimensions of the logs and the length of the span that they must cover.
Also, to simplify the task, you can use ready-made tables presented by the guru of our forum with the nickname Roracotta.
Roracotta FORUMHOUSE user
I spent several evenings to make tables that would be understandable even to a novice builder:
Table 1. It presents data that meets the minimum load requirements for the floors of the second floor - 147 kg/sq.m.
Note: since the tables are based on American standards, and the sizes of lumber overseas are somewhat different from the sections accepted in our country, you need to use the column highlighted in yellow in the calculations.
Table 2. Here is data on the average load for the floors of the first and second floors - 293 kg/sq.m.
Table 3. Here is the data for the calculated increased load of 365 kg/sq.m.
How to determine the length of a beam
Premises in buildings under construction most often have a rectangular shape, which allows the load-bearing structures of the floor to be placed parallel to the smallest wall. The size of the beam depends not only on the dimensions of the room, but also on the material from which the walls are built.
The depth of embedding beams in brick walls is from 100 to 150 mm. When embedding into a wooden wall, the embedment rate of the beam must be at least 70 mm.
In some cases, various metal fasteners are used to place load-bearing structures of the floor. These are brackets of various configurations, corners or various perforated plates and nail tiles. When using fasteners, the length of the beam will almost always be equal to the span of the room or, in other words, the distance between the walls.
A design solution is also used when the load-bearing elements of the floor are part of the rafter structures. In this case, the beam is a structure for forming an overhang; it rests on the Mauerlat and has an extension beyond the outer edge of each wall by approximately 500 mm. This design solution can increase its length by approximately 1 meter.
When selecting and calculating wooden beams, it is necessary to remember that the most optimal distance that can be covered using these structural elements is a 6-meter span.
If it is necessary to cover large distances, it is recommended to use wooden structures of rectangular or I-section made from laminated veneer lumber or to use intermediate structures such as racks, columns, decorative arches, etc.
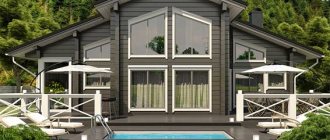
Ceiling beams in a wooden house. Ceiling functionality
In a wooden house, structures are a mandatory part of the ceiling. The owner can leave them in their natural form or match them to the style of the room. You can make an individual project that combines a strict style with room zoning. Beams can mask design flaws or utility lines. They can be used as a basis for installing other decorative parts (lamps, plasma, dried herbs).
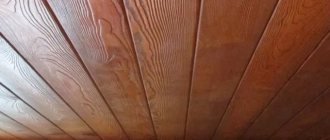
Wooden beamed ceilings are found in modern and old homes
Beam structures can be used in space zoning.
To do this, you can use the following solutions:
- place one impressive beam between two zones;
- increase the volume of space by placing a block under the ceiling surface;
- visually expand the area by fastening products on opposite walls;
- lengthen the room by placing beams parallel to the wide surface of the wall;
- lower the ceiling by fixing the material on opposite walls;
- decorate the attic and pitched ceiling with beams, paint them with the same textured shade as the ceiling.
Requirements for finishing materials
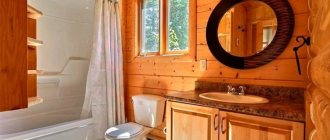
The ceiling in a wooden house is characterized by its design features; it serves as a light structure made of flooring and beams. In the gaps between the beams, the space is filled with thermal insulation.
Modern style
The ceiling finish should be light, provide sound insulation and retain heat.
The main criteria for selecting finishing materials are:
- durability;
- safety . In addition to reliability and strength, the chosen finish must comply with fire safety standards and not emit harmful substances even when heated;
- external design . Materials should be combined with the walls, creating an overall design, giving the room attractiveness and comfort.
It is better to choose natural materials that can ensure optimal air circulation in the ceiling structure.
Preparatory work
The ceiling surface is first prepared by antiseptic treatment of structural parts. In case of high humidity (in a bathhouse, kitchen or bathroom), moisture-protective compounds are additionally applied.
Spacious living room of a country house
You also need to remember about fire resistance, for which wood is impregnated with compounds that prevent combustion. Additional processing will extend the service life and prevent deformation of finishing elements.
If there is no antiseptic, the wood can be impregnated with waste (machine oil), which will protect the surface. For finishing the ceiling near the roof, polyethylene film is not suitable as a vapor barrier due to its complete tightness.
As a result, a greenhouse effect appears, which ensures the accumulation of liquid. This will lead to destruction of the insulation properties and damage to the wood.
Polyethylene film with a foil coating should have a ventilated space of 1-2 cm between the insulation and be attached with the foil facing out.
Advice
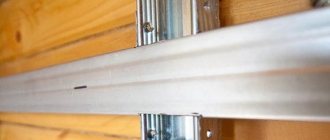
To eliminate installation errors, it is better to use Izospan and control the tightness of the joints in the film strips. To do this, use wide tape to select the joints on the joists.
High-tech style
Insulation
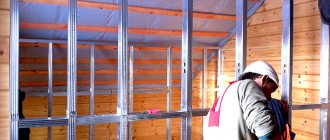
Before carrying out the cladding, it is necessary to insulate the ceiling surface, for which different thermal insulation materials are used. Insulation is carried out in the attic or inside the house, when thermal insulation is laid under the sheathing.
Additionally, wiring and other communications that were not carried out during construction work are being installed.
Binder
As floor beams, beams with a cross section of 15*15 or 15*20 are often used, and sewn boards of 15*10.5*15 cm are often used. Such materials provide suitable strength and allow the lining to be made from different coatings.
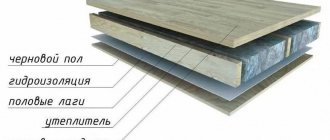
The ceilings can be attic or interfloor. In the first case, thermal insulation must be laid. Interfloor ceilings divide heated rooms and therefore require sound insulation. It is made from basalt or mineral wool with thermal insulation properties.
Protection of insulation from liquid leaks and wet fumes is provided by vapor and waterproofing. In this case, special films made of non-woven raw materials are used.
The installation of floors using this technology protects against humidity, deformation, and condensation, regardless of the chosen decorative coating. The material is hemmed using one of two methods: by hiding the beams, sewing them completely under the trim, or using them as decorative parts.
When hemming from below, lay insulation and sound insulation between the beams, hemming a vapor barrier with a finished ceiling in the lower part.
A waterproofing membrane is laid on top, the floor of the attic or upper floor. This technology is used when the ceiling height is suitable, when there is no need to save space.
When using beams in decoration, the finishing is mounted on them or hemmed to bars attached to the sides of the planks.
Necessary explanations for calculations
- Height and width determine the cross-sectional area and mechanical strength of the beam.
- Wood material: pine, spruce or larch - characterizes the strength of the beams, their resistance to deflection and fracture, and other special performance properties. Usually preference is given to pine beams. Larch products are used for rooms with a humid environment (baths, saunas, etc.), and spruce beams are used in the construction of inexpensive country houses.
- The type of wood affects the quality of the beams (as the grade increases, the quality deteriorates). 1st grade. On each one-meter section of timber, on any side there can be healthy knots measuring 1/4 of the width (face and edge), and 1/3 of the width (edge). There may also be rotten branches, but their number should not exceed half of the healthy ones. It should also be taken into account that the total dimensions of all knots in an area of 0.2 m must be less than the maximum width size. The latter applies to all grades when it comes to load-bearing beam structures. There may be plate cracks measuring 1/4 of the width (1/6 if they extend to the end). The length of through cracks is limited to 150 mm; first grade timber can have end cracks up to 1/4 of the width. The following wood defects are allowed: tilting of the fibers, tilt (no more than 1/5 of the side area of the beam), no more than 2 pockets, one-sided growth (no more than 1/30 in length or 1/10 in thickness or width). Grade 1 timber may be affected by fungus, but no more than 10% of the lumber area; rot is not allowed. There may be a shallow wormhole on the wane parts. To summarize the above: the appearance of such timber should not cause any suspicion.
- 2nd grade. Such a beam can have healthy knots measuring 1/3 of the width (face and edge), and 1/2 of the width (edge). For rotten knots, the requirements are the same as for grade 1. The material may have deep cracks up to 1/3 the length of the timber. The maximum length of through cracks should not exceed 200 mm; there may be cracks at the ends up to 1/3 of the width. Allowed: inclination of fibers, heel, 4 pockets per 1 m., sprouting (no more than 1/10 in length or 1/5 in thickness or width), cancer (extending up to 1/5 of the length, but not more than 1 m) . Wood can be affected by fungus, but not more than 20% of the area of the material. Rot is not allowed, but there can be up to two wormholes in a 1 m area. To summarize: grade 2 has borderline properties between 1 and 3, and generally leaves a positive impression upon visual inspection.
- 3rd grade. Here the tolerances for defects are greater: the timber can have knots measuring 1/2 the width. Face cracks can reach 1/2 the length of the lumber; end cracks measuring 1/2 the width are allowed. For grade 3, it is allowed to bend the fibers, tilt, pockets, core and double core, sprouting (no more than 1/10 in length or 1/4 in thickness or width), 1/3 of the length may be affected by cancer, fungus, but not rot are allowed. The maximum number of wormholes is 3 pcs. per meter To summarize: grade 3, even to the naked eye, does not stand out as the best quality. But this does not make it unsuitable for the manufacture of floors on beams. For more information about the varieties, read GOST 8486-86 Softwood lumber. Technical specifications;
Interfloor ceiling in a wooden house. Technology for installing wooden floors
To complete the work you will need the following tools:
- axe;
- a circular saw;
- hacksaw;
- hammer;
- screwdriver;
- screws and nails;
- plane;
- waterproofing and thermal insulation materials;
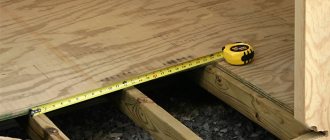
- building level at least 80 cm long.
- When erecting walls, special openings or recesses for beams are formed in their upper part. Before starting work, these nests are cleaned of dust and debris and waterproofing material is laid in them. Roofing felt is most often used. If the walls are made of brick, the nests can be treated with bitumen or mastics based on it.
- The ends of the beams are coated with bitumen.
- Place the supports in pre-prepared openings.
If the structure is made of wood, the beams are cut into the upper crown. There is a way to attach support elements to the wall, like a dovetail. It is used in houses built from logs or timber. This connection method is simple and reliable. Metal brackets are required to secure the beams.
Insulation of interfloor solid wood floors
Wooden floors in the house are installed according to the following rules:
- the timber laid in the nest must be at least 4 cm away from the walls of the recess;
- the beams should be located at a distance of 40-50 cm from the chimney;
- every 3-4 beams are attached to the wall with anchors;
- The space between the timber and the walls of the nest is filled with tow or glass wool.
The installation scheme for interfloor ceilings provides for heat and sound insulation. Therefore, the gaps remaining after laying the beams are filled with polyurethane foam.
Flooring technology
Depending on the location of the observer, the wooden floors between floors may represent either the floor or the ceiling of the room. There are special requirements for floor construction. Before proceeding with the installation of the flooring, each beam is hemmed on both sides with cranial bars with a section of 40x40 cm or 50x50 cm.