When constructing or renovating any home, wooden I-beams are often used. At the same time, they increase the reliability of the structure, reduce costs and installation time. This article will discuss the advantages of these products, their independent production, characteristic features and scope of application of such wooden beams.
I-beams made of wood
What are wooden I-beams?
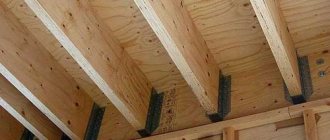
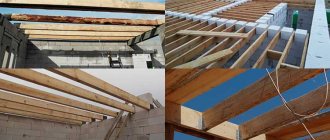
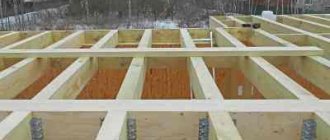
A large assortment of high-quality building materials is constantly entering the market, among which I-beams have taken a worthy place. Why is this product so popular? The beams have an unusual cross-sectional shape, where the main element creating the rigidity of the structure is the OSP, OSB (oriented strand board) board. It can also be made of thick plywood.
Externally, the supports look like rails, in which a stiffening rib in the form of a moisture-resistant plate is embedded between the beams. Thanks to this, the products can withstand heavy loads and fully retain their shape and integrity after installation.
You need to actively advertise your services. This will require personal meetings and negotiations with construction firms and companies, concluding contracts for the supply of I-beams through stores and retail chains in the city, using Internet opportunities: a one-page business card website with photos of products, prices, production contacts; announcements on specialized platforms and forums, active participation in exhibitions on building materials.
With an unlimited budget, a commercial on local television or radio, installation of a board or banners around the city, in the construction materials markets will bring results. Don’t neglect print advertising: promotional leaflets, business cards, newspaper advertisements.
Do-it-yourself I-beams made of wood
When making elements for the support beam, it is best to use laminated veneer lumber, since such a blank corresponds to the correct geometric shapes. At the same time, it is free from deformation, twisting and bending. But you can use timber from any coniferous trees, you just need to comply with the main condition - high-quality drying of the wood.
To independently manufacture I-beam supports, in addition to timber, you will need the following materials and tools:
- A circular saw;
- Wood glue;
- Roulette;
- OSB (orientated strand board);
- Channel for uniform compression of the workpiece;
- Clamps.
Manufacturing procedure
When making an I-beam from wood with your own hands, you must:
Step #1 . Make a calculation and prepare 2 timber of the required size. The greater the height of the beam, the larger the cross-section of the workpieces should be, but in any case the cross-section can be at least 40x60 mm.
Step #2 . In the middle of the products, make a groove with a width equal to the thickness of the slab, and a depth equal to 10-15% of the size of the beam. At home, you can make such a recess on a circular saw using a circular cutter of appropriate thickness.
Step #3 . Make sure that the groove does not have internal defects such as roughness, bending, or chips.
Apply glue over the entire surface of the groove.
Step #4. Insert the slab into the grooves of the upper and lower beams.
Step #5. Compress the entire structure through the prepared channels (corners) using clamps.
Step #6. Leave the entire structure in this form for several hours until completely dry.
After gaining the necessary experience, such wooden I-beams can be made with your own hands with good quality, and used in all kinds of ceilings.
Making a beam with your own hands
Necessary premises for the production of OSB I-beams
Premises of former workshops, factories, and hangars are suitable for starting a business. The required area is considerable - 150-400 square meters.
m. All communications must be available. Including power consumption production line.
It is necessary to have spacious storage facilities for consumables and finished products.
Prices
I-beams are made to a certain size and using dry timber from a certain series of wood (BP, LVL or W). And also a special adhesive composition is used, which has increased fire safety and moisture resistance. In this case, the cost of the product will depend on the length, category and impregnation applied to the surface of the I-beam.
Let's consider the prices of an I-beam support 6 meters long, category W.
| Height in mm. | Planed timber in mm. | Price per 1 linear meter in rub. | Price with bioprotection in rub. |
| 245 | 45×65 | 295 | 315 |
| 300 | 45×65 | 310 | 335 |
| 355 | 45×65 | 320 | 340 |
| 400 | 45×65 | 335 | 355 |
Cost of traverse per linear meter
Special milling machine SF-101
The special milling machine – SF-101 is designed for forming a wedge-shaped or rectangular groove in a wooden block or LVL-beam (shelf).
Press characteristics:
| Overall dimensions (mm), LxWxH: | 1500 x 800 x 1400 |
| Weight (kg): | 450 |
| Staff (persons): | 1-2 |
| Bar processing speed p.m/min: | 7,8 |
| Number of cutters (pcs): | 2 |
| Power, consumption (kW): Mill drive motor _1 Mill drive motor _2 Block feed gear motor | 3,0 3,0 0,75 |
| Additional requirements: an aspiration system is required (not included). |
GOSTs and SNiPs for I-beams
The use of supporting products in construction is regulated by state standards and regulations.
In this case, the following documents have been developed and applied:
GOST 30244-94. "Building materials and components."
SNiP 2.08.01-89. "Houses for living."
GOST 8486-86E. “Specifications for materials of species from coniferous trees.”
SNiP II-25-80. "Wood structures".
In the manufacture of wooden beams, materials from coniferous trees are used in accordance with GOST 8486.
GOST 8486. Production of cranial blanks from coniferous material.
GOST 2695. 1.3.2. Hardwood timber (alder, aspen).
SNiP II-25. Design parameters of beam wood, and it must be at least 2nd grade. For cranial bars it is allowed to use grade 3 wood.
Manufacturing and dimensions of the traverse
Wooden I-beams are made using a completely different technology than similar metal structures, although they have a general similarity.
Both wood and metal I-beams have three main elements:
- Top shelf;
- Bottom shelf;
- Partition.
But unlike iron products, for wooden floors each of the constituent elements is manufactured separately, and then the entire structure is assembled. The wall can be OSB or thick plywood, and the shelves are made of either solid wood or laminated veneer lumber. They are connected to each other using grooves and secured with an adhesive connection. Typically, the dimensions of the beams are as follows: 200 × 80 and a partition with a thickness of 27 mm.
Standard dimensions of an I-beam of wood
Depending on the load, various manufacturing technologies for wooden I-beams have been developed, and their materials and sizes will be different. This can be seen more clearly from the diagram below:
In the production of wooden floors, as a rule, special equipment is used (milling machines, circular machines, gluing machines, presses, etc.)
Common mistakes
Let's figure out what needs to be taken into account in order not to make dangerous mistakes, and what can go wrong during the production of beams.
Mistake #1
Purchase of unprepared raw materials. If you decide to make I-beams for flooring yourself, then you must not forget that in production conditions everything is made using a special technology, and calibrated dry fittings are used, which prevents the beams and boards from twisting and acquiring irregular shapes.
Mistake #2
Purchasing and using inappropriate or too cheap glue. For example, as attractive as choosing a resin adhesive may be, it is an absolute no-no when working with I-beams. Epoxy resin has very poor adhesive properties and takes too long to harden.
The best choice of glue remains polyurethane. It is thermally active, but does not ignite itself, and when working with wood this is very important.
Of course, it is worth noting that PVA glue will not work, no matter what magical adhesive properties it may have. Moment glue is also inappropriate in this case.
Mistake #3
Incorrect pairing of the beams themselves. Here you need to understand that these are not simple wooden beams, but I-beams, and attaching them with an overlap is a big mistake. They must be placed end-to-end and secured with plates.
Do not use perforated tape to prevent the beams from tipping over later. You need to use accurate calculations using a calculator.
Mistake #4
Using incorrect fasteners. The most awkward thing seems to be the use of polyurethane foam by builders to seal holes. The bookmark must be strictly special. It is forbidden to use the wrong dougong, this will disrupt the load-bearing capacity of the floor, and the entire structure may collapse.
Ordinary screws are also not used for I-beams, since they themselves cannot withstand heavy loads. It should be remembered that screws are not structural parts - they can only attach something light in weight. Also pay attention to the dougong - if its height is insufficient, then it cannot be used. Size also matters - a small bracket is unacceptable.
Advantages of using I-beams in construction
This design came to us from abroad, where beams have been used for floors in low-rise cottage construction for more than 30 years. They found basically the same application in our country.
The main advantages of using I-beams are:
- Strength. Even after long-term use, the traverses remain in their original condition.
- A light weight. Unlike metal analogues, beams are relatively easy to install, and they can bear heavy loads.
- Independence from the width of the building. The length of the support beam can be adjusted using inserts (up to 13 meters), while maintaining the load capacity and reliability of the product.
- Budget cost. The price for wooden I-beam products is significantly lower than for other similar floors. Their economic effect reaches from 30 to 200% compared to other similar materials.
These floors, treated with impregnating bioprotective agents, do not lose their qualities under the influence of moisture and temperature changes.
Advantages of I-beams
Undoubtedly, the advantages of support products of this type are enough to make a choice in their favor. And they are as follows:
- Thanks to the relatively low height of the wooden I-beam, wood material can be used most economically.
- These floors are not subject to twisting, deformation or change in size, like their solid “brothers”, which are used for the same purposes. (Such lumber in the form of timber or logs loses moisture when dried, and this causes changes in linear dimensions and geometric shape).
- When installing I-beams, hidden communications can be laid in them: cables, water pipes, air ducts.
In addition, beams are easy to install when installing floors. Builders do not need to have special skills, which significantly reduces installation time.
Comparative characteristics
For clarity, we present a comparative table of the main parameters with similar metal and reinforced concrete products, calculated for an area of 200 square meters. The table shows what replacing heavy metal and reinforced concrete structures with I-beams will give:
| Characteristic | Wooden I-beam | Board or timber | Metal I-beam | Monolithic reinforced concrete beam |
| Floor installation price per sq.m, euro | 20 | 30 | 60 | 50 |
| Installation time for floors on the area, in days | 4 | 8 | 5 | 18 |
| Number of people required | 4 | 4 | 5 | 5 |
| The need for lifting mechanisms | No | No | Yes | Yes |
| Need of wet process | No | No | No | Yes |
| Geometry of elements | No shrinkage, twisting or creaking | Possible shrinkage, drying out, cracking, squeaks | No change | No change |
| Structure weight, kg | 45 | 55 | 310 | 370 |
| Requirement for additional preparatory work. works | No | No | Seal seams, level corners, plastering | Align corners, plastering |
| Laying communication networks in ceilings | Yes | Difficult | No | No |
Assembling an I-beam
The procedure for making supports with your own hands, when the technology is followed, does not take much time:
- Coating the surface of the groove with glue;
- Connecting a slab of plywood or OSB with the upper and lower beams;
- Pressing, alignment and fixation.
When assembling an I-beam, you need to achieve not only a tight connection, but also to prevent distortion in the structure. To do this, you can use two metal channels along the entire length of the products, which, after being placed on top and bottom, should be secured with clamps.
You can watch the video to see how to assemble the beam step by step:
I-beam floor support
What is PPU timber, timber insulated with polyurethane foam?
PPU is a combined building material. Outwardly, it looks like a sandwich panel. Many fear that polyurethane foam can harm the health of home residents. But this insulation does not react to external influences and does not emit toxic substances even when heated. In addition, the material has high fire resistance, which is a definite plus based on fire safety rules.
To make insulated timber, you need well-dried boards (about 90%), from which two types of blanks are made.
Lamels are two identical boards that will be located at a distance of 70 mm from each other and form the basis of the building material. The joints that hold the slats together are called dovetails. They are placed between the boards at a distance of 50 cm from each other. When the lamellas are connected, cavities appear.
After shaping the product, the voids between the lamellas are filled with insulation - polyurethane foam, which occupies all the space and seams.
Thanks to this arrangement of building materials, it seems that the house is completely wooden.
To make glued bags, you can use valuable wood (cedar, oak, ash).
This building material can be created from different materials - noble types of wood are used for the outside, and simpler types are used for the inside.
Reinforced and lightweight beams, their advantages
Wooden I-beams have many advantages over other load-bearing floors. First of all, they are not subject to bending or twisting. Any shrinkage does not affect the dimensions and configuration of the product.
Thanks to this, the floors are always smooth and without any creaking, and the roofing is not subject to deformation. If they are used as interfloor ceilings, then the ceilings will be perfectly smooth. By using a wooden I-beam in construction, you can solve several problems at once, since it can be manipulated. In other words, the beam can be used according to the design: where it is necessary to withstand a large load, a reinforced I-beam is used.
And if during the calculations it turns out that it is possible to use a lightweight I-beam support, then this will be a good solution for the economic effect. This approach when constructing floors can result in saving both lumber and a certain amount of money.
Lightweight beam options
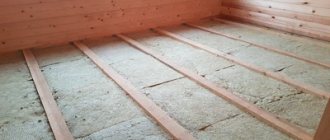
Hemming the ceiling
The next stage is extremely simple: a hemming board of arbitrary thickness is placed on the lower shelves of the wooden I-beam, which is fixed in any way. Boards can also be laid with a gap, using the rough backing as a support for thermal insulation, especially when it comes to dense materials like stone wool or EPS. This will slightly reduce the dead weight of the ceiling.
The boards should not be fitted too tightly; leave a gap of 3–5 mm for deformation during drying. If you want to immediately lay the lining under varnish, leaving the beams open, take the trouble to insulate the insulation from spillage and weathering, leave a gap at the ends of the slats of at least 2-3 mm.
You can also refuse to lay boards like this and hem the ceiling with, say, chipboard. However, the described approach allows you to avoid downtime: after all, the finished ceiling is not installed quickly, and the ceiling must be used.
DIY OSB beams
To make an I-beam with your own hands, where the stiffening rib will be an approximately stranded OSB board, first of all, you need to make a correct calculation of the expected load. The support is made independently in several stages:
- In the upper and lower beams, a groove is made in the center according to the thickness of the slab.
- Then, depending on the height of the support, a slab of a certain size is cut out and the cut is carefully processed, while chips, cuts and other defects are not allowed on the material.
- Glue is applied to the surface of the groove, the plate is inserted into the grooves of the beam.
- It is compressed under pressure and aged for some time.
You can watch the video for more details on how to independently make an I-beam from wood:
What tools are needed?
In addition to the standard tools required in construction, for this work, emphasis should be placed on two components.
- Rack. There is not much choice here - you can take either plywood or the main options - chipboard or OSB sheets, which significantly surpass fiberboard in technical characteristics. There are many alternative options on the market, but the old school is best here. It is advisable to focus on particle boards - they are more reliable and durable.
- Glue. As a rule, few people take into account that the choice of glue also plays a significant role, especially when working with wood. Toxicity here is extremely undesirable, and therefore the more natural and safe the adhesive composition, the better, especially when building a house or other residential complex (cottage, dacha).
Do-it-yourself wooden I-beam from boards
You can make any assembly element from the boards and even build a house, not to mention such a structure as an I-beam. What is such an I-beam?
This is a well-known cross-section of elements, which in shape resembles the letter “H”. Calculations show that when creating such a geometric figure from boards, the rigidity of the load-bearing support is created much greater than that of rectangular or square cross-section products made from timber.
Beam made of boards
Construction of insulated profiled timber
Insulated laminated veneer lumber can be single-chamber or packaged. The single-chamber one copes with heavy loads without problems - even taking on the entire weight of the house, it does not deform. It consists of two boards, which are fastened together with jumpers so as to obtain the desired width of the product. The resulting frame is filled with polyurethane foam. Afterwards, an internal ventilation system for the walls is installed so that the glued layer can “breathe.”
Glued laminated timber with insulation is strong and has good thermal insulation, which is why it is in demand in the building materials market.
Packaged laminated veneer lumber has one difference from single-chamber laminated timber. Inside it has not only horizontal jumpers, but also longitudinal ones. Thanks to this design, “honeycombs” appear in it, into which polyurethane foam is added. This type of building material is also called insulated double timber construction.
The use of polyurethane foam in laminated timber makes it possible to avoid special preparation of the wood from inside the structure. The main thing is to make sure that the sides that will be glued together are dry and clean, then the fit will be tight, which will make the glued building material durable.
I-beam frame house
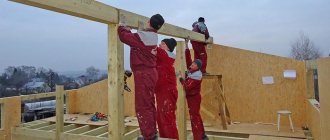
The use of I-beams in house construction makes it possible to quadruple the strength of the walls compared to simple frame buildings. As a result, a building built using Canadian technology from this material is reliable and lightweight, and the construction of the house is relatively inexpensive and with a reduced time frame.
The advantages of this structure:
- Smooth walls inside and outside the house;
- Increased strength and stability of the frame;
- No deflection, torsion and rotting of the ceiling;
- Long service life;
- Relatively low cost of constructing a building from I-beams.
In addition, when building the frame of a house, you can quietly install all communication lines and electrical wiring in the openings of the product.
Foam timber
Polyurethane foam has a number of advantages. Thanks to its low thermal conductivity, the house retains heat longer. It occupies all the space inside the frame. Thanks to this, cold air practically does not penetrate into the premises, that is, there are practically no cold bridges.
But in order to properly use insulated timber during construction, you need to organize good internal ventilation of the walls, because it has low vapor permeability. For this reason, glued material can quickly lose its properties.
