Garden decor creates a good mood and makes the space cozy and truly individual. There are many ways to decorate your garden and yard; Among them, the ancient art of sculptural wood carving stands out. Three-dimensional wooden figures, thought out to the smallest detail, can decorate any space, and they can be viewed from all sides.
Professional work Source 1000000diy.ru
Choosing an image motif
Wooden sculptures have existed since ancient Greece and Rome. In the Middle Ages this art became ubiquitous; carved wooden figures decorated temples and palaces, and a carefully carved and gilded goddess was placed on the bow of a sailing ship.
Contemporary wood sculpture impresses with its variety of stylistically different directions. These include Japanese netsuke, fancy African sculptures, and figures decorating country, chalet and art deco interiors. The accumulated wealth of ideas can become a source of inspiration for the owner who decides to decorate his site. Wooden sculptures suitable for homemade production are conventionally divided into three types:
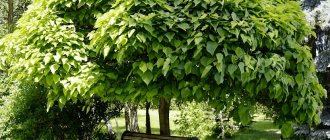
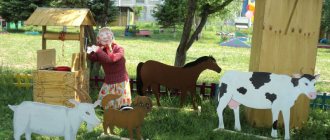
- Sadovaya. A garden is a place where you want to relax and communicate with nature, and a three-dimensional figurine will come in handy here. Very often, images of animals, real and fabulous, are chosen to decorate the garden.
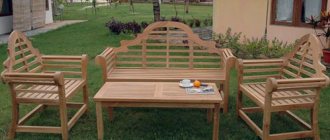
Country style Source dachnaya-zhizn.ru
- Sculpture for home. Wooden art objects are able to demonstrate the taste and inner world of home owners; they must be conceptually unified with the interior design.
- Figures for children. They are popular as an ideal educational material for children from 6 months: they are environmentally friendly, develop imagination and tactile skills.
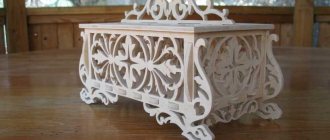
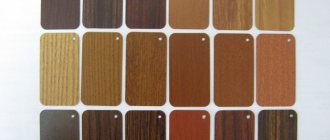
Figures made from different types of wood Source baza.zruchno.com.ua
See also: Catalog of projects of stone houses with a plinth
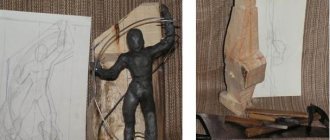
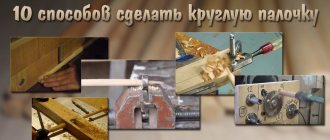
How to make a hand out of wood: work order
First, let's prepare everything we need for work:
- camera;
- wood;
- vice;
- mounting block;
- screws;
- felt-tip pen;
- band-saw;
- mallet;
- flat or semicircular chisel 12 mm;
- round, flat and V-shaped incisors;
- dye;
- wood varnish.
Take photographs of your hand from different angles and print the photos. This is necessary because The figurine is a three-dimensional image, and when cutting it out you will have to look at it from all sides. These photographs should be constantly before your eyes, i.e. they can be pinned to the wall at eye level above the desk. This concludes the preparatory work; we begin carving.
Operating procedure
- We screw the workpiece to the working block so that they are fastened “tightly”, we fix the block in a vice.
- Roughly mark the location of the figure on the block of wood with a felt-tip pen or pencil.
- Make several cuts in 25 mm increments along the upper edges of the block.
This is necessary so that the workpiece does not crack. - Use a chisel to trim off excess wood, giving the workpiece a rough approximation of the desired shape. The wood must be cut to the same depth. Start cutting out the brush last, first just mark its location.
- So, gradually removing the excess in small, equal portions, we give the workpiece an approximate shape. After this, you can begin precise processing.
- Using a small, sharply sharpened straight cutter, we carefully form the rounded surfaces of the wrist and palm. With the other hand we direct the movements of the cutter.
- We also cut out the indentations between the fingers with a straight flat cutter, carefully removing small chips. If necessary, movement is limited to the left index finger.
- A small chisel with a curved blade is used to cut out wrinkles and lines on the palms and fingers.
Skills and Tools
To make a figurine, not only practical skills are important, but also knowledge of the laws of composition. A person with an artistic education builds a detailed image of the future product in his head. If the shape is simple, an experienced craftsman begins work by marking the wood; if the shape is complex, a sketch is drawn in two projections.
It is difficult for a person without experience to imagine a spatial form in all details, so you will have to start work by making a model. The easiest way to model it is from clay or plasticine with a wire frame at the base, and work out the details in a stack.
Beginners learning how to make a wooden figurine will need some skill with tools. When making garden figures for your garden yourself, you usually use a pocket knife and a blunt knife; In this way you can perform simple elements.
Playful composition Source img.aviarydecor.com
Professional woodcarvers acquire an impressive array of tools designed for sawing, gouging, drilling and carving. Their collections consist of a variety of knives, chisels, drilling and measuring tools.
Beginners who decide to try their hand at carving should purchase a hatchet, two or three chisels and a cutting knife. For initial processing you will need a chainsaw, and for fixing small workpieces - a vice. Sooner or later you will need a hacksaw, drill, sandpaper, or sanding machine.
Wood carving tool
See also: Catalog of companies that specialize in the construction of small architectural forms (gazebos, grill houses)
Mistakes and how to avoid them
It takes a lot of time to master carving. And it goes not only to learning how to work with a tool, but also to coping with the consequences of failures and mistakes that are made due to inexperience.
Professionals advise paying attention to these “little things” that can ruin the final result:
- Only well-dried wood should be used.
- You should not hastily delve into the surface of the workpiece; all movements should be made smoothly and with minimal pressure on the tool.
- It is necessary to take into account the specifics of different types of wood, having studied it additionally, with different types of wood and you need to work differently.
- You can’t start working without a sketch; a beginner should give up improvising.
- You can’t grab onto everything at once and try to complete complex tasks; you need to gradually move from the simplest tasks to more complex ones.
Wood selection
It is believed that the ideal material for beginners is linden, which has soft, flexible wood. In fact, without practice, such a craft can be quite easily ruined by careless movement, which is much more difficult to do with hard rock. The choice of wood type is important for the type of craft. So, for example, for sculpting a face, light, plain wood is chosen (dark varieties are less expressive). Recommendations boil down to the following tips:
- If you are planning medium-sized wooden figures, apple, birch, hazel or cypress wood is suitable.
- If you are planning a miniature with a lot of detail, choose birch, alder, pear and linden; Both aspen and maple will do.
Fairytale story Source dachnaya-zhizn.ru
- Pine and spruce wood with a pronounced texture (striped pattern) are used for crafts with large elements; These varieties are not suitable for working with small parts.
- For large figures, you can use aspen: durable, inexpensive wood is not afraid of moisture and does not rot when it comes into contact with the soil.
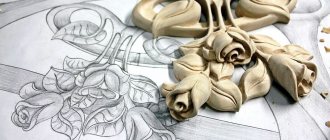
Main types of geometric carving
Over the centuries, different regions have developed their own techniques for creating beautiful patterns from geometric shapes, and their original features make it possible to classify ancient finds according to the ethnographic characteristics of nationalities.
Newer products used generalized experience, which served as the basis for the use of various techniques and combinations.
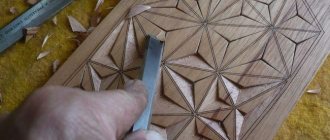
Combinations of various lines and elements are made using several carving techniques, including:
- Triangular wedge cutter, used for cutting triangular shapes.
- Dihedral, with wedges in the form of sectors or segments.
- Tetrahedral, with recesses made in the form of a square, rhombus or rectangle.
- A curved appearance, the edge of which was obtained by cutting a circle, oval, spiral or bracket into wood.
For each individual work, its own level of recess and width is selected, as well as the angle of inclination relative to the surface of the board or wooden product. The notches are combined in a given order and form a solid ornament.
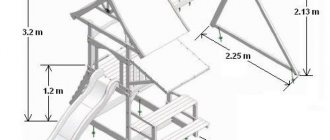
Manufacturing stages
The process of making a garden sculpture goes through the following stages:
- Rough processing. Its goal is to draw the basic shape of the figure based on the sketch, which is transferred to the workpiece through a system of control points. Work begins with the projection where the greatest material removal is expected. Based on the sketch, the general silhouette and proportions are outlined.
- Refinement of contours. It is carried out along four edges: frontal, rear and lateral. At this stage, you can refine the lines, and then, slowly, remove excess wood, getting closer to the outline and not trying to overly round the outline.
Elder Source cs2.livemaster.ru
- Doubling of edges. Four corners are removed from the workpiece, 8 faces are formed. At this stage there is no need to deal with detailing; its goal is to clarify the position, plasticity and character of the sculpture.
- Detailing. Using a chisel and mallet, they get rid of the edges, and then begin to work on small details. It is not recommended to mark details with a pencil - it will leave dirt that is difficult to remove.
- Polishing and protection. The finished figurine is treated with sandpaper or a grinding machine and coated with wax, stain or varnish.
- Coloring. If you plan to paint, the figure must first be dried for one to two weeks. If the sculpture will stand in the garden, it is painted with alkyd paints and varnished. Alternative option: the sculpture is well primed and covered with stain.
Owl Source res.cloudinary.com
Tools for working with geometric patterns
For high-quality and comfortable creative work, it is necessary to prepare appropriate conditions. You should equip your workplace with good lighting, arrange your tools comfortably, and find the right seat height.
Of the tools you need to stock up on the following set:
- A ruler and a medium-hard pencil are needed for marking and drawing figures on a flat wooden surface.
- A file or jigsaw is useful for shaping blanks for cutting.
- A compass designed for quickly marking and dividing repeating fragments.
- Several chisels and oblique knives of different widths, which are used for carving.
- Devices for sharpening tools.
The width and angle of the cutter are selected based on the sizes of individual geometric fragments, the edges of which are cut, trying not to go beyond the perimeters of the figures. To correct the pattern, you may need fine-grained sandpaper and an eraser.
Rough work
Before cutting a figurine out of wood, you need to bring the material into the desired form - saw it to size, remove the bark, if any, and thoroughly clean out the irregularities. When transferring a design onto wood, mark the main lines that will be cut out first. If this figurine is a person, it is worth determining where the head, legs, arms, and torso are. If this is an animal or some kind of abstraction, then it is also worth noting the widest and narrowest places in the figure. The excess is cut out. This is called rough processing. Its purpose is to leave in the hands of the master a form ready for detailed processing. And at this stage you shouldn’t cut off absolutely all the excess, as sometimes relief processing may be needed to make it more realistic. But even if the product does not provide anything like this, it is worth remembering that this is only the first stage of processing the figurine.
All about sculptural wood carving
join the discussion
Share with your friends
Wooden figures are a separate work of art that fascinates, captivates and amazes the imagination . There are many ways to process wood, the most complex of which is the sculptural type of carving. It was he who caught our attention.
Sculptural wood carving: features and description
Wood carving is a very ancient art. Even the approximate date of its origin is unknown. Our ancestors carved patterns, figures of animals and people, and sculptures. Often this was for religious purposes, for example, masks of pagan gods and spirits, totems.
Today, wood carving also has its fans. Some people do this just for fun, while others do it to make money.
There are several main types of thread:
- sawing and slotting;
- brownie;
- relief carving;
- in-depth;
- geometric carving;
- sculptural carving.
The most complex and interesting is sculptural wood carving. We will talk about it further.
Painting the sculpture
Painting is carried out only on dry wood. This means that for some time (at least a week) the figure should stand without finishing. And it is advisable that before painting the sculpture is already covered with primer, which closes the pores of the wood. Before painting, it is enough to dry only the top layers. If you prime the wood and then paint it with alkyd paints, the sculpture will be less likely to crack.
It is better to paint and varnish a sculpture for a garden, or prime it well and cover it with stain. For carved figurines for the home, paints are needed less often, but you can make the figurine colored: if you subsequently coat it with varnish, then virtually any paint can be used. For example, acrylic compounds are often used today.
Wooden figurines for children are often painted with regular gouache and coated with high-quality varnish (glossy, for furniture). The most environmentally friendly toy will be one coated with linseed oil.
Make a figurine yourself? Why not, it just takes a fair bit of preparation. Start with small toys based on preliminary drawings and sketches, so you will understand whether wood carving, miniature sculpture and all the intricacies of this craft attract you.
Advice from the experts
Mastering figured wood carving is a complex but fascinating process. For beginning craftsmen, we have collected expert advice that will help in this difficult task.
- Sculptural carving in wood requires a good command of all other types of woodworking. All these skills will be useful during work.
- The master must clearly imagine the result, outline all the details of the future figure and see it in all projections. Therefore, you need to create models, and from them transfer the idea to the tree.
- During processing or drying, cracks may appear on the product . No one is immune from this. To seal a crack, you need to make an impression, prepare a plug suitable in shape and size, and insert it along the contour. Small cracks can be filled with clear varnish.
- You need to work with wood carefully and carefully . With strong pressure, large cracks may appear, which will ruin the entire work.
Wood carving is presented in the video below.