Articles
All photos from the article
After renovating an apartment, a lot of scraps of various materials remain, such as wood, sheet fragments, metal corners, pipes, etc. From almost any material you can make a useful homemade product that will be beautiful and functional.
Today we are interested in a photo frame, and not a prefabricated one made from scraps of wooden baguette, but a monolithic one made from sheet material. Our instructions will tell you how to make a photo frame from plywood with your own hands.
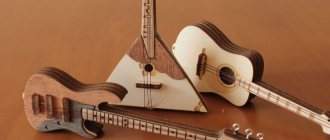
Classic frame.
What will you need?
A decorative tree made of plywood, made by yourself, is considered the most successful idea for the design of a room. To make such a decorative item yourself, it is enough to have sheet plywood and the following auxiliary materials on hand:
- electric jigsaw;
- drill;
- scissors;
- pencil;
- Double-sided tape;
- template-drawing;
- sandpaper or sanding machine;
- furniture varnish;
- self-tapping screws;
- various decorations for decoration.
As for the main material - plywood, it is better to choose it with a thickness of at least 10 mm. Sheets must be first or second class, without defects.
It is best to give preference to coniferous plywood; it is inexpensive, looks chic in the interior and has good moisture resistance.
Hardwood plywood is durable, but expensive and is only suitable for making crafts that are planned to be placed indoors.
DIY photo frames step by step: master class with photos and descriptions
As mentioned above, the frame can be made of any material and adjusted to any photo size.
Expert opinion
Strebizh Viktor Fedorovich, leading construction foreman
Combining different photographs in one work in accordance with the chosen topic, this technique requires not so much special skills as love for creativity and for your family. If you want to clarify something, please contact me!
Photo frame sizes
The first frames appeared long before the advent of photographs and the ability to take photographs. They were used to frame pictures. The artists chose the sizes of the canvases to their taste, and the owner himself ordered a frame for the finished painting. In those days, painting a picture was not a cheap pleasure, and the design led to additional considerable costs.
With the advent of cameras, manufacturers of photographic products came to the conclusion that standardized frame and photograph parameters significantly reduce the cost of production. This made photography more accessible. The sizes of photo frames were also standardized according to the size of the printed photos.
Most Commonly Used Photo Frame Sizes
Standard sizes of photo frames now mainly depend on the sizes of photo cards printed in a photo salon or studio.
What are the sizes of photo frames:
- B7 is a well-known size for small photos - 9x13 cm. This size is more suitable for photos in an album, although small photos can be used in multi-frames or modular ones, depending on the designer’s idea.
- A6 is also one of the most used standards for photos - 10 cm by 15 cm. This is ¼ sheet of the classic A4 paper format.
- B6 – photo size 13x18 cm, the largest of the common variants of classic photography. This format is large enough to place a photo of this size on the wall; from a distance you can already see the details.
- A5 - the size of the photo and photo frame, respectively, appeared largely thanks to the same standard A4 sheet, since A5 is half of it and is equal to 21 by 15 centimeters. It is convenient to print this format yourself on a printer at home or at work. Photo frames of this size are most often found.
- A4 - as in the previous case, we are actually talking about two slightly different standards - 20x30 cm and 21x30 cm. This format is widely used because not only in a photo salon you can print photos in this format. At home, many people print out certificates, thanks, and diplomas, which are then placed on the walls of apartments and offices.
Popular photo sizes of standard A
All of the above are standard frame sizes that are widely used for photo cards that match the parameters.
Custom sizes
Selecting the size of the photo frames discussed above will not be difficult; they are often used and therefore in demand. You can find them in any large office department or in a photo salon. Things are a little more complicated if the dimensions of the required frame differ from the standard, or are shaped like an oval or circle. Or you need a large photo frame. They either have to be ordered online or made individually.
For photos of standard large sizes, frames of sizes A3, A2 or A1 are used, depending on the size of the photo, poster or painting. These parameters correspond to standard sheet sizes of paper and cardboard. So: A3 is 30x40 cm, A2 is 40x60 cm, A1 is 60x80 cm.
In addition to the A and B paper standards, there is a relatively rare group of SRAs. These sizes are a cross between standards A and B. For example, SRA0 is a size of 90x120 cm, and SRA3 is 30 by 45 cm.
Custom SRA size
Unpopular sizes C and B
Rectangular shapes of photographs and photo frames are considered familiar and common. But the square frame is already considered non-standard, and finding it is more problematic. A frame with this shape looks unusual and original, and placing it in the interior is a little more difficult than a rectangular one.
Square photo frames look more unusual than rectangular ones
Round and oval frames are mainly used for portraits. They are reminiscent of the photographic traditions of the past. The very absence of angles in the photograph evokes in viewers associations with something vintage.
How to make your own photo frame
- first you need to select the picture you like and transfer it to the working window of the program;
- then you should select the scaling section, taking into account the dimensions of the existing sheet of plywood;
- the finished drawing is divided into fragments, each of which is printed in turn;
- The preparation of the template is completed by gluing all the fragments into one sheet, after which the contour is carefully cut;
- Next, the template is applied to a sheet of plywood and outlined with a simple pencil.
Wooden half frame
Another option for making a photo frame using wood. Such a product can fit into more modern designs, and its manufacture does not require special skills. It is enough to follow all the rules and recommendations.
Tools and materials
To create a half frame, prepare the following:
- photo in the size you choose;
- two light wooden strips;
- a piece of fabric;
- natural rope;
- special eye screws large enough to pull the rope through;
- some polymer clay;
- stapler;
- universal glue;
- scissors;
- pencil and knife.
Making a wooden half frame
You also need to prepare a ruler or other measuring instrument. Once everything is ready, you can start working.
Instructions
Step 1 . Set the recommended temperature to preheat your oven to make polymer clay. Then, using a knife, cut the clay into two even pieces. Roll them in your palms to form smooth balls. Use a pencil to make a hole. The diameter of the hole should be slightly larger than the thickness of the rope. Place the finished clay on a baking sheet and bake for a few minutes until the material hardens.
A hole is made in the ball
Step 2 . While the clay is baking, use a cloth to rub the varnish or stain into the wood, giving it a deeper shade. Don't forget to add old sheets of paper to avoid damaging your home surface. Leave the wood until completely dry.
The wood is given a deeper shade
Step 3 . Take one of the wooden strips and, measuring about 3 cm from both ends, make marks with a pencil.
A wooden strip is marked
Step 4 . Screw both eye screws into these points until they are tight.
The eye screws are tightened
Step 5 . Place the top of the photo or painting face down on the top strip of wood (with screws). This will be the back of the picture. Carefully align the paper so that it is centered and straight. Then secure the canvas with a stapler and glue.
The paper is neatly aligned
Step 6 . Place both clay balls onto the rope and thread the end of the rope through one of the eye screws. Tie a tight knot and then do the same on the other side. Remove any excess rope and use all-purpose glue to secure the edges. This will protect the clay balls from wearing out and the knot from coming undone.
The edges of the nodes are fixed with universal glue
Step 7 . Now all that's left is to hang your new wall art in a place of honor.
The finished frame is hung on the wall
Photo half frame
Another photo of the craft
Manufacturing technology
Wood made of plywood is considered the most popular decorative item in a modern interior.
Before you make such a craft with your own hands, you need to decide on its size, shape and purpose. Many people prefer to make a large family tree; the process of making it can begin after preparing all the photographs of relatives.
To make such an interesting decorative item, you need to follow some steps step by step.
- First, drawings and sketches are prepared, according to which templates for all elements and the trunk of the future tree should be cut out. Then frames for family photographs are measured, and boxes from boards are prepared. The frames must include holes for subsequent fastening. Photo frames and boxes should be primed.
- The next step is to attach the hooks and loops. It is recommended to lay thick fabric at the bottom of the box, giving preference to natural materials.
- Putty should be applied to the prepared plywood trunk, which will allow it to acquire a natural texture. Once the putty surface has dried, you can safely proceed to sanding and painting, using dark brown paint.
- The process of making a family tree is completed by cutting out leaves from paper and gluing them to the trunk. To give the foliage more volume, they are folded in half. After this, photographs of relatives are placed in chronological order.
A wish tree made of plywood also looks no less interesting in room design. It can often be found in the homes of newlyweds. Each invitee can write their congratulations or wishes to the lovers and hang them on the tree.
Carved wood also looks gorgeous in the interior, but its production is expensive compared to plywood crafts.
Which is better: heated floors or radiators?
Warm floorBatteries
To make a wish tree, you need to cut out a trunk, crown and branches from sheets of plywood. All parts are carefully sanded, primed, painted and attached to the wall.
Making a DIY photo frame is not particularly difficult. You can decorate paper with anything, but the decor should not be too heavy. Let it be inscriptions, stamps, glued buttons, paper flowers. When decorating it in a modern style, you can paint the frame with chaotic abstract elements using a regular marker.
You can make a variety of photo frames with your own hands from cardboard. This will be a stronger and more durable option, unlike paper.
We will look at a standard method that anyone can do. It is better to take very thick cardboard, in this case the frame will last much longer. Accordingly, you need scissors that can easily cut through such cardboard, Moment glue or hot glue with a hot glue gun.
In addition, you need a loop for hanging or an additional piece of cardboard for the leg.
Plywood tree (16 photos): how to cut a family tree for the wall? Layouts, templates and do-it-yourself drawings of large carved trees
For beginning craftsmen who plan to make such a craft for the first time, experts recommend choosing simple models. They will be much easier to cut and assemble.
Expert opinion
Strebizh Viktor Fedorovich, leading construction foreman
Hardwood plywood is durable, but expensive and is only suitable for making crafts that are planned to be placed indoors. If you want to clarify something, please contact me!
Popsicle stick photo frame
Popsicle stick frames are beautiful and easy to make. Even children can make such crafts and give them to friends, family members or teachers. With a little time, you can also create your own stick frame.
Simple option
Step 1: Find 4 Popsicle sticks. You will need one stick for each side of the frame. If you need a thicker frame, glue 2 sticks together to make one wide one.
Popsicle sticks
Step 2 . Glue the sticks together to form a square and wait for the glue to dry. To do this, use regular PVA glue.
Gluing sticks
Step 3 . Paint and decorate the frame. This can be done using markers or acrylic paint. Let the frame dry and then decorate it. You can write something on the surface of the product, such as “Daddy and Me” or “I love you, Mommy.” You can also glue items such as glitter, gems or buttons onto it.
The frame of the product is decorated
Step 4 . Place the finished frame on the photo and trace it from the inside using a pen. Photos can be valuable, so it's best to use a copy instead of the original.
Marking is being applied
Step 5 . Cut out the photo. Try to go a little beyond the line you drew. This way your photo won't stick out from the frame.
Photo cut out
Step 6 . Glue the photo to the back of the frame. This manipulation will make the frame and photograph a permanent structure.
Pasting photos
Step 7 . Add ribbon to the back of the frame if you want to hang it on a nail. Cut a piece of tape, flip the frame over, and apply some glue to the top left and right corners. Press the ends of the tape for a few seconds to secure the tape. Let the glue dry and then hang the frame.
The tape is fixed at the back
Step 8 . If you wish, you can glue magnets to the back of the frame so that it can be attached to the surface of the refrigerator instead of a wall. Turn the frame over and apply some glue to the top and bottom of the frame. Press the magnet and wait for the glue to dry. Place the frame on the refrigerator door.
Gluing the magnet
Step 9 . The popsicle stick photo frame is ready. If desired, it can be hung on the wall or attached to the metal surface of the refrigerator.
This is what the finished craft looks like
Reusable frame
Step 1 . Line up 8 popsicle sticks side by side. Lay them horizontally. This will form the basis of your photo. You shouldn't glue them together.
8 popsicle sticks
Step 2: Use a hot glue gun to glue three sticks on top of the horizontal sticks. Place three sticks vertically. Glue one stick in the center of the base of the frame. Glue the other two sticks to the left and right of the base. This will serve as the basis for the entire structure.
3 more sticks are glued on top
Step 3 . Turn the frame over and place a photo of the appropriate size. Place the photo in the center of the design, but do not glue it. You will use the photo as a template.
Photo is placed
Step 4 . Draw a vertical line of glue on both sides of the photo. Make sure the line goes from the bottom of the frame to the top. Be sure to leave a small gap between the glue and the edge of the photo. This way the glue won't get into the photo.
There should be a gap between the glue and the photo
Step 5 . Place the popsicle sticks on the glued surface and press them with your fingers. Hold the chopsticks upright. Make sure the inside edge of each stick overlaps the photo. This will help secure the photo inside the frame. Otherwise, it will simply fall out.
Sticks are pressed with fingers
Step 6 . Glue one stick on top and bottom of the frame base. Apply glue to the surface of the sticks to be glued and fix them in the position as in the photo.
The same is done at the top and bottom of the frame.
Step 7 . Place three sticks on top of each other and secure them with glue. Make another element as in the photo. These will support the bottom of the frame so it can stand.
Creates additional frame support
Step 8 . Glue each stack to the bottom of the frame base. One of them will be in front of the photo, and the other will be behind. This will make the entire structure more stable.
This will make the frame more stable.
Step 9 . Decorate the finished product. Paint the frame and let it dry before decorating. You can write something on the surface of the frame, such as a name or a short message. You can also glue on various small objects, such as glitter, gems or buttons.
The frame can be further decorated
Step 10 . Slide the photo across the top of the frame. To put another photo or image, simply pull it out and replace it with a new one.
A photo is inserted at the end
Making a picture frame with your own hands |
DIY embroidery frames: how to make them at home from cardboard and ceiling plinth? Embroidery hoops made of wood and scrap materials
We will look at a standard method that anyone can do. It is better to take very thick cardboard, in this case the frame will last much longer. Accordingly, you need scissors that can easily cut through such cardboard, Moment glue or hot glue with a hot glue gun.
Expert opinion
Strebizh Viktor Fedorovich, leading construction foreman
Today we will dive into the creative process and find out what it takes to make a beautiful frame from different materials. If you want to clarify something, please contact me!
Preparing tools
As the main material, you can use various wooden products, for example, plywood or parts of pallets. You can easily make frames or other products from them. After choosing the design of the future frame, you need to prepare working tools.
Preparing tools
Table. Tools for making a wooden frame.
| Position name, photo | Description |
| Wooden elements | Various wooden options will work, such as popsicle sticks, unnecessary slats, or part of a pallet. Alternatively, you can buy ready-made wooden baguettes and make an elaborate frame out of them. |
| Fasteners | You can use wood glue or special finishing nails to join individual pieces of wood together. If the structure is very large and reliable fixation is needed, then these types of fastening can be combined. |
| Saw and miter box | Using these tools, you can cut pieces of wood at a certain angle, which is very important when creating a frame structure. The resulting joints are of the highest quality, which has a positive effect on the appearance and reliability of the frame. |
| Clamp | If you plan to seriously engage in the manufacture of frames in the future, then a clamp will allow you to obtain ideal quality products. It is needed to press the parts of the structure while gluing them, thereby maintaining the ideal geometry of the wooden craft. |
Note! Be sure to buy paints and varnishes to process the finished structure. For this purpose, acrylic paints, stains, impregnations, varnishes or other wood compounds can be used to give the frame an elegant appearance.
Master class: birch bark photo frame
DIY frame - features of manufacturing and application in interior design
Instructions for making from a wooden frame
Now we glue the parts. Apply PVA glue to the ends with a brush, then assemble the frame and tighten it around the perimeter with a rope, pulling it from the middle to the corner on four sides using wooden blocks. It is advisable to lightly press all four slats to the plane of the table so that they do not move while the glue dries. The structure must dry for at least a day.
Then reinforce the corners. Glue a wooden or plywood corner on the back side, which is best embedded flush with the plane of the frame, retreating 15-20 mm from the outer edge of the baguette. Trace the scarf with a pencil, use a hammer and chisel to make a groove and place the part in it using PVA glue.
After the glue has dried, the frame must be given a finished look, that is, the final finishing must be done. Trim along the outer perimeter with a plane, sand down any existing unevenness on the outside. After this, coat with varnish, stain or paint, depending on the desired decorative effect.
Making your own photo frames from cardboard: how to create it easily and simply
Photo frames can be either thematic or classic, it all depends on your capabilities and imagination.
Expert opinion
Strebizh Viktor Fedorovich, leading construction foreman
If for some reason it is impossible to print now, just take a photo, trace it along the outline, and leave stripes 1.5 and 1 cm wide on the sides. If you want to clarify something, please contact me!
How to make a photo frame with a jigsaw
On the NemolotokTV channel they showed how to make, using a jigsaw, a photo frame in which you can place a photo of a famous actress or your loved ones. The result was an original and beautiful product.
Original photo frame with a jigsaw
Today we will work with the Rose template. The photo frame template itself looks relatively simple. But we will create an unusual picture frame from it. The template has already been transferred to plywood. Before sawing, we will make internal holes with pushpins. We just need small holes so that the internal parts can be reused for another craft. Each hole must be widened so that the jigsaw blade fits through it. It is convenient to make two holes as close to each other as possible. And then combine them into one.
This Chinese store has a lot for woodworkers.
Sawing a photo frame
Let's start cutting. First we cut out the general outline. Then loosen the screw that secures the jigsaw. We take out the canvas. We insert it into the inner hole, fix the jigsaw with a screw again and begin cutting. The first part is ready. Then you can continue in the same way. Or you can change it a little.
Products for inventors Link to the store.
Let's take an old, dull jigsaw blade. Use pliers to remove the protective cap. Now the jigsaw can not be removed from the machine. But you will need to be extremely careful when working on a machine with such a jigsaw. The jigsaw had previously become dull. Therefore, in order to work with it again, it will need to be shortened. So that the dull teeth are lower than the working area of the jigsaw. Our jigsaw has become shorter. But its length is enough to saw our plywood. And it will cut like new again.
DIY electronics in a Chinese store.
We replace the jigsaw on the machine. And let's start cutting. So we cut out all the remaining parts. At the end of the work, be sure to put back the jigsaw blade with the protective cap. Next we cut out a frame 3-4 mm wide. To do this, you can use leftover plywood from other crafts.
We will glue the frame. Therefore, it can consist of several fragments. We place the frame on the second part of the sheet and place the sheet with the rose on top. This is what our picture frame will look like.
Sanding a photo frame
Let's start sanding. Our parts are relatively large. Therefore, the first sanding can be done with paper with grit P 120. We do not sand the outer edges at this stage. We will sand them after gluing. Next, we take paper with grit P 320 and do a fine sanding. As usual for internal parts, we cut the paper into strips, attach a clothespin and sand.
Coloring
Before gluing, we need to paint the inside of the parts. We temporarily isolate the areas where the glue will be applied with paper tape. We will paint the lower part from the inside with azure. Teak color. Stir the glaze. And we begin to apply with a semi-dry brush and rub well. The top piece will need to be painted from the inside. Before we glue. We will also paint with Renner glaze - chestnut color. This is a darker tone so we have some contrast. We start by painting the inner edges. They need to be painted very carefully. So that there are no drips on the front side.
Next, we begin to paint on the inside. Here, too, it is important to prevent drips on the front side. We leave the edges of the part unpainted - where we will apply glue. The teak glaze bottom piece has dried. Now we apply varnish to it. We paint with Renner M827 varnish under a brush. Stir and apply in a thin layer. The varnish is applied, like transparent paint, in a not very thick layer. Otherwise, bubbles may remain on the surface after drying.
Let the first layer dry for an hour. Then we do a light sanding to knock down the pile. And apply the second layer. The varnish has dried. Remove the strips of tape.
All parts are ready for gluing. We will glue them together with bindex. As usual. The reason is that it is slow. You can have time to fix everything. And after drying it becomes transparent. Those. almost unnoticeable. We apply bindex to the frame parts. Apply to the bottom part. Then we apply it on top of the frame. We install the top part. Next, we check from all sides and align all the parts.
Usually, when we paint large sheets of plywood with water-based materials, the sheet of plywood may become slightly deformed. On flat crafts this is not very noticeable. But on composite products like ours, the deformation is noticeable. That's why we put our parts under the press. You can use clamps. You can just books or other flat and massive objects. Let it dry for several hours.
Final processing
Our picture frame is almost ready. In principle, you can leave it in this form. Dark azure on the inner edges looks aesthetically pleasing. You can only do external sanding and apply varnish. It's transparent. After drying it will look exactly like this. If you want to preserve the feeling of untreated wood, then instead of varnish you can apply the lightest of oils - maple. You can leave it without finishing. But then the surface will be less protected.
We will grind the edges on a machine. And we will try to make all 3 parts look like one. To do this, draw lines as close to the edge as possible. And then we sand the edges, focusing on these lines. After this we round the corners. Next we sand it by hand. In order to give a rounded shape to all corners and edges, we need paper with large grain. We'll take P120. If you have a hand nozzle, you can do the same with it. This is, of course, more convenient. Next we place a circle with a finer grain. We have P220. And for the final grinding we use a wheel with P400 grit. We aligned the ends of all 3 parts. Corners and edges were rounded.
Now we remove the dust and start painting. We will paint the outside on all sides with Renner Azure, chestnut color. To avoid staining the inside, insert a paper plug. It is better to take a laminated magazine cover. So that the plug does not become soaked through. We begin to apply the glaze from the ends. Dry the first layer of glaze for 1 hour. Then we do a light sanding to knock down the pile. It is very important not to sand. Azure has a thin film. Therefore, you need to sand carefully. Don't push. The goal is to make the entire surface matte. Next, remove the dust and apply the second layer. The second layer of glaze has dried. And we can leave it like this.
For a painting that is not under load, glaze can act as a finishing coat. But let's add another layer of varnish to give the characteristic shine of the varnish coating. We do light sanding again. We put the paper plug again. We will apply the same varnish M827 under the brush. Apply a thin layer. We carefully ensure that there are no drips. Varnishes have a high dry residue. Any drip will be visible after drying. This is what we got in the final. You can do another sanding and apply another coat of varnish. The shine will be even more pronounced. But the surface will also become even less wooden in appearance. We will leave the product as is.
Bottom line
So, we have a picture photo frame. She looks beautiful on her own. But you can insert photos, foil, colored paper, velvet or even fabric inside. For the photo it is important that the eyes do not overlap. Although, it depends on who is important in the photo. Maybe a little mystery will be even better. From the cutting template you can make a template for the inserts. And by trying it on in a photo, you will immediately see how best to cut it to get the best look. For grandparents, you can make a collage with photographs of children and grandchildren. For most situations, the petals should be sufficient. Read how to hide defects and how to cover the surface of wood.
A Practical Approach to an Aesthetic Attribute
A photo frame in the interior can be successfully turned into an object of important utilitarian value. The frame is easy to add and make from it:
- a mirror, albeit defective, but sufficient to look at before leaving the house,
- key holder - with hooks along the bottom edge, designed for hanging house keys, a first aid kit, a mailbox,
- a hanger where the photograph will play an additional role: if the hanger is for children, the hooks will be located low, and the gaze of adults will fall on its top, where the photos are placed,
- a “reminder” board, if you attach a hanging notepad with tear-off leaves to the bottom of the photo frame,
- an album or diary, where a photo frame will become the basis of the cover.
Your own intuition will tell you how to make a picture frame. If the picture is a drawing by a 3-year-old child that you want to frame and keep as a keepsake, the frame should be durable and appropriate to the theme
If you want to hang on the wall a landscape drawn by your daughter in art school, you should take care of a decent level of execution of the frame. It can be wooden, with hand-made carvings, or plastic, with gold-plated inserts.
What will you need?
It is best to give preference to coniferous plywood; it is inexpensive, looks chic in the interior and has good moisture resistance.
Expert opinion
Strebizh Viktor Fedorovich, leading construction foreman
Before you start making a tree from plywood, you must first prepare a sketch, which will then be used to make a paper model and a template for cutting out the necessary parts. If you want to clarify something, please contact me!
Plywood photo frame
One of the simplest options for making a photo frame is using a plywood sheet. Thanks to its simple design, you can make such a frame in just a few steps.
Step 1. Prepare all the necessary tools for work.
Tools and materials
Step 2 . Paint the pre-cut boards some color, preferably dark tones.
Painting details
Step 3 . Wait a few minutes for the paint to dry.
Wait for the paint to dry
Step 4 . Apply double-sided tape to the wooden board.
Double-sided tape attached
Step 5 . Remove the backing from the double-sided tape.
Removing the backing
Step 6 . Carefully place your photo onto the tape.
Photo is pasted
Step 7: Adjust the dimensions of the photo if necessary - you may need to trim the edges of the photos so that the dimensions exactly match the dimensions of the frame.
The edges of the photo may need to be cropped.
Cropping a photo
Result of work
Step 8 . That's all. The plywood photo frame is ready.
Finished frame
You can make several of these frames
Such products are beautiful and elegant, and they are very easy to make. All that remains is to hang the finished craft on the wall and enjoy its look.
Decorating a photo frame
- from cardboard,
- from colored paper,
- from corrugated paper using the quilling technique,
- from scrap materials - from plastic bottles, from tubes glued together from old newspapers, etc.,
- from natural materials - stones, cones, shells, etc.
How to treat the surface → Room decoration → How to choose the right paint → Surface treatment technologies → Leveling and finishing the walls → Selecting and applying a primer → Removal from the surface → Stretch ceilings and technologies → Reviews and testimonials
Types of photo frames
There are many options for photo frames. When creating them, materials can be used from the simplest to exclusively professional ones, requiring pre-order in specialized salons or online stores. The resulting hand-made little thing no longer falls into the category of ordinary photo frames.
Wooden undecorated photo frame Multi-frame - for a collage of several photos
Photo frames may vary in material, installation method and type of execution. According to the type of placement, frames are divided into: wall-mounted, table-top or universal. By execution type:
- single;
- multi-frames - frames on several photos.
According to the type of attachment to the surface, in addition to the classic one - hanging on a nail, photo frames can be magnetic, which allows you to place it, for example, on a refrigerator or on another metal surface.
With singles everything is quite clear. Multi-frames are frame collages, which are arranged depending on the number of frames included in the module, and on the taste preferences of the author.
Modular symmetrical multi-frame
A multi-frame has a single base on which several photos are placed, each in its own smaller frame. Multiframes can be:
- symmetrical;
- asymmetrical;
- with internal frames of the same or different sizes, etc.
A multi-frame can also be one large frame, for example, size A2 or A3, the photos inside of which are attached with decorative clothespins or bright stationery nails.
One example of an original multi-frame for photos is a panel designed in the form of contrasting puzzles, and each puzzle contains a photo. So, what materials can you use to create modern photo frames if you want to create and decorate yourself?
The main element in any photo frame is what the photo will be attached to. First of all, a foundation is required and the following can serve as it:
- cardboard;
- wood (processed and unprocessed, dry branches, etc.);
- plastic (for example, old CDs);
- glass or mirror;
- any other hard material that is at hand and matches the design idea.
Photo frame from CD discs
The most common and affordable materials as the basis for a future photo frame, of course, are thick cardboard, paper and wood.
Types of decorative frames by type of material for their design and decoration
The huge amount of decorative materials that currently exist provides craftsmen and craftswomen, as well as those who just want to start creating with their own hands, unlimited freedom of choice. When it comes to creating modern photo frames, the most commonly used materials when decorating are:
- colored paper;
- cardboard;
- felt;
- foamiran (“plastic suede”);
- decorative tape;
- fabrics and finishing materials (including jeans, lace, buttons, buckles, etc.);
- pebbles;
- shells;
- dried flowers;
- artificial flowers;
- cereals and dough.
Various interesting small-sized products made of wood, plastic, metal, glass and stones are also actively used by home craftsmen for decoration and finishing.
And this is not a complete list of materials that can be used to decorate an original handmade photo frame. You can even use colored tape and pencils!
Frames made from colored pencils can be used not only for photographs, but also for children's drawings
Features of working with the material
What is a plywood sheet? It consists of several sheets of veneer, which are connected to each other using glue.
Not only the quality of the finished product, but even its structure and color depends on which sheet you choose.
If you are going to cut out various figures using a jigsaw, then you need to choose the highest quality types of plywood.
They are particularly durable, which ensures that the plywood will not crack, ruining the entire appearance of the product at the most unpredictable moment.
If you are going to start working immediately, immediately on the day of purchase, then choose only dry sheets of wood.
They won't break the jigsaw blade every 10 minutes.
To work with plywood, you will need to acquire a number of tools.
- Jigsaw
- Jigsaw files
- Hand or electric drill
- Awl
- Ruler
- Grinding machine
- Burner.
Pallet picture frame
If you don’t know what to give to a friend or loved one, then a frame made from a pallet is a great gift. To make it, you don’t need any special tools or skills, so anyone can make such a picture frame. You just need to follow the step-by-step instructions below.
Step 1 . Find a whole pallet or small parts of it. Select four small boards to form the frame and make sure they are all long enough.
The boards must be long enough
On a note! If you have spare parts from an old pallet, you can use them to decorate the finished structure. They may also be needed if you made mistakes while working.
Step 2. Decide on the photo size. Take measurements and use them to control the wood you cut.
You need to decide on the size of the frame in advance.
Step 3 . Cut the wood pieces to size. Using your measurements, cut the pieces of wood to the width and length you need for the frame.
Elements of the future frame
Step 4 . Sand the surfaces of the wood pieces using a plane (or have someone do it for you). This must be done with each of the blanks.
Workpieces need to be processed
Step 5 . Form a square frame on a flat surface. Glue the four pieces together at the junctions. Use clamps to tightly connect the parts. Aim for a very neat and tight fit at every corner. Clamps (such as clamps) will help create the necessary pressure. Leave until the glue is completely dry before removing the clamps.
Glued frame
Step 6 . Apply varnish to the surface of the frame. If you want to decorate it, then after varnishing the product can be painted in different colors.
Frame after applying varnish
Step 7 . Glue a thick piece of cardboard to the back of the frame, leaving the top part unglued. The picture or photograph will need to be inserted into the frame through the top. Glue some string to the back and hang the finished frame on the wall. Instead of a loop, you can make a cardboard leg that is attached to the back of the product.
Corrugated cardboard is glued to the back
Step 8 . Insert the photo and hang the frame on the wall in a suitable place. Everything is done, all that remains is to enjoy the result of the work done.
Finished photo frame