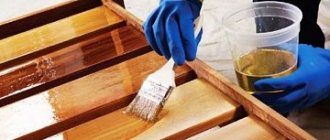
Pigment stains are the least sensitive to the chemical composition of the finishing layer applied over them. Almost any coating can be applied to the dried stain, for example, oil or water-based varnish for finishing wood, tinted water-based or oil-based stain. The stain must be completely dry before applying varnish. The drying speed is affected by temperature, as well as the humidity of the surrounding air and the wood itself, so you should not pay special attention to the instructions on the can. Use your nose: if you smell solvent, the stain is not yet dry. Dyes are more capricious. If you apply a varnish containing the same solvent with a brush or swab, you can leave streaks and partially mix the dye into the varnish. Sometimes it is possible to achieve greater color depth, but more often the quality of the coating decreases. If you have the appropriate equipment, it is better to apply the varnish by spraying to avoid problems.
Dyes, pigments and methods for obtaining the desired color
You've assembled your next project and carefully sanded all surfaces. There's already a can of varnish nearby, but this time you don't want the wood to have its usual color. You want this item to match the old decor of your living room or to be indistinguishable from expensive furniture sold in interior showrooms. However, perhaps you just need to match the color of the different boards from which the project is made, imitate exotic species, or make the texture of the wood more expressive, and its usual color more saturated. If you are faced with one of these tasks, it's time to start toning.
Tinting is based on two types of coloring substances - pigments and dyes. We'll help you choose the right tool for your project and show you how to work with it.
Choosing the “right” boards
Pine has significant knotiness, but in our case this is part of its attractiveness and uniqueness. Regular, non-rotten, hard knots, which are an integral part of the structure of the board, are not a hindrance, but “dead” such elements of wood should be avoided. That is, the rotten ones, those that stagger, fall out. Also, boards with accumulations of these formations near the core or with knots around which the wood grain lines sharply change direction should be rejected.
But even boards with these disadvantages are quite suitable for use. The problem can be solved in a simple way: by securing the falling knots with epoxy glue. Do not be afraid that over time its adhesive properties will weaken and the board element will fly out or crumble. This glue is based on epoxy resin, which is extremely durable after drying.
How to choose one option from many possible ones
What type of dye do you prefer? You have a wide choice (photo below). The decision depends on what kind of wood you use, what look you want to give it, and what kind of coating will be applied at the final stage of finishing.
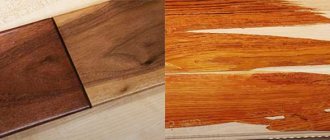
For regular tinting, use pigment stain or dyes. These dyes work differently (photo below) and will produce different results as you can see in the photos below. Pigment stains are sold in stores that sell paint and varnish materials, and dyes can be found in specialized stores or ordered from catalogs.
Pigment stains unevenly stain wood with areas of varying density, such as maple, birch, cherry or pine. Dyes penetrate deep into the surface regardless of the density of the wood. Having chosen the desired shade, remember that all dyes fade over time. Pigment stains retain color the longest. Among dyes, the most persistent are water-soluble ones, while oil or alcohol solutions of dyes fade quite quickly. Do not use dyes for tinting if the wood is exposed to sunlight - in such conditions they fade very quickly.
Conclusion
I would also like to remind you that the final shade of a wooden product takes on only after complete drying and if stable temperature conditions are maintained in the room. In cases where humidity fluctuates greatly, an additional deviation from the desired result is possible - the tone may be darker (read also the article “Wax coating for wood: compositions. Preparation and application”).
In the video presented in this article you will find additional information on this topic.
Easy to apply
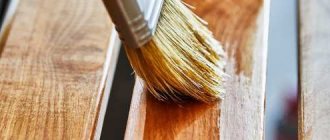
The technique of tinting with pigment stains and dyes is almost the same. Test it on a test cut, then apply a generous amount of color onto the surface of your piece and wipe off any excess to even out the color.
Then let the surface dry completely, then wipe it again to remove the deposits that have formed in some places. Remember that the color of the surface changes as the composition dries, and then changes again when applying clear varnish (photo below left). Dyes for tinting wood can be purchased in the form of a ready-made solution or dry powder. Thoroughly dissolve the powdered dye and strain the finished solution (photo below right). Typically, the color of wood painted with dyes does not change with increasing number of layers of the coloring composition. It becomes darker, but remains transparent. Each new layer of pigment stain darkens the surface color more and reduces transparency.
Pine primer
Experience in processing pine wood shows that applying stain to its clean surface leads to uneven tone and staining.
The carpenters conducted an experiment with test samples to determine which primer composition would provide better color uniformity. The surface was treated with shellac for furniture, a factory primer-conditioner for wood with uneven absorption and a polyurethane composition. The latter showed the best result.
After applying and drying the composition, the surface is lightly sanded in the direction of the fibers with a sponge with abrasive No. 320 and a liquid stain is applied.
Possible defects and their elimination
Although tinting is considered a simple operation, sometimes problems arise. But many of them can be avoided if you know what can happen.
Pile raising. The main disadvantage of water-based compounds is that they raise the lint on the wood. You should be prepared for this, and it is better to lift the pile in advance and carefully remove it (photo below left), and then start tinting.
Difference in wood color. Even a good board sometimes has areas and stripes of different colors, and most coloring compounds cannot hide this difference. Working with such boards is shown in the photo below right. Spotting. Some types of wood stain unevenly. By pre-treating the surface with conditioner, you can achieve a more uniform toning.
The next page (photo below) shows examples of such processing. Darkening of the ends. The end surfaces absorb more stain than the rest of the board. To reduce color differences, sand the ends with an abrasive one grit finer than the rest of the surfaces. Then treat them with conditioner. Tinting with dyes instead of pigment stains also helps reduce discolouration of surfaces without the need for conditioner.
Color mismatch. Sometimes the color of painted wood is different from what you expected. If the shade matches your plans, but it is too light, apply another layer of the same color composition. If the resulting shade is not the same as required, it can be covered with a darker stain.
If the color is too dark and the surface is not yet dry, it can be lightened a little by wiping with a suitable solvent. Water stains are washed off with water, but for oil stains you need to use white spirit.
If the water stain has already dried, you can partially remove it with a broom and re-tint the surface. Dried oil stain can often be removed with organic solvents for varnishes and enamels. If this is not enough, use a remover, then lighten the remaining stains with bleach, and then begin toning again.
It is possible to lighten the painted surface slightly by gently wiping it with a suitable solvent, but care must be taken to maintain an even shade and to avoid spots and streaks.
Proper grinding
A step-by-step proven method on how to properly sand a pine board:
- to begin with, you can take coarse-grained discs for a grinder and, changing them in descending order, finish the procedure with disc No. 180;
- then, additionally sand it manually using a block with sandpaper No. 180. It is necessary to move along the fibers: this will remove marks from the sander;
- The final stage is sanding the ends with sandpaper with grit No. 220. This will prevent them from excessively absorbing the stain.
Variations on a theme
We've focused on pigment stains and dyes, but there are five other products that can be used to tint wood. In some cases, it is better to prefer combined coloring compositions containing pigments and dyes, colored oil-varnish mixtures, gel stains, universal finishing compositions, or so-called “lint-free” stains (that is, stains that do not cause lint to rise). The most convenient to use are combined coloring compositions (photo above). However, in some situations, gel stain allows you to achieve better results (photo below).
Colored oil-varnish mixtures, which include the so-called “Danish” oil, contain oil, varnish, thinner and coloring agents. Such compositions are easy to apply, penetrate deeper into the wood and, thanks to a moderately stable binder, can serve as an independent finishing agent.
Universal finishing compositions used as the final finishing layer contain a varnish (for example, polyurethane) with coloring agents. The diluent for such compositions is white spirit or oxa, and the coloring agent is dye or pigment. With their help, the finishing coating is applied simultaneously with tinting. They practically do not penetrate deep into the wood and are similar in properties to paints. Because they dry quickly, working with them requires certain skills to apply an evenly thin layer. Additional layers darken the color and make it less transparent. When applying with a brush, it is difficult to avoid overlapping areas that will appear as dark spots. As a general rule, the use of such compounds should be avoided when finishing in a workshop.
“Lint-free” wave-based stains can be diluted with alcohol or varnish thinner, and oil-based finishing coats can be used over them. They dry too quickly, making them less convenient than regular water stains, and most hobby woodworkers can do just fine without them.
What is parquet tinting?
Parquet tinting is a multi-stage process of introducing a tinting pigment into the pores of wood, as a result of which the parquet acquires the desired shade. This type of wood processing will give the parquet board a natural color and emphasize the structure of the wood, resulting in an opportunity to update an old parquet floor or to style a new flooring to match your interior design.
Advantages of parquet tinting:
- Suitable for processing solid floor boards and parquet, regardless of the type of wood.
- Makes it possible to obtain a unique appearance or improve the external condition of an old coating. Depending on the speed of application and intensity of the tinting agent, when using the same composition and color, you can ultimately get a different shade, thereby emphasizing the uniqueness.
- Masks defects of worn parquet: stains, dirt, minor damage and other imperfections. This is relevant for existing parquet during restoration work.
- The ability to choose the desired color for any interior due to a wide palette of colors.
- Without performing major renovations, it will allow you to update the appearance of the room.
Tinting agents can be divided into three groups:
- Glazing (transparent) only slightly changes the shade of the wood, emphasizing the structure and characteristic cut pattern.
- Whitening - lightens the surface of the coating without harming the fibers, unlike chlorine-containing and oxygen bleaches. For example, using white oil, parquet acquires a silver or ivory hue and increases the density of the wood.
- Colored - change the shades of the floor to rich colors from amber to black.
In order to obtain different tones , the smoothness of the floor is of particular importance; the greater the roughness, the more saturated and deep the shade will be in the final result. Consequently, by changing the grain size of the abrasive material on the surface of the parquet board, a unique color scheme is obtained. Another way is to change the level of absorbency of a wooden board by wetting the planks with water and then drying them. This method lifts the villi, holding a large amount of pigment, thereby increasing the intensity of toning.
Expand your color palette
Most carpenters buy ready-made compounds for tinting wood, a standard range of which is available in many stores. But if you want to go beyond the usual colors or just want to experiment, learn how to change these colors to your liking. One way is to mix standard colors, but first you should make sure that the compositions you mix are compatible. They must use the same solvent.
Much more possibilities are provided by adding primary colors to ready-made compositions or applying them directly to the surface of the wood. Use artist's oil paints or so-called Japanese paints if oil-based stain and varnish will be applied later. If the product is covered with stain and water-based varnish, you can use acrylic paints diluted with an aqueous solution of glue. Such paints are sold in art salons and craft stores.
The color wheel will tell you how to get the desired color. The most famous color wheels show how to create all other colors using red, yellow and blue paints.
Nevertheless, the decoration of furniture is traditionally dominated by restrained shades of the so-called “earth” range (see photo below). Various combinations of natural and burnt umber, sienna, ocher, black and white pigments provide a rich palette of beautiful shades that are used in furniture making. Experiment with scraps and, once you achieve the desired result, do not forget to write down the recipe.
If you want to achieve a special shade, use the available options that most woodworkers don't even know about. Acrylic and oil paints and a color wheel will help you achieve any shade that will turn the most ordinary project into something special.
We used acrylic glazes and paints sold in art stores to achieve these results on oak wood. The left swatch was painted with natural sienna, the middle swatch was burnt umber, and the right swatch had both paints mixed together.
You can see the difference between dyes and pigment stains. The oak board on the right was painted with golden brown stain, and the board below was stained with the same color stain.
Like paints, pigment stains remain on the surface of the wood, almost without penetrating into the depths. Due to the high pigment content, the paints are opaque. Stains contain the same pigments, but in smaller quantities, so they are relatively transparent (they can be considered highly diluted paints).
The smallest particles of pigment are mixed with a binder - a substance that holds the pigment after drying on the surface. The most famous oil-type binder is drying oil. Other substances are used in water-based stains. All pigment stains should be thoroughly mixed before application to evenly distribute settled pigment particles in the liquid and prevent the appearance of multi-colored streaks.
Dyes are very different from pigments. They are transparent, penetrate deep into any wood, and with them it is easier to achieve color uniformity.
You can purchase ready-made dye solutions, dry powders or liquid concentrates. Powders and concentrates are diluted with an appropriate solvent: water, alcohol or one of the petroleum solvents, for example, solvent. It is important to use the appropriate solvent for each type of dye. As a rule, water-based dye cannot be diluted with alcohol.
Liquid dye concentrates can often be diluted with several solvents. Alcohol dyes are the fastest drying (perhaps too fast drying, which makes them difficult to work with). Water-soluble dyes are safe and most convenient to use.
When tinting, the most important thing to consider is how the color changes as the coloring composition dries. Often a carpenter, seeing a dry surface, considers it necessary to apply several more layers to enhance the color, but this usually leads to a mistake. If the color of the raw surface is as required, there is no need to do anything. This color will return after applying clear varnish, as shown in the photo on the left . Some stains dry faster than others, and if the stain is already dry, it will be more difficult to remove excess stain. Water stains dry faster than oil stains. Often the dry surface will appear dusty and dull in color, but this is not something to worry about.
By mixing dry dye powder with alcohol or water, you will not be able to completely dissolve all its particles, despite the thorough mixing. Let the solution sit, then stir again, and then strain through a paper coffee filter, cheesecloth or nylon stocking to get rid of undissolved particles. Always wear a dust mask when handling dry powder as it generates a lot of dust and can cause allergic reactions and respiratory problems. To achieve the desired shade, you can mix pigment stains with dyes if they are diluted in the same solvent. For best results, mix products from the same manufacturer. You should also dilute each coloring agent separately before mixing them with each other. Do not add powder or concentrate of one color to a prepared solution of another color.
Water-based stains and dyes raise the lint on the wood. The tiny fibers swell and remain raised, like bristles. If you apply a layer of finishing compound (varnish or paint), the surface will resemble sandpaper.
The easiest way to deal with this phenomenon (before applying a stain or water-based dye) is to lift the lint and then remove it. Wet the surface with clean water from a sprayer and let it dry completely. Now sand or scrape to remove any raised lint. Simple and effective scrapers are made from replacement blades for craft knives. Hold the blade almost vertically as shown in the photo and carefully scrape the surface.
Wood can have different colors, and it is not always possible to completely correct this difference with one coat of stain. This is most difficult to do on wood species such as cherry or walnut, where the sapwood is much lighter than the heartwood.
If you want the entire surface to be dark, apply stain only to the sapwood, as shown in this cherry plank. After drying, apply another layer of the same stain, covering the entire part. If you want to achieve a uniform color throughout the entire surface, the color of the stain should match the color of the heartwood. Only stain areas with sapwood with this stain.
Pine, cherry, maple and birch wood on the surface of the same board has areas of different densities. This heterogeneity causes uneven toning when using pigment stains. Soft areas absorb more stain than hard areas and appear darker after tinting.
You can reduce the effect of heterogeneity using a conditioner, applying it before tinting. Conditioner is a type of binder that closes the pores of wood, and you can see the results of its use in the photo on the left.
We used Minwax conditioner and a red-brown stain on the left pine board, while the right board was stain only.
You can prepare the conditioner yourself. If you chose polyurethane varnish for the top coat layers, make a conditioner from one part varnish diluted with five parts solvent. Apply this mixture to the surface, dry, lightly sand with 220-grit sandpaper, and then tint with stain.
Combined compositions containing dye and pigment stain usually separate during long-term storage on a store shelf. The dye remains in solution, and the pigments settle to the bottom of the jar. To obtain the original color, the composition should be thoroughly mixed. You can determine such compositions using a stick, lowering its end to the bottom of the jar. If there is a clot on it, and the stick itself becomes colored (see photo below), you are dealing with a combined composition. The dye stains dense areas of the wooden surface, and the pigment accumulates in the pores. Such compositions tint problem breeds more evenly, but to further reduce color unevenness, it is better to first apply a conditioner. Combined formulations are applied in different ways.
At the top of the can, if you do not stir its contents, is a dye solution that can be used directly to tint wood or added to a compatible varnish to create a toner (more on this in the next article in this series).
By lightly mixing the contents of the jar, you will get a slightly different shade of the same color. Thorough mixing will give another shade. Finally, the pigment residue, if not stirred, is excellent for use as a patina, which will be discussed in the next article.
A gel stain consists of a pigment, dye or mixture thereof and an oil- or water-based binder. Strictly speaking, it is a type of paint that covers a surface without being absorbed into it. Such stains slightly hide the texture pattern, but they make it easier to achieve uniform color (see photo below). The left sample was covered with a regular water-based stain, and a gel stain was used to tint the right sample. Gel stain is excellent for applying the so-called patina. The patination technique allows you to add layers of color between layers of the base coat and imitate a textured pattern on any surface. For example, you can make two different boards look similar and turn hardboard into oak.
Wood tinting, 5.0 out of 5 based on 1 rating
Wood preparation
Before applying stain, the surface must be moistened and dried. This will prevent the fibers from deforming immediately after processing. After these two stages, the wood must be sanded. The grit size of the grinding tools should be 120 – 150. After cleaning from dust, grind with an abrasive of 150 – 180 grit and then thoroughly clean it from dust again. Desirable wood parameters: temperature > +15 C°, humidity 8 – 12%.
It is highly advisable to treat resinous pine wood with a product to remove resins.
Preparatory work
Once the choice of manufacturer and shade has been made, you can begin preparation. The final result will directly depend on its quality. The preparatory stage is divided into the following operations:
- Completely remove any remaining existing paintwork. For this you will need a scraping machine. This operation can be done manually only in the smallest areas.
- Carefully inspect the surface of the wood. All minor defects (depressions, burrs) must be cleaned with sandpaper, vacuumed, and puttied.
- Clean the putty areas and polish.
The preparatory work includes removing the remaining paintwork using a sanding machine.
Next, thoroughly vacuum the surface again. The dust left behind will form clumps and interfere with the quality of the tinting.
Parquet whitening method
One type of parquet tinting using white pigments is called parquet bleaching. This method is best carried out on traditional types of wood such as oak, maple, beech, pine, larch . Of the listed species, oak and ash lend themselves well to color changes, while beech and maple are a more difficult task.
Rules for successful bleaching include:
- Preparing wood using a parquet sander.
- The correctness of the selected parquet colorants, varnishes and oils. It is worth emphasizing that not all colorants are suitable for parquet varnish.
- Application of the composition using a brush, roller, spatula and single-disc machine with pad.
- Comply with the drying time indicated on the packaging.
If all points are followed, parquet whitening will be performed smoothly and with excellent results.
Parquet whitening technology
The tinting composition should be applied in stages with the gradual addition of white tones until the desired color is achieved. You should definitely do a preliminary painting on a separate sample or on a small area of parquet in order to determine how the pigment applies and how many layers are needed.
To begin with, the parquet is scraped. Next, carefully remove dust from the surface using a vacuum cleaner. Then a special wood bleach is applied to the floor surface for 10-14 hours. If there are cracks, gaps or gaps on the parquet, they should be filled with putty (a mixture of wood dust, bleach and binder, for example LobaDur Fugenkitt losung ). After time, the surface is ground, giving the surface smoothness. Finally, varnish the parquet.
Let's start tinting
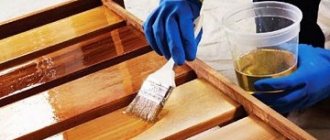
There are several ways to tint. Paint by hand, spray or dip. The most common method that can be successfully used at home is painting with a brush. So, the old wooden bedside table is ready for its color transformation. And this is what she has to do:
- Cleaning and sanding
. Before painting, it is important to level the surface and make the wood structure as smooth as possible. An ordinary sandpaper will help with this. - Applying stain
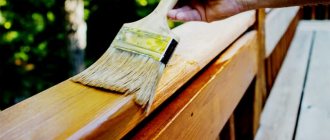
. Using a roller or brush, spread the paint evenly over the wood along the grain. And to remove excess, simply rub the stain with a dry cloth or swab. - Paint drying
. This stage is extremely important. It is better to be patient and wait until the layer dries thoroughly. Only in this case can you evaluate the final result of the work and the resulting shade. If it is not saturated enough, you can apply the stain again. - Varnish coating
. This completion of tinting prolongs the wear resistance of the colored wood product.
DIY wood tinting
– the process is quite labor-intensive. However, if you love creativity and are not afraid to try new things, then this type of work will certainly bring maximum pleasure. And bright wooden interior items will delight you every day!
White wood stain
To give your furniture a white color, you don't have to paint it. A lightening stain is also suitable for such work, which will not only make the product lighter, but also emphasize its structure.
Wood stain is intended not only to give the product a lighter shade, but also to protect it from adverse environmental conditions. It is very important to consider, when considering different types of such a product, how and what you will apply it to. If there is a risk that moisture will spill onto the surface of a bleached object, then it is best to use wax, oil and acrylic preparations, but if your craft will be in a dry and ventilated place, then water stain will also work.
With the help of white stain you can visually expand the room by applying it to the flooring or wooden walls
Using white stain you can achieve a very interesting effect and create an aged finish. It must first be painted with a white water-based stain; after it dries, the object must be treated with a stiff brush. A dark-colored wax or oil stain is rubbed into the formed pores on the wood.
When using water stain, do not forget about the protective layer. The painted product must be treated with wax or oil.
Light stains do not always have a pronounced color. There is a colorless stain that is applied solely to protect the wood from adverse natural factors.
Details: stain colors for wood (photo examples)
Why Us?
This is a rhetorical question. Every company wants it to be this way. We are not the oldest organization in Moscow, although we have been on the market since 2001. But we can say with firm confidence that all the work we undertake is done with the highest quality!
Toning a board is a process in itself! Board tinting differs from parquet treatment in many nuances!
If you don't know how, don't try it!
Useful articles:
We make nuts from pine!
