Home / Wood processing / Wood bending
Curvilinear furniture frame structures are difficult to produce, and large curves cut from straight sections of wood will require complex manufacturing techniques to avoid the weakness of short fiber and large, uneconomic waste. However, using dry or wet bending techniques, complex curved shapes can be produced quite economically, and since the fibers will run along the bend rather than across it, the finished product will be stronger. Dry bending involves first dividing the wood into thin sections, but thicker pieces can be bent by soaking or steaming.
Michael Toneti's bent café chairs and rocking chairs are classic examples of bent furniture made by steaming, and in the thirties of the 20th century, furniture made from laminated materials became an element of high fashion, after the invention of industrial methods for producing various grades of plywood. Both steam bending and layer bending can be accomplished in the home workshop, and both methods continue to be used in the antique furniture industry and by skilled craftsmen and designers.
Steamed wood can bend with a relatively large bending angle. The steam softens the wood fibers enough to bend them and mold them into the desired shape. It may require significant bending force, but it is quite achievable in a home workshop using basic equipment. You will need to make a template, a clamping clamp and a steam chamber. Wood bending is not a precise procedure. There are many options, and often trial and error is the only possible way to obtain the desired result.
Cold bending of wood
Bending is one of the methods for making beautiful and durable wood parts, for example, for furniture.
It is quite possible for a home craftsman to master this technology. A bent part is much stronger than a sawn part, less wood is consumed in its production, and the sawn surfaces produce side-and-a-half and end cuts, which complicate further processing and finishing of parts. There are three ways to bend wood. One of them, the most famous, involves pre-steaming wood and then giving it the required shape in powerful presses. This hot bending method is used mainly in mass production, for example, of chairs.
Along with it, especially at home, two other methods of bending wood are practiced, but in a cold state.
- The first is bending solid wood
with preliminary cuts along the bend.
The second is bending, in which a bent part is produced by pressure in molds from a workpiece, which is a package of several layers of thin strips of wood coated with glue.
- When bending in the second way - with cuts - narrow grooves parallel to each other are sawn into the workpiece to a depth of 2/3-3/4 of its thickness, after which the workpiece is given the desired shape.
The maximum bending radius depends on the depth of the cuts (and, accordingly, on the thickness of the workpieces), the distance between them and the flexibility of the wood. The cuts are made both parallel and perpendicular to the fibers. This work operation is performed using a miter saw or a hand-held circular saw with a guide stop. If you don’t have a special tool, a regular wood saw will do. The main thing is that the depth of the cuts is the same.
How to bend wood
If you decide to decorate the room with wood or start creating beautiful furniture in a classic style, then you will need to make curved parts. Fortunately, wood is a unique substance because it allows an experienced craftsman to play with the form a little. It's not as difficult as it seems, but not as easy as we would like.
Previously, the site already had a publication on bending plywood. In this article we will understand the principles of bending solid boards and timber, and find out how this is done in production. We will also provide useful tips from professionals that will be useful to the home craftsman.
BONDING WITH SIMULTANEOUS BENDING
When bending wood
the fibers on the inner side are compressed, and on the outer side they are stretched. Wood “tolerates” fiber compression relatively easily, especially if it is pre-steamed. It is almost impossible to stretch it.
Flexibility also depends on the type of wood and the thickness of the workpieces. For example, hard wood from temperate climate zones - beech, oak, ash, elm - is easier to bend than tropical wood species (mahogany, teak, sipo, etc.). Conifers are too tough for this.
The resistance value of bent wood until it breaks is determined by the ratio 1:50, i.e. The bending radius must be at least 50 times the thickness of the workpiece. For example, a workpiece with a thickness of 25 mm requires a radius of at least 1250 mm. The thinner the wood, the easier it bends. Therefore, where possible, it is advisable to make a part of the appropriate shape by bending (Fig. 1).
In this method, individual strips of wood of the same thickness and width are glued, laid in several layers so that their grains are parallel, and placed in a mold made of hardwood. The matrix and the mold punch are compressed with clamps and the bag is left in this position until the glue dries.
The thickness of the strips glued to each other can vary between 1-6 mm, again depending on the required bending radius. Cold-curing glue is suitable for gluing layers. If bent-glued blanks are intended for use in external structures, it is best to use waterproof glue.
Making bent plywood
A plywood sheet is two or more sheets of wood joined together using a special adhesive.
The wood usually used is birch, alder, pine or beech. These materials have the following advantages:
- Increased level of moisture resistance. This plus makes it possible to use moisture-resistant plywood in buildings with high levels of moisture or when decorating the facades of buildings.
- There is no warping at all, and the plywood does not rot.
- Beautiful and aesthetic appearance.
- Easy to use independently. Working with such material is very easy.
- Plywood sheets are resistant to sunlight.
- Low cost. Technical indicators are much better than those of natural wood.
- Easy care. Plywood sheets can be treated with various cleaning agents.
- Environmental friendliness. Plywood is made from environmentally friendly wood and is safe for human health. Therefore, bent plywood is perfect for any room in the house, even a nursery.
- High wear resistance. It does not wear out when in contact with different furniture.
- Durability. Thanks to its qualities, it has an extended service life.
- It is possible to make bent plywood with a variety of smooth shapes. This quality is perfect for creating original designs.
BENDING USING CLAMPING DEVICES AND PRESS FORMS
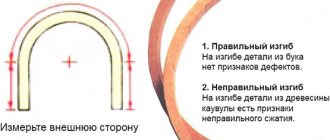
To determine the permissible thickness of the veneer strips or planks to be bent (with a larger thickness, the wood may break), you need to know the smallest bending radius. The wood is most deformed on the inside of the bend. Therefore, it is always necessary to measure here.
As an auxiliary device, it is advisable to use a template that you can make yourself. To determine the bending radius, we take an ordinary school compass and draw several circles on tracing paper (with a slight increase in their radius) that have a common center. As a result, we get a template. We apply it to the surface of the bend, for example, a mold, and move it until we find a suitable circle of the largest diameter. We measure its radius on a template. We divide the resulting value by 50. The quotient of the division will be the maximum allowable thickness of the strip of plank or veneer.
When working with molds, the bend on the outside of the workpiece should be smoother than on the inside. In this case, we draw two circles from one center, the radii of which differ by the total thickness of the strip material.
The most difficult situation is when it is necessary to bend a part of a complex configuration with different bending radii. Here, curves for the inside or outside of the workpiece can be constructed freely if its shape is not tied to the contours of any piece of furniture.
In this case, the line for the second cut (the first one is at the beginning of the bend) can be constructed like this. Using a compass, measure the total thickness of the layers to be glued, draw a circle with it on hard cardboard, cut out a circle and apply it in several places to the line of the first cut. At the same time, we apply the circle so that it is in contact with the first line, and draw its outline on the opposite side, respectively. The second cut line will be the end-to-end connection between these auxiliary lines.
Why bending is better than sawing
A curved wooden part can be obtained by two methods: by bending a flat piece, or by cutting out the required spatial shape. The so-called “sawing” method attracts users with its simplicity. For such production of parts and structures, you do not need to use complex devices, you do not have to spend a lot of time and effort. However, in order to cut a curved wooden product, you have to use a workpiece that is obviously too large, and a lot of valuable material will be irretrievably lost as waste.
But the main problem is the performance characteristics of the resulting parts. When cutting a curved part from ordinary edged lumber, the wood fibers do not change their direction. As a result, transverse cuts fall into the radius zone, which not only worsen the appearance, but also significantly complicate the subsequent finishing of the product, for example, its milling or fine grinding. In addition, in the rounded areas that are most vulnerable to mechanical stress, the fibers run across the section, which makes the part prone to fracture in this place.
Whereas when bending, the opposite picture is usually observed, when the wood only becomes stronger. The edges of the curved beams or boards do not have “end” cuts of fibers, so subsequently such workpieces can be processed without restrictions, using all standard operations.
Bending wood fibers
BENDING TECHNOLOGY WITH MAKING NOTCHES ON BLANKS
When determining the number of cuts to be made on a workpiece for bending along a known radius (it also depends on the width of the groove and the type of wood), we use an auxiliary structure. To do this, we take a block similar to the workpiece (Fig. 2). We cut out one single cut on it with a depth of 2/3-3/4 of the thickness of the block. Draw a straight line on a sheet of paper and mark the cut point on it.
We place the block on the paper so that its lower edge before the cut coincides with the drawn line and the marked point of the cut, and fasten the block with a clamp to the work table. We set aside the distance of the required radius b on the line and the block and bend the block until the upper edges of the cut meet. The distance a between the end of the line and the mark on the block will be the distance between the individual cuts that can be marked on the workpiece.
If cuts need to be filed on the outside of the workpiece, the distance between them and, accordingly, their number are determined in the same way. We bend the workpiece as much as the elasticity of the wood allows. If the test piece of wood breaks, then this can be expected from the workpiece fixed in the mold.
Based on materials from the magazine “Do It Yourself”
Source: www.norstar.ru
Areas of application of bent wood elements in construction
This material is used not only in residential construction, but also in the construction of economic and industrial buildings.
Bent beams expand horizons in the field of design and implementation of structures, allowing you to solve the following problems:
- Bent beams make it possible to bridge large distances between walls, since beams, trusses and other types of structures for roofing are made from it. This allows the construction of warehouses, buildings for keeping animals on large farms and other structures that require a large area;
- Wood is resistant to various influence factors, which is why structures made of bent-laminated wood are used for the construction of warehouses;
Important! Since wood impregnated with special compounds does not rot and does not corrode at all, it becomes even more reliable than metal.
- This material is used in the construction of greenhouses and greenhouses, since it can be used to create durable and stable structures of a convenient shape and large area;
- The most common method of application: bent laminated veneer lumber - a material for roofs of unusual shapes and domes;
Semicircular rafter system
- Bent laminated veneer lumber also makes it possible to build small architectural structures: elegant arbors made of timber with a domed roof will be an excellent decoration for the site; they look original and unusual.
Bent glued dome for gazebo
The domed roof structure is not only unusual and beautiful from an aesthetic point of view, it is also beneficial for other reasons. Snow will not accumulate on such a roof, it heats up very little from the sun and does not create a large load on the walls. It is no coincidence that this type of roofing has been used since ancient times.
How to bend wood for furniture?
3 parts of 10% ammonia solution;
1 part glycerin;
Or the composition of the branded GF-20: diethylene glycol monoethyl ether - diethylene glycol monoethyl ether.
Or there is another interesting product Super-Soft 2™ which, as they say, does not smell, does not change the color of veneer, and does not contain glycerin, but does wonders with veneer (photo on the right). Unfortunately, I don’t know the composition.
You can experiment with the percentage of ingredients yourself. The more glycerol, the longer the plasticity remains. In these recipes, relative plasticity remains for about a day. The more alcohol or other active substance, the faster the softening occurs.
Apply the solution to the veneer either by spraying or by rolling or dipping or in another way convenient for you.
Chemical methods for plasticizing wood
It is also known that it is possible to make lumber more pliable using impregnation with various compounds. There are ready-made impregnations that make wood cells more plastic, for example, “Super-Soft 2”. Some practitioners soak wood in so-called textile conditioners, obtaining a similar result.
But quite primitive “recipes” can also be used containing ammonia and ethyl alcohol, glycerin, alkalis, hydrogen peroxide, dissolved alum... Many of them act extremely simply - they increase the ability of the workpiece to absorb water and help retain moisture in the fibers.
Thin products such as veneer are processed by spraying, but preparatory chemical impregnation of normal lumber is usually carried out using the full immersion method. It takes time for the working substances to get inside the bar or slats, usually from 3-5 hours to several days (although heating helps reduce the wait).
Largely because of the length of the processes, chemical plasticization is not often used, although there are other problems: the cost of chemicals, changes in colors, the need to provide protection from harmful fumes, the increased tendency of such curved parts to straighten...
Chemical plasticizers for wood
How to bend wood
How to bend wood
If there is a need to manufacture a curved wooden element, then at first glance it may seem that it is easier to cut out the desired element in a curved form, but in this case, the fibers of the wood material will be cut, thus weakening the strength of the part, and as a result, the entire product . In addition, when sawing, a large waste of material is obtained, which cannot be said about the method when the wooden blank is simply bent. Wood is cellulose fibers held together by a chemical called lignin. The flexibility of the tree depends on the arrangement of the fibers. Note! Only well-dried wood will be a reliable and durable source material for the production of various products. However, changing the shape of a dry wooden blank is a difficult process, because dry wood can break, which is very undesirable.
Having studied the technology of how to bend wood, as well as the basic physical properties of wood, which allow you to change its shape and subsequently preserve it, it is quite possible to start bending wood at home. Some features of working with wood Bending wood is accompanied by its deformation, as well as compression of the inner layers and stretching of the outer ones. It happens that tensile forces lead to rupture of the outer fibers. This can be prevented by carrying out preliminary hydrothermal treatment. So, you can bend blanks of timber made from solid and laminated wood. In addition, planed and peeled veneer is used for bending. The most plastic are hardwoods. These include beech, ash, birch, hornbeam, maple, oak, poplar, linden and alder. Bent glued blanks are best made from birch veneer. It is worth noting that in the total volume of bent-glued blanks, birch veneer occupies approximately 60%. When steaming the workpiece, the compressibility increases significantly, namely by a third, while the tensile ability increases by only a few percent. This means that it is not a priori worth thinking about whether it is possible to bend wood thicker than 2 cm.
Steam box heating
First you need to prepare the steam box. It can be made by yourself. Its main task is to hold the tree that needs to be bent. There should be a hole in it to allow the steam pressure to escape. Otherwise it will explode. The steam outlet should be located in the bottom of the box. In addition, the box should have a removable lid through which you can pull out the bent wood after it has acquired the desired shape. To hold the bent wood piece in the desired shape, clamps should be used. You can make them yourself from wood or buy them at a specialty store.
You should make round scraps of wood - several pieces. Off-center holes are drilled in them. After this, you need to push the bolts through them, and then drill another hole through the sides to push them in tightly. Such simple crafts can become excellent clips. Now it’s time to steam the wood; to do this, you should take care of the heat source and close the wood piece in the steam box. For every 2.5 cm of thickness of the workpiece, the product needs to be steamed for about an hour. After time has passed, the tree must be removed from the box and given the required shape. The process must be completed very quickly. The workpiece bends neatly and softly. Note! Some types of wood bend more easily than others due to different elasticity. Different methods require different amounts of force to be applied. Once the desired result is achieved, the bent tree must be fixed in this position. You can secure the tree while shaping it. This makes it easier to control the process.
Using chemical impregnation
To destroy the lignin bonds between fibers, you can treat the wood with chemicals, and this can be done at home. Ammonia is ideal for this. The workpiece is soaked in a 25% aqueous ammonia solution. After which it becomes very obedient and elastic, which allows you to bend, twist it and squeeze out relief shapes in it under pressure. Note! Ammonia is dangerous! Therefore, when working with it, you should follow all safety rules. Soaking the workpiece should be carried out in a tightly closed container located in a well-ventilated room. Aqueous ammonia solutionAqueous ammonia solution The longer the wood is in an ammonia solution, the more plastic it becomes. After soaking the workpiece and giving it a shape, you need to leave it in this curved form. This is necessary to fix the shape, and also for the ammonia to evaporate. Again, bent wood should be left in a ventilated area. Interestingly, after the ammonia evaporates, the wood fibers will regain their former strength, and this will allow the workpiece to retain its shape!
First you need to make a piece of wood that will be bent. The boards should be slightly longer than the length of the finished part. This is because bending will shorten the slats. Before you start cutting, you should draw a diagonal line with a pencil. This needs to be done across the underside of the board. This will help maintain the sequence of the slats after they have been moved. The boards are cut with a straight-layer edge, in no case with the front side. So, they can be added together with the least change. A layer of cork is applied to the mold. This will help avoid any unevenness in the shape of the saw, allowing for a cleaner bend. In addition, the cork will keep the delamination in shape. Now glue is applied to the top side of one of the wooden slats. The glue is applied to the lamellas with a roller. It is best to use urea-formaldehyde glue, consisting of 2 parts. It has a high level of adhesion but takes a long time to dry. You can also use epoxy resin, but this composition is very expensive, and not everyone can afford it. Standard wood glue cannot be used in this case. It dries quickly, but is very soft, which is not welcome in this situation. The boards are held together after gluing. The boards are held together after gluing. The bent wood blank should be placed in the mold as quickly as possible. So, another lamella is placed on top of the lamella coated with glue. The process is repeated until the bent piece reaches the desired thickness. The boards are fastened together. After the glue has completely dried, you should shorten it to the desired length.
Tire as an effective way to avoid wood destruction during bending
Since the main problem is fiber breakage on the outer radius side, it is this surface of the workpiece that needs to be stabilized somehow. One of the most common methods is to use an overhead splint. The tire is a steel strip with a thickness of half a millimeter to two millimeters, which covers the beam or board along the outer radius and bends on the template along with the wood. The elastic strip absorbs part of the energy when stretched and at the same time redistributes the destructive load along the length of the workpiece. Thanks to this approach, coupled with humidification and heating, the permissible bending radius is reduced significantly.
In parallel with the use of steel bars in bending devices and machines, mechanical compaction of wood is achieved. This is done using a pressing roller, which presses on the workpiece along the outer bending radius. In addition, the template form in such a device is often equipped with 3 mm teeth (in increments of about 0.5 cm), oriented towards the movement of the workpiece.
The purpose of the jagged surface of the template is to prevent the workpiece from slipping, to prevent mutual displacement of fibers in the wooden massif, and also to create a small depressed corrugation in the concave radius of the part (the fibers are pressed inside the massif, therefore, problems with folds are solved).
Bending pattern with tire
Pressing with a tire allows you to bend bars and boards made of coniferous and soft deciduous wood with a minimum percentage of defects. Please note that parts made of relatively hard wood when bent with pressing become approximately ten to twelve percent thinner, and pine and spruce blanks become 20-30% thinner. But the positive aspects of this method include a significant increase in the strength characteristics of the finished product, as well as a significant reduction in the requirements for the presence of flaws and defects in wood blanks.
How to bend wood for furniture?
When making runners for a rocking chair, curved slats for the back of a chair, or a gunwale for a boat, you'll need curved wood pieces. You can cut them from solid wood or bend a piece that has been steamed, laminated or slotted. Mastering these skills is another milestone towards mastering the art of carpentry. Below is the basics.
Which wood is easier to bend and which is more difficult?
Some woods perform better than others due to their cellular structure and grain texture. The easiest woods to bend are those with long grain, such as white and red oak, ash and hickory. Elm, maple, walnut and cherry can be bent, but with great effort. You should avoid softwoods such as spruce and pine, as well as dense or oily tropical woods such as ironwood and African mahogany. Whatever type of wood you choose, make sure that the pieces are straight-grained and free of knots.
How long should wood be steamed before it becomes flexible enough to bend?
A rule of thumb is to steam for an hour for every inch (2.5 cm) of thickness of the workpiece. If the processing time is shorter, it will be difficult to bend the workpiece; if more, it will be difficult to work with wood.
What happens to wood during steam bending?
Wood fibers are held together by lignin, a glue-like substance that surrounds the cells. When wood is steamed at a temperature of 88-107°C, the lignin softens, allowing the fibers to stretch or contract as the workpiece is bent. When the wood cools, the lignin hardens again and the fibers are fixed in their new position.
Is it easier to bend freshly cut wood than dried wood?
Yes. Green wood is more flexible, and the fresher it is, the better. Air-dried wood is more difficult to bend, and kiln-dried wood is even more difficult.
Bending slats for the back of a rocking chair. Is it possible to build a small device for bending under steam?
Can. All you need is a steam source and a steam chamber. The simplest source of steam is an electric kettle; in second place is a wallpaper steaming machine. The simplest steam chamber is a box made of 19 mm thick plywood.
Here are some tips.
♦ Make the box as small as necessary because the steam must heat the entire chamber for maximum efficiency.
♦ Equip the chamber with dowels to create a shelf on which the wood will be accessible to steam from all sides.
♦ Build a simple device to supply steam from the source to the chamber. It can be made using PVC pipe and a few fittings.
♦ Do not make the box airtight. Drill several holes with a diameter of 6 mm to allow steam and condensation to escape and measure the temperature with a cook's thermometer.
♦ Tilt the drawer slightly to allow condensed moisture to drain away.
How do I make a mold to bend steam treated wood and how to use it?
Make a mold from several layers of 19mm plywood or bonded boards. Place beveled blocks under the bottom of the mold at both ends, on which the clamps of the clamps will rest securely.
Put on safety glasses and remove your workpiece from the steam chamber. Place it on the form and press one end with a clamp, placing a piece of wood under the clamp to evenly distribute the pressure across the width of the board. Press the other end of the workpiece in the same way. It is best to place the workpiece on the mold immediately after removing it from the steam chamber.
I'm making a set of curved back chairs for the dining room, but I'd rather glue together several thin slats rather than steam bend one thick piece. How thin should the backrest slats be and how should I prepare the wood for gluing?
Most types of wood become flexible at a thickness of 3 mm or less. First, select a board of such thickness that it is enough to make planks, taking into account the thickness of the cuts. It is better to take a board longer than you need, and after bending, cut the strips to the required length.
Cut one strip on a circular saw fitted with a smooth saw blade and set it aside. Smooth the edge of the board on the jointer, cut the next plank and repeat the process. By jointing the board before cutting the next piece, one side of each plank will be smooth, well suited for applying glue. Stack the planks in the same order in which they were cut.
Wood bending technologies
Nature does not like straight lines and it takes a lot of time and effort to make wooden products straight. However, bending wood is also a rather labor-intensive process. Bent wood elements are often used in Scandinavian furniture in the form of beautiful, light and durable products with unity of structure and form. In this article we will look at several ways to bend wood: simple power bending, bending using cuts, steam bending and layer bending.
Simple power flexion
This is the simplest method and involves bending wood by hand and attaching it to a mold to secure the bend. The thinner the wood, the easier it is to bend. It follows from this that the greater the bend, the thinner the wood should be. Veneer can take on almost any bend, while an oak blank 2 cm thick is almost impossible to bend. It should also be taken into account that different types of wood have different degrees of flexibility. So the ratio of the thickness of the workpiece and the minimum bending radius for some species will be: beech - 1/2.5; oak - 1/4; birch - 1/5.7; alder – 1/8; spruce - 1/10; pine - 1/11. That is, with a beech blank thickness of 10 mm, the minimum bending radius will be 25 mm.
As a rule, the workpiece is fixed with glue, since the use of nails or screws in bending areas can lead to the formation of cracks and breaks. There is an unspoken rule - what can be fixed by hand can also be fixed with glue. When gluing, to reduce gaps, you need to move from the center to the edges, or from one edge to the other.
Bending using cuts
This method of bending wood is the least durable because the wood is sawed through almost the entire thickness and very little strength remains in it. Therefore, this method of bending wood is used only where there is no heavy load, for example rounded corners, etc.
The main material for the manufacture of bent-sawn parts is plywood. To achieve the best results, cuts are best made on a circular saw using a limit stop. The cuts should be made across the grain at a distance of about 5-10 mm. from each other. The depth of the cut should be about 1/5 of the thickness of the workpiece.
To fix the bend, you can use glue or wood filler. By gluing and fixing two curved slats with the cuts inward, it is possible to create interesting elements in some designs, although with limited strength.
Bending in layers
In terms of its physical properties, such wood is close to hydrothermally bent wood, and in terms of some indicators of dynamic loads, it has even better mechanical properties than solid wood.
The first step is to prepare the slats. The thickness of the lamellas is largely determined by the amount of bending. The greater the bend, the thinner the lamellas should be and vice versa. As a rule, the thickness of the lamellas should not exceed 3.2 mm.
The cut layers of wood are then coated with glue and pressed into the template using grippers. You cannot use regular wood glue to connect the slats. For these purposes, adhesives based on urea-formaldehyde or epoxy resins are best suited.
Before removing the part from the template, the glue should set within 24 hours. It should also be taken into account that after the mold is released, the workpiece may straighten out a little. This effect can be minimized by reducing the thickness of the lamellas or creating a shape with a slight bend.
Bending with steam
Hydrothermal bending of wood gives the highest quality results, but requires a lot of labor and technical equipment.
Before starting the bending process, due consideration should be given to the choice of wood. Almost any type of wood can be bent, but hardwoods such as oak, beech, elm, birch, cherry, maple, walnut, and ash have the best flexibility. It is not recommended to use coniferous and soft species such as spruce, pine, cedar, and alder. It is also important that the wood is free of cracks and knots at the intended bend.
Each cell of wood fibers is coated with lignin, a glue-like chemical that binds the fibers together tightly at normal temperatures. The heat transferred by the steam softens the lignin, allowing the fibers to shrink and stretch. As the lignin cools, it hardens and binds the fibers tightly together again.
Freshly cut wood is best suited for bending. The best option is also atmospheric drying wood, since during chamber drying lignin is noticeably strengthened, making bending more difficult. Before steaming, kiln-dried wood can be soaked overnight in water. Processing of atmospheric-dried wood and pre-soaked kiln-dried wood requires the same amount of time.
Wood acquires its best plastic properties at a humidity of 25-30% and at a temperature of about 100°C. Steaming time depends on the thickness of the wood. So, for example, to steam a workpiece with an initial humidity of 30% and a thickness of 25 mm until the temperature in the center of the workpiece reaches 100°C, it takes 1 hour, and with a thickness of 35 mm - about 2 hours.
Before removing the workpiece, make sure that all tools are at hand, as the wood cools and hardens very quickly. Be sure to wear thick gloves to avoid getting burned by the steam. Remove the part and immediately secure it with the grips.
Removal of the product from the mold is usually accompanied by a slight bending. Therefore, the form must have a bend a little more than required in order to maintain the desired curvature of the product. To minimize flex, leave the piece secured in the mold for at least a few days.
How to bend a tree?
No, our task is not at all to bend an innocent plant. We are talking about wood building materials. How to bend a tree so that it bends and does not break? The method of bending wooden products has been known since ancient times: to give the wood a shape, all that is needed is heat and moisture, under the influence of which the plasticity of the material increases with all the ensuing consequences. How to bend a tree? Keep it in hot water (the higher the temperature, the faster the processes occur) or treat it with steam (a steam generator can be made from a kettle or use an iron). The higher the temperature, the faster the wood gives way and you can start bending it. Moistened and heated wood can be bent under the influence of a load (the ends of the board are placed on supports), and a load is placed in the place of the future bend. Dried wood perfectly retains the minimum radius of curvature that was achieved during the bending process. Now we know how to bend wood, we can dwell on this issue in more detail.
Wood reaction to external influences
The fact is that wood reacts differently to bending. The convex part is subject to tension, the concave part is subject to compression. Moreover, the material also reacts differently to steaming. For example, the ability to compress increases by as much as a third, but the ability to stretch – by only a couple of percent . That’s why you shouldn’t think about how to bend a board more than two centimeters thick at home. It is also necessary to take into account that different types of wood react differently to bending. For example, such species as oak, larch, and maple bend poorly, but beech, ash, and walnut bend well. So before you think about how to bend the board, decide on the type of wood from which it is made.
Machining methods
In some cases, there is no point in resorting to softening: for example, if the part is fixed to a sufficiently rigid frame, it will take the desired shape over time due to natural changes in humidity. Another special case is the need to bend plywood to a radius less than that allowed for a certain thickness. Here it is worth using both softening of the sheet and its mechanical processing.
One of the processing methods before bending is to apply a series of cuts parallel to the folding axis on the inside of the bend. It is better to make cuts with a cone cutter using a linear guide. The depth of the grooves should be no more than 3/4 of the thickness of the workpiece, and in the end at least two layers of veneer should remain intact.
If the cuts face the inside of the part and are hidden from view, there is no point in calculating their number and pitch. Subsequently formed scars can, if necessary, be leveled with automotive putty and sanded to a smooth state. With due diligence, it is possible to calculate the reduction in the length of the arc during bending, using a known angle and radius of bending. In this case, the number of cuts will be equal to the quotient of the arc reduction divided by the thickness of the cutter in the widest part of the entry. The required number of cuts must be evenly distributed over the entire bend radius.
Before fixing to the template, the cuts formed in the plywood are filled with high-quality wood glue, such as Titebond 2. Exposed glue can be immediately removed with a spatula or sanded after drying. While the glue hardens, the plywood is firmly fixed to the template.
You can also make it easier to soften thick plywood by perforating the workpiece. Holes with a diameter of 2–3 times the thickness of the plywood are made with a core cutter or Forstner drill in a checkerboard pattern with a step of about 80–100 mm between them. The degree of perforation can be greater; this is determined both by the flexibility of plywood to bend and by the required final strength of the part. Naturally, this bending method is only suitable for hidden technological elements that do not form a finishing plane. If desired, the bent part can be sheathed on one or both sides with veneer or thin plywood, having previously softened them.
Often, when manufacturing structural elements from wood, it is necessary to obtain curved parts, and it is not always possible to produce such an element by simple sawing or milling.
Wood bending is used for this purpose .
This technology makes it possible to use wood more economically than the technology of its mechanical processing, which is especially important for areas with a shortage of timber. Actually, wood bending is an ancient method of producing curved blanks, based on the property of wood to change shape under the influence of moisture, temperature and external load, as well as its ability to maintain its acquired shape even after the load is removed. External loads in this case are bending forces combined with the plasticity of wood, allowing wooden blanks to bend. Theoretically, the essence of these processes is the occurrence of normal (perpendicularly directed with respect to the cross section) stresses in the material, stretching the material along the convex side and compressing it along the concave side. This process is associated with a shift of layers of material along the fibers. Therefore, the cut should go exactly along the fibers, and knots are unacceptable.
The magnitude of the resulting stresses depends on the thickness of the bar, and they differ significantly in the areas of tension and compression: the permissible stretch of wood does not exceed 1-2%, but the compression limit reaches 15-20%. That is why, during free bending, wood parts are destroyed due to the rupture of the outer layers, which are subject to tensile forces. To avoid such breaks, you should use boiling or steaming of the wood - in this case, the wood The steaming method is preferable, since in this case the wood fibers are saturated with moisture more evenly, however, in artisanal conditions this method is not always technically possible. Therefore, it is better to use boiling instead, especially if you need to bend a small section of the part.
Wood bending tips
Cooking should be done in water heated to 90-95 oC; the water should not be brought to a boil.
The duration of welding is determined by the type of wood, its initial moisture content and the thickness of the block. For example, a 40 mm thick beech block with an initial moisture content of 15% must be boiled for 1 hour 30 minutes. Then the part must be secured in the template clamp and, gradually increasing the load, give it the required shape. Deciduous wood (birch, beech, ash, hornbeam, maple, linden, etc.) is the most plastic, therefore it is often used to produce bent wood blanks.
How to bend plywood, fiberboard, MDF
At home, plywood is bent by increasing its humidity, then ironing it (an iron is required), and fixing it in a template. Any frame element can serve as a template and its shape does not necessarily have to be curvilinear. The product is attached to the template using tape. You can clamp bent plywood between two spacers, give it a bent shape using ropes, tying them around the product in several places along the radius of curvature. Plywood can only be used after it has dried. It seems that we have figured out how to bend plywood - let's move on.
How to bend fiberboard? The technique is the same as in the previous case! How to bend MDF? In this case, you can go in two ways: either bend thin sheets (no more than 5 mm) and glue them together, or use flexible MDF , which has transverse slots on one side. The thickness of such sheets is usually 8 mm. When bending, they are placed on top of each other with their milled sides, and then glued together. That's all!
Source: thewalls.ru
Using chemical impregnation
To destroy the lignin bonds between fibers, you can treat the wood with chemicals, and this can be done at home. Ammonia is ideal for this. The workpiece is soaked in a 25% aqueous ammonia solution. After which it becomes very obedient and elastic, which allows you to bend, twist it and squeeze out relief shapes in it under pressure.
Ammonia is dangerous! Therefore, when working with it, you should follow all safety rules. Soaking the workpiece should be carried out in a tightly closed container located in a well-ventilated room.
Aqueous ammonia solution
Some features of working with wood
Bending of wood is accompanied by its deformation, as well as compression of the inner layers and stretching of the outer ones. It happens that tensile forces lead to rupture of the outer fibers. This can be prevented by carrying out preliminary hydrothermal treatment.
So, you can bend blanks of timber made from solid and laminated wood. In addition, planed and peeled veneer is used for bending. The most plastic are hardwoods. These include beech, ash, birch, hornbeam, maple, oak, poplar, linden and alder. Bent glued blanks are best made from birch veneer. It is worth noting that in the total volume of bent-glued blanks, birch veneer occupies approximately 60%.
When steaming the workpiece, the compressibility increases significantly, namely by a third, while the tensile ability increases by only a few percent. This means that it is not a priori worth thinking about whether it is possible to bend wood thicker than 2 cm.
Delamination method
First you need to make a piece of wood that will be bent. The boards should be slightly longer than the length of the finished part. This is because bending will shorten the slats. Before you start cutting, you should draw a diagonal line with a pencil. This needs to be done across the underside of the board. This will help maintain the sequence of the slats after they have been moved.
The boards are cut with a straight-layer edge, in no case with the front side. So, they can be added together with the least change. A layer of cork is applied to the mold. This will help avoid any unevenness in the shape of the saw, allowing for a cleaner bend. In addition, the cork will keep the delamination in shape. Now glue is applied to the top side of one of the wooden slats.
The glue is applied to the lamellas with a roller. It is best to use urea-formaldehyde glue, consisting of 2 parts. It has a high level of adhesion but takes a long time to dry. You can also use epoxy resin, but this composition is very expensive, and not everyone can afford it. Standard wood glue cannot be used in this case. It dries quickly, but is very soft, which is not welcome in this situation.
The bentwood blank should be placed into the mold as quickly as possible. So, another lamella is placed on top of the lamella coated with glue. The process is repeated until the bent piece reaches the desired thickness. The boards are fastened together. After the glue has completely dried, you should shorten it to the desired length.
Testing the mechanical properties of wood for bending
The average bending strength of all tree species is considered to be 1000 kgf/cm2, which is twice the compressive strength and approximately 30% less than the longitudinal tensile strength. When bending, different layers of wood experience different stresses - the top layer receives compression, and the bottom, on the contrary, experiences tension. In the middle part of the sample subjected to bending there is a neutral region that does not experience any stress. The area experiencing tensile stress begins to collapse first - the outermost fibers of the wood break.
You can visually determine the bending strength of wood by the nature of the fracture - high-quality samples will have an uneven fracture with the presence of a large amount of chips, and a defective one will have an almost even fracture, without protrusions and dents.
When bending, one part of the workpiece is subjected to compression, the other to tension, so the bending resistance indicator is between the compression and tension resistance indicators. The ratio of compressive strength to tensile strength varies from 1.7 to 2.2 for different types of wood.
The humidity of the wood is also reflected in the resistance to static bending - when the humidity changes by 1%, the resistance changes by 4%.
The strength or fragility of wood can be determined by the resistance to impact bending. If the resistance is low, the wood is brittle, and a high resistance value indicates high viscosity of the wood.
Impact bending resistance is measured using a pendulum by measuring the work Q kg/m required by a pendulum of a certain weight to break the test block. The resistance itself is calculated using the formula A = Q/bh2, in which b and h are the width and height of the cross-section of the sample in centimeters, respectively.
Testing the mechanical properties of wood for bending
Why does wood become more plastic under different influences?
It's no secret that wood is an elastic, tough, compression-resistant material. This is due to the presence in wood of a natural polymer - lignin (similar to glue), which gives the wood strength and permanent shape. Lignin binds cellulose fibers together. Lignin is located in the cell walls and intercellular space of wood.
In different wood species, lignin content varies from 20 to 40 percent.
Under the influence of temperature, water, chemicals, “natural glue” softens. And after giving the wooden workpiece the required shape, the lignin cools and returns the wood to its former elasticity and strength, without changing the shape that the master gave it.
Optimal wood temperature for bending
In order for lignin to reach the desired state and the wood to become more plastic, it is necessary to heat lumber from solid wood to 95-105 degrees Celsius. The wood must be completely heated to the required temperature, not just the surface layer.
Bending wood. Some important tips
- Curved wood of the desired shape is fixed in this position for a while until the structure of the wood is stabilized (5-7 days on average, after drying up to 15%).
- It is important that different types of wood bend differently. Hard woods take bending well (oak, beech, elm, etc.).
- Coniferous species are practically not used in bending.
- The thinner the piece of wood, the easier it is to bend.
- The best option for a workpiece for bending will be material split along the fibers.
- Choose the wood to bend carefully. It must be free of defects (knots, resin pockets, cracks, etc.)
Regardless of the method used to prepare the wood for bending, once the wood is removed from the mold, the bend will relax slightly.
Therefore, the bend radius should be slightly smaller than necessary in order to subsequently compensate for this effect
Source: drevologia.ru
Why bend wood?
Wood bending is one of the oldest methods, used since ancient times to make canoes, bows, sleighs, barrels and so on. How to make bent wood parts?
At a time when wood was mainly used for the construction of mobile structures such as wheels for carts and carriages, bending the material was a defining process.
We can say that bending wood is a very simple process, provided you have the necessary knowledge and skills
Wooden products such as wooden toys, spoons, picture frames, etc. can also be made using various wood bending techniques.
The bending of wood can be different, depending on what purpose is being pursued - whether the shape of a boat, an arch, a barrel is needed...
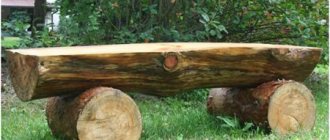
Wooden garden furniture for the cottage: log version
Few people know, but with minimal effort and money you can build quite attractive garden furniture from logs - one might even say exclusive furniture. Here, of course, everything depends on your approach to the matter and imagination, but in general this is true, and the principle is quite simple - the main thing is to have a tool such as a chainsaw, and everything else will follow. If we consider the principle of manufacturing such garden furniture, then it can be presented in the form of the following sequence of work.
- Thick logs are placed at the base of the table or benches - they don’t even need to be processed. Simply cut to the required size and install at a certain distance. In general, things are simple with the table - they put the thickest stump in a certain place, and the table, one might say, is ready. All that remains is to build the countertop and that’s it. With benches or chairs the matter is somewhat more complicated, but there are also more options - you can simply lay thick logs on the ground, or you can make some semblance of legs.
Wooden garden furniture photo
Wooden garden furniture photo
A special role in the process of manufacturing such exclusive garden furniture from wood is given to the selection of wood - in particular, logs and branches, which in their shapelessness should create a complete abstract or very real picture. This is precisely the beauty of such wood crafts for the garden.
Steam box heating
First you need to prepare the steam box. It can be made by yourself. Its main task is to hold the tree that needs to be bent. There should be a hole in it to allow the steam pressure to escape. Otherwise it will explode.
The steam outlet should be located in the bottom of the box. In addition, the box should have a removable lid through which you can pull out the bent wood after it has acquired the desired shape. To hold the bent wood piece in the desired shape, clamps should be used. You can make them yourself from wood or buy them at a specialty store.
You should make round scraps of wood - several pieces. Off-center holes are drilled in them. After this, you need to push the bolts through them, and then drill another hole through the sides to push them in tightly. Such simple crafts can become excellent clips.
Now it’s time to steam the wood; to do this, you should take care of the heat source and close the wood piece in the steam box. For every 2.5 cm of thickness of the workpiece, the product needs to be steamed for about an hour. After time has passed, the tree must be removed from the box and given the required shape. The process must be completed very quickly. The workpiece bends neatly and softly.
Some types of wood bend more easily than others due to different elasticity. Different methods require different amounts of force to be applied.
Once the desired result is achieved, the bent tree must be fixed in this position. You can secure the tree while shaping it. This makes it easier to control the process.
