Wood is the most popular and valuable material with excellent consumer characteristics. Wood is used for construction, interior decoration, interior decoration, furniture and other various household items.
But wood also has weaknesses, such as a tendency to warp and deform. If the board has moved, how can it be corrected? In this article we will present four effective methods.
In order to straighten the board that has led, you need to understand why the wood warped.
How to level a wooden board?
Author: Irina Zheleznyak | Published: November 9, 2022 at 21:48
Wood has many advantages and excellent consumer characteristics, which is why it is so popular and so often used for construction and interior decoration, production of furniture and other household items. But this material also has weaknesses. One of them is the ability to deform and warp. How to straighten a board if it is misaligned? There are several effective ways.
Let's look at the mistakes.
The first and most important mistake is that the material of the walls is not taken into account.
The second mistake is that you need to choose the smoothest block and preferably planed or at least calibrated on both sides.
The third mistake is that the plane for the sheathing is not aligned.
The fourth mistake is that you need to think about the design of internal and external corners in advance.
There are two popular ways of leveling bars - “using linings from scrap materials” and “using spacers”.
Why do wooden boards become deformed?
Unfortunately, warping of wood is by no means uncommon. Some wood species suffer more from this phenomenon, some less. But when exposed to certain factors, almost all wood is deformed.
What causes deformation of lumber:
– changes in temperature and humidity in the room where wood is used or stored. Wood is a living, natural material with high hygroscopicity, that is, the ability to absorb water. If the room where the lumber is located is too humid, the wood will swell over time, which will lead to its deformation. The same applies to changes in room temperature. Under the influence of heat, wood is very easily deformed, especially if the elevated temperature is combined with high humidity;
– improper drying of wood. The largest percentage of deformation of wooden boards occurs precisely at the drying stage. The fact is that moisture from the wood does not evaporate evenly along its entire length. This creates tension in the wood fibers, which leads to deformation. The wood can bend, warp, twist, and waves can form on the surface of the board. Most often this happens during natural drying of lumber or if it is not completely dried in the drying chamber or the wrong temperature mode is chosen.
This phenomenon can be reduced with the help of special processing, impregnation of the material with special compounds, equipping the wood with compensation cuts, etc.
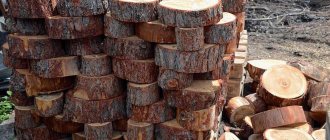
Often, uneven, deformed boards are rejected during production. They can be recycled, cut into smaller pieces, removing the uneven area, and recycled. But it also happens that you bought good quality boards, they were delivered to your site, they lay there in a damp garage or hangar and you noticed that the geometry of the material was broken. It’s a shame to throw away such material, but it can’t be used for its intended purpose. What to do? You can try to level the wooden board. It is quite possible to do this; below we will describe several truly working methods.
How to level a wooden board
How to level a wooden board:
- using a plane. How to level a board with a plane? This method is as simple as two and two. Take a hand plane and remove wood from the uneven area until the surface is level. This method will suit you if there are slight curvatures on the board. It should be understood that with such processing the thickness of the board can be significantly reduced.
It is important to note that the plane must have a long sole, otherwise you will not avoid wavy marks on the board. If the surface to be treated is large in area, it will be more convenient to use an electric planer. Don’t be alarmed, this unit is easy to operate even if you hold it in your hands for the first time, it has a wide platform and a convenient design. Before starting work, the board must be firmly secured;
– exposure to heat and moisture. This is something like “a wedge, they knock it out with a wedge.” If your board has acquired curvature precisely due to the influence of these factors, you can apply them to influence from the side opposite to the curvature. This method is suitable for correcting minor deformities;
– steam treatment and pressing. If the distortions are more serious, you can treat the wood in the curved areas with steam (you can use a steam cleaner) and put it under a press. It is necessary to leave it in this position for several days, then check the result and, if necessary, repeat the procedure;
– leveling under pressure. Another method involves placing a curved board between two sheets of lumber and securing it with clamps. This method must be used in a cool, dry room. The deformed board should be positioned with the curvature down. The board should be left under pressure for at least three days, then evaluate the result.
Irina Zheleznyak, Staff correspondent of the online publication “AtmWood. Wood-Industrial Bulletin”
How useful was the information for you?
Tools used
In order to straighten wood, you need to prepare the following tools:
- manual or electric plane;
- grinding machine.
You should be careful when choosing such tools. For example, the plane must have a long sole, otherwise defects may remain on the surface of the board. To begin with, it is important to fix the beam motionless and remove all kinds of defects from the surface. If you need to work with only one board, then you can get by with a hand plane, but if you need to straighten a lot of wood, then it is advisable to choose an electric option. This will help save energy and time.
It is important to remember that after processing the thickness of the lumber decreases.
There are times when curvature occurs over time. For example, if a house has already been built using wooden beams, then over time the walls may bend under the influence of negative atmospheric phenomena. In this case, you can also carefully eliminate all kinds of defects.
It should be remembered that the reverse process cannot be instantaneous and it will take time for the walls to become the same again. The alignment may take at least a month, but a positive effect is guaranteed.
There are different opinions about the advisability of sampling a quarter with an electric planer. Some consider this a waste of time, arguing that it is better and faster to make a fold using a circular saw or milling machine. Others say that the quality of the work will be better after the planer. Both are right. However, in order to make technological sampling on machines, it is necessary to have them available. Therefore, making steps with an electric planer, although a painstaking task, has the right to life.
One more thing. If a person is not engaged in carpentry business and lives in an apartment, then he is unlikely to have to choose a quarter power tool. For those living in a private house, this option may come in handy, and more than once.
The principle of leveling a wooden floor without removing boards
When carrying out renovations, it is also necessary to replace the floors. The covering plays an important role in creating the interior; in addition, the use of creaky and sagging boards is not the best solution. To save money and effort, it is necessary to simplify the process as much as possible. For example, removing old coating is a very expensive pleasure. It's best to avoid this. Next we look at how to level a wooden floor without tearing down the boards. There are several methods, the choice between them depends on how damaged the wooden floor is.
Gender survey
At this stage, you will have to carry out not only a thorough inspection, but also measurement of irregularities. The wooden floor must meet the following requirements:
- the boards should not be damaged by rot or mold;
- cracks or gaps between elements should not be more than 5 cm (even if they are less than 5 cm, leveling with plywood will be required; other methods cannot be used);
- height differences do not exceed 1-2 cm.
Assessing gaps and height differences between boards
If these conditions are not met, then it will be almost impossible to repair and level the wooden floor without changing the boards. To choose an alignment option, you need to know the height difference. The following instruments are used for measurements:
- construction levels (laser, hydraulic, bubble);
- rule.
The simplest option is to attach a long strip or metal profile to the floor and measure the deviations with a ruler. You can also buy a bubble level at a hardware store to inspect a wooden floor yourself. It determines the slope of the board and costs between several thousand depending on the length of the body.
You can make a hydraulic level yourself. All you need here is a thin transparent tube and water. The disadvantage of such a device is that it is not very convenient to use. The most accurate way to measure a wood floor is with a laser level. This device is used by professional builders, its cost is high, and its use requires special skills. If you need to level the boards in a house or apartment yourself, there is no need for such precision.
Leveling the walls of an old house
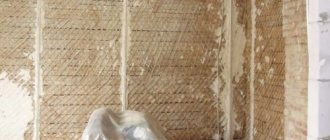
This work is carried out using metal corners 60 mm thick, and the length must correspond to the length of the opening. First you need to cut off some of the wood and prepare a place for the stand, and only then will you have to install the metal corner. By leveling the walls you can ensure:
- aesthetics;
- reliability;
- durability of the house.
Well, to ensure high anti-corrosion properties, the surface of the boards should be treated with a special compound
Thus, the alignment of curved block walls guarantees the quality, strength and safety of the building.
Methods of performing work
There are several alignment methods, each suitable for different cases:
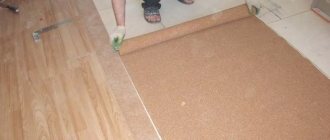
- Laying a substrate made of elastic material is used if the unevenness does not exceed a few millimeters. This increases sound insulation. Most often, materials such as isolon or polyethylene foam are used. The thickness is set within 2-5 mm.
- For more serious defects, scraping is suitable. This method is also not capable of leveling out serious differences, but it can refine the surface and give it an attractive appearance. Before starting work, the floor is carefully inspected for the presence of metal fasteners. Staples and screws will have to be removed, and the nails will be sunk into the boards so that there is no chance of damaging the sanding machine.
- The putty is suitable for height differences of 2-3 mm. Sealants or acrylic compounds are used.
- Self-leveling floors or cement screeds.
- The most reliable option that will allow you to level a wooden floor with serious differences and cracks is plywood or OSB boards. For work, material with a thickness of 14-22 mm is used. There are two methods that can handle different sizes of bumps.
It is worth talking about putty and plywood in more detail.
putty
Repairing gaps between boards using putty
Leveling a wooden floor using this method will require preparatory work. They consist of cleaning the surface from dust and dirt and priming. The primer layer ensures a high degree of adhesion of the putty to the wooden surface.
The material for processing is selected depending on the finishing floor covering. If you plan to lay tiles, linoleum, laminate or parquet on the boards, then acrylic putty is suitable. When using a wooden floor as a finishing floor and then covering it with varnish, use a sealant matched to the color of the material.
Acrylic mixtures are characterized by low strength, so you can replace them with other compositions:
- if the layer does not exceed 1-2 mm, putty on plaster using PVA glue is suitable;
- For a thicker layer, a mixture of sawdust and PVA is used.
The disadvantage of this composition is that it is difficult to distribute over the surface, so after drying it will require sanding until completely leveled.
Laying plywood
The most reliable way to level the boards. After laying the plywood, you can install the flooring (tiles, carpet, linoleum, laminate, parquet). There are two technologies for performing work:
- without intermediate supports for differences of less than 1cm;
- with intermediate supports for differences of more than 1 cm.
Laying without supports consists of securing the sheets with glue and screws. Before starting work, it is necessary to lay out the elements and cut them. The distance between the parts is taken to be 2-4 mm, and between the wall and plywood - 8-10 mm. This is necessary so that the sheets do not affect each other and waves do not appear when the material expands.
Layout options for plywood sheets
Having laid out the parts of the flooring, they are numbered. And they begin to fasten. The adhesive layer should not exceed 2-3 mm. The composition is applied to the leveled surface. Sheets must be laid with a spacing of at least 10 cm.
After the glue has completely dried, you can begin installing fasteners. Before starting work, holes are drilled in the sheets for self-tapping screws, which are located at a distance of at least 20 mm from the edge of the part. The fastening pitch is taken within 15-20 mm. After completion of the work, the surface of the plywood is sanded with a special machine.
The use of intermediate supports increases the leveling capacity . You can use logs or point support points (blocks). The former allow for higher reliability, while the latter save on materials. It is important to provide for the arrangement of the elements so that the joint of the sheets falls on the place of support. The pitch of the elements is determined depending on the thickness of the plywood sheet.
- when using flooring with a thickness of 12-14 mm, the support spacing should be 30-40 cm;
- thickness 16-16 mm – 50 cm.
For OSB and chipboard, other values are accepted:
- thickness 16-18 mm – step 30-40 cm;
- thickness 20-24 mm – step 50 cm.
Laying plywood on intermediate supports
The thickness of the supports is taken on average 15 mm. The width of the boards for making logs is 40 mm. Fastening to the plank floor is carried out using self-tapping screws. Attaching the plywood to the supports can be done with self-tapping screws or glue.
When leveling the floor without removing boards, it is important to ensure that the subfloor is in good condition. If the logs are rotten, then none of the methods described above will help; only replacing the structure will give the result.
Korovin Sergey Dmitrievich
Master of Architecture, graduated from Samara State University of Architecture and Civil Engineering. 11 years of experience in design and construction.
Laying the laminate correctly
This material is particularly sensitive to the quality of base preparation, so this process will be examined especially closely. After preparing the old wooden floor, laying the flooring itself will not take much time.
Checking the strength of the old foundation
An old wooden floor often creaks under load - this is a sure sign that some of the joists are rotten or some of the boards require replacement.
For high-quality preparation of the base, several recommendations can be given:
- The most radical way is to remove the floorboards and inspect the joists. If there is even the slightest hint of damage to the wood due to moisture or insects, it changes;
In advanced cases, you will have to re-lay the floor
Note! Plywood under the laminate on a wooden floor is laid only after the floor has been repaired. If you lay it on sagging floorboards, the laminate will not last long.
- in old houses, the spacing between the joists may be such that the floorboards sag when walked; in the case of laminate flooring, this is unacceptable; the locks on the sides will wear out in a matter of months. In this case, it will be necessary to lay additional wooden logs;
- in the most advanced cases, the logs can simply lie on the ground; the instructions for preparing the floor for laminate do not allow this. You can simply raise them above ground level by laying brick pillars;
The joists need to be replaced here
- but if the logs are laid on top of a concrete base and are not attached to it, then it would not be superfluous to attach them to the concrete base with metal anchors;
- Next, we inspect the floorboards themselves; there should be no cracks or traces of insects. If some of the floorboards have to be replaced, then you can only use boards of the same thickness; a difference in height of even a couple of millimeters is unacceptable.
Leveling the floor with an electric planer
Detailed requirements for the quality of the wooden base for laminate flooring are contained in the SNiP standard 3.04.04-87. The main thing to pay attention to is the evenness of the surface. The requirements are very strict, unevenness of no more than 1 mm/2m 2 area is allowed, this can be explained by the fact that the laminate boards are connected into a lock, and differences in height of the base will lead to its rapid destruction.
If the laminate is laid on an uneven base, the lock will quickly collapse
As for the surface preparation itself, you can proceed to it only after the correction of more serious defects (such as sagging floorboards, rotten joists) has been completed.
Instructions for leveling the floor are as follows:
- first, the cracks are puttied, unevenness on the floor surface is measured, it is advisable to use a grinder or electric planer only to eliminate height differences within 4-7 mm;
- then the floor is divided into squares and each of them is machined;
The sanded part is highlighted in color
Note! You can treat the entire floor at once, but in this case it will simply be more difficult to control the quality of the surface.
- Before processing, all nails must be buried inside the board with hammer blows. Moreover, you don’t need to hit the board as hard as you can with a hammer, leaving dents; just use a punch. It is placed against the head and the nail is carefully buried in the board. If this is not done, then when leveling the floor, the knives of the power tool will simply be damaged;
Crooked lumber: what to do?
Unfortunately, quite often you have to deal with curved lumber. In such cases, carpenters say that “the board went screw.” This material is difficult to use.
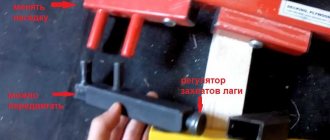
A slight curvature can be corrected. This requires 2 strong screw clamps. Place one clamp on a curved board that will serve as the bottom beam. Use the second clamp to secure the corner bracket. The corner bracket is pre-attached with self-tapping screws to the lower beam.
Straighten the crooked beam by pressing down on the clamp. When the beam is level, attach it with several screws to the part of the bracket that is located on the pole. To keep the timber in the proper position, use a long self-tapping screw.
Attach the screw clamp to the bottom beam. While pressing the clamp, bring the lower beam into the desired position. When the beam is completely level, screw in a long self-tapping screw. It must be long enough to fit at least halfway into the post.
The bottom beam is now secured and will remain in place.
Preventive action
To avoid or limit wood warping, the wood storage environment must be suitable for the humidity and temperature levels in which the end product will be used. In most rooms, a low-power air conditioner is sufficient to reduce humidity. During dry periods, use a humidifier along with a heater. Avoid sudden fluctuations in humidity and temperature. You can also reduce your risk by:
- Please select your boards by hand before purchasing. Avoid material with large knots.
- Buy enough wood as needed for your current project. This way, all lumber will have the same moisture level.
- Wood should be stored horizontally with plenty of cross boards between the levels to allow air circulation.
RELATED MATERIALS
Jigsaw: saw blades for different materials
If you need to saw off, cut, cut out, it is difficult to find a tool equal to a jigsaw. Wide .
Tools: A jigsaw that won't chip wood
The saw blade for a jigsaw can be different. Why?
Tools: Hacksaw with replaceable blades
Which tool is better – specialized or universal? We will talk about using a hacksaw.
Tools: chainsaw work
There are two types of chainsaws: electric and gasoline. Chainsaw - more powerful than .
Tools: Adjustable drill
How to drill with an adjustable drill?
DIY wooden tiles
The path in the yard can be paved with tiles made from wood yourself. And do it.
How to make a wooden floor on joists
To make a wooden floor on joists, it is not necessary to call a specialist. You can make everything your own.
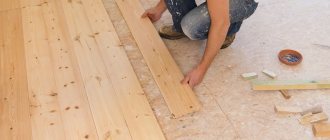
Option two: pinch with a spacer
To straighten a screw board, you will need a couple of pieces of boards equal to the pitch of the rafter system. We place one segment where the corner of the curved beam is blocked, the second one is hammered in next, simultaneously correcting the defect, that is, leveling the wrong angle.
PHOTO: avatars.mds.yandex.net Quite reliable fixation, which does not even require any additional fasteners; everything works only due to tightly fitted parts. So these details should be measured especially carefully.
How to level a wooden floor: step-by-step instructions
Wooden floors are the most used element of the internal structure of a private house or apartment. There definitely comes a time when it needs to be repaired. Or change it due to complete wear and tear, but it rarely comes to that.
The repair consists of installing or replacing the top covering. To do this, it is necessary to bring the existing plank covering - the subfloor - into proper condition. We need to start with the Recommendations for the installation of floors (in development of SNiP3.04.01-87).
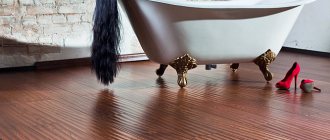
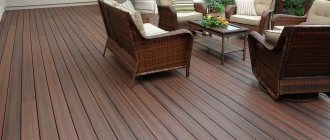
The wooden base must be strong, flat and level. When this is not the case, your new flooring (laminate, tile, linoleum) placed on top of an uneven base will look ugly. Here we note that if there is a dog in the house, then laying tiles or laminate flooring is the best solution.
The floor is leveled after all finishing work is completed.
Types of irregularities
Uneven wood subfloors fall into two categories: overall slope and unevenness within its perimeter. When the entire floor has a slope, the second category is not paid attention to: it is eliminated during general leveling.
If all four sides of the perimeter are at the same level, and the problem is sagging or unevenness in individual places, this local deficiency can be eliminated in another way: by adding a substrate or applying a leveling compound, or by shaving off protruding boards.
Let's look at how to level a wooden floor without tearing down the boards.
Creakiness
Old floors can have another very significant drawback: squeaks. They must be eliminated first.
Causes of squeaking
Each squeak is individual, but the general reasons are as follows.
- Initially, boards with high humidity were laid. After drying, they became deformed and rub against each other when loaded.
- Large distance between lags: boards sag under load.
- Thin boards.
- Due to the drying of the wood, the fasteners became loose.
- There is high humidity in the room.
Eliminating the last two is understandable, but the rest will have to be tinkered with.
You should start by tightening or replacing fasteners.
They vary in color.
Black with PH standard head (Phillips). D 3.5 – 4.8; L 16 – 150 mm. Hardened, phosphated. With large thread pitch. Inexpensive, fragile, insufficiently protected from rust. The slot often breaks off. For interior work.
Yellow with head PZ (Pozidrive)D 1.5 – 6; L 10 – 250 mm. More expensive, galvanized, with good corrosion resistance. The head has diagonal rays (double cross). Reliable slot. With smaller thread pitch. They can only be tightened with a bit marked PZ. Universal, for external and internal work.
Yellow ones are recommended for all floor leveling work. In what follows, we will call them fasteners or self-tapping screws.
If the creaking does not stop, check (by the location of the fasteners) the distance between the lags. If it exceeds the recommended one, you will have to bring it into the norm.
If isolated creaks remain, a hole is drilled in these places through which polyurethane foam is poured. Rubbing powdered graphite into small and short cracks also helps.
The creaking of floorboards against each other is eliminated by making cuts between the boards with a circular saw or an angle grinder with a saw blade. The main thing during such an operation is not to get into the fastening element.
The creaking of thin boards is eliminated by laying slab material on top.
Simultaneously with these operations, it is necessary to examine the floor elements for the presence of wood-boring insects and fungal diseases. The affected areas are cut out, or the board is completely replaced. New wood materials, including slabs, must undergo fire and bioprotection.
We wrote in detail about eliminating creaking wooden floors in this article.
Leveling the floor with a general slope
This defect means that one side of the room's perimeter is lower than the other. Most often it happens in a wooden house. The best way to check the overall slope of the floor is to use a laser level. This can be done with an inexpensive line laser, but more accurate results are obtained with a rotary laser level.
It projects a perfectly straight line across the entire room. To see that the floor is not horizontal, you need to measure the distance between the laser level line on the walls and the floor in different places around the perimeter of the room.
A slope of more than 1 cm cannot be eliminated using substrates for the finishing coating. The only way out is to level the wooden floor with plywood or OSB along thin joists.
Plywood or OSB
The choice of material for leveling floors in dry rooms is influenced by its price. Plywood (GOST 30427-96) of the FK or FSF grades is reliable, but expensive (even unsanded). OSB/OSB (oriented strand board, GOST R 56309-2014) is cheaper, more environmentally friendly in production (made from waste), but inferior in physical and mechanical properties.
The quality of plywood is usually not satisfactory, but with OSB you can make a mistake.
The shavings should be large, the surface textured, and not leave splinters on the hand. The smallest chip is 75, the longest is 150 mm. The OSB-2 brand is suitable for floors, but the universal OSB-3 is used: it can withstand high humidity.
Unscrupulous manufacturers save polyester resins that bind wood by adding small chips and sawdust to the shavings. It is clear that such a slab does not have the declared strength.
The height of the room will decrease by 5–6 cm, which is not significant. The rules for laying plywood or OSB are the same, so the description will be general.
Preparation of slabs
The most used sizes of plywood are 1250 x 1250, OSB – 2500 x 1250 mm. Thickness – from 15 mm. For greater rigidity, it is allowed to lay two layers with a thickness of 8 (plywood) - 10 (OSB) mm. In a private house, they try not to make rooms that are elongated, like in high-rise buildings, so these sizes are optimal in terms of the amount of waste.
Recommendations based on your search history
How to plan with an electric planer. Tips for Beginners – Duration: 8:52
- 3 years ago
- 224
One size without thicknesser Without thicknesser – Duration: 5:00
- 3 years ago
- 900
Board 1st grade, truth and deception – Duration: 16:13
- 2 years ago
- 58,334 views
How to make a wood board. – Duration: 12:24
- 3 years ago
- 245,233 views
DIY thicknesser is simple – Duration: 14:23
- 6 years ago
- 826,192 views
An easy way to straighten the edge of a board on a router table - Duration: 6:07
- 3 years ago
- 41
Solid wood countertops. Problems and their solutions. Method 1. (Practical advices of furniture-maker) – Duration: 7:28
- 4 years ago
- 39
Carpentry without a thicknesser for wood Do it yourself solid wood furniture without a thicknesser 2015 – Duration: 18:08
- 5 years ago
- 118
SHIELD With your hands, without tools, as my grandfather taught. – Duration: 13:26
- 2 years ago
- 153
How to edge an unedged board - Duration: 8:16
- 2 years ago
- 63
Plywood rack, leveling plywood for laser cutting - Duration: 7:39
- 2 years ago
- 4,263 views
Queries similar to led board how to straighten
How to plan curved boards. – Duration: 9:51
- 1 year ago
- 102,662 views
It is possible without a surface planer. – Duration: 5:41
- 1 year ago
- 188
Crooked tabletop Solving the problems of wooden tabletops - leveling the tabletop! DIY Kitchen – Duration: 34:09
- 2 years ago
- 8
Improper storage of boards and its consequences – Duration: 5:20
- 1 year ago
- 4
A simple surface planer made from three boards and a router! – Duration: 5:44
- 2 years ago
- 32,824 views
Local alignment
Slope the floor towards the middle. As a rule, such a defect occurs in places that are intensively used.
Volume cavities can be filled with durable material. Craftsmen offer budget compositions: plasters, putties, cements, adhesives mixed with sawdust. Everyone has the right to experiment. But the floor should last for decades. There are no guarantees that these compounds will not turn into crumbs.
Therefore - no matter how trite it sounds - trust the professionals. The best choice is self-leveling solutions. This way you can level a wooden floor under a laminate. Cement base, reinforcing fibers, polymer modifiers. Ceresit, Kerstonit, Vetonit, Knauf, Staratel are the most famous brands. But even these compounds are not directly intended for use on wooden floors.
Before purchasing, you should study the instructions: the amount of shrinkage, the amount of fiber or fibers (the more, the better). If they are not there, you will have to fill it over a reinforcing mesh nailed with brackets to the boards. It's better to avoid this. You should not use finishing mixtures if the required layer height is more than 5 mm.
Self-leveling compound is sold pre-mixed, in large buckets, or as dry mixes. In the latter case, the proportion of water and mixture must be observed with pharmaceutical precision.
Excess water will lead to delamination of the composition and reduce strength. Particular attention is paid to the hardening time: the mixture must be used in time during this period.
The areas of the old wood floor that need to be filled are identified. They must be absolutely rigid. On them, acrylic putty is used to seal all the places where the self-leveling device can drain. The junctions between the floor and the walls are covered with damper tape. Then the entire floor area is cleaned and dusted.
A moisture-proof primer is applied to the area where the self-leveling material will be used. If the primer is absorbed very quickly, 3–4 layers are required.
Pour a large amount of well-mixed leveler onto the lowest point of the base. Spread it over the floor with a notched trowel, squeegee or needle roller (the height of the needles is 2 mm above the fill layer) so that it completely covers the lowered area.
The mixture will find its own level, hide unevenness, but must initially be distributed over the entire area.
Allow the material to dry according to the manufacturer's directions. Fragmentary leveling of the wooden floor with a self-leveling mixture ends with cutting the damper tape.