by Alexey | Crafts Vintage Decor Workshop Interior | Sunday, April 22, 2018
| Follow Make-Self.net on Facebook and be the first to read our articles. |
In every home ever built, there are two most important components - the floor and the roof. We don't spend a lot of time looking at the roof of our home, but we do spend many hours a day interacting with the floor. Regardless of whether we sit on it, walk or stand. Unless, of course, you can walk on the ceiling like Spider-Man . Considering all these factors, it can be said that the floor is the main part of your home that reflects your personality and lifestyle. Today we are going to share some amazing flooring ideas with you. Enjoy...
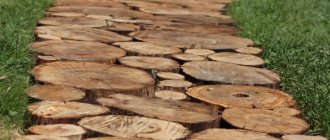
The floor is made of wooden cuts.
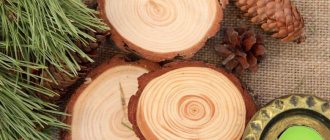
Nowadays, such seemingly very simple at first glance floorings made from wooden sections of logs - such unique stumps - have become very popular.
Laying end cuts
Laying slices is the main part of the work on installing decorative floors, similar to laying out a mosaic. There are several technologies for laying wooden slices on a prepared surface.
Filled with self-leveling mixtures
First, lay out the largest sections.
This option is best suited for creating noble floor coverings for apartments or country houses.
Sawed round pieces are laid out over the entire floor area. It is better to start the layout with the largest cuts, leaving space between them for smaller elements.
After this, we fill the gaps with small cuts, which allows us to diversify the overall picture and save on the consumption of such expensive material as self-leveling floors.
The rounds can be laid directly on the waterproofing without additional attachment: after pouring with epoxy mortar, all elements will be soldered into a single monolith.
After completing the layout of the end cuts, we begin to fill the floors with an epoxy self-leveling mixture.
For a greater decorative effect, you should choose not completely transparent, but slightly darkened epoxy self-leveling floors.
Distribute the mixture with a wide mop.
Dilute the mixture according to the instructions and pour it over the “stumps” so that they are slightly covered (0.3 - 0.5 cm).
Since self-leveling floors have increased fluidity, leveling them will not cause you any particular difficulties. To do this, just use a wide construction mop.
Laying on sand
If the thickness of the wooden “pancakes” you have is different, then for ease of leveling you can use coarse sand. The laying technology in this case is similar to laying paving stones. A 2-3 cm layer of sand is poured onto the subfloors, and cuttings are laid on top of it. To learn how to beautifully lay alloys, watch this video:
Leveling them in height is done using a building level and a rubber hammer, the blows of which deepen the protruding elements.
Filling joints with clay-lime paste
This option is the most budget-friendly, since it practically does not use expensive purchased mixtures.
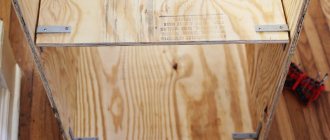
In this case, the saw cuts are laid on a layer of plywood, to which they are glued using glue (PVA, “liquid nails”, etc.).
Then we prepare a solution consisting of 5 parts of sawdust, 2 of clay, 1 of lime and 1 of melted fat or vegetable oil. We fill all the gaps between the “pancakes” with this mixture. As a final touch, we cover the surface of the cuts with stain and varnish.
Wood flooring with geometric patterns for $80.
Detailed master class here.
Advantages of a stacked floor
- Environmental friendliness - all components and materials used in the production of flooring from wood cuts do not have a negative impact on the human body;
- Cost-effectiveness - if you live near a forest belt, you can save a lot on material, although if you purchase it, you won’t be able to save your wallet;
- Strength qualities are at a high level due to the fact that hard wood is used in production, and it is filled with paste, which after drying becomes unusually hard;
- Appearance - the unusualness and beauty of such a design solution will almost stun guests, and will continue to delight you for many years.
To install such floors, you will not need to hire outside specialists, because the whole process is completely simple; after reading this article, you will be able to do them yourself in your home.
The floor in the bedroom is made from timber cuts.
A young Japanese designer who wanted to renovate his bedroom in the city center of Hamamatsu used materials left over from the renovation. This is how a floor made from saw cuts of wooden beams was born. The end result is a unique, handcrafted finish that resembles a giant Tetris made from multiple blocks of wood.
Preparing the subfloor
We get rid of the old base from the bumps, seal the cracks, cover it with soil.
The next step is to prepare the rough base of the floors and lay the cuts. The surface of the base should be almost perfectly flat, without holes or bumps. Otherwise, it will be difficult to achieve a perfectly flat surface of the decorative coating.
Using a building level, a flat metal profile or a wooden lath, we check the entire surface of the floors. In the right places, we remove the bumps with a grinding machine or a mason's pick, and fill the holes with plaster mortar.
If the rough base is too uneven, it will be easier to pour a leveling screed over its entire area.
To protect wood from moisture contained in concrete floors, floors are covered with rolled waterproofing materials or coated with water-repellent mastic.
Floor made of leather belts.
At first glance, this flooring is very reminiscent of traditional parquet. But, if you look closely, you can see the original pattern of details, miniature holes and the heterogeneous color scheme of the canvas. To the touch, the floors seem softer and warmer than usual. And there is nothing strange about this. The fact is that the original floor covering is made of many leather belts connected to each other.
Preparation of cuts
Achieve the same thickness of the cuts, otherwise the floor will be uneven.
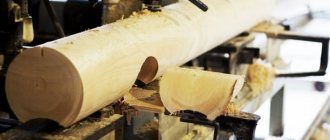
You can prepare wood cuts of the required thickness with your own hands. To do this, you will need a gasoline or electric saw and a piece of wood in the form of a tree trunk or a piece of wood butt.
Thick branches and trunks of thin trees will also be used. They can be used to fill the space between large diameter wood rounds. You can cut them at your dacha or garden plot.
Such trimmings can also be ordered at the sawmill
All end cuts must be of the same thickness to avoid a situation with a traumatic “stump” sticking out above the general floor level.
If you do not have such an opportunity, then the necessary cuttings can be ordered for a certain amount by a worker at a sawmill or woodworking plant.
Recently, decorative wooden cuts can be found on sale in some construction supermarkets.
When choosing the thickness of the cut, you should remember that this is the amount that will reduce the height of your room, so you should not make too thick cuts - the recommended thickness of wooden “pancakes” is about 3-5 cm.
Hardwood will last longer.
Thinner cuts are extremely fragile and will inevitably break during use.
If there is a choice, when making cuts, preference should be given to harder wood species - larch, oak, walnut, hornbeam.
Of course, such wood is more expensive than pine, alder or birch, but the service life of the flooring will be longer.
The table shows the hardness classes of various tree species.
Wood for cuttings should be taken well-dried, since wooden rounds made from raw material may begin to crack after being laid on the floor, and this will ruin the entire appearance of your decorative floors. Detailed instructions for making cuts are presented in this video:
It is not necessary to clear the bark from the trunks before sawing. This is usually done to remove the larvae of various woodworms that live under the bark. But in the case of pouring floors with a polymer composition, the larvae are unlikely to be able to survive, much less eat wood impregnated with epoxy resin.
It is necessary to remove the bark if you are going to fill the gaps between cuts with clay mortar.
Floor made of coins.
What can you buy with small change these days? You can’t even buy a box of matches, but when you collect the coins together, you can think about really big projects. For example, make an original floor out of them.
What is this floor?
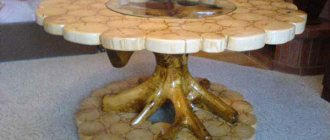
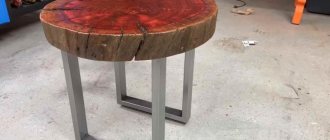
Cross cutting of logs leads to the appearance of round logs several centimeters thick. It is these that we will lay on the floor, creating a unique surface. To consolidate the result, a fill is made, which can be very different. A striking example is self-leveling floors. By the way, in this way you can create not only floors, but also a wide variety of interior details, from wall decoration to countertops.
The floor is made of old wood.
Wood floors are generally one of the most sought after elements in a home. Because of its natural appearance and natural warmth underfoot, wood looks very beautiful and always remains timeless.
Are all logs suitable for this role?
In fact, in addition to the “painful” logs already mentioned above, those that are too soft will also not be suitable. Try to select wood from hard, durable species. If we take specific examples, soft wood species are spruce, pine, fir, cedar, aspen, linden, and poplar. It's better not to use them. But oak or walnut are perfect for this.
You also need to focus on your financial capabilities. After all, such floors can be not only cheap, but also quite expensive if you buy blanks and do not make them yourself, and also if expensive types of wood are used to finish the floor.
The floors are made of old brick.
The brick floor is a striking architectural element. A real old floor resembles a city pavement or the paths of a quiet park. Despite the fact that these floors are hard and durable, they bring into the interior their own unique artistic play of their natural colors of old baked clay.
Minor disadvantages
Those people who are involved in laying such floors claim that the process is not at all as complicated as it seems. But here everything depends on the size of the fragments and the floor area. Sometimes you can fuss for quite a long time;
When properly filled and processed, such floors are quite durable structures that do not require additional processing. However, if mistakes are made, such a floor can cause a lot of trouble. Therefore, the requirements for attentiveness and compliance with all rules are very high here.
Using wooden boards as a tool for professional designers
Another feature of wooden plank flooring that designers often use is its graphic nature. It forms a certain rhythm and direction, which, with the right approach, can transform the interior, make it more interesting and dynamic.
There are several basic techniques: firstly, boards are often laid in the direction of movement, giving the space greater clarity and consistency. Secondly, the room seems brighter and more spacious if the boards lie perpendicular to the plane of the windows.
And finally, the visual perception of the proportions of a room can easily be changed, for example, by emphasizing its elongated outlines with the direction of the wooden covering. Or vice versa, creating the illusion of a wide hall by laying the boards parallel to its narrower side. All these techniques can be found in photos of the floors of wooden houses created by professional designers.
Which type of flooring you ultimately consider to be the best option depends on your goals, preferences, and the budget you have. However, all existing varieties can be an excellent, effective solution if there is a clear understanding of their advantages, disadvantages and capabilities.
Interior doors in the house - which ones to choose? Review of the best models of 2022. 125 photos of new designs- Entrance doors to the house - which ones to choose? Review of the best models of 2022, design examples + 120 photos
8 by 8 house layout - the best design projects of 2022. Instructions for beginners + 100 design photos
Option one
For this option of making a floor with your own hands, end logs of logs up to 120 mm thick can be suitable. However, in this situation, you can show your imagination and lay round log houses of various diameters. To complete the work, you will also need the following materials: lime, sawdust, wax, clay, flax oil, water.
Laying is done as for a mosaic with small gaps between adjacent parts. You need to pour sand with small pebbles onto the surface in a layer of up to 10 cm. Then you need to lay the saw cuts, slightly pressing them into the sand. You also need to adjust the height of the parts - it should be the same. The gaps must be filled with the following paste: 1 kg of fat, 5 kg of sawdust, 1 kg of lime, 2 kg of moistened length.
Then you need to carefully fill all the gaps and cracks in the wood cuts. Leave everything to dry for 2 days. Then the surface must be well polished. This can be done with wax and oil.
Option two
The wood cuts need to be cut with a band saw. Next, they are placed on plywood and glued with construction glue. The seams must be filled with a special solution, which should contain 20% sawdust.
When everything is dry, you need to sand it with a sanding machine. The floor surface will become smooth and the cuts will be clean. Then the surface of the floor from the saw cuts must be covered with sealant. The solution is 80% mortar for self-leveling floors based on epoxy, a self-leveling mixture. It is recommended to choose a dark color. But you will need to make sure that the dark paint does not stain the surface of the log houses.
Upon completion of work, it is recommended to apply a topcoat, varnish, epoxy, or polyurethane-based self-leveling floor.
In some cases, saw cuts are placed on liquid concrete. However, the choice of material is left to everyone’s discretion.
After final leveling and sanding, the floor surface can be covered with stain, then a final varnish coating can be applied. This way the floor can be given a certain shade.
Now we know about making floors from wooden logs. Here you can give freedom to your imagination and make various ornaments from log houses of different diameters. Follow our instructions on the technology of performing the work and the floor from the saw cuts will be excellent. We wish you success!
- Using wood oil
- What types of wood impregnations are there for interior work: reviews and recommendations
- Types of wood paints and their features
