Home » Type » House
DesignHouseBuildingDIY
Alyona
15308 Views
The pediment of the house must be strong and reliable. Therefore, this issue should be given special attention. In this article you will learn about the features of the robot, patterns, materials and finishing methods. And the main thing is that it’s all possible to do it yourself, everything exactly the way you want. Read about all this and more below.
What it is?
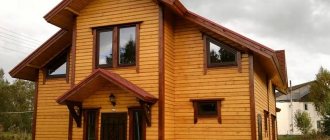
The pediment (from other Greek: Front - forehead) is a natural continuation of the end wall of the building. It is located above the cornice, which coincides in level with the ceiling between the top floor and the attic. Usually this is a plane limited by the roof slopes. More often they are simple triangular or polygonal broken in shape, sometimes semicircular or bow-shaped (reminiscent of the bend of a stretched bow). There are also other configurations, for example, in the form of a trapezoid.
The pediment is a natural continuation of the end wall of the building
Since the ancient times of Ancient Greece and Rome, the pediment began to be used as an additional independent architectural element decorating the building. In this capacity, it was widely used in palace and temple buildings, small architectural forms - rotundas, triumphal arches, etc. Coats of arms, wreaths, emblems, cornucopias, allegorical figures of Muses or Geniuses of glory were placed in its field.
Structural diagrams
From a constructive point of view, the pediment is an attic wall that protects its interior from atmospheric influences - wind, dust, rain and snow. This part of the facade can be solid or it can have a dormer window - round or semicircular.
A dormer window is required to equalize the pressure inside the attic and outside the building. The dormer window should open, especially in summer. A wooden house without this device will constantly creak and deform. In brick - due to the rigidity of the structures, cracks may appear in them, which can very easily turn into emergency defects that will require a considerable investment of funds to eliminate.
From a constructive point of view, this part is an attic wall
Sheathing
The cladding of a structure built according to the frame principle is especially in demand in private construction. Allows you to get an inexpensive, practical roof.
The following materials are used for cladding:
Lining or other lumber. Arranged using frame technology.
First, a frame is built, onto which boards are then sewn. The cladding performs excellent decorative and protective functions. Due to its low resistance to moisture, the pediment must be periodically coated with protective paints and varnishes.- Vinyl, metal, cement siding. It is easy to install, resistant to atmospheric influences, and practically does not weigh down the structure.
The panels are connected by snapping locks. For lathing, dry bars or metal profiles are used. The casing is attached with self-tapping screws and staples. Vertical installation of siding requires impeccable execution, therefore it is considered more difficult. - Asbestos slate. A popular type of cladding in Soviet times. Lately it has been rarely used. The disadvantage of the material is fragility and heavy weight. A plus is the low price and moisture resistance.
- Corrugated sheets are classified as large-format finishing materials. One sheet can often cover the entire area. The number of joints and fastening points is minimal, so the likelihood of corrosion is negligible.
- Opaque polycarbonate , various polymer finishing panels. They have good water resistance, but resistance to wind and low temperatures is questionable. There is a danger of destruction under the influence of ultraviolet radiation. This covering is suitable as a temporary option.
- Sheets of moisture-resistant plywood or moisture-resistant plasterboard are cheap types of sheathing. They are easy to install, but require periodic painting. Plywood and drywall are best used for interior cladding.
Advice. The choice of material must be approached with all responsibility and not neglect the advice of professionals.
Material for production
For a brick or wooden house with unforeseen additional external finishing, it will be better if the material of the enclosing structures matches the material of the pediment. That is, for a brick unplastered house it should be brick, and for a wooden frame it should be made of logs, and for a plastered house it should be plastered. At the same time, the thickness may differ from the thickness of the walls to a lesser extent.
Advice Don’t get carried away with using different materials for this part of the wall and the enclosing structures. If this was not specifically intended by the architect or designer, in most cases this may indicate bad taste.
Beautiful country house design
Video description
The video contains a detailed description of the features of finishing work using vinyl siding:
Installing vertical siding on the roof gable requires additional labor costs, because with this installation method it is more difficult to achieve an ideal result.
Vertical installation of vinyl siding should be done in the following order:
- Corner strips are fixed along the edges of the gable wall .
- A plumb line is lowered from the top of the rafter system, necessary to indicate the central axis .
- is installed along this line .
- With a predetermined step other plates are attached parallel to the central one.
- the installation of panels begins , with the first segments installed in the corners of the structure.
The end result should be a vertical cladding like this Source bg.decoratex.biz
Finishing methods
Often the house design provides for additional finishing of the facades, often combined with insulation, and this can be:
- simple or decorative plaster;
- facing with ceramic, artificial or natural stone tiles;
- covering with plastic, fiber cement, and other types of sidings or panels;
- use of the so-called ventilated facade. This allows outside air to pass freely under the cladding and remove excess moisture. And also make the building less cold in summer and cooler in winter.
Timber building
In this case, the material and manufacturing methods may differ from how the walls are constructed. So, for example, the walls can be made of brick, and the gables can be made of foam concrete blocks or wooden panels. After uniform finishing of facades and frontal parts, they can look like they were built in the same style.
Recommendations for selecting siding
Rice. 11. The house is covered with facade panels, and the pediment is covered with siding to match the main finish.
Any type of siding is suitable for cladding the pediment: wood, metal, fiber cement or polymer (PVC siding or polypropylene facade panels). The advantages and disadvantages of each of them are shown in the table.
| Wood siding | Metal siding | Fiber cement siding | Polymer siding | |
| Moisture resistance | 2 Wood absorbs moisture, this spoils its appearance and performance characteristics. | 4 Under normal conditions, metal siding is not afraid of water. But if the protective coating is damaged, it may rust. | 5 Resistant to moisture. | 5 Resistant to moisture. |
| Corrosion, incl. biological | 1 Susceptible to infection by fungi and mold. | 3 If the protective layer is damaged, it may rust. | 5 Not susceptible. | 5 Not susceptible. |
| Frost resistance | 3 If wood has absorbed moisture when it freezes, it will deteriorate. | 5 Frost-resistant. | 5 Frost-resistant. | 5 Frost-resistant. |
| Fire safety | 1 Wood is a flammable material. | 4 Metal does not burn, but the polymer protective coating will melt. | 5 Does not burn. | 3 Does not support combustion. Extinguishes on its own if it is not exposed to a direct source of fire. |
| Weight | 4 Light enough. | 4 Light enough. | 3 Heavy. | 5 The easiest. |
| Strength | 3 Durable enough. | 4 Durable enough. | 5 Very durable. | 3 Durable enough. |
| Price | 5 Inexpensive. | 5 Inexpensive. | 2 Dearest. | 5 Inexpensive. |
| Easy to install | 4 Fairly simple installation. | 5 Easy installation. | 4 Fairly simple installation. | 5 Easy installation. |
| Ease of use | 2 Requires regular treatment with protective compounds. | 5 Does not require special care. It is enough to wash it with running water from time to time. | 5 Does not require special care. It is enough to wash it with running water from time to time. | 5 Does not require special care. It is enough to wash it with running water from time to time. |
| Total score | 25 points. | 39 points. | 39 points. | 41 points. |
Table 1. Comparative characteristics of different types of siding.
Thus, the most versatile, affordable and easy to install and use is polymer siding. It can be vinyl, acrylic, polypropylene. The characteristics of the panels themselves depend on this:
- Vinyl siding is frost-resistant down to -65 degrees, but may fade slightly in the sun.
- Acrylic siding is resistant to high temperatures, does not fade, but can withstand frosts of no more than -50 degrees.
- Polypropylene panels are the most durable, but also the most expensive.
Siding can look like a wood siding, stone or brick siding, or a tiled siding. With a huge range of colors and a variety of textures, there is sure to be an ideal option for your home.
Summary
Installing siding is not a difficult task. And when it comes to the gable of a house, finishing with siding will not be difficult for a person who knows how to hold an angle grinder in his hands.
However, it is important to follow all panel manufacturer rules and recommendations. And don't rush. Remember and follow the golden rule: measure seven times - cut once.
If you are not confident in your abilities or are not ready to spend time on installation work, entrust the house cladding to professionals.
You can find them based on reviews from neighbors, but it is advisable that the house was lined a couple of years ago and without visible defects. Another option is certified installers recommended by the manufacturer. As a rule, he is responsible for such employees. And he knows that these are professionals who will not let you down and will not cheat. Return to list
Insulation of the gable
When the attic space is adapted to accommodate an attic or mezzanine, and the thickness of the front wall is less than the thickness of the front walls, this part of the house must be insulated. Thermal protection is best done from the outside. There are two reasons for this:
- maintaining the useful volume of the attic space;
- inclusion of the gable wall in the thermal protection system.
Red brick finishing
The insulation must be protected from mechanical damage. Therefore, thermal insulation is usually combined with sheathing or cladding. It is performed using a wooden or metal frame in the form of slats, fixed with screws to the wall at a certain pitch and interval. The cells that are formed between the frame lattice elements are filled with mineral wool mats or foam sheets before cladding.
Before installation, the insulation is wrapped in a film with waterproofing and water-repellent properties. At the same time, it allows steam to migrate through the walls, resulting from human activity and changes in internal and external temperatures. A vapor-permeable film or membrane does not allow the thermal insulation to become saturated with water condensate and, as a result, lose its protective properties.
To prevent soaking when installing the covering, a roof overhang is installed. It is supported through the lathing on fillets - figured boards that protrude beyond the façade at a distance of up to 40 centimeters or more.
Wood never goes out of style
Installation technology
The gable element is constructed before the roof is erected or after:
- In the first case, nothing prevents you from building the correct geometry of the brick wall, but careful calculation of the parameters will be required.
- The second option will require orientation to the space between the slopes. This is a good choice when constructing a frame with further cladding.
Read more about the types, design and installation techniques of a gable roof gable in a separate article.
Brick
The technology for constructing a pediment made of brick, aerated concrete, foam concrete or gas silicate is practically the same and consists of the following steps:
Mark the side walls of the building. Find the center of an isosceles triangle. For an asymmetrical roof, the projection of the ridge is shifted closer to the side wall area.- The slats are fixed to the outside of the walls at the points obtained, raising them above the walls at the height of the ridge.
In this way, the top of the truss structure is determined. Cords are pulled and secured between the slats. The height of the windows is preliminarily determined. - They begin to lay out continuous rows of the wall, focusing on the cord. Make indents for window openings or doors. The masonry does not differ from the usual one, except that mandatory trimming of the outer bricks along the cord line will be required.
- If the pediment is very high, pilasters are laid on the inside to protect it from collapse.
- Upon completion of the masonry, the sidewalls are leveled with masonry mortar.
After complete drying, the brick gables, which are the walls of the attic used, are covered with plasterboard on the inside and an insulating layer is laid. Mineral wool, penofol, penoplex, polystyrene foam can be used as heat insulators.
On a note. In the southern regions, insulation of a brick gable may not be necessary if the attic space is not used as a living space.
Frame
Modern technologies have greatly simplified the construction of a pediment. Frame structures are used for the construction of insulated and cold roofs. This is a budget-friendly way to protect your home from adverse weather conditions.
The principle of constructing a frame structure is to install vertical posts to which the facing material is attached. The dimensions of the timber for constructing frame walls depend on the wind load. The minimum cross-sectional size of a rack for a private house is 100x100 mm. The block can be replaced with a paired board.
Installation of a pediment element using frame technology includes the following steps:
First, calculations are made and materials are selected. It is necessary to find out what the slope of the roof will be and what materials it will be sheathed with.- The frame is being erected.
If the gable part is a continuation of the wall, then it is built using the same technology as the walls. Vertical bars are attached to the mauerlat and the outer rafters. The approximate pitch is 40 cm. - The frame is treated with fire-retardant impregnation, which will significantly increase the service life of the structure.
- The finished frame is sheathed with finishing materials, such as plywood. In recent years, vinyl and metal siding have become widespread. The panels are easily installed by snapping the locks.
- The sheathing should protrude 5 cm beyond the edges of the roof. Installation begins from the top. Between the sheets of plywood leave 5-7 cm of free space, which will act as ventilation gaps.
- A layer of membrane is laid, which acts as a hydro- and heat insulator. Then another sheet of plywood, this time it is mounted flush.
- The next covering layer is a waterproofing film. To protect the edges of the plywood, it is bent and secured with staples.
- If necessary, the structure is insulated. The thickness of the heat insulator is selected depending on climatic conditions. A practical insulation material is mineral wool mats, the width of which should be a couple of centimeters greater than the distance between adjacent rafters.
There is a technology for assembling the entire structure on the ground and then securing it to the roof. In regions with increased wind activity, the disadvantages of a light frame pediment appear. For the construction of gables with sheathing made of steel profiled sheets, metal sheathing can be used. The step is the same as for wood.
Important! To prevent the collapse of the structure, all calculations must be done by a specialist.
Video instructions for the correct assembly of gables:
Construction of window or door openings
Window or door openings can be created by expanding the dormer window to the area required for a comfortable stay in the room. If the pediment is solid or “blind”, the openings are made in the standard way. For brick - a horizontal groove is cut at the level of the upper part of the opening, into which a concrete or metal lintel is inserted and secured. The underlying masonry is then removed to install window or door infill.
Beautiful home decoration with a pediment
Mounting J-profiles
The starting guides must be secured perfectly, because... The quality of the entire cladding depends on the correct installation.
Starting profiles must be installed strictly horizontally
First step. Take a level and find the lowest point on the sheathing. We step back 50 mm from it and put a mark. To do this, screw a little self-tapping screw into the rail.
Second step. We consistently move around the building and continue to place marks with self-tapping screws to fix the starting profiles. We also screw screws into the corners of the house.
Third step. We stretch the ropes between the corner marks.
Fourth step. We mark the boundaries of installation of corner profiles on the slats. We take the profile itself, apply it to the corner of the frame structure and put marks along the edges with a pencil.
Mark the location of the edges of the fastening strips on the sheathing
Fifth step. Moving further along the rope, we make a 6 mm horizontal gap from the edge of the corner profiles and fix the starting guide to the frame slats.
Leave a gap between the starting guides and the nail strips.
Technological indentations when installing starting siding profiles
To avoid making a 6 mm indentation, you can cut off parts of the nail strips so that they do not rest against the J-profile during temperature changes.
Instead of indentation, it is possible to trim the profile fastening strips
If you install guides that deviate from the level, the siding will also warp. It will be extremely difficult to correct this in the future.
Decorative finishing of pediments
Most houses have a pronounced cornice, that is, a widening of the outer wall at the level of the attic floor. It is sometimes additionally decorated with molded moldings - rods, cuts, etc. It is recommended that the so-called frontal boards be made in the same way, that is, elements that complete the inclined or curved parts of the pediment, so that the parts limiting it are the same. An end wall that turns into an attic fence when there is no cornice is called a gable wall.
Brick pediment
A brick gable or gable may be decorated with a turned brick design, for example in the form of imitation brackets to support a cornice slab.
These protruding and sinking alternating parts are called crackers. The brickwork is reinforced every 3...4 rows with a wire mesh with d = 4...6 mm.
German style house
When the house and the gable are plastered, the color of their surfaces most often matches in color, but sometimes designers recommend contrasting tones to create the color scheme of the structure.
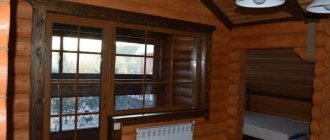
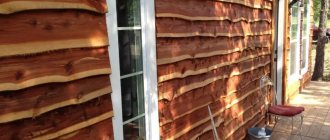
Wooden pediment
When finishing wooden houses, they are sometimes sheathed with clapboard, that is, a cottered board with a thickness of 1...1. 5 cm. Sheathing is done vertically, horizontally or obliquely - herringbone or other type of pattern . Cornices and front boards of gables, as well as platbands and window frames are often decorated with carvings. And on the ridge they install a weather vane with a flag or a silhouette of some totem animal.
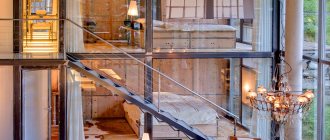
Large panoramic windows let in a lot of light
Wood is a combustible material, as well as an organic substance, with low resistance to biological pollution. Therefore, wooden elements and structures must be adequately protected before use.
For biological protection against fungus, rot, mold, borers and bark beetles, wood is treated with antiseptics in water-soluble form or added to the varnish primer. Fire retardants are used to reduce fire hazards. These are substances that increase the flash point and also, when heated, release substances that prevent combustion.
We install internal corner profiles
The procedure for installing these elements does not differ significantly from the technology for arranging external corners - we leave a gap of 3 mm between the profile and the soffit, and lower the lower end of the profile below the J-bar by 0.6 cm.
If there is a protruding plinth or other element from below that stands out from the general level, then between it and the profile we also leave a 6-mm indentation - the profile of the internal corner must not rest against it.
There are 3 methods for arranging internal corners, see the picture.
3 options for implementing internal corners for siding
If the wall height is more than 300 cm, we splice the profiles. The technology is the same as for arranging external corners.
Example of splicing internal corner profiles
We leave a 9mm gap between the slats, carefully cutting off excess material. The overlap of the upper element on the lower one is 2.5 cm. We install fasteners in 4-centimeter increments, placing them strictly in the center of the holes intended for this. The exception is the highest point. Here the fasteners need to be installed at the top of the hole.
Pediment decoration
If the home owner has the necessary financial resources and wants to decorate his home using classic architectural orders and styles, he can choose any suitable gable configuration. For example, it can be made open, that is, without bringing the frontal boards to the ridge, they can be completed with volutes - twisting snails.
Between them, install a rectangular or round pedestal, on which, in turn, place a flowerpot, an urn, and sometimes a bust of the owner or a particularly revered ancestor. The dormer window in the gable field can be decorated with a molded wreath with floral patterns. Below, under the eaves, in a special rectangular field, a saying or motto that suits the owner’s spirit or mood is sometimes placed in Latin.
This will be interesting to you: REVIEW: Modular houses for permanent residence: What to consider and in what style to decorate? (200+Photos of Projects)
Pediment canopy
Construct a canopy on the pediment of a wooden house using sheathing during its installation on the rafters. They simply make it longer so that a canopy (overhang) is formed to a given length. This method is used for roofing that will be covered with lightweight materials, for example, bitumen shingles. For heavy materials, this method of forming a canopy (overhang) is not entirely suitable; the sheathing boards may not withstand the load.
Another method of forming a canopy is done using a rafter system. Before making the canopy on the pediment, the mauerlat beam is made slightly longer. In this case, the first pair of rafters and the ridge beam will form it. The distance to which the timber will be carried determines the size of the overhang. It should be said that the second method of forming an overhang is more expensive and more difficult to implement, but this design allows it to withstand any weight of the roofing.
Pediment - do it yourself
Making a pediment with your own hands is no more difficult than the construction of other vertical enclosing parts of the building. But this is only the case when there is certain construction experience and qualifications. In their absence, it is better to start self-training in construction by setting up a barn or garage.
You will also need to remember the school course in Euclidean geometry. This will be required in order to correctly mark at least two identical parts of a house of a triangular or more complex shape. They are usually spaced from one another at a distance of 10 meters or more. And all this needs to be done using a cord, a plumb line, bubble and water levels. Otherwise, if there are errors in the markings, you will end up with a curve shifted to one side, a roof with a ridge skewed in the vertical and horizontal plane.
Classic style
Advice It is not recommended to carry out work on the installation of gables alone. It is better to invite one or two assistants. Adult relatives, acquaintances or neighbors can be used in this capacity.
If difficulties arise during marking, call a surveyor. He, having at his disposal geodetic instruments - a level and a theodolite and others, will be able to correctly carry out the breakdown, but will ask for some money for it.
Video description
This video was shot specifically so that you have an idea about installing the panels on the frame:
Two ways to install PVC panels
In order to cut slabs of the desired shape, special templates are used, which are made based on the angles of inclination of the roof and its shape. The material for them can be thick paper or cardboard.
This picture shows the most convenient way to cut siding panels Source yandex.kz
When cutting panels according to templates, always maintain the temperature reserve, and do not adjust them flush with the edges of the pediment. At the very top row of panels, the entire nail strip is cut off, and holes are drilled at the top of the slab for installation.
The point for drilling is determined after applying the segment to the seat. But the hole should be located no closer than 3cm from the cut edge of the plate.
The installation of the panels itself proceeds in a vertical direction from bottom to top. Installation begins with fixing the starting profile and continues with the systematic fixation of slabs and connecting elements.
Advantages and disadvantages
Brick pediment. The most reliable method of building strong and durable fences. There are practically no disadvantages.
Stone finishing option
Wooden pediment. With all its advantages - ease of installation and processing, environmental properties (does not emit substances or fumes harmful to humans) it has a disadvantage - increased flammability and fire hazard
Pediment made of corrugated board. Disadvantages: unpresentable appearance, risk of corrosion at the fastening points.
Pediments lined with plastic panels or siding. Advantages – they cope well with protective properties. Disadvantages: warping, color fading, low resistance to solar ultraviolet radiation.
VIDEO: How to mark the pediment correctly?
Pediment marking
Detailed visual aid
Light touches for an eye-catching design
All that remains is to give the pediment a small touch of individuality so that the soul of the master can be felt. For example, here is a simple decorative element for the pediment, which is especially loved overseas:
You will get a nice dormer window if you follow this master class:
You can also make an elegant and very beautiful decoration in the style of Russian architecture that will transform any home.
Got some ideas for yourself? Share your impressions and ideas in the comments!