There are many landscaping and yard decorating styles that use planter boxes, and making them yourself can save you a lot of money. Moreover, in this case it will be possible to take into account everything: the ideal size, color, texture, materials, etc. Therefore, the prospect of making such decorative items yourself looks very attractive.
There are various techniques, and while some require a special tool and skills to work with it, for others, enthusiasm and a desire to master the information are enough.
From boards or slats
The good thing about boards or ready-made slats is that they do not need to be further processed. In extreme cases, minimal processing is required.
What you will need:
- electric jigsaw or saw;
- plane;
- grinder;
- screwdriver;
- roulette;
- square;
- hammer.
If you don’t have a power tool, the easiest way is to make a standard box. And if you have a screwdriver or a jigsaw, the shape of a flower box made by yourself can be any shape.
You need to prepare slats or boards, plywood scraps and pieces of OSB in advance. To treat the surface, you need to buy wood antiseptic, stain and paint. To reliably fasten the parts together, special glue, nails and screws are useful.
The operating algorithm is as follows:
- Blanks are cut from the boards: several long ones - for mounting the bottom, shorter ones - for the ends, and for the front and rear sides - the same length as for the bottom.
- All parts are leveled with a plane, and then cleaned with coarse sandpaper.
- 4 holes are drilled in the ends for fastening, and 3 in the side walls.
- The bottom, front and rear sides are connected with screws using a screwdriver, and the ends are screwed in last.
- After the box is ready, its surfaces are sanded with fine sandpaper.
If you are preparing outdoor flower boxes with your own hands, you need to remember about the constant exposure to moisture and sun. To prevent the products from becoming unusable within a couple of months, they are treated with an antiseptic outside and inside, and the top is additionally covered with stain, enamel or paint.
Regular wooden box
In fact, this is an ordinary rectangular design that is suitable for growing flowers in the country or storing various household items at home.
The advantages of making boxes from wood are due to the fact that it is an environmentally friendly and affordable material, convenient for processing with hand tools.
To assemble such a product you will need:
- boards that will go to the bottom and walls;
- fastening elements: screws, nails, metal corners;
- tools: screwdriver, hammer, wood saw;
- roulette;
- a simple pencil and paper to prepare a drawing.
First, a drawing is made. A sketch of the finished product is drawn on paper and the main dimensions are determined. The schematic image allows you to accurately calculate the material needed to make the box.
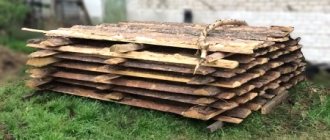
Any boards left over after construction or renovation are suitable as raw materials. The main thing is that the material is of high quality: there should be no signs of rotting or wormholes, otherwise the service life of the box will be short.
The boards are cut according to the specified dimensions. There should be 5 elements in total: side and front walls, bottom. The boards are nailed together; corners can be placed at the joints to provide additional rigidity to the structure. If the box is intended to be used for growing flowers indoors, it makes sense to lay a layer of waterproofing made of plastic film on the bottom.
From pallets
Here the material will be old waste pallets. First, the nails are pulled out with pliers, and all broken or damaged slats are thrown away.
In order for your DIY outdoor flower boxes to turn out beautiful and not look like handicrafts, you need to immediately draw a sketch with dimensions. Then the order of work is as follows:
- The slats are sawed to the required length and sanded.
- Assemble the top frame and base.
- These two parts are fastened with side panels using nails.
- Decorative strips are applied to unsightly joints.
- After this, the surfaces are treated with an antiseptic, stain and varnish.
Sometimes the outer parts are decorated with round saw cuts, branches or boards in the form of a picket fence. You can attach legs to the bottom to raise the flower boxes off the ground. Sometimes they make high stands. This improves air circulation and keeps flowers clean even after rains.
Container location
The location and type of structure will depend on the variety and type of plant being planted. Floor boxes are perfect for installation inside a balcony. When installed outside the balcony, hanging balcony containers are used.
Tall plants in large containers are placed on the floor in the corners or along the wall.
The composition of plants planted together is arranged in such an order that one plant does not create a shadow for another. Light-loving and hanging (falling) plants are placed in hanging boxes with various fastenings.
From concrete slabs
If you are interested in how to make a balcony flower box with your own hands, you need to pay attention to the option of concrete slabs. These often remain after work on landscaping or garden paths. The advantages of concrete are that it is strong, wear-resistant and durable.
For one box you will need 5 identical sized slabs. They are fastened together with a special adhesive glue. This method is extremely simple; anyone with no experience can do it. In the classic version, such containers are left untreated, as they look solid in gray. But if desired, the surface can be painted in any shade.
Mounting and holder options
Brackets secure containers to walls, fences and balcony railings. The fastening can perform not only a supporting function, but also be a decorative element.
Read here how to hang a balcony box on a bracket and other fastenings.
Made from concrete blocks
The option is even simpler - DIY decorative flower boxes made from concrete blocks. In this case, there is no need to build anything and work with tools. Blocks are often left over after the construction of a house or outbuilding. You can create a whole multi-level composition from concrete blocks by simply placing them on top of each other in different tiers. For additional decoration, you can use paint in aerosol cans. They often make interesting graphics when the boxes are painted in a checkerboard pattern or diagonally.
conclusions
Boxes for growing flowers outside the window and stands for them will become a real decoration for your home, window or loggia, and an independent decorative element. Tell us what boxes and brackets you use when growing flowers outside your windows? You will find more useful tips on the topic in the video in this article.
Did you like the article? Subscribe to our Yandex.Zen channel
September 22, 2016
Accessories, Design, Windows
If you want to express gratitude, add a clarification or objection, or ask the author something, add a comment or say thank you!
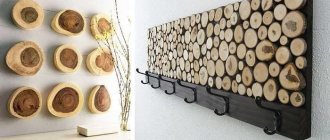
From a stump
A flower container made from an old stump will fit very well in a country-style garden plot or a Provençal courtyard. For this, not only a stump, but also a snag or log will do. Usually the correct shape is chosen, but twisting trunks can look even more interesting. Sometimes several stumps are installed nearby, thus arranging an entire flowerbed.
There are two different approaches when working with snags or stumps. The first involves preserving the old bark on the wood. This way the product looks more mysterious and fits better into the rural landscape. But supporters of the second approach warn that larvae of various pests often live under the bark, which, after hatching, can destroy the flowers growing in such a box. Therefore, it is better to completely remove the bark from a stump or snag in advance. The core must be hollowed out with a chisel, and then all debris must be removed. Then the excavation is filled with soil and flowers are planted.
Material
A variety of materials are used in the manufacture of balcony boxes. Can be chosen to suit any taste and design.
Plastic hanging railings
Plastic boxes are one of the most popular materials. Such containers can be purchased at any garden store. Plastic containers are distinguished by a wide range of colors and a variety of appearances with different imitation.
They are also distinguished by their light weight, which is ideal for installation on balcony railings.
Inexpensive containers with pallets from Siena and Idea are in demand among flower growers.
Wooden pallets
Wooden boxes are less common due to the property of wood to lose its quality when exposed to water. This type of container is often used on railings and fences using brackets.
Rattan baskets
Wicker baskets look aesthetically pleasing. Compared to others they are more expensive. They are mainly used in conjunction with plastic containers for convenience and beauty.
Ceramic and clay
Ceramic containers are not used as hanging containers. Ceramics is a heavy material. Such containers are placed on the floor.
Clay containers can be installed even on a small loggia. Inside, for waterproofing, they can be painted with water-based paint or covered with film.
Forged and hinged
Forged gratings are usually used as hanging mounts in conjunction with other types of containers. Used for beauty.
From old furniture
A very original option - DIY flower boxes made from old furniture. Suitable chests of drawers, bookcases, desks, etc. People with imagination adapt chairs, armchairs or banquettes for these purposes. Low-growing plants are planted in such containers.
Before planting flowers, this furniture must be treated with a protective agent so that the wood does not fall apart in a couple of months under the influence of wind, sun and rain. It can then be painted in bright or moderate colors, although often this furniture is left in a natural color if it is made of wood. Metal or plastic pieces of furniture are more stable and do not collapse as quickly, but at the same time they do not look as attractive as wooden ones.
How to make a box of flowers at home from improvised materials?
After reading our master class, all questions regarding how to make flowers in a box will be resolved. Ready-made bouquets can be purchased at Sanata Flowers. For those who like to make gifts with their own hands, our florists have prepared mini-instructions.
For a flower box gift you will need:
Flowers (delicate peonies, classic red roses, exotic ranunculus, etc. are suitable); Scissors; Scotch tape, preferably transparent; Floral oasis of green; Polyethylene film; The simplest box with a tight lid, sold in any gift store (round boxes are a priority). In order to figure out how to make a bouquet in a hat box, prepare everything you need in advance. Floral sponge (otherwise known as floral foam/foam) is easy to find in hardware and flower stores. Why is a green sponge necessary? This type of foam absorbs and retains moisture best. Gray and brown sponges are used mainly for compositions with dried/artificial flowers.
How to make a fashionable bouquet of flowers in a box of roses with your own hands: photo, master class
Anyone who once received flowers in a box as a gift was sure to feel all the charm, beauty and convenience of such a gift! No, this is far from a banal gift!
It would seem like ordinary flowers and an ordinary box. But how impressive! In addition, such a bouquet does not require a vase or water, which means you can place it anywhere and at any time.
Yes, purchasing such a modern bouquet will be quite expensive in a professional flower shop, where in addition to the cost of flowers, design work will also be included. However, you will be able to make this wonderful gift with your own hands, investing your love and creativity.
Everything you need for work can be easily purchased in stores: special gift boxes of any size and different shapes, decorative ribbons, decorations for bouquets (words, congratulations cut from a thin sheet of plywood, butterflies, bows, soft toys, etc.). d).
INTERESTING: You can also save on flowers by purchasing them not in boutiques, but in granny shops or by growing them yourself.
The most noble and, of course, spectacular flower for such a bouquet in a box is a rose. A bouquet of roses will delight anyone for an anniversary, birthday, or women's holiday.
What to prepare for work:
- An empty box (special, hat or small shoe box, but previously covered with wrapping paper for decorative purposes).
- Satin ribbon (wide, matching the color of the box)
- Roses (armful, one or several shades)
- Ornamental green plants and gypsophila (fern or ficus)
- Floral sponge (a special sponge soaked in moisture into which flowers are inserted)
- Cling film or tape (needed to finish the inside of the box, protecting it from moisture).
How to make a bouquet:
- First, carry out the “internal” work, finishing the box with film or tape, because if it gets saturated with moisture from the floral sponge, it will lose its attractive appearance.
- Then decorate the outside of the box with wrapping paper, lace, or satin ribbon (you can also tie and attach a bow).
- Beautifully insert cut roses, greens and gypsophila into the sponge.
- Pour water into the sponge and place it inside the box
- The bouquet is ready
Options for bouquets in a box with roses:
Box with a bouquet of red roses Box with a bouquet of multi-colored roses Box with a bouquet of small pink roses Box with delicate pink roses
Small box with a bouquet of roses
How to make a fashionable bouquet of flowers in a box of tulips with your own hands: photo, master class
Tulips are those flowers that will look very impressive as a bouquet in a box. Their only peculiarity is that they have a very soft leg. Therefore, such a bouquet must be lush and large, which means you will need a lot of tulips.
What to prepare for work:
- A tall and not very wide box (preferably round - a cylinder).
- Decorative materials for the box (paper for gift wrapping).
- Wide satin ribbon (for bow)
- Several pearl half beads (half beads)
- Glue moment
- Organza or mesh (20-30 cm)
- Floral sponge
- Wide tape (for interior work)
How to make a bouquet:
- Prepare a box for the bouquet by lining the inside with tape and the outside with wrapping paper.
- The sponge is moistened and tulips are inserted into it
- The inside of the box is decorated with organza along the edge
- The bouquet is inserted into the box
- Several flowers are decorated with half beads
- A tied bow made of satin ribbon will look very neat and aesthetically pleasing on the box.
Options for bouquets of tulips in boxes:
A huge box with tulips A small box with pink tulips A box with multi-colored tulips A spectacular box with a bouquet of tulips A tall box with a lush bouquet of tulips
How to make a fashionable bouquet of flowers in a box of peonies with your own hands: photo, master class
During the peony flowering season, it is simply impossible not to take advantage of this advantage, because these flowers have a very elegant, spectacular appearance and an amazing, strong aroma!
INTERESTING: Peonies are not expensive at all, have good durability and are now in trend! This means that a bouquet in a box of peonies will be very fashionable and relevant!
What you will need:
- Any box (preferably not very tall)
- Satin ribbon
- Lace (a strip exactly as long as the diameter of the box).
- Floral sponge
- Wide tape
- Decorative foliage
- Gypsophila
- Bouquet of peonies
- Wooden inscription or decoration for a bouquet
How to do:
- For this bouquet, you should choose a box that is not very high, since the peonies for the bouquet will be cut short, because the trunk of the flower is not strong enough).
- Decorate the box inside with tape and outside with decorative paper, and also attach a satin ribbon bow or lace in a circle).
- Place a floral sponge inside with inserted peonies, decorative greenery, gypsophila, and deepen the wooden decor in the center.
Bouquet in a box with peonies:
A box with peonies: white and pink A box with a lush bouquet of peonies and other flowers, greenery, berries A small bouquet of bright peonies A stylish bouquet of bright peonies A small bouquet of peonies in a box
How to make a fashionable bouquet in a box of flowers and sweets, sweets, chocolate with your own hands: photo, master class
Not only flowers, but also sweets will look very impressive in such a bouquet. Giving “mixed” bouquets is not only fashionable, but it is much nicer to receive them as a gift! After all, in addition to aesthetic beauty, you can try sweets and get a lot of pleasure!
What to prepare for work:
- A box in the shape of a cylinder
- Wooden cooking skewers
- Chrysanthemums (several branches of different shades)
- Decorative foliage
- Gypsophila
- Sweets in beautiful and bright packaging (chocolate or candy - good quality).
- Wide tape
- Floral sponge
- Organza
- Half beads or rhinestones (optional)
How to do:
- Carry out decorative internal and external work with the box, having thought through its design and all decorations in advance.
- Prepare “flowers” from candies. To do this, you should use tape to attach the candy to the skewer by the wrapper and decorate it with organza in a circle.
- Then you need to stick flowers and skewers with candies into the floral sponge, decorating them with greenery and gypsophila.
- If desired, the box itself, some sweets and flowers can be decorated with shiny rhinestones or beads.
Options for bouquets in boxes with sweets:
Box with flowers and sweets Box with flowers and macaroons Box “2 in 1”: flowers and sweets Box with flowers and gingerbread cookies
What's special about bouquets in a box?
A box of flowers and chocolates is a unique work of a florist. Each designer chooses his own design method using different flowers, fruits and sweets. Such a composition, created with soul, will definitely appeal to creative and energetic people.
The main question is: how long do flowers in hat boxes stay fresh?
The composition is based on a floral sponge. Before decorating, it is soaked generously with water. This allows the flowers to retain their freshness for as long as possible. Florists trim the stem of each flower and place it in a sponge soaked in water. The short stem of each flower provides its bud with quick access to moisture and prolongs the freshness of the composition. In addition, a special fertilizer is placed in the box, which also prolongs the life of the bouquet.
Sources
- https://derevo-s.ru/obustrojstvo/interer/yashchik-dlya-cvetov
- https://mojdominfo.ru/derevyannyj-yashhik-svoimi-rukami/
- https://DerevoDoska.ru/yashhik-dlya-tsvetov-iz-dereva-01/
- https://DrevoGid.com/izdeliya/yashhik.html
- https://vdome.club/podelki/raznoe/klumba-iz-yaschikov-foto-idei-kak-sdelat-svoimi-rukami-iz-derevyannyh-plastikovyh-yaschikov.html
- https://stroy-podskazka.ru/dizajn/aksessuary/postavki-dlya-cvetov/vidy/derevyannye-yashchiki/
- https://sanata-flowers.ru/kak-sdelat-cvety-v-korobke-svoimi-rukami/
- https://delaemrukami.org/1689673049432394302/kak-sdelat-modnyj-buket-v-korobke-iz-zhivyh-tsvetov-idei-foto-master-klass/
- https://poskakushki.ru/cvety-v-korobkah/
[collapse]
Important Rules
There are important rules that should be followed when making flower boxes with your own hands:
- Drainage holes . In any containers, drainage must be provided at the bottom, otherwise the roots of the plants will rot from excess moisture.
- Sustainability . It is necessary to compare the height and weight of the flower that will grow in the box, and you need to take into account its parameters in adulthood. If this is not done, then the entire structure will be unstable, and if it falls, the plant will most likely break.
- Treatment. Do not neglect wood processing. If there are chips sticking out on it, then without sanding this can cause injuries, cuts or splinters. You should also treat the surface with protective solutions, without which the wood fibers will quickly be damaged by bacteria and fungi.
- Mobility. If you plan to grow crops that react very sharply to changing weather, then it is better to make the boxes small so that, if necessary, they can be hidden from the scorching rays of the sun, hidden in the shade or brought indoors at night.
- Coloring . It is better to paint containers that will be on the south side in bright colors, as they can fade greatly from the sun, and the appearance will deteriorate. In addition, dark colors attract more light, which can be harmful in southern regions and cause overheating of the roots.
- Material. You should not use low-quality plastic for these purposes, as it often evaporates toxic substances. This will slow down the development of flowers or completely destroy them.
If you follow all these rules, you will be able to make not only a beautiful, but also a functional box with your own hands.
Optimal sizes and requirements for containers
First you need to decide on the size of the box.
Deep containers are used for plants with an extensive root system. The smaller the plant, the smaller the box.
It is also necessary to decide on the number of plants that will be in the composition, since the required length will depend on this. On sale you can most often purchase standard sizes of length 60.80 and 100 cm.
It is important to choose a container in which there will be proper heat exchange and sufficient access of oxygen to the roots of the plant. It is necessary to check for drainage holes with a diameter of at least 10 mm. There must be a tray under the container to collect excess water.
Plastic VS Wood
Plastic pots are versatile products. They can be painted and decorated. But such material quickly deforms in the sun. The greenhouse effect from heating negatively affects plants. Finished products have standard sizes. They may not fit on a small balcony. Wooden shelves do not have all these disadvantages. They are durable, comfortable and versatile.
What is decoupage?
Decoupage is a technique for decorating a surface using a cut-out design or ornament. The design is glued to the surface of the object and secured with a layer of transparent varnish. Paper decorative elements are most often used. For gluing complex surfaces, it is more convenient to use napkins; they are much thinner than paper, so they stick more easily to the curves of the surface.
The first mention of decoupage dates back to the 15th century. Chinese craftsmen used pictures to decorate furniture. Later, in the 17th century, this technique began to be actively used by Europeans, when furniture from Asian countries came into fashion. Skilled craftsmen glued pictures to the furniture and covered the surface with 30 layers of varnish.
Decoupage in the modern world is represented not only by the decoration of hard surfaces, but also by the processing of fabrics and leather. Decoupage is used in various directions and styles, but most often this technique is typical for pieces of furniture and accessories made in a classic style.
Plant selection
Garden annuals and indoor plants are most convenient for placing on the balcony.
To obtain ready-made annual seedlings by May, the seeds are sown in late February - early March. These are plants such as calendula, gatsania, diascia and everyone’s favorites, petunia (for more details, see the article “petunias on the balcony”) and surfinia.
The variety of climatic zones in Russia requires an individual approach to the timing of moving indoor plants closer to fresh air. Adaptation must occur gradually. To “harden” the plants, when the daytime temperature rises to 15-17 °C, the flowers are taken out to the balcony for 1.5 - 2 hours. When warming reaches 20 °C, plants are left for a full day.
Spring is characterized by significant fluctuations between day and night temperatures. Plants are removed indoors if the nighttime thermometer drops below 8 degrees. At this temperature, in abundantly watered heat-loving plants, the root system rots and dies.
On glazed balconies, the air temperature should not exceed 28-30 °C.
Flowerpots with wooden lining
You can even create an unusual flowerpot using old plastic buckets or tanks; in this case, the buckets themselves are used directly as flower pots, into which soil will be poured. To make such a flowerpot you need to do the following:
- cover the selected container with pre-treated antiseptic, wood oil or painted wooden strips;
- drill several holes in the bottom, attach the legs to the edge with bolts or self-tapping screws;
- the flowerpot can be additionally decorated with various elements, for example, a lid and four high legs, as in the photo below, it all depends only on your desire and imagination.
The flowerpot can be additionally decorated with various elements, for example, a lid and four high legs, as in the photo below, it all depends only on your desire and imagination.
Photo source: www.postroiv.ru
What are the best varieties to plant to grow all summer?
The choice of plants depends on the type of balcony and its lighting. If the loggia is located on the dark side, then it is optimal to plant begonia, fuchsia and other shade crops.
On the sunny side it is better to plant petunia, marigolds, mint, parsley and any low-growing plant species. It is also necessary to pay attention to the combination and size of varieties.
Read here which annual and perennial flowers are best to plant on the balcony.