Kikimora
15355 0 11
Kikimora September 28, 2016Speciality: I love my home, I like to equip it, periodically change something, do it with my own hands. There are no special hobbies. I am the administrator of a small women's forum.
Plasterboard cladding of log walls
This summer we spent a lot of time studying the countryside real estate market, as we are planning to move closer to the city in the near future. Now we know that our funds are only enough for a house made of timber, so the question of finishing it looms ahead, and in particular how to sheathe the inside of a wooden house with plasterboard.
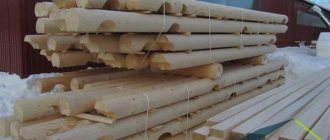
And since most finished buildings are built from fairly thin 15x15 timber, it would be nice to think about insulation.
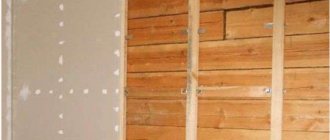
We are quite familiar with plasterboard - we have used it more than once in renovations, but the technology for installing it in a new wooden house, as it turns out, has its own nuances.
Features of installing drywall in a wooden house
Wood is a natural material that not only has positive properties, but also some disadvantages. To avoid negative consequences during the construction and operation of a wooden house, it is important to take into account its features. The question of how to sheathe the inside of a wooden house with plasterboard correctly and complete the interior finishing can be solved by following the rules for its installation:
- Before installing drywall sheets, wooden walls are treated with antiseptic agents that will protect against the appearance of rot, mildew and mold.
- The wood is coated with fire retardants to protect the log or timber house from fire. These can be two-in-one antiseptic-fire retardant products.
- Plasterboard finishing is carried out after partial shrinkage of a wooden house - a year after construction.
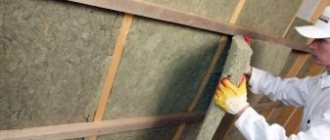
- In case of additional insulation from the inside, a vapor barrier film is laid under the plasterboard sheets. The vapor barrier film prevents the formation of condensation in the insulation.
- Caulking cracks in the crown of the house and sealing cracks in logs and beams will help prevent the appearance of moisture on drywall.
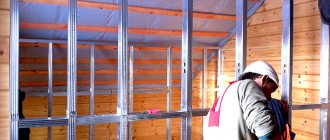
- After the building shrinks, the building material is mounted on a frame that is not rigidly connected to the ceiling and floor of the house.
A deformation gap of 30-50 mm is left between the plasterboard and the floor or ceiling. To do this, pads made of any building materials are placed on top and bottom of the plasterboard sheets. Then they are removed. After finishing, the gaps are closed with decorative skirting boards. The frame must also be independent of the supporting foundation of the house so that the drywall does not deform during operation.
It is very important that the frame is secured to the “slippers” and is floating
Sliding frame made of wooden blocks
It is better to make a wooden frame for drywall from dense wood, such as pine or oak. Regardless of the type of tree, the frame elements must be treated with antiseptic solutions to prevent the formation of mold and rot and fire retardants to prevent the wood from burning.
The algorithm for performing the work is as follows:
- The outline of the future frame is drawn on the floor and a projection is made onto the ceiling;
- Next, mark the places where you plan to install sliding guides for drywall. It should be remembered that from the corner to the near post it is necessary to maintain a distance of about 0.6 meters. The edges of the drywall must rest on the bars;
- For additional strength, intermediate slats are installed between the main bars in increments of 0.2 meters;
- Metal corners are used as fastenings for vertical frame elements, on one side of which there is a vertical oval groove. Direct fixation is performed with a screw and washer. The corners are attached at a distance of 0.2-0.3 meters from each other;
- The outer bars are placed first, between which a fishing line or cord is pulled to install intermediate elements;
- The fixation of the bars should not be strong so that the bolts can move along the mounting angle when the house shrinks;
- After installing all the vertical supports, proceed to the installation of horizontal struts; their location can be arbitrary. However, experts recommend installing the jumper so that the corner of the plasterboard sheet rests simultaneously on the vertical and horizontal frame element.
Advantages and disadvantages
- low cost. To cover the walls of a house with plasterboard, you will need a much smaller amount than when finishing with clapboard;
- easy and quick installation. Drywall sheets are large in size, so they can sheathe large surface areas of walls and ceilings in a fairly short time;
- plastic. The material bends easily. It can be given any shape from rectangular cascades to semicircular arches;
- has good thermal insulation properties, which allows you to save on energy costs and heating;
- has light weight. You can make the interior lining with plasterboard alone, with your own hands, without anyone’s help;
- During installation, free space is created under the drywall in which utility lines can be hidden;
- environmentally friendly material. It does not contain toxic or synthetic additives and is safe for human health;
- The constituent element of gypsum board is gypsum. It is fireproof. Only the cardboard part of the material can ignite, but only from the side of the fire. There are also fire-resistant plasterboard sheets that are not afraid of fire;
- fragility. Drywall can break off during transportation, operation, or installation. Therefore, it must be handled with care. To hang a heavy item on a plasterboard box, you need to use special fasteners. They will help avoid damage to the material;
- cannot withstand temperature changes. It is mounted at a temperature not lower than -10 degrees;
- It occupies a significant area, so it is not used in small rooms.
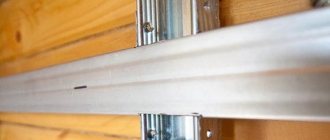
Tricks when working with metal profiles
Here are some tips that will be useful in your work:
- Cutting metal is permitted only with a circular saw or metal scissors. A grinder with an abrasive wheel will heat up the parts so that the zinc layer at the cut site will evaporate - that is, the profile will begin to rust.
Cutting with scissors for metal
- When installing racks in a partition, do not make them single. It makes sense to increase material consumption and pair parts. In this manner, instead of PS, it is possible to use PN, which in turn will greatly facilitate the installation of jumpers and insulation.
Connected profiles with jumpers
- In places where the walls are curved when installing the guide profile, it is recommended to cut it to repeat the shape of the base.
- The frame can also be strengthened through jumpers.
Types of drywall
According to the intended purpose, plasterboard can be:
- arched. This material is thin 6.5 mm thick;
- ceiling It is intended for arranging suspended structures and finishing ceilings in dry rooms with humidity up to 70%. Its thickness is 9.5 mm;
- wall It is used for cladding walls and arranging interior partitions. Its thickness is 12.5mm.
According to technological features, plasterboard is divided into:
- standard or regular plasterboard;
- moisture-resistant gypsum board;
- fire-resistant gypsum plasterboard;
- moisture-resistant and fire-resistant;
- acoustic. It is used in rooms where increased sound insulation is required.
The material varies according to the type of edge. The edge is:
- straight. Gaps between straight-edged sheets are not sealed. Designated PC;
- Refined edge of the UK. The joints between sheets with such an edge should be puttied, reinforced with sickle mesh;
- the semicircular edge is sealed with putty, but not reinforced (HRK);
- rounded edge of the lock.
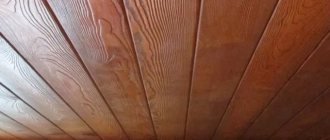
Appearance of different drywall
GVL
GCR is a material consisting of a gypsum core and 2 sheets of cardboard. The elements are connected using glue. Cardboard is used as a reinforcing element. It also gives shape to the material.
GVL are gypsum fiber sheets. They consist of a mixture of gypsum and fluff pulp. Waste paper is mixed with water and sheets are made under a press, which are then dried. They are used to level surfaces and frame frames. GVL is a more durable material. Unlike drywall, it can be used to finish floors.
Finishing gypsum fiber board walls in a wooden house is more labor-intensive. Before screwing the screws into the gypsum fiber, you need to drill holes.
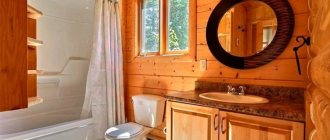
Otherwise, it is impossible to tighten the hardware due to the high density and strength of the sheets. Heavy objects can be hung on a wall covered with gypsum plasterboard: shelves, mirrors. This material is suitable for finishing a bathroom in a wooden house. GVL is not flexible, so it cannot be used for arranging shaped elements.
Useful information for those who want to have their own wooden sauna
Despite the abundance of modern building materials, characterized by a long service life and affordable cost, natural wood has not lost its leading position in private housing construction for centuries, thanks to its environmental safety and exceptional energy efficiency.
However, when building timber or log houses, one problem arises - strong shrinkage of the structure, which does not allow it to be covered immediately after construction. Because of this feature of the material, it is impossible to immediately begin interior decoration and move into a new home.
A special device will help to avoid roof deformation during shrinkage - sliding rafters, the design of which we will discuss in our article.
Sliding supports for rafters are special devices that are necessary to connect the elements of the rafter frame to each other, but leave them a small reserve of movement, which prevents deformation of the structure during the shrinkage process. In everyday life, these fasteners are often called sliders or slides. They consist of two parts, one of which is stationary, and the other is capable of sliding. Sliding bearings are made of durable, corrosion-resistant metal that can withstand significant loads. The advantages of this method of fastening rafters are:
- The ability of the roof to change its geometry during the shrinkage process, thanks to which the construction of the roof can be carried out immediately after the completion of the construction of a wooden house, without waiting for the wood to completely dry.
- Facilitating the process of attaching rafters. The use of special movable fasteners reduces the share of manual labor when assembling the rafter frame and reduces the time spent on roofing work.
- Provides reliable fastening. Sliding supports, manufactured in the factory, undergo several stages of quality checks, therefore they are guaranteed to withstand the snow and wind loads to which the rafters are exposed during operation.
Please note that movable fasteners for rafters are subject to intense loads during operation, so they are made only from high-strength, low-carbon steel with a thickness of at least 2 mm.
Functions
Shrinkage is the process of changing the size of wooden buildings due to a decrease in wood moisture content, which lasts for 1-3 years from the date of construction. The most active shrinkage occurs in the first year, during which the house may become 1-2 heights lower. It is because of this property of wood that it is not recommended to re-roof immediately after construction. A sliding support for rafters solves this problem by performing the following functions in the structure of the rafter frame:
- Preventing deformation of rafters during the shrinkage of a wooden house. Thanks to such a movable system, the rafter legs adapt to the size and geometry of the structure, compensating for the thrusting loads to which load-bearing walls are subjected.
- Ensuring frame mobility during operation. Wood is a natural material, which during use, even after the shrinkage process is completed, can change its humidity and size. They say about wooden houses that they “breathe”, so the roof rafter frame must adapt to them, also changing dimensions when humidity increases or decreases.
Note! Many people believe that if the rafters and frame of the house are made of the same material, then the rafter system will not be deformed during the shrinkage process. In fact, the shrinkage of different structural components occurs unevenly. In this case, the dimensions and geometry of the frame elements change in several planes at once.
Feasibility of reinforced structure
Today, there are very different opinions from builders and specialists about the construction of houses using double frame technology. Considering that the cost of such construction is quite high, it makes sense to first study the relationship between cost and quality.
Useful: High-tech frame houses
Some experts are of the opinion that, thanks to the use of this technology, the customer can receive a structure that will be durable, reliable and aesthetically pleasing. Interior and exterior decoration of a house can be done in a variety of ways. These features can be considered the main advantages of construction.
Other experts believe that the savings that can be obtained during the operation of the house will reimburse the amount of construction costs only after 10-15 years. It is worth noting that the single-type frame fully complies with the requirements for the thermal insulation qualities of houses in the northern regions.
Which to choose
To choose the right material, it is important to know the operating conditions of the premises.
For rooms, standard plasterboard is usually used; for rooms with high humidity: kitchen, toilet, bathroom - moisture-resistant.
If possible, you can buy fire-resistant drywall for the entire house. In this case, for the interior decoration of the kitchen and bathroom, the material must also be moisture resistant. Therefore, moisture-resistant GKLVO plasterboard sheets are chosen.
You should pay attention to the quality of the material.
It is better to buy drywall from a well-known brand to be sure of its strength characteristics, for example Knauf.
When choosing, you should determine for what purposes it will be used: for walls, for finishing the ceiling or for creating curly elements. Based on the purpose of the material, you need to select sheets of a certain thickness.
Common mistakes
The most common errors include:
- laying sheets of drywall with the front side facing the wall. They should be positioned with the front side inward. When the front sides of the sheets are combined, a recess is formed at the joints, which is convenient for treating them with putty;
- the formation of cross-shaped seams leads to a deterioration in the strength of the material. Plasterboard sheets must be installed with offset seams;
- the location of the screws is close to the edge. When temperature changes occur, the metal expands and breaks the plaster. The fasteners should be located at a distance of 10-15 cm from the edge and always not opposite each other on adjacent sheets, but offset;
- The screws are screwed in incorrectly. The cap should not stick out from the sheet, this will make it difficult to putty the seams. The level of the hardware can be checked with a spatula. If, when passing the spatula along the surface of the sheet, the head touches the canvas, then the self-tapping screw must be tightened;
- the absence of a compensation gap from the floor and ceiling can lead to the formation of cracks at the joints. The gap should be 30-50 mm.