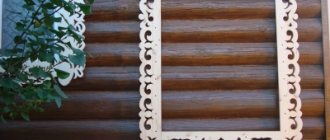
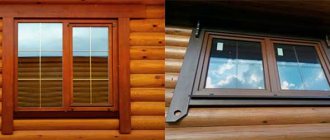
Platbands are decorative elements used in finishing door and window openings. They are used to hide cracks. Thereby they serve to improve the appearance of doors and windows. There are two types of platbands: external and internal. In this article we will talk about platbands for interior doors. They may vary in material, color, shape and method of fastening.
Types of platbands
In order to make it easier to choose platbands, or as they are also called - strips, let's figure out what they generally are. The first thing they look at is the material from which they are made:
Wooden planks are considered the most versatile, as they can be painted in the desired color. They are attached to liquid nails if the wall is smooth, or to nails without heads.
Laminated platbands made of MDF (fine fraction) are difficult to distinguish from wooden ones. But unlike the previous ones, you won’t be able to paint them, so they choose from ready-made colors. For MDF, any of the possible mounting options. When attaching to nails without heads, it is necessary to drill blind holes in advance.
PVC products are usually used with plastic doors. They are attached either with glue or with a perforated mounting profile.
Metal products are undoubtedly the most reliable and durable. The most common ones are steel and aluminum. However, this type of platbands has a specific appearance and is mainly used on entrance doors.
There are also gypsum, ceramic and polyurethane platbands. But they have an unusual appearance and are rarely used in ordinary residential apartments and houses. They are also not durable.
In addition to the material, platbands differ in the method of fastening: overhead and telescopic. The latter have their own grooves for fastening.
Elimination of defects
Even with experience and skills in decorative finishing of doorways, you can make annoying mistakes. The following tips will help disguise minor installation defects.
1. If the wall is uneven, the wooden frames may bend and the joints may diverge. To avoid this, during installation the joint is additionally secured with a finishing nail.
2. Significant defects in the wall around the door frame are covered with wide planks (10-12 cm).
3. To disguise nails when installing planks of unsaturated colors, it is good to use light furniture wax or sealant of the appropriate shade.
Types of fastening
Before installing the trim on the workpiece, you must mark the cut angle and the desired length. Using this marking, the plank is cut with a miter saw, or, if it is not available, with a hacksaw using a miter box, which will help cut at an angle of 45 degrees. As in any other case, it is better to use a high-quality tool. This will help to avoid unnecessary irregularities, inaccuracies and, accordingly, unnecessary problems.
Flat platbands are attached at an angle of 90 degrees, wooden and MDF - at an angle of 45 degrees. Let's consider possible fixation options.
Finishing nails
Wooden and MDF trims are easier and better to fasten with nails with flat heads. Then, if necessary, they can be easily dismantled. And so that the platbands do not dismantle by themselves and hold tightly, the nail should be driven into the door frame at least 20 - 25 mm. It is better to make the distance between the nails the same. To simplify the task, you can pre-drill through holes in the lantern. At the end, so that the nails do not disturb the appearance, they can be painted over with a wax pencil.
You can also drive nails into the door frame first. Then use pliers to remove their caps. The length of the visible part of the nail without the head should not be greater than the thickness of the strip. Next, having placed the platband against the nails, a wooden beam wrapped in fabric is applied to the plank at the location of these nails, and with a few light blows of a hammer the plank is pressed onto the nail.
Liquid Nails
For a flawless appearance, without visible fixation elements, use a special glue - “liquid nails”. However, this method is characterized by weak fixation and difficulty in dismantling. In addition, it can only be used on perfectly smooth walls. But if you decide that this mounting method is the most suitable for you, then apply adhesive to the back side of the casing and lean it firmly against the wall. In the case of an interior door, it is enough to hold the bar in this position for about a minute.
Attachment by beaks
This one is different in that it does not use any of the above mountings. The casing itself is equipped with a latch, shaped very similar to a beak. Hence the name. This fastener is inserted into a recess on the door frame. Thus, the fastening is not visible from the outside. But over time, the joints may collapse, and then they will need to be treated with glue.
Dismantling
Removal of platbands is usually required when cash is replaced. There is no need to worry about their safety, but the work is done carefully. Taking an ax with a sharp blade and a hammer in their hands, they begin to dismantle:
- To remove the trim carefully, the interior door is placed in an open position. Positioned in the doorway, the tip of the ax is inserted in the upper corner between the bar and the frame.
- The hammer is used to hit the butt of the ax until the blade plunges under the cash.
- By pressing the handle on the ax, the bar is separated from the box. The further procedure consists of similar actions. They use an ax in a circle until the dismantling of the platbands is completed completely.
The procedure must be carried out carefully so that no dents are left on the door frame. Instead of an axe, homemade sharpened strips of durable metal or other similar devices are suitable.
Installation methods
The installation of the trim should begin from the side into which the door opens. This is explained by the fact that the hinges interfere with the fastening of the strip to the door frame. Therefore, you have to make an indent that is the same on all sides.
It happens that the door is in a corner, then the platbands are installed only on two sides. Or you can saw off half the width of the plank and install it from the side of the adjacent wall (as in the photo).
There are also cases when the platband is installed only on one side. For example, when the slopes on other sides are finished with tiles or something else.
Installation instructions
Installation methods vary slightly depending on the material of the platbands. Some slats have special grooves, some trims are simple slats that need to be nailed or attached with self-tapping screws. The requirements for the rough surface also vary.
Wooden frames
Wooden platbands are good for their unpretentiousness to the rough surface. It is advisable that the wall be clean, but small differences in level can be easily overcome by loosening the fasteners or simply using polyurethane foam.
As a rule, there are two grooves on wooden platbands, and they are filled with a layer of polyurethane foam. This allows you to secure the casing more securely. Additional rigidity is added to the wooden frame using nails or self-tapping screws. The screw caps are flared and covered with acrylic putty. The heads of the nails are hidden in the same way.
Plastic platbands
Plastic trims are easy to install. They are installed on special nipples, which are self-tapping screws with plastic heads. The platbands have grooves in the form of longitudinal grooves. The groove is aligned with the nipple head and the casing is struck with a fist. A click indicates that the nipple is secured. Depending on the width of the rail there may be 2, 3 or 5 grooves. If desired, you can hide various types of communications in the adjacent furrows: wiring, Internet or television cable.
Plastic trims are easy to install
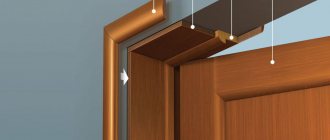
Telescopic platbands
Telescopic platbands are a relatively new trend in door technology. The meaning of such a platband is that the width of the door frame is less than the thickness of the wall. As a result, a natural groove is formed into which the telescopic platband in the form of a corner is inserted. There is nothing complicated in installation, just insert the platband into the groove.
Mounting at an angle of 45
This method is suitable for curly and rounded platbands. The procedure is as follows:
Measure the height of the vertical slats from the floor. They are placed on the floor, therefore, their joints with the baseboards will be on the side. The height of the vertical elements is measured from the floor. The planks from below are placed on the floor covering, which is why the joints of the baseboards and door frames are on the side.
Then the workpiece is cut according to the markings using a miter saw, and in its absence, using a hacksaw and a miter box. The top is cut at 45 degrees on the desired side.
Now the side trims are attached no higher than halfway, so that they bend at the top.
The upper loose parts of the platbands are folded back and the upper part is placed under them. At the joints, lines are marked at an angle of 45 degrees, then the excess part is cut off. Now you can secure the platbands in all remaining places.
Preparing for work
Before installing door frames, you should prepare the walls around the opening. If they have defects larger than 5 mm, the bar may move away from the plane, forming a noticeable gap. The curvature of surfaces can also cause such an unexpected effect as a mismatch of edges at the junction of the side and top trim.
To avoid unpleasant surprises when installing decorative elements around the door, it is recommended to level the wall, making sure that both the side and top sides of the opening are in the same plane. This can be done using a long straight board, placing it across the opening and moving it from bottom to top. In some places under the tool you will notice voids if the planes are not level enough. Mark the boundaries of each defect.
The wall is leveled with finishing gypsum putty. The solution must be mixed according to the manufacturer's instructions and applied to the surface, stretching with a long rule. Dry the wall for 24 hours and begin installing the front door casing.
When choosing in a store, you need to visually evaluate the smooth surface of the planks. The part adjacent to the wall should not have any curvature. Particular attention should be paid to planks made of solid wood: if dried incorrectly, thin planks may “screw”, that is, bend along the long side. Due to improper storage, door frames made of any material can bend. Such a part cannot be installed smoothly and accurately.
In addition to the platbands themselves, you need to prepare the following:
- finishing nails;
- hammer;
- side cutters;
- saw;
- drill and thin drill (1.5 mm);
- wax pencil;
- miter box or protractor;
- roulette
In some cases, instead of nails, you can use screws or special glue. If the platbands are made of solid wood, a longitudinal crack may appear when driving nails. To prevent such a defect, you need to use a drill, drilling narrow holes in the places where the profile is attached.
Installation of plastic platbands
For plastic trims, glue is used extremely rarely, since the connection with it is not reliable. The most commonly used mounting profiles are:
- The mounting profile is cut to the size of the door frame (a little smaller if possible).
- The joints are sawed off at an angle of 45 degrees.
- The profile is fixed with self-tapping screws to the door frame. If the door is cheap (Chinese), then the mounting profile is fixed to the wall, since it will not be possible to securely tighten the screws into such a door.
- The profile is screwed from the middle in two directions. At the same time, they monitor compliance with the level.
- Then measure the height of the side parts and cut off their tops at an angle of 45 degrees. Next, the workpieces are inserted into the grooves of the vertical profiles, where they can move.
- A fastener is inserted into the cut of the planks - corner fittings. The top is measured and cut at 45 degrees on both sides. The product is connected to vertical platbands, fixed in the mounting profile.
Joining the platband with the plinth
Some people think that the trim at the bottom needs to be cut because the baseboard should go there. It is not right. You need to cut the baseboard itself, otherwise it doesn’t look nice. Therefore, at the very beginning of the article, we said that platbands are installed before baseboards.
Plastic skirting boards have decorative plugs that allow you to make the joint of the skirting board with the platband neat.
A 45 degree cut is made on the wooden plinth. This allows you to equalize the thickness of the plinth with the thickness of the platband.
Thus, in this article we examined the topic of platbands for interior doors. By following our tips and recommendations, you can easily choose the methods of fastening and installing the planks yourself and implement them at home.
Required set of tools, materials
Before installing decorative strips, you need to prepare everything you need. The set of tools, equipment, and consumables depends on how the installation is planned. The following materials and tools will be useful:
- miter box;
- hammer;
- screwdriver;
- jigsaw;
- roulette;
- construction square;
- chisel;
- wax and construction pencil.