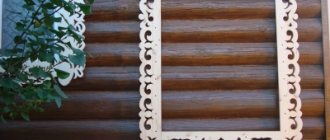
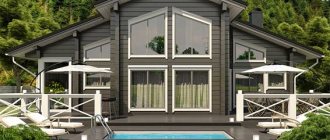
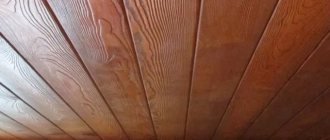
House carving is a beautiful and practical solution for interior and exterior decoration. Carving was intended to decorate one's home outside and inside with the help of carved items. With the help of a carved facade you can make your home festive. All protruding and overhead elements of the house's facade were decorated with carvings: cornice, platband, piers, porch pillars, roofs.
Material for platbands
Carved platbands are made mainly from coniferous wood. The best option is pine, it cuts normally, is inexpensive, and is durable due to its high resin content. In principle, you can use any other coniferous board, but it is better not to try with spruce: it is too fibrous and cannot be cut even with the sharpest tool.
You can also make carved frames from hardwood - linden (the softest), poplar, maple, oak, cherry, etc. But you need to be able to work with each species, get your hands on it, and there is no guarantee that you will get something digestible, and hardwood is expensive. That’s why window frames are often made from pine. You just need to pay attention to the quality characteristics.
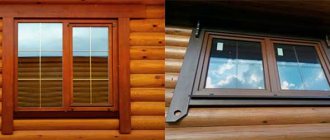
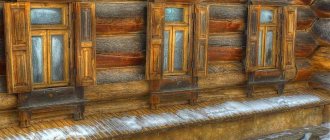
Carved window frames - a way to make your home unique
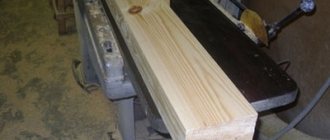
If you have wood or a board that has been lying around for 3 years or more, you can use it: it is already definitely dry, it just needs processing and calibration. If you don’t have woodworking equipment at home (thicknesser and circular saw), you will need an edged board. Wood of the first or highest grade is suitable for carved platbands. This means that there should be no knots, chips, or resin pockets on the board. Take chamber-dried wood with a moisture content of no more than 8-12%. This is not sold in the markets; you need to look for it at sawmills and construction stores.
Why kiln drying? Because it is dried in a special chamber, quickly removing moisture. At the same time, some of the boards crack and bend - these are rejected, the rest are sold. If you make platbands from chamber-dried wood, they will definitely not be damaged or cracked.
History of the craft
One of the oldest methods of wood carving - house carving - originated on the banks of the Volga under the hands of architects who decorated the bows of ships. The patterns reflected the flora and fauna, symbols associated with the water element. Because of its origin, house carving is often called ship carving.
The simple texture of wood, easily processed, allowed even simple peasants to decorate their homes. The financial situation and status of the family were reflected in the size and complexity of the ornament and wooden lace.
Residents of the Middle Volga region at the beginning of the 19th century adopted the experience of shipbuilders, beginning to decorate the ridges and roofs of houses with patterns. The type of creativity gained popularity over time, and craftsmen began to decorate the remaining elements of the buildings.
At that time, house carving and wood carving were labor-intensive and complex processes. Which was done entirely manually. The work became more complicated on a larger scale; The material for the work was hard and durable wood - spruce, pine - capable of withstanding sultry heat and harsh winters for a long time.
Tools
To make carved platbands with your own hands, you will need the following minimum set:
- drill with a set of drills;
- electric jigsaw with soft start and a bunch of different wood saws;
- chisels;
- sandpaper with grains of different sizes;
- flap disc made of sandpaper for wood on a drill.
You can make these carved window frames with your own hands.
To reduce the time it takes to create carved patterns and polish, it is better to have a router and a grinding machine.
Creative process
Woodworking begins with transferring the design to the workpiece. For this purpose, all templates were prepared at the preliminary stage. When the drawing is applied to the part, the stage of drilling holes next to the drawn lines begins.
Experienced craftsmen advise using saws with fine teeth, otherwise the edges of the slots will have a ragged outline and the product will lose its aesthetics. It is advisable to drill with feather drills, having prepared a thin hole in advance.
Gluing thick paper to the back of the workpiece helps prevent torn edges when cutting through plywood. For beginners, it is better to try simple patterns with large details and a minimum number of corners.
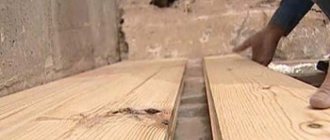
One at a time or in bulk?
Carved platbands usually consist of repeating elements. At least two vertical slats on each window are made identical. And since several windows are usually decorated, a lot of identical elements are required. If you are going to make slotted trims, you naturally want to cut out several pieces at the same time, stacking the boards and somehow securing them.
The applied carved platbands are also interesting
The desire is understandable, but difficult to implement, and the benefits over time are not as great as it seems. The first difficulty is that home craftsmen usually have jigsaws that are not very powerful. To cut through several boards, you have to move the saw more slowly along the intended pattern. On straight lines the speed is still tolerable, on curves it is low. And the smaller the bend radius, the slower you have to move the file. If you work with one board, there are no such problems. So, in terms of time, if there is any gain, it is very small.
One more thing. Even thick, good, expensive files with a large thickness of the workpiece are deflected. So, when cutting several boards at the same time, the quality of the slot on the bottom (or two) remains a big question.
Glossary of terms
Basic elements of house carving
Baluster
- a small volumetric or flat column that supports the railing of the fence.
End board
is an ornamental board covering the ends of the logs of a log house.
Front board
(red board, scarf) - a carved frieze on the main facade, placed above the windows.
With the frame construction of the pediment, it covered the transition from the wall logs to its plank cladding. Chimney
- a wooden pipe for the release of smoke in a smoking hut, usually carved.
A brush
is the openwork end part of a hairline or towel.
The ridge
is the upper joint of the roof slopes, covered with a ridge, as well as a figurine decorating the end of the ridge.
Chicken (kokora)
is a curved spruce trunk or a trunk cut down along with one of the rhizomes growing perpendicular to the trunk.
It is attached to the sides of the male roof and carries a stream-water source. Platband
is the frame of a window or doorway that closes the gap between the wall and the window or door frame.
Visually highlighted and emphasized the opening. Okhlupen (okhlup, shelom)
is a hollowed out log covering the ridge of the roof.
A valance
is a carved board located horizontally under the eaves of the porch roof.
Flow (water tank)
- a beam with a hollowed out longitudinal groove for drainage;
The lower ends of the planks covering the roof rest against it. The towel
is a carved board covering the joint of the railings.
Prichelina
- a board covering the ends slightly.
The male (gable)
is a self-supporting triangular pediment.
The upper part of this pediment was called the brow (ochelye). An earring
is a carved board covering the ends of the felled logs.
Sleg
- a horizontal log embedded in the pediment.
Soroka
is a dowel that fastens the horse's harness and ohlupen.
Shutters
are single- or double-leaf carved shutters for slanted windows.
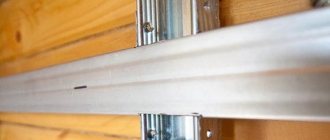
The procedure for manufacturing a platband with slotted threads
Using a template, transfer the desired drawing onto the board (read below for where to get it, how to enlarge it, and how to make a template). If necessary, we correct it and draw out the details well. Next, we will describe the procedure step by step.
Slotted thread without backing board. To make the drawing more clearly visible, a large difference in color is needed
Removing wood from the slots in the pattern
- To do this, we drill large-diameter holes in those places where the wood will need to be removed. The diameter of the hole should be slightly larger than the width of the jigsaw blade (usually 12-14 mm). The drill should go vertically downwards, make sure that the hole does not go beyond the line (but small errors are not scary).
Here is the main stage of cutting out the platband from wood - We insert a jigsaw file into the slots and cut out the pattern along the marked lines.
Since the carving will be viewed from afar, some inaccuracies are not fatal, but it is still worth striving for the ideal.
Making a curly edge
Some platbands have a smooth edge. Then we skip this stage. If the edge is figured, you will have to do some more work with a jigsaw.
- After about 5-7 cm, we make perpendicular cuts of the “extra” part of the board to the intended line of the casing. Greater precision or straight lines are not needed; we try not to cross the drawn line.
It’s easier to make a figured edge - Starting from the right or left, we make a cut along the intended line. The sawn pieces fall off during the process, so the work is not too difficult.
If the cut is complex, there may be unattractive places left. It’s not scary, we’ll modify them later where necessary - with chisels, the same jigsaw, emery. When you are satisfied with the result, you can move on.
Final revision
Owners of wooden houses probably know everything about how to process wood. But, just in case, let’s repeat the general rules again.
- We polish. Grind using any available method. Faster and best of all - with an eccentric sander, slower - with an emery wheel on a drill and a flap attachment, very slowly - with your hands and sandpaper. Ideally, we combine two methods - using a sander we process the horizontal surface, and the recesses with a flap attachment and, where it is missing, with our hands.
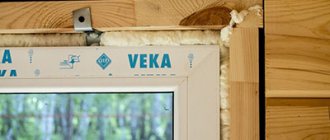
We polish and bring it to normal condition - We prime. Since the wood must be protected from fungal beetles, exposure to rain and sun, it must be coated with a protective impregnation. Look for any for external use. It is best to soak the workpiece for a few minutes in a bath of solution. If this is not available, use a brush to go well through all the slots.
- Let's paint.
The choice of paints and varnishes is very wide. Suitable for any outdoor use. But keep in mind that opaque paints will have to be renewed periodically - once a year for sure. And this means removing the old paint, priming, painting again. The situation is simpler with wood oils - they do not form a film on the surface of the wood, but are absorbed into the fibers. The coating also needs to be renewed, but just clean it from dust and cover it with a new layer. And the processing frequency is less. Disadvantages of wood oil - higher price, fewer colors.
This is the result of labor
And then - installation of the carved platband. It depends on the chosen type: you can immediately put it on the wall, or you can put it on a backing board, and then on the window.
Cutting out signs
The signs tend to be irregular in shape. The contours of the product emphasize the curves of the letters, so you will have to tinker with the workpiece, cutting out excess fragments in certain places. The letters can be drawn by hand using a pencil and ruler, or you can download a ready-made inscription from the Internet. Making signs is very simple, so this option is ideal for beginning carvers. All you need for the job is a blunt knife and the Bogorodsk set “Tatyanka”. After cutting, the plate is sanded and covered with stain. When the composition dries, the recesses are additionally emphasized with a second layer. The inscriptions on the signs for the bathhouse are complemented by clouds, oak or birch leaves, ladles, basins with brooms. For the street, use a beautiful, even font and neat curls along the contour, since drawings would be inappropriate here. In the same way, you can make an original sign for a retail store or pub, for example.
How to enlarge a template
Simple carved platbands can be made without templates. There will be several examples in the video - it shows how to draw and cut. But not everyone can draw more or less complex patterns on their own. It takes skill and talent. The easiest way is to find a diagram, print it in the desired size, transfer it to cardboard and cut it out. You will get a template that you can trace.
The second way: copy from a photograph. Not all diagrams can be found. Some, especially antique window frames, you will not find anywhere. If you have at least some drawing ability, you can copy them.
Even such an ornament can be copied... if you have the skill
Questions may arise about how to increase the size of the found diagram or template. There are three options:
- Using any graphic editor. The simplest one - Paint - is available on any computer running Windows (the “Image” tab, the line “Change image size”, select “centimeters” and enter the desired length (height) in the box. The resulting file can be printed. If the printer is small format, It may be necessary to split it into several pages.Them should then be glued together and, based on the resulting drawing, a template should be made.
- Using a photocopy. Copiers have a zoom function.
- Taking graph paper, transfer the drawing to the desired scale. To do this, divide the original image into squares with a side of 0.5 or 1 cm (can be printed on a piece of checkered paper). Then we transfer the lines to graph paper, increasing them in the required proportion.
The first two methods are faster. But when scaling, the picture may turn out fuzzy and blurry. It can be corrected manually, or drawn in some editor, for example, CorelDRAW. Watch the video to see how to do this. Just an example of drawing a diagram for carving.
Carved symbols of bygone times
Of great interest are the ancient Russian huts that are found in villages. Many works are over 100 years old. Platbands and shutters are real “wooden splendor”. There are no carved houses that are similar to each other. On the shutters of one hut there are two scrolls in the form of spirals. They gradually turn into stems. And they are crowned with the heads of fabulous birds. The shutters of another residential building are decorated with iconostasis motifs with rich floral patterns.
The mermaid was associated with the coastline. It is this image that protects many buildings and their owners. On the pediments, carvers often sawed out the owner's name and the year of construction. Those patterns that are present on the platbands are not difficult to detect in folk embroidery.
Magic spells are forever imprinted in the works of Russian craftswomen. The cut-out ornament appeared later.
Schemes, templates, patterns
Narrow edge elements
Decorative elements for vertical or horizontal strips
Schemes for cutting out wooden trims
Slotted elements for window decoration Pattern diagrams for decorating brackets
Scheme of carved platband
What can happen and options for vertical slats
More brackets
Towel or side patterns Possible patterns
This is a non-cut thread
Jewelry options
Drawings and diagrams
Welted, overhead, with crowns
Central elements for vertical strips
Three more options
Different styles, but no doubt spectacular
The style is completely different...