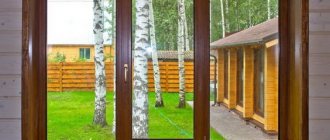
During a major renovation, a problem may arise: how to install a window in a wooden house if it is no longer needed and a blank wall is needed instead. This situation is quite possible if the owner decides to arrange the partitions in a new way. This often leads to the need to change the location of door and window openings, but at the same time it is still necessary to preserve the aesthetic appearance of the building and protect the rooms as much as possible from the penetration of cold. There are several ways to solve this problem with minimal cost.
Stages of dismantling and sealing the opening
Let's look at the sequence in which the window opening is dismantled and installed using frame technology, if all the steps are done by hand.
Purchase of materials
First of all, you should decide what technology will be used for the reconstruction and how to fill the opening. It should be taken into account that, depending on the method, it will take different times to adapt building materials to the required humidity level.
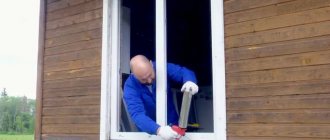
Dismantling
It is advisable to begin dismantling old windows by removing double-glazed windows from the frames (or glass in old structures).
The next step is to remove the frames
Please note that the frame installed between the frame and the frame will still be needed, so all stages of dismantling must be carried out with the utmost care
After the frame is removed, we recommend that you do not stop and disassemble the casing, since in any case the seal must be changed.
Frame assembly
If during the inspection it is determined that all casing strips have remained in working condition, you can begin the reverse process - closing and thermal insulation of the opening.
The assembly of the frame should be carried out according to the internal size of the frame and taking into account the fact that the installation of finishing strips is carried out on clamps. To increase the rigidity of the box, the inner and outer planes can be covered with chipboards.
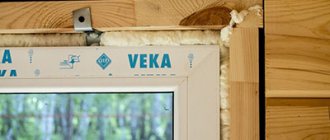
Installation with vapor barrier
To improve thermal insulation, the internal cavity of the frame is filled with mineral wool slabs. At the same time, it is advisable to seal the surface of the embedded box that is directed outward with a waterproofing film.
Exterior and interior decoration
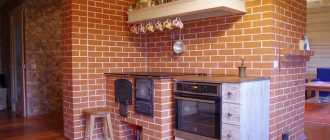
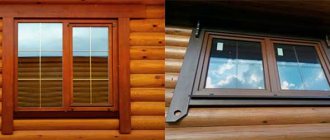
Example of a false window from the inside
Hiding the old window position is the most difficult part of this type of timber frame renovation.
The easiest way to do this is with the help of a special type of boards, one side of which is profiled as the visible part of a log house (“block house”).
There are several types of block house boards, differing not only in thickness, but also in rounding radius. Therefore, before buying building materials for finishing cladding, it is necessary to measure the rounding radius of the logs in the part of the log house where the opening will be laid.
The inside of the window opening being closed is sewn up in the same way.
Note that if the dimensions allow, the inside of the former window can be decorated with an original artistic composition.
Calculate the cost of painting and insulating your home right now
How to block a window in a wooden house with timber video
An element such as a window frame in a wooden house is an integral part of construction if you want to get a truly reliable structure. Since any wooden house, no matter whether it is made of timber or logs, always shrinks over time, the frame will be an excellent basis for preserving the integrity of the window.
Mistake during assembly
Note!
Installing windows in a wooden house without frames will be fraught with many problems. The presence of this detail saves the home from possible displacement of logs in the area of the window opening, and also preserves the functionality of the windows during the process of shrinkage of the house.
Features of casing manufacturing
If you decide to make the frame yourself, first of all you should think about the appearance of the window opening that you want to get, as a result of which it will immediately become clear what materials should be chosen for your construction.
Important!
In order to obtain a functional and reliable design, you must adhere not only to each step of the manufacturing technology, but also comply with the basic requirements for product parameters.
The pigtail consists of several parts, the maximum width of each of which should not exceed 26 centimeters. No one forbids making these elements wider, but in this case, be prepared for the fact that the structure will quickly become covered with cracks, which will play a role not only in the issue of reliability, but will also leave an imprint on the external aesthetics of the building and the frame itself.
For manufacturing, it is best to take wood whose moisture level reaches at least 10%. With a lower value, internal cracks will appear in the wood, and this is not acceptable. Therefore, you need to approach with special care the manufacture of wooden casing for the window openings of your home.
Part without sample
For such a procedure as installing a window in a wooden house, frames can be made for window structures with or without sampling. Before you begin production, it is better for you to decide in advance on all the details of execution, since a clearly outlined and thoughtful plan will not only speed up your construction, but will also protect you from rash decisions that may subsequently affect the success of your event.
Pit without sample
If you do not plan to carry out interior decorative finishing in your house, that is, the wood will have its original appearance, then it is best to use a frame with a selection for the window structure. Otherwise, it is recommended to carry out the trim without cutting under the window, then you will be able to complete not only the interior, but also the exterior of the house.
Sample part
The frame of windows in a wooden house in the photo below has a selection, unlike what you could see in the previous photos.
Pit with sample
To make any of them you will need to use:
- chainsaw;
- a grinding machine;
- drill;
- screwdriver;
- jigsaw
This is exactly what the main set of tools looks like, taking part in the manufacture of casing for installing windows.
In addition, you may need:
- consumables (for example, bits);
- measuring instruments, without which you will not be able to achieve accuracy in all work;
- protective equipment (for example, a respirator to protect the respiratory system and goggles to protect the eyes from small splinters).
Below you can watch a video review on the topic of the article, which clearly reveals the entire technology for installing the pigtail.
Performing work with regular windows
Even standard windows in a wooden house without frames will not be able to maintain their attractiveness and functionality, since, despite the similarity of materials, the shrinkage of the house still takes its toll. Therefore, even wooden window structures need this element.
Execution technology in the diagram (1)
Step-by-step implementation of a standard pigtail:
- The logs that are adjacent to this opening are taken as the basis for cutting out the grooves. This is where the block will be inserted.
- The block, as one of the sides of the frame, is installed as the very first of all elements. It is mounted on the lower beam of the opening, which ensures that the side parts do not move.
- Before installing the block, a layer of inter-crown sealant should be laid. Linen fabric is perfect for these purposes.
- The next stage is the installation of vertical parts. Linen sealing material should also be placed in the previously made grooves.
- The top beam of the frame closes the installation of the structure.
Execution technology in the diagram (2)
Note!
Do not forget to leave a gap above the casing, which is intended for shrinkage. An inter-crown seal is also packed into this area.
There are cases when polyurethane foam is used as a sealant, but this material is not suitable for these purposes. After all, polyurethane foam is aimed at holding logs together, which does not give them any opportunity to shrink naturally. Such a serious technological error can ruin all your efforts.
Carrying out work with plastic windows
As for plastic windows, the technology according to which the frames are installed in the openings is slightly different from the standard version.
PVC pigtail on the diagram
Technology for creating casing for PVC windows:
- Preliminary preparation of the window opening, namely increasing the opening by 13 cm larger than the frame intended for installation.
- Calculation of gaps must be carried out taking into account the most likely percentage of shrinkage, as well as all sizes of seams.
- Forming a ridge by cutting out this part in an already prepared window opening. This part will be used as a base for a carriage with a groove. It is within this groove that the logs will shrink.
- Making a carriage. Prepare a beam with parameters 150x100 mm and make a groove in the middle of it. The comb will be placed on this groove. Please note that the size of the carriage will necessarily exceed the size of the window by at least 5 cm. Both its width and depth should have the same indicator. Before actual cutting, you should accurately mark all the parameters, and only then get down to business.
- For the upper part of the casing, a board with parameters of 150x40 mm is taken. Grooves for the ridge are cut out on it, after which it can be placed in the structure.
- After the side parts of the casing are installed, the crossbar is secured with self-tapping screws. It is necessary to ensure that the self-tapping screws do not get into the ridge, as they will provide too rigid a connection to the structure, so the post will not be able to perform its main function.
Openings after installing the frame
After completing the assembly of the pigtail parts, it is worthwhile to insulate it. To do this, insulation based on flax or jute fiber is placed in each gap. As for the grooves and ridges, it would be appropriate to carry out the caulking procedure here.
The result of installing a non-standard window with a frame
You can use similar techniques not only for framing windows, but also for doorways, which also require such protective structures.
Recommendations for competently laying an opening using a frame method
In order to lay a window opening in a wooden building using frame-type filling, a number of operations must be performed. Work begins with dismantling the old block. In this case, the doors are first removed, after which the frame is carefully removed. Both disassembled elements can later be useful, for example, for installation in outbuildings.
Then the freed surfaces of the opening need to be cleaned of debris, dirt and dust. Next, a kind of casing is installed, which is also required in this case. It is made of boards or thin timber and attached to the walls of the log house with self-tapping screws or nails. Unlike installing a full-fledged window unit, in this case there are no serious requirements for the window frame.
At the next stage of the work, the frame is attached to the installed casing. Usually it is sheathed with a block house, matched in profile and size to the material that was used in the construction of the log house. After this, insulation is placed in the interior of the opening. As a rule, mineral wool, extruded polystyrene foam and other materials with similar properties are used in this capacity.
The filling of the opening is completed by installing the frame from the inside, which is then also covered with clapboard or block house. To create an effective and durable structure, it is recommended to protect the laid insulation from the inside with a layer of vapor barrier, and from the outside with a hydro- and windproof film. In addition, it is necessary to construct a ventilation gap that allows moisture accumulating on the vapor barrier material to freely leave the opening space.
Sealing an opening in a new building
Sometimes the question arises, how to seal a window in a wooden house if it has just been built? The reasons may be different: the owners decided to make changes to the project or purchased the structure at a low price and want to modify the design themselves. Unlike an old building, in this case shrinkage has to be taken into account.
The new log house must “sit down”, so its height will decrease. Rigid fastening of any structures to walls is impossible. When shrinking, this can lead to cracks in the logs and other deformations.
The simplest solution to the problem in this case will be the frame method described above. The unnecessary window is removed, but there is no need to disassemble the frame. The frame is installed not in the opening itself, but in the frame of the frame, fastened to the wall using a tongue-and-groove system, and the nails for fastening the frame should not go into the wall.
After this, a lining or block house is attached to the frame in the same way, covering the hole. The internal space and all cracks are filled with insulation, then the cold will not penetrate through the opening. You can install false window shutters on the outside; the inside of the wall is sheathed with clapboard, plasterboard or other materials.
How to seal plastic windows to stop it from blowing
There are situations when all the ways to fix problems with blowing are not effective and do not give any results.
This means that you need to fix this problem in other ways. One of them is insulating a plastic window in the winter.
First you need to improve the slopes. This can be done using:
- Foam plastic;
- Expanded polystyrene;
- Mineral wool;
- Sandwich panels;
- Glass fibers.
Choose the material based on the size of the cracks. Glue the material with assembly adhesive, then putty and paint.
There is also an option to seal the cracks in the plastic window. For this purpose, regular tape or a self-adhesive seal made of rubber or foam rubber is suitable.
But this needs to be done when a strong draft remains after all the above criteria have been corrected. Plastic windows are practical and easy to use, but there are also problems with them, which lead to certain hassles. A special moment when the windows were not installed correctly and were not adjusted correctly.
How to choose plastic windows is written here.
Devices and tools
List of materials and devices that will be needed to seal cracks in wooden windows:
- putty knife;
- chisel;
- sharp knife;
household scissors;- hammer;
- flat brush;
- screwdriver;
- Bulgarian;
- wooden glazing beads;
- small nails;
- sandpaper.
If polyurethane foam is used, you will need a foam gun.
How to seal a window opening in a log house
Good day. Please tell us how to seal an unnecessary window opening in an old log house (how the joint is made between the existing log and the new beam and how and with what the joints are insulated), and then expand the existing one to install a window block of a different size.
Igor, Vologda.
Hello, Igor from Vologda!
Let me clarify: your question consists of two parts. The first question is how to seal the old opening and the second question is how to expand the existing one.
Since the log house is old and has already completely settled over the many years of its existence, there should not be any special problems.
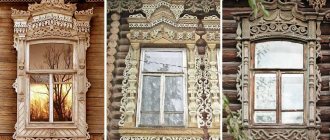
Owners solve the sealing of an old and unnecessary window opening in different ways. In the simplest case, they sew up the opening both inside and outside with ordinary wooden panels made from boards of some type (edged, lining, imitation timber, blockhouse, etc.). It is clear that for a more aesthetic perception it is advisable to choose the relief of a new material that matches the shape of the old one. For example, if the frame is made of logs, then it is preferable to use a blockhouse with a width approximately equal to the visible part (sphere) of the log. If the log house is made of timber, then an imitation of timber is used. But this is in form.
And the main goal is for the sealing of the opening to provide strength properties and, above all, not to be a “cold bridge.” Why are both vertical and horizontal joints made not end-to-end, but stepped. Either these joints-slots are closed with overhead strips or window casings that are the same in shape as the rest of the window openings in the log house. The result is a “false window.” In Vologda you can walk past old brick houses, in which some of the windows are blocked up and framed with relief cement platbands, a complete similarity to what was said.
In the case when stepped joints are made, then on one side of the wall (external or internal) old logs (or beams) are sawn through about a quarter of their thickness with a chain saw. /At the same time, the main thing is not to run into old nails, otherwise you won’t have enough chains./ Most often along the entire contour of the window, with a deviation of five centimeters or a little more from the existing opening. Use a chisel to remove excess wood. This results in a sample size of one quarter.
And then the two shields mentioned above are made. One is external, the other is internal, different in area. Depending on the thickness of the walls, a corresponding window frame is made, onto which these two panels are stuffed on both sides. The internal cavity is filled with insulation (tow, moss, isover, mineral wool, etc.). To ensure against moisture penetration, it is a good idea to attach a waterproof film to both sides of the frame. Some people use macroflex foam, but it must be protected from light, otherwise it will quickly collapse. The frame is fastened “tightly” with nails or self-tapping screws.
/If you have available cuttings of logs of the required diameter, then you can do without a frame with sheathing, and insulation will only be needed along the cracks. The trimmings of the logs are selected along their bottom in the form of a groove-groove, as is the case on old wall logs. The top trim is adjusted to the location. Fastening From the ends with nails or self-tapping screws “at an angle,” that is, obliquely. But the sample is still the same quarter, or rather half in the main old logs and in the new cuttings of logs. The joint is obtained in the form of a contour resembling the Latin letter Z. /
The expansion of the old opening for a larger window block is done in the same way as described above. That is, with cutting into a quarter, but according to the size of the outer contour of the new window and the thickness of the window block. If the thickness of the window block is small (most often this happens with plastic windows), then you can cut it deeper. But then, to install the window frame casing, sometimes you also have to cut out and select the wood of the log (timber) for it.
I don’t know how clearly I presented the material, I hope the main ideas are clear.
Other questions on the topic of metal and interior doors and windows:
Post navigation
As practice shows, plastic windows (PVC or Euro-windows with double-glazed windows) have higher energy saving characteristics than ordinary wood windows. For this, as well as for a number of other reasons, more and more often, when constructing or reconstructing a wooden house, preference is given to PVC windows. Naturally, this is a controversial preference, yet we will not figure out which windows are better - wood or plastic.
Installing plastic windows in a wooden house In this article we will look at how to independently install plastic windows in a wooden house (also a log house made of logs or timber). Let's create this using an example of a more common installation method.
The window installation process consists of several steps:
- Removing old windows in a wooden house
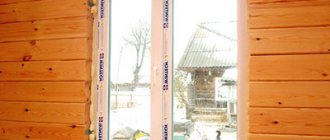
- Preparing gaps for installing new windows
- Installation of plastic windows in a wooden house
Removing old windows in a wooden house
Dismantling old windows in a wooden house The disassembly process, in most cases, is not particularly difficult. For this work you will need a saw (chainsaw, electric saw), an axe, a nail puller or a crowbar.
If the windows are old and the window frames are rotten and worthless, then you can savagely smash everything and everyone, without caring about the safety of the latter.
If the window frames are in good condition, then carefully remove them, having previously removed the glass. These frames can be used to construct a greenhouse or veranda. gazebos or other building needs.
When dismantling old windows, you should definitely follow safety precautions when working with cutting and chopping tools; use safety glasses when working with saws. Before sawing the structure, make sure that there are no nails or any iron pins - this will allow you to save the tool (saw band) and protect you from possible injuries, since when the saw jams, it is quite difficult to hold it in your hands.
Preparing gaps for installing new windows
After removing the frame, you need to make sure that the window opening is suitable for installing a new window. Specifically, check the condition of the wood of the window frame, the absence of signs of rot, wormholes, cracks, chips and other damage. It is recommended to treat it with protective compounds. If the window frame is not suitable for the upcoming use, then you need to change it to a new one. For this, a good, dried planed board will be useful. The corners can be fastened with locks (for example, mortise-tenon), or you can simply screw them together with screws of sufficient length. It is imperative to treat the structure with protective compounds.
Installing casing in a wooden house When replacing a window frame, you can carry out an inspection and, if necessary, change the vapor-waterproofing, insulation materials, and check the condition of the material (wood) in the window opening of the wall.
It may be useful to replace some parts of the opening. For example, in logged houses, in most cases, sections of logs located under the window opening suffer. In this case, the warped areas are cut out and replaced with pieces of logs of suitable size. The replaced areas are strengthened depending on the abilities - with staples, long mortars, wooden locks (mortise-tenon).
Be sure to treat the replaced area with protective compounds.
Installing windows in a window frame (for log houses, installing a window frame is done using a frame or casing) is a more correct method of installing windows. In this way, the rigidity of the opening is maintained and a strong base frame is created. But at the same time, the window itself will be able to self-regulate with seasonal fluctuations in the house (shrinkage, movement, etc.).
During installation, the window frame is leveled.
Installation of plastic windows in a wooden house
After preparation, we proceed to the window installation process itself.
First, we separate the window frame from the sashes; if the window is solid, we remove the double-glazed window. We do not remove the protective film from the windows - it will protect the profile from possible damage and scratches.
Window sill installation
Installing a window sill in a wooden house If you need to install a window sill, we first install it. When installing, we adjust the plane using a level and backing plates (pieces of wood, plywood, etc.).
If the window sill is also made of PVC, then you need to slip a washer under the head of the screw (so that when tightening the screw does not fall into the cavity of the window sill). We screw the screws into places located under the future frame (so that it is perfect and the caps are not visible). But in most cases, the lower wide board of the window frame serves as the window sill, and therefore the installation of an additional window sill is not required.
Frame fitting
Installing a window frame in a wooden house We place the frame on blocks about 1 cm wide and check the level for correct installation. Be sure to leave a gap of more than 1 cm at the edges, install the blocks between the frame and the window frame. They will prevent the frame from moving horizontally, prevent possible deformation of the frame during installation, and allow the window frame to be firmly secured to the window frame.
We check the flatness of the surface of the wall (window frame) and frame, not allowing the frame to protrude beyond the boundaries of the window frame.
Window frame installation
Installing a window frame in a wooden house We fasten the frame using long screws to the window frame, being careful not to overtighten the screw.
After installing the frame, we hang the sashes and install double-glazed windows (in blind windows).
When installing a double-glazed window into a profile, it is necessary that there is a gap of about 5-7 mm between the double-glazed window and the profile.
This will prevent the glass from warping and cracking in the event of possible deformations of the profile (frame) during use (seasonal fluctuations in the structure, possible distortions during shrinkage and during use).
Vertical adjustment is made using adjustment plates.
Installation of double-glazed windows
Next, using a plastic bead, the double-glazed window is fixed in the PVC profile. The tenon of the bead should fit into the groove on the frame until it clicks. The connection should be created by slightly tapping the glazing bead with a wooden or rubber mallet or hammer.
Window foaming
Next, we foam the space between the window frame and the frame. We wait until the foam hardens. During this period of time, it is not recommended to open or ventilate the window to prevent deformation of the frame from the expansion of the foam.
After the foam has hardened, we cut off the excess and you can move on to finishing with platbands.
After removing the protective film, the window is ready for use.
Video showing installation of plastic windows in a wooden house
Sources: ,
No comments yet!
How to cover a house with a blockhouse with your own hands photo
How to cover a block house with your own further.
DIY entrance steps of a personal house
Design options for entrance steps Entrance steps are made from the following.
Hand exercises at home
Exercises for arms further.
Popular articles
curious
Do-it-yourself corner fireplaces in a private home
Stages of installing a corner fireplace made of plasterboard A fireplace is not only a heating object, but also a decorative element. Naturally.
Frame house 5 5 do it yourself
Frame house 6x5 Construction of houses is the main direction in the construction industry. Experienced specialists offer users various options for building a frame house.
Build a tree house by hand projects
In order to build wooden houses, they often use “winter” wood, i.e. the one that was prepared in.
Choosing a mounting method
An important condition for filling openings with bricks is to ensure a reliable connection between the new structure and the old one. There are two binding methods:
There are two binding methods:
Scheme of ligation of sutures.
- ligation of sutures;
- anchoring
Bonding seams with an existing structure is used to seal brick walls. To do this, at the ends of the doorway it is necessary to knock out bricks to a width of at least 12 cm. Niches are formed into which new stones will fit when the opening is filled with bricks. If the partition is folded into half a brick, then it is enough to knock out the finishing halves in every fourth row.
The dressing method is not very suitable for sealing window openings, because they are made in a load-bearing wall, folded into 1.5-3 stones (thickness from 250 mm). Here it is more appropriate to perform anchoring: using a hammer drill, drill holes in the side ends of the structure and hammer pieces of periodic profile reinforcement into them.
The diameter of the connecting reinforcement is from 6 to 10 mm, the depth of immersion into the thickness of the structure is at least 100 mm. Anchoring is performed every 3-4 rows; it is most convenient to do it during the construction of the partition so that the seams of the new and old masonry coincide. This method is also used for connection with concrete walls.
General information
In our time, timber has replaced the logs from which log houses were built. It would seem that these materials are similar, however, log wooden houses are built completely differently.
If the construction of a log house required the skill of a carpenter, then almost every person who is at least a little familiar with construction can assemble a house from timber. The difference between a log house and a timber house, as experts often say, is comparable to the difference between building buildings made of brick and rubble stone.
How to seal cracks in plastic windows
Installation errors lead to a large number of problems. To avoid them, you should initially contact experienced specialists.
Why did a gap appear between the frame and the slope?
? Most likely, the foam layer was not adequately protected. What to do? To solve the problem.
- Remove the old foam layer.
- Clean the gap thoroughly.
- Blow out new foam.
- Wait until it dries.
- Trim off the excess.
- Caulk the joints.
- Paint it.
- Additionally, seal the cracks with acrylic frost-resistant sealant.
This is about the question of how to cover up the cracks in plastic windows from the outside. Of course, if you do not have experience in carrying out repair work, then it is better to seek help from specialists.
What sealant should I use to seal cracks in plastic windows? You can use acrylic, bitumen or polyurethane sealant. The main thing is not to use silicone sealant; under the influence of temperatures it can roll up and become unusable.
To permanently get rid of the appearance of cracks, you should equip your plastic windows with external slopes made of plastic.
How to get rid of gaps between the frame and the sash
? This will require correct timely adjustment, as well as replacement of the sealing rubber.
How to cover cracks in plastic windows inside
? If the problem has already manifested itself, then the easiest way to fix it is with a sealant. There are special sealants for windows and doors. This is what you should use.
Consequences of cracks
If you leave cracks in wooden windows without sealing, serious problems will arise:
- The formation of fungus and mold on a wooden structure.
Increased amount of dust on the windowsill and in the house.- Violation of sound insulation. Sounds from the street penetrate well into the room.
- The appearance of a draft from wooden windows.
- The presence of insects that enter the house through cracks and crevices.
Thermal protection is gradually reduced and the cost of heating the room increases greatly. The wood is destroyed and the windows become unusable. Replacing wooden windows is much more expensive than installing plastic ones.
How can you block the opening?
In general, there are two different approaches to solving the question of how to seal an old window:
- disassemble and assemble the wall of the log house, while installing new logs;
- dismantle the old frame and double-glazed windows and fill the opening.
The first approach is applicable in cases where there are no heavy structures above the windows or the house is small (for example, this is how windows in the end walls of bathhouses or country houses are sealed; windows in the attic, etc.).
From the point of view of thermal insulation and reliability, this solution is the most correct, but it is not always feasible. But even in this case, it is necessary to take into account that new logs may have a completely different level of humidity, so when purchasing a “repair kit” you should monitor the humidity and degree of shrinkage very carefully.
The second option - dismantling the old window and filling the opening - is more versatile and can be made using various materials.
How the block house is attached
If a log or timber house has additional external finishing, then the easiest way is to fill the opening with foam blocks or bricks, and build up a finishing layer on the outside. However, we note that wood has much better heat-insulating qualities, so it is better to make the backfill from timber.
In cases where it is necessary to close a window in a wooden house with timber or logs, and there is no external finishing, a lot of effort will have to be made to hide the traces of such repairs. The classic solution to such a problem is to use a frame frame, mineral wool and planks of a block house that imitates a log house.
The list of options would be incomplete without mentioning such exotic solutions as sealing plastic windows from the outside with decorative wooden shutters and creating a false window on the inside.
How to carefully disassemble a window and correctly lay the window opening
The need for such changes as sealing window openings in a wooden log house does not arise often, so not everyone imagines how to install a window in a wooden house without resorting to such a labor-intensive and costly operation as complete dismantling of the log house with the subsequent installation of new logs.
Just as in many other situations, sealing windows in a wooden house is more complicated than similar operations performed during the reconstruction of a stone building. The differences are due to the special structure of wooden building materials, as well as the fact that in this case it is necessary to take into account the moisture deformation of the wood.
We insulate old wooden windows with our own hands
Quite often, insulating only the frames does not give the desired result, since a draft in the house appears not only because of the cracks in them.
Poorly secured glass may also be the cause. The fact is that in frames that have served for a long time, the glass was secured using putty.
Over the years of use, the old putty, which originally held them firmly in the frame, has lost its qualities, becoming brittle and fragile. Sometimes it completely crumbles, and the glass is held in place only with the help of small nails.
Naturally, they do not prevent cold air from entering the room. Therefore, the insulation of wooden windows must begin with fixing the glass, performing this work in the following order:
- The old fastening is removed - putty and glazing beads. If the glazing beads (slats holding the glass) are worn out, then it is better to purchase new ones in advance.
- The glass is removed, and the frame is thoroughly cleaned of paint drips and putty residues.
- An alkaline solution removes traces of putty from glass.
- The frames are washed, wiped dry, and then their inner perimeter is coated with colorless silicone sealant.
- The glass is installed in place, securing it with glazing beads using special window nails. You need to attach the glazing beads very carefully, since pinched glass can crack if the temperature changes.
- Noticed cracks must be coated with sealant, the excess of which is removed with a damp cloth. After a few hours, the glass can be washed with window cleaner, and then you can begin insulating the frames.
To insulate wooden frames, seals equipped with an adhesive layer are usually used. The assortment of hardware stores includes foam rubber and polymer seals. Polymer sealing tapes will last for several years, while allowing windows to be opened
The foam rubber sealing tape will have to be changed annually, since it gets wet when exposed to water, losing its properties. To glue the seal, just press it tightly around the perimeter of the frame with the adhesive side.
If the cracks in the frames are too large, you will have to caulk them, filling them with foam rubber or cotton wool. Then you need to stick masking tape or strips of paper on them. You can also use fabric strips.
Fabric and paper can be glued to the frame with a soap solution, which is easily washed off in the spring. After the solution dries, the fabric becomes airtight.
Important: to avoid the appearance of condensation in the interframe space of the window, you should place bags with any substance that absorbs moisture (adsorbent) in it. These include activated carbon, salt, soda and silica gel
When choosing a method of insulation, you can combine various options for insulation materials. Most often, budget line insulation products are used, while obtaining the expected result.
The result of the work on insulating windows with wooden frames will be a noticeable improvement in the climate in the house. Properly performed insulation will allow you to save up to 50% of the heat in the house, while simultaneously reducing heating costs.
How to properly insulate wooden windows for the winter - learn from the video:
Education factors
There are common reasons and there are specific ones that are not so common.
To repair cracks efficiently and quickly, you need to know the list of possible factors for their appearance:
- The difference in the coefficients of thermal expansion of two materials - glass and wood. They have different elasticity. Even with a perfect fit, a gap will still appear. It's just a matter of time.
- Poor installation . If parts are poorly fitted or installed. Gaps may appear where the frame meets the window sill or slopes.
- Frame wear and drying out . Wooden frames are constantly exposed to environmental factors. If weather conditions are too changeable or the windows are installed in a region with sudden climate change, then the cracks will increase quickly.
- Settlement of the foundation of the house can also cause the window to warp and cause cracks to appear.
- Wear of sealing materials . There are no eternal materials. Therefore, over time they lose their protective qualities.
Sometimes the cause may not be obvious, but the presence of cracks can be felt. For example, after cleaning, dust immediately appears on the windowsill, you can hear a lot of noise from the street, and you can feel the blowing of cold air. You can determine the location of the hole using a regular lighter. It is enough to carefully walk the flame along the window and record the places where it deviates.
Important! Old wooden windows require an integrated approach and insulation of all possible points of cold bridges.
Expanding the window opening
During a major renovation, the opposite situation may arise: the opening should not be removed, but, on the contrary, expanded so that more light penetrates into the premises. In this case, you will need to dismantle the old window, disassemble the frame and cut a hole to the size of the new one. However, you need to take into account that the opening must be at least 14 cm wider than the selected window sashes: 5 cm on each side will be required for a new frame and another 2 cm for a layer of polyurethane foam that will hold the frame.
The side parts of the pigtail - the carriages - are made of wooden blocks in which grooves are cut. Protrusions are cut out at the ends of the logs, and with their help the casing is installed in place. A gap of 7–10 cm is left between it and the top log above the window, which will gradually decrease in the future due to shrinkage.
After installing a plastic window, it is filled with insulation, which will shrink over time. The height of this gap should also be taken into account when preparing a new opening. The gap cannot be filled with polyurethane foam: this material will not allow the logs to sink.
Preparing the opening for installation
If this is not a new building, but you need to replace an old window with a new one, then the first thing you need to do is get rid of the unnecessary frame. It is not difficult. Then clean all slopes from plaster. You also need to remove the old window sill. Wooden inserts remain in the opening into which self-tapping screws are screwed. Next, take measurements of the opening; it must be slightly larger than the window itself.
It can be attached with anchors right through to the wall, which allows you to open the window in any direction without increasing the load on the frame. When choosing a frame, it is important that the inner glass does not sweat. The width should be from 12 to 22 cm.
All cracks must be blown out with foam from a gun. To ensure that the foam is distributed evenly and there is no pressure on the frame, you need to blow it out in several stages.
Installing new, smaller windows
The opposite case is when the new window is smaller than the old one. The need for such a replacement often arises when renovating bathhouses and utility rooms.
Several solutions are already possible here, among which there are simple and complex options.
By simple we mean those situations when changes in size occur within a small range.
Plastic extensions for expansion
That is, if it is necessary to move the window to the left or right by a few centimeters, then the resulting void can be filled using special expanders (if it is a PVC window), or by increasing the thickness of the casing strips with ordinary boards of suitable thickness.
Let us formulate the main rule for such changes in size: the planned displacement of the window must be such that the resulting voids in the frame can be covered with platbands.
It should be noted that any attempt at such changes will be accompanied by difficulties in finding optimal proportions in the external design of the window, which will be extremely difficult to find with increased or uneven frame thickness.
Therefore, in order for modified window openings to look correct and beautiful both from the outside and inside, a much more complex technology should be used, based on replacing logs in the crowns.
Objective difficulties for installing windows in a wooden house
This is how a building made of wood shrinks.
Many homeowners think that the log house shrinks only in the first 10-12 months after its installation, then it does not change the geometric parameters. But this is far from true.
Yes, wooden walls dry out especially intensively during the mentioned period. However, the instructions from professionals warn that even then this process does not stop and continues for at least five years.
Although not that noticeable. In some areas, based on climate conditions, walls shrink throughout their entire service life.
Note! As the logs or beams of the log house dry out, the height of the walls of the building may decrease by 1-1.5 centimeters for each meter. For example, when the height of the walls is 3 meters, the log house shrinks by 4.5 centimeters.
It’s easy to guess what will happen if you don’t take this fact into account before sealing a window in a wooden house. If you leave only the standard gap of 2 centimeters for the mounting foam, then at best the window block will be deformed and its sashes will jam. In the worst case, the window will simply break.
Solution
Installing window blocks in a log house with your own hands is quite doable. However, to do this, a special structure must be placed in the opening - a “window”; experts also call it a “casing”. It will give the block independence from the external walls of the building, and will also take all the main loads.
Installation of casing has the following advantages.
- It prevents logs or beams from moving from the established vertical in the window opening.
- Does not interfere with vertically directed shrinkage of enclosing structures.
- Strengthens the walls in the area of the window opening.
Let's find out what a pigtail can be and how to place it correctly.
Basic variations of pigtail
In its simplest form, the casing is a beam with a cross-section of 5x5 cm. It is inserted into a vertical groove of the same cross-section, cut into the ends of the beam or logs of the opening.
The window frame is screwed or nailed to this element. Please note that this version of the frame can only be used before installing wooden windows.
With a more complex casing method, an element called a ridge is cut out at the ends of the opening, essentially a tenon. A carriage equipped with grooves is put on it.
Such a mistake is made if, when deciding which windows are best to install in a wooden house, you choose the metal-plastic option.
The photo shows casing using carriages.
- Window carriages are a vertically located beam with a cross-section of 15×10 centimeters with grooves cut at its ends measuring 5×5 centimeters. Horizontal jumpers made of boards with a cross-section of 5×15 centimeters with spikes at the ends are inserted into them.
- Thanks to the ridge, the timber or logs slide in the groove when the building is seated. As a result, they do not deviate in the vertical direction and do not compress the window unit.
- In some cases, a tenon is cut out on the carriage, and a groove in the opening. This does not change the operating principle of this design.
Note! Before cutting a window in a wooden house, keep one important point in mind. The installed casing should be 6-7 centimeters in height less than the window opening. This gap is necessary for smooth shrinkage of the building walls.
Sealing existing openings
For example, if there is no longer a need for any of the doorways in the house, then it must be closed. You can close the openings in the internal partition using ordinary drywall or other similar material.
However, if the opening is in the outer part, then it is impossible to do without a major filling of the opening. In such a situation, special blocks and bricks will come to the rescue.
The opening must be carefully prepared before the sealing process. The plaster should be completely removed: starting from the lowest base to the slopes and inconspicuous corners.
New so-called grooves are created in the brick opening for future masonry. Half the brick should be removed on every 4th row. Holes are created in the inner walls of the concrete into which 9-10 mm reinforcement is driven. This is done to strengthen the bond with the brick material.
The wall covered with brick is left to harden for a day, and only after a day they begin to plaster. Initially, the areas of the walls freed from plaster will have to be primed.
During the plastering process, steel mesh is used every 240 mm. Steel structures are used to further strengthen the structure. Next, the wall is sprayed with cement, and the mixture (mortar) begins to be applied. The number of layers of plaster should depend on the correspondence between the levels of the previous and existing walls.
But! Be careful! Each subsequent new layer can be applied only one day after the previous layer has hardened. Before each application of a layer, the surface should be well primed, and the other side of the wall should be plastered.
Possible difficulties and errors of the process
- The main mistake that owners of wooden windows make is starting repairs with the onset of cold weather. Many people begin sealing cracks when heat loss becomes noticeable. As a result, you have to rush, and some operations need to be done with open windows. Putty materials adhere worse, and the insulation result becomes less quality.
- The second mistake is sealing the cracks on the opposite side than required. For example, it is recommended to insulate parts such as ebb, slopes and window sills from the outside. It is more expedient to reconstruct other elements from the inside.
- The third inaccuracy is the incorrect selection of material to the size of the gap. There are materials that are well suited for sealing large holes. With the help of others, this cannot be done efficiently.
Work order
Proper use of masonry mortar.
As a rule, when sealing an unnecessary doorway with brick, a partition thickness of 12 cm (half a brick) is maintained, since this structure does not bear any load; the upper part of the existing wall is held by a lintel. A window in an external fence can also be laid in half a brick, provided that additional insulation is provided.
To ensure that a blocked door can bear the load from hanging cabinets or any household appliances, the usual method of laying stones is used - on spoons. In this case, it is necessary to bandage the seams by half or a third of the length of the brick. Sometimes another method of embedding is used - a one-and-a-half hollow stone 88 mm high is laid with a bandage on the edge. But it should be taken into account that such a partition will not be able to bear additional load.
The work is carried out in the following order:
- Prepare a simple cement-sand mortar of M50 grade, using 1 part M400 cement to 5 parts well-sifted sand. Another option is to purchase ready-made masonry mixture and mix it with water, following the instructions on the bag.
- Moisten the base and sides of the opening with water. Place 1 row of stones near the installation site, cut the last one to the required size.
- Carefully spread the mortar to the length of 2-3 stones and begin laying 1 row. After each laid brick, pull the mortar to its side with a trowel, and then press it with the next stone.
- Apply the mortar to the end of the last brick in advance and put it in place. To maintain the thickness of the seam, the stones must be tapped.
- Fill the entire opening in this way, focusing on the plane of the existing wall. Do not allow the masonry to bulge or cave in; to do this, constantly check the wall, applying an even plank to it. Another option is to pull the mooring line and navigate along it.
In a situation where it is necessary to pass heating pipes made of PPR, metal-plastic or metal through the gap being laid, steel sleeves (cases) are placed in the partition. Their diameter must be greater than the outer size of the pipe. The length of the case is selected so that its ends extend beyond the surface of the masonry by 2-3 cm.
After the mortar has hardened, the structure must be lined so that the door covered with bricks does not differ in appearance from the rest of the walls. Choose the appropriate type of finishing - plaster, drywall or other material.
Objective difficulties for installing windows in a wooden house
This is how a building made of wood shrinks.
Many homeowners think that the log house shrinks only in the first 10-12 months after its installation, then it does not change the geometric parameters. But this is far from true.
Yes, wooden walls dry out especially intensively during the mentioned period. However, the instructions from professionals warn that even then this process does not stop and continues for at least five years.
Although not that noticeable. In some areas, based on climate conditions, walls shrink throughout their entire service life.
Note! As the logs or beams of the log house dry out, the height of the walls of the building may decrease by 1-1.5 centimeters for each meter. For example, when the height of the walls is 3 meters, the log house shrinks by 4.5 centimeters.
It’s easy to guess what will happen if you don’t take this fact into account before sealing a window in a wooden house. If you leave only the standard gap of 2 centimeters for the mounting foam, then at best the window block will be deformed and its sashes will jam. In the worst case, the window will simply break.
Solution
Installing window blocks in a log house with your own hands is quite doable. However, to do this, a special structure must be placed in the opening - a “window”; experts also call it a “casing”. It will give the block independence from the external walls of the building, and will also take all the main loads.
Installation of casing has the following advantages.
- It prevents logs or beams from moving from the established vertical in the window opening.
- Does not interfere with vertically directed shrinkage of enclosing structures.
- Strengthens the walls in the area of the window opening.
Let's find out what a pigtail can be and how to place it correctly.
Basic variations of pigtail
In its simplest form, the casing is a beam with a cross-section of 5x5 cm. It is inserted into a vertical groove of the same cross-section, cut into the ends of the beam or logs of the opening.
The window frame is screwed or nailed to this element. Please note that this version of the frame can only be used before installing wooden windows.
With a more complex casing method, an element called a ridge is cut out at the ends of the opening, essentially a tenon. A carriage equipped with grooves is put on it.
Such a mistake is made if, when deciding which windows are best to install in a wooden house, you choose the metal-plastic option.
The photo shows casing using carriages.
- Window carriages are a vertically located beam with a cross-section of 15×10 centimeters with grooves cut at its ends measuring 5×5 centimeters. Horizontal jumpers made of boards with a cross-section of 5×15 centimeters with spikes at the ends are inserted into them.
- Thanks to the ridge, the timber or logs slide in the groove when the building is seated. As a result, they do not deviate in the vertical direction and do not compress the window unit.
- In some cases, a tenon is cut out on the carriage, and a groove in the opening. This does not change the operating principle of this design.
Note! Before cutting a window in a wooden house, keep one important point in mind. The installed casing should be 6-7 centimeters in height less than the window opening. This gap is necessary for smooth shrinkage of the building walls.
Ways to fill the opening
There are several common solutions for how to remove a window in a wooden house:
- The most radical, but also the most reliable and aesthetic way is to disassemble part of the log house and replace the logs or beams. If we are talking about an attic or dormer window, this is not such an expensive solution, and it will allow you to forget about all the problems with blowing through the walls. But it should be borne in mind that old and new lumber will settle differently, so it is better to purchase dried wood and do not forget about laying insulation. When shrinkage is complete, re-caulking of the resulting cracks will be required.
- Installation of fragments of logs or beams of similar size and diameter into the hole. This is a rather labor-intensive method: the opening logs are cut at an angle of 45 degrees, the same angle is made at the ends of the insert pieces. There is also a minus: the new elements filling the hole will be very different in color. In this case, you will have to paint the entire wall to disguise the embedded part, or use another cladding option.
Frame method
How to install a window in a wooden building with minimal labor costs without cladding? There is a simple and effective method that will allow you to forget about the cold, and at the same time the structure will remain beautiful and neat. Sequencing:
- The old window block is being dismantled. The doors are carefully removed and the frame is removed. There is no need to throw away the plastic system: it will be useful for a summer house, greenhouse or gazebo.
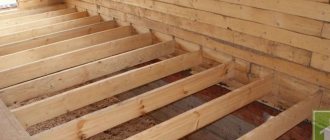
- The resulting hole is cleared of accumulated debris and dust. After this, a frame made of thin timber or wooden slats is installed in it. It can be attached to the wall logs with nails or self-tapping screws.
A frame is stuffed onto the frame from the outside, and material corresponding to the walls is attached to it. If the house is made of logs, they usually use a block house, if it is made of timber, a horizontal lining of the required size is used. As a result, the opening will not be noticeable from the street, and the surface will appear smooth. To avoid any difference in color tone, the wall should be painted. The internal space of the frame is filled with insulation: you can use a thick layer of mineral wool, penoplex, extruded polystyrene foam or other materials. The insulation must fit tightly to the frame and sheathing, then the wall will not freeze. On the inside, similar work is performed: the sheathing is installed, and decorative material is nailed to it. Usually this is a clapboard or block house. Next, the entire wall is covered with varnish or paint so that it acquires a uniform appearance.
If external or internal cladding is intended, you can do without sheathing. OSB boards made from sawdust and shavings are nailed to the frame-frame, and the internal space is similarly filled with insulation. After this, the building is finished with the selected material: OSB boards retain heat well, the insulation will not allow the wall to freeze.
In some cases, a window opening in a log house is covered with brick or aerated concrete blocks. This method is possible if the object is supposed to be faced with brick or other material, with cladding on the inside. Typically, infill bricks are used only in very old buildings where shrinkage has long since completed.
How to lay a window in a wooden house: step-by-step instructions and video
How to install a window in a wooden house if you need to get rid of it on the wall is not very often of interest, but it does happen. This can happen if you want to divide a large room into smaller rooms. There may be a lot of extra windows in the corner room, so it would be appropriate to make the decision to get rid of them. Otherwise, in summer there is a risk of excessive sunlight entering the room, and in winter it can be quite cool.
Getting rid of the window
First of all, it is necessary to completely remove the unnecessary window in the wall. This process begins by removing all fasteners, after which it will be possible to remove the window frame. After this, it is worth getting rid of all sorts of protruding parts, particles of solutions from previous installation work, as well as other elements that may interfere with the further work process. A large rectangular hole appeared in the wall.
Dismantling a window opening
Frame and sheathing
To create a light wall directly inside the main wall, you first need to make a frame. The material is selected in accordance with the material from which the building is made. In this case it is a wooden frame. In no case should you skimp on nails, because it is they who must securely and firmly hold this structure in the wall.
In order to remove an unnecessary window opening, it is necessary to attach slabs to the frame; these can be OSB slabs. They are long-sized chips compressed under high pressure. Each subsequent layer of such chips is located perpendicular to the previous one, which subsequently helps to provide such structural elements with an increased level of strength. These boards are distinguished by a homogeneous structure without knots, which is significantly superior to the structure of plywood. Thanks to this, the boards have high strength and durability. It is also worth noting the addition of formaldehyde to the mass of parts, due to which the slabs become environmentally friendly.
Insulation
When the wall is completely covered with the above panels, the structure should be insulated using basic materials. Here are the main types of possible insulation:
- Mineral wool - the material has good thermal insulation properties, helps absorb noise and contains environmentally friendly components.
- Foam plastic - helps create a favorable microclimate in the room and protect the walls from the cold.
Note!
When insulating the walls of a house from the inside, mixtures such as ecowool, wet plaster and polyurethane foam are used.
Moisture insulation
At this stage, a drainage system or special insulation impregnated with resin should be prepared. This process helps to protect the wall from water and moisture entering the room. Due to this, the resulting moisture will flow down the walls. The insulation needs to be carefully secured; for this purpose, plastic nails are often used.
Attention!
Be sure to ensure that cracks and crevices do not appear during moisture insulation.
Facing
Finally, all that remains is to veneer the wall from the outside, after which it will be completely ready.
The inside of the wall is covered with plasterboard. An important process is the alignment of joints. If you do not have the skills to work with this material in this direction, you should seek help from specialists.
Taking into account the capabilities and taste preferences of the owners, you need to paint the wall or hang wallpaper on it.
Features of laying a window from timber
From the above information follows the answer to the question of how to cover a window in a wooden house with timber. Moreover, if the walls of the structure are built from wooden beams. It is recommended to select these elements with a thickness corresponding to the standing walls. It is worth noting that the beam is considered a ready-made log, which only needs to be secured and connected to other elements. They contribute to rapid construction and ease of wall construction technology. Also, walls made of this material are not capable of sagging and are a fairly economical option compared to logs.
Scheme for laying a window with timber
If you are interested in the answer to the question of how to install a window in a wooden house, a video is provided below for your reference.
This section describes the main stages of the work and, most importantly, a description of how to properly install a window in a wooden house. After all, a structure made from this type of material has a lot of advantageous characteristics. It is worth noting the ability of wood to pass oxygen into the building and the low thermal conductivity of the material. Also, a house made of wood has the ability to assemble and disassemble the structure itself, so sealing the window opening yourself does not cause any difficulties. From a material point of view, such structures are cheaper for the owner.
Settlement and shrinkage. Features of wood
Wooden houses, compared to brick ones, are more susceptible to shrinkage. But very often shrinkage is confused with slump.
Settlement occurs due to the pressure of the building on the ground, and under the same geological conditions, the heavier the structure, the more the house settles. The correct choice of foundation allows you to minimize these processes. A consequence of soil heterogeneity and different degrees of settlement of two adjacent walls can be the appearance of cracks in the plaster or folds in the wallpaper in the corner.
Shrinkage is a change in the geometry of a building due to the drying of materials. It is present in houses made of concrete or brick, but is most evident in wooden houses built from logs or timber with natural moisture.
Wood, as a building material, has a heterogeneous structure. Wood is a collection of a huge number of through channels (tracheas and tracheids), oriented along the trunk from the roots to the crown. Freshly cut wood always contains water (more in spring and summer, less in winter). It is present in free form inside the cavities of the channels, but there is also bound water, which is located in the walls of the channels (in swollen microfibrils). Typically, the amount of bound water reaches 30% of the total mass of conditionally dry wood. When the bound water dries, the walls begin to dry out, which leads to a change in linear dimensions. Therefore, in these cases, finishing work, including the installation of windows and doors, begins only after six months or a year, when the “active” phase of drying of the wood has passed.
What can happen when installing a window without casing?
The shrinkage is most insignificant for houses made of laminated veneer lumber, slightly more for houses made of timber or chamber-dried rounded logs.
Their windows can be installed immediately after the construction of the walls and roof is completed. But even in these cases, before installing the window, a frame or casing is first installed in the opening.
Option two - plastic
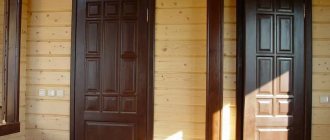
Due to the relatively high cost of natural wooden slopes, homeowners often opt for cheaper plastic. PVC windows today can be seen in many wooden buildings; plastic slopes in this case can become a harmonious and durable finishing element. Even in log houses, not to mention timber houses, plastic windows with the same slopes become part of the interior and facade decoration.
It should be noted right away that today there are two common options for plastic slopes:
- Sandwich panels. This is not just thin plastic, it is a structure where between two laconic plastic sheets there is a layer of thermal insulation - polyurethane foam or polystyrene foam. The first type of thermal insulation is preferable. Manufacturers offer sandwich panels, for example, measuring 1500x3000x10 mm at a price of about 1.2 thousand rubles (thermal insulation - polystyrene foam). Such sheets can be cut to the size of your slopes; you will have to purchase additional corners and a special profile in order for the structure to take on a finished look. Plastic sandwich panels can be laminated on top with a colored film, which allows you to choose an option for your interior. Such panels can perfectly imitate wood, which is very important for wooden houses;
- A simpler and cheaper option is plastic slopes with jumpers. Such panels are thin and do not differ in heat and sound insulation properties, although they can be not just white, but oak or walnut, for example, thanks to lamination. The cost of a linear meter of such slopes can vary from 160 to 800 rubles, depending on the presence of the laminated layer and the width.
The advantages of plastic slopes include ease of installation, durability, ease of maintenance, more affordable cost compared to wood, and the ability to choose an option for the interior. Sandwich panels for slopes are the best choice; they have fewer disadvantages, but plastic with jumpers on slopes can look cheap and can be easily damaged upon impact. In low-quality products, lintels may appear in the sun, which will not decorate the window at all.