Material such as plywood is increasingly being used to cover floors. However, if we are talking about wooden flooring, then laying plywood on a wooden floor is not so easy; there are certain nuances that need to be taken into account.
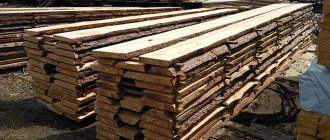
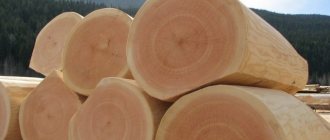
First of all, you need to understand what plywood is. This is a material consisting of 3 layers of wood, but it often happens that there are more such layers. There are several types of such material, so if the question arises about what kind of plywood to lay on the floor, it is recommended to opt for a waterproof option, which is impregnated with a special adhesive solution.
Plywood is great for subfloors because it is durable and does not warp.
Covering a wooden floor with such material is a very good solution, as it has a number of advantages.
First of all, it should be noted that plywood is the most practical subfloor for a living space. When such a floor is in use, it cannot be deformed, since there is no doubt about the strength and reliability of such a coating. This material can be used not only as a rough coating, but also as a base one.
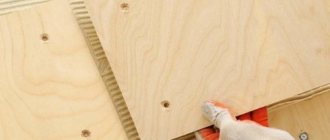
But you should know that before laying plywood on a wooden floor, there must be a certain gap between its sheets, which does not have the best effect on the appearance of the floor. To avoid this, the plywood laid on the floor must be sanded (for this it is recommended to use fine-grained sandpaper), then everything is varnished and the result is a very attractive and prestigious appearance. For all this you need to use the following tools:
- Hammer. Nails. Self-tapping screws. Screwdriver. Building level. Hacksaw.
Plywood comes in 1-4 grades.
Using moisture-resistant plywood will allow you not to fear the consequences of a flood, which can always be caused by neighbors above. If we talk about the advantages of such a material, we should note its excellent thermal insulation qualities, which allow it to retain heat 20% more than other materials.
Laying plywood on a wooden floor is especially recommended in cases where it has completely become unusable (either dried out or loosened).
Using this material, you can put everything in order very quickly and inexpensively, and it will be very reliable. But if there are significant temperature changes in the room, then it is best to avoid using plywood; the same applies to apartments where there is high humidity. That is, there is no need to lay plywood in the bathroom or in a room where there is no heating.
Preparing Worn Wood Floors
Laying plywood on a wooden floor is carried out after inspecting and repairing the old covering:
- Remove the baseboards.
- Rotten floor fragments are replaced with new ones.
- Creaking and sagging floorboards are strengthened by screwing them to the beams with self-tapping screws.
- Areas with damaged paintwork are treated with an antifungal compound (primer).
- Check the plane with a level to identify differences and irregularities.
If the differences are significant, then leveling is indispensable. Most often, plywood is used for this purpose on a wooden floor - this material is the most popular due to its availability, cost and ease of working with it.
Minor irregularities and protrusions (2 - 4 mm) can be eliminated with a plane and/or a sander - in this case, the decorative coating can be laid directly on the wooden floor.
Recommendations
The main problem with laying plywood sheets is the difficulty of leveling the surface. It is rare that it is possible to lay sections so that a perfectly smooth and flat surface is obtained. Therefore, after laying plywood on a concrete floor is completed, its surface must be sanded with a machine.
A less dusty and labor-intensive method of adjusting the surface involves using large-sized window glass. After laying the plywood sections, a sheet is laid out on the floor, and the locations of protruding edges, “bumps” or corners are marked with a marker. Using a picture on the glass, a manual grinder can be used to adjust the surface no worse than with an industrial machine.
What kind of plywood is used for the floor
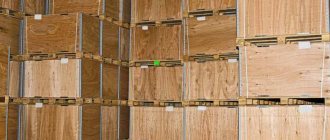
Plywood is available in various thicknesses, sanding and finishing qualities. Therefore, an inexperienced builder is always faced with the question: what kind of plywood to lay on a wooden floor so that it will be a reliable basis for a decorative coating.
- The brand of plywood is a difficult choice for the home craftsman. Usually the choice is made between the FS and FSF brands. FC is plywood in which the veneer sheets are glued with a less toxic glue than the FSF brand (read: “Which plywood is better for the floor - choose the brand and type of material”). However, the quality characteristics of FC are weaker: it is not very moisture resistant. Therefore, if environmental friendliness and safety are a priority (floors in a children's room, bedroom), then it is better to buy FC. For rooms with high humidity and traffic (the hallway of an apartment, a country house), FSF is chosen.
Note: there are brands of plywood that combine strength, moisture resistance and safety (for example, FB), but due to the high cost (2 - 3 times compared to FC), the average user rarely considers this option.
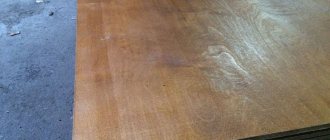
- The quality of the material also matters: the higher the grade of plywood, the better, smoother the surface, which means the decorative coating will fit better and last longer. To level the floors, grade 1 and 2 plywood is used.
- Plywood can be sanded on both sides (Sh2), on one side (Sh1), and not sanded (NS). For leveling take Ш1.
- Material thickness. Experts believe that for floor work this material should be at least 8 mm thick, and preferably more (for more details: “What thickness of plywood is suitable for a floor”). What thickness of plywood to lay on a wooden floor is regulated by a simple rule: the thicker, the better. At a minimum, the plywood should not be thinner than the final floor covering.
Sometimes plywood is used as a subfloor, laying sheets directly on the joists. In this case, the thickness is needed from 2 cm.
Do you need any preparation for plywood?
Covering the floor with plywood on a wooden floor begins after preparing the plywood sheets. They need to be brought into the room where installation is planned and left for 2 - 3 days. Wood tends to change dimensions depending on humidity and temperature, so it is necessary that these parameters of the material and the environment coincide.
Experts advise moistening the edges of plywood sheets with water at room temperature if the room in which work is being done is not heated regularly.
It is also advisable to treat the sheets with an antifungal and fire-retardant primer.
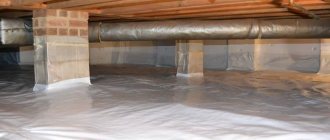
Attention: you should not work with plywood in a room with high humidity: if condensation accumulates on a piece of film left in the room during the day, it is recommended to dry the room using available means (heating devices, turning on the heating).
Features of choosing glue
Depending on the finishing floor covering
When choosing an adhesive for gluing plywood to the base of the floor, you need to start from the material of the latter and the conditions for further use of the room:
- When deciding how to glue ceramic tiles to a wooden floor, you will need tile adhesive for plywood that does not include water and is not aggressive towards wood.
- If you need parquet adhesive for plywood on a wooden floor, you should choose between epoxy-polyurethane or pure polyurethane systems containing artificial resins and solvents.
- To glue linoleum onto plywood, you need an appropriate adhesive that can provide a long-lasting, strong seam. It is affordable, safe and approved for use in residential areas.
Laminated plywood (with a film coating) cannot be glued. Therefore, before applying the epoxy compound to it, the film must be removed from the surface with sandpaper.
For unveneered plywood
After gluing to the screed, plywood can be either an independent coating or simply serve as an intermediate layer for the finishing coating.
For unveneered plywood, you can use any glue. The only important thing here is that its surface is clean and dry. The adhesive can be applied evenly with a roller or brush to both surfaces to be bonded. Long-curing adhesives require preliminary fixation of plywood sheets to the screed using dowels, nails or clamps after approximately 30-40 cm. After work, excess mixture must be removed along with unnecessary nails.
Measure seven times: cutting and fitting sheets
Cut sheets of the same shape. Experts recommend 0.6 by 0.6 m, but you can do 1 by 1 m or 1 by 0.5 m - it all depends on the thickness of the plywood and ease of use. After cutting, the sheets are tried on: laid on the floor, following the “staggered” method - the transverse joints should not match, the appearance of the laid sheets resembles brickwork (read: “How to lay plywood on the floor - laying rules”). You should ensure that the damping distance is maintained during installation: a gap of 2 - 3 cm from the wall, 0.5 - 1 cm between sheets. If the fitting was successful, the sheets are numbered so that the final attachment of the plywood to the wooden floor goes smoothly, without a frantic search for the right sheet. In addition, it is useful to draw a plan for laying sheets with the corresponding numbering. Finally, you should mark the floor with a pencil or chalk so that you know where to place the joists.
Note: cut plywood is inspected for defects formed during cutting; delaminated or deformed ends of the sheets will affect the quality of the coating; it is better to replace them.
Tools for making a plywood base
Before starting work, you should check that you have the necessary set of tools:
- Electric jigsaw;
- Drill with a set of drills;
- Screwdriver;
- Level;
- Roulette;
- Self-tapping screws;
- Dowels.
After installing the plywood base, you will need to prepare it for decorative flooring: thin coverings (linoleum, carpet) will require careful sanding of the surface. To do this, it is better to purchase a grinder or use a special attachment for a drill. You can use fine-grit sandpaper if the floor area is small.
Plywood leveling technology
Before laying plywood on a wooden floor, a technology of execution is chosen; the choice depends on the magnitude of the differences and unevenness of the wooden floor. Three alignment methods are used:
- Leveling by laying sheets directly on a wooden floor. It is used if the unevenness is no more than 1 cm and is formed by the ribs of the floorboards. The flatness of the sheet, based on the protruding edges, evens out the difference. This installation method often uses a plywood underlay on the wood floor to act as a shock absorber and improve thermal insulation.
- Leveling using point supports (bosses). Used as a budget option for floors with small differences. For the bosses, squares cut from plywood, laminate, or boards are used.
- The sheathing device for leveling floors is used when horizontal differences are 1–8 cm. The strip support is made from beams or cut strips of plywood; this method is the most expensive, but also the most reliable.
For any type of base, the rule is: the thinner the plywood, the closer the support points should be.
The procedure for leveling using joists
Before starting leveling, determine the highest point of the floor by level. From this point they begin laying lags - beams located in parallel. Lay the logs, adhering to the marks made during the initial layout of the plywood fragments. They need to be located at the junction of the sheets.
- The logs are laid one by one and secured to the wooden floor using special glue and self-tapping screws. Each beam is checked with a level in all directions, if necessary, placing bosses under it and filling irregularities with plywood trim. Pieces of trim should be additionally lubricated with glue to increase the reliability of the base. There is a special glue for plywood on wooden floors that does not require additional fastening. But more often, craftsmen use proven methods: they lubricate the required places with available glue (“Bustilat”, “Liquid Nails”, “Moment”), and then secure them with self-tapping screws.
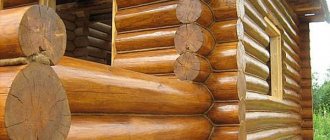
- Then the sheathing is installed - transverse bars located at a distance equal to the width of the prepared sheets, and in accordance with the original marks. Installing a plywood sheathing on the floor will make the coating more stable and durable. It is necessary to carefully observe the markings so that the sheets, during the subsequent installation of plywood, do not, as they say, “hang in the air,” but are attached to the sheathing and form a reliable plywood floor in a wooden house or apartment.
- To improve heat and sound insulation, the sheathing space can be filled with appropriate material, after first getting rid of construction waste.
- Plywood sheets are fastened according to the diagram, checking the number marks. To ensure that the heads of the screws do not protrude above the plane, they are recessed. To do this, drill a recess at the attachment point equal to the diameter of the screw head.
After installation is completed, all that remains is to prepare the plywood floor in accordance with the type of finishing coating. For thin coatings, all irregularities, cracks at joints, and recesses from recessed screws are puttied. For more rigid coatings, a special noise-absorbing underlay may be needed. In any case, it is advisable to varnish the plywood several times to extend its service life.
Famous manufacturers
When gluing small-sized elements, you can use both regular “Moment” and PVA. For large volumes of work, adhesives of various purposes and compositions are produced.
The most common and well-known manufacturers:
- Artelit (Poland) - the company produces professional adhesives for plywood and parquet. The range includes synthetic, polyurethane mixtures, two- and one-component. Among them are waterproof and quick-hardening.
- Bostik (France) is a world-famous company that produces a wide variety of construction products. For gluing plywood, glues based on PVA (polyvinyl acetate), two-component polyurethane and others are used.
- “Rogneda” (Russia) is a domestic manufacturer; the mixtures produced have an affordable price and, in many ways, are not inferior to foreign analogues. The company produces both universal adhesives and special parquet adhesives for floor coverings.
- Titebond (USA) - produces a line of products for gluing wood, parquet and floor coverings in general.
Plywood is an unpretentious material for construction work. High-quality glue for plywood will undoubtedly increase its service life and reduce the likelihood of deformation. If the rules are followed, the connection will be reliable. However, if you use cheap, low-quality compounds, there is a high probability of sheets peeling off on the sides and unevenness appearing. Gluing plywood together is not that difficult, and in most cases there are no operational problems.
When buying glue, it is important to pay attention to the labels on the packaging - special glue for plywood is better than universal glue. It is also important to make sure that the mixture is environmentally friendly - if the work is carried out in a residential area, it is desirable that the glue contains a minimum content of toxic substances.
Rules you need to know
Before laying plywood on a wooden floor, it is worth checking and repairing all communications running under the floor, so that later you do not have to open up a new finished floor. It's worth knowing that:
- The length of the screws used in the work should be three times the thickness of the plywood.
- The distance between the screws is no more than 20 cm.
- The sheets are screwed, retreating 2 cm from the edge.
- If there is thin plywood, it is used in 2 layers, placing the sheets so that the seams of the top and bottom layers do not coincide.
- When installing a plywood base using the point method, the bosses are placed at a distance of 20–25 cm.
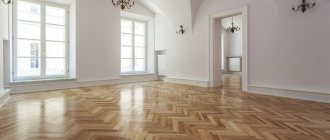
Photos of beautiful modern coatings will not leave anyone indifferent, and an insufficiently level floor will no longer be an obstacle. Using these recommendations, any man who knows how to hold a tool will know how to lay plywood on a wooden floor and will be able to do it with his own hands.
Laying on the frame
Plywood floors on joists are formed using the following technology:
- Supporting parts are set with a fixation step of 40–60 cm. It is taken into account that all products must be placed in the same plane.
- The treated slabs must be laid in a checkerboard pattern so that the joints fall on the timber. To fasten the products, wood screws are used. A distance of 15–20 cm is formed between the screws.
- Before fixing the flooring, the logs must be treated with antiseptics and fire retardants.
For flooring in domestic premises, logs can be laid in increments of about half a meter, and for highly loaded rooms, logs are installed at a distance of 150 - 200 mm
Attention! With a distance between the support beams of up to 40 cm, the optimal sheet thickness is 12 mm, 60 cm - from 15 mm.