SHARE ON SOCIAL NETWORKS
FacebookTwitterOkGoogle+PinterestVk
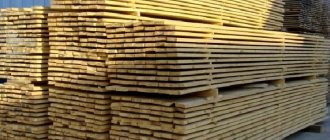
Beitz is not just one type of coloring composition. This is a product that breathes life into old furniture, stairs, floors, doors and window sills that have long lost their presentable appearance. From this article you can find out what tinting abilities wood stain has: colors used to create an exotic interior, shades that imitate expensive species, as well as interesting combinations that allow you to achieve beautiful effects.
Stain is a tinting mixture that can be used to give any wood product the desired shade.
What it is?
Stain is a liquid product that is applied to a previously prepared wood surface, penetrates into the upper layers and, after drying, changes its color and properties.
The stain consists of a coloring pigment and base, optionally equipped with protective components: against fungi, insects, ultraviolet radiation, humidity, fire. The product was invented in the city of Cologne and throughout the world, including our country, and was originally called “beitz” from the German word for “dye.”
Current beyts can be purchased in the form of a ready-made solution, powder or concentrate for dilution. The higher the concentration, the richer the shade. Application in several layers allows you to enhance the effect, and finishing varnish, oil and wax coatings help to consolidate the result.
Preparatory stage: making a color sample
After purchasing the stain, but before starting the actual painting, it is advisable to make a color sample (test paint). It is necessary to understand whether a given stain is suitable for a particular surface, to identify the final color and determine the number of layers of paint required.
To make a color test, use a board that has been treated (sanded, sanded) in the same way as the wooden surface to be painted. Naturally, the type of wood of the sample board should also coincide with the main surface.
The board is covered with stain in one layer. After drying, the second layer is applied to 2/3 of the sample. The third layer paints another 1/3. The dried stain is covered with two layers of varnish. By comparing the color intensity of each part of the sample, choose the number of layers that is most suitable for a particular surface.
To choose the most optimal option, several test colors are often done. To do this, several boards are coated with different stains. Then they make a choice.
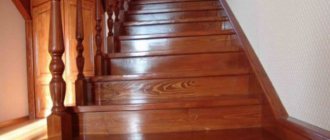
What is stain used for?
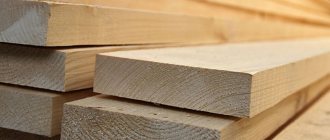
Wooden external and internal walls, outdoor and indoor flooring, furniture, doors, windows, decorative items, kitchen utensils and dishes are subjected to artificial staining. First of all, this technique is intended to change the shade of wood.
There are also additional functions:
- protection against wear and damage under the influence of unfavorable external factors (precipitation, sunlight, fires, insect pests, putrefactive microorganisms, mechanical damage, such as abrasion by feet in the case of parquet);
- restoration of products, leveling of color, returning the original gloss and depth of color;
- giving inexpensive wood a resemblance to noble varieties, and sometimes complete imitation (there was alder, but the result was beech or hornbeam);
- emphasizing the beautiful natural structure and unique pattern of wood.
Wood staining compositions made from coffee, tea and vinegar
Natural stains are good precisely because they are absolutely safe for human health - what bad things can happen from ordinary food products?
So, to give the wood a brown tint, you can do this:
- Brew the tea, let it brew, then strain out the tea leaves. The resulting composition can be impregnated with wood, saturating it with tannins (contained in tea). Depending on the amount of impregnation and the concentration of the brew, you can get many shades of brown.
- Ground coffee beans need to be brewed, infused and strained. Treat the wood with the resulting infusion. The color will be darker than in the previous case, and it depends on the strength of the resulting drink.
- You can add a little soda to the ground coffee - in a ratio of 1:4 (1 part soda to 4 parts ground coffee) and brew it the same way.
Vinegar is useful for giving wood a dark tint. True, you will need not only vinegar, but also small nails or iron filings (stock up if you know a metal turner).
The stain is done like this:
- Nails or shavings must be degreased and filled with vinegar.
- The container should be placed in a dark place and left for up to 7 days - depending on the desired color and concentration of stain.
- Then the wood is impregnated with stain. This process is called “ebonyization” - that is, giving the material a black tint. The method allows you to obtain various shades of black, but it is especially effective when used for staining species like walnut (with a high content of a substance such as tannin).
Using vinegar stain requires caution
What types are there?
The typology of stains is based on the main substance, of which there are quite a few:
- Water.
- Oil.
- Drying oil.
- Wax.
- Acrylic.
- Alcohol.
- Solvent.
To make selection easier, we will divide the paints into 4 main groups, according to the purpose and features of their use.
Water
These are the most commonly used and affordable stains. They are sold in the form of powders and concentrates for dilution with water. This is convenient because you can fine-tune the color. After dissolving the powder, it is recommended to strain the composition; also, during operation, the container should be shaken regularly to get rid of sediment.
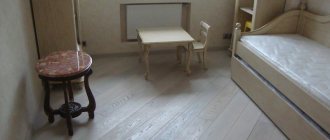
Water stain is applied in several layers with a brush or roller. The more layers, the more uniform the coloring. The consumption is economical, there is no sharp chemical smell. This type of paint is used mainly for interior work. Upon completion, apply a finishing layer of varnish, oil or wax.
The disadvantages of water-based stain are that it takes a long time to dry (up to a day) and leads to swelling of soft resinous wood, so it is not suitable for processing pine or spruce.
Oily
Such stains are made on the basis of drying oil, linseed or hemp oil. They apply evenly, penetrate deeply, and give the wood a rich, rich shade and beautiful gloss. Oil stains protect the product from fading in the sun, attacks by insects and fungi, and excess moisture.
The composition is applied with a brush or lint-free swabs. It takes a long time to dry - depending on the base, 6-12 hours. The main area of application is the restoration and improvement of furniture, doors, windows, parquet boards, but oil stain also performs well outdoors.
During long-term storage, the product thickens, but it can be easily returned to working condition using White Spirit solvent.
Alcohol
These stains come in a wide range of shades, penetrate deeply into the wood, protect it from rotting and insect attacks, but require certain experience and skills from the craftsman. The fact is that the alcohol stain dries at lightning speed, in less than half an hour, so all the mistakes made are clearly visible.
Compositions based on alcohol and solvent (nitromortar) have a pungent odor, work with them carefully, using personal chemical protective equipment, and upon completion thoroughly ventilate the room, although such stains are better suited for the street.
To avoid defects, alcohol stains are not applied with brushes, but sprayed with a spray gun, trying to cover the maximum area.
Wax
Acrylic and wax stains have similar properties, are sold ready-made, are expensive, do not penetrate into the wood, but only create a thin colored film on the surface that protects from moisture and solar radiation. Varnish is usually applied over this film.
Acrylic and wax based stains do not have any odor and are excellent for interior work, especially for the restoration of antique furniture. The composition is convenient to apply with a wide natural bristle brush, and it dries in 4-6 hours.
Wax stains perfectly mask minor imperfections, but when applied in several layers they can lie unevenly and form stains.
How to make stain with your own hands?
How to make stain with your own hands?
You can prepare something like a stain at home with your own hands. Several recipes:
- For a brown shade . Grind the walnut shell into powder, put it in water, boil the powder for 10-20 minutes, strain the resulting coloring solution through a sieve and cool.
- For a reddish-brown shade . Take 200-300 g of onion peel, boil it in 1 liter of water, strain the solution through a sieve and cool.
- To lighten wood . Mix a 40% hydrogen peroxide solution and a 30% ammonia solution in a ratio of 9 to 1, mix the resulting mixture thoroughly.
What to consider when choosing?
The following factors will help you decide:
- Purpose. There are products for external and internal work, with varying degrees of health safety, covering power and coloring results.
- Additional options. We are talking about protective properties and visual effects: mother of pearl, frost, patina.
- Type of wood. For soft conifers, wax, acrylic and oil stains are preferred, which apply evenly.
- Consumption. It is always indicated on the packaging. If there is a large area to be processed, the issue of economy comes to the fore.
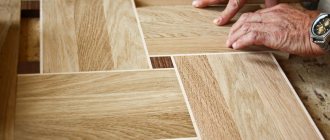
- Color code. It is standard, for example: “walnut”, “cherry”, “mahogany”, but the shades from different manufacturers differ, so it is better to purchase the stain you like with a reserve.
Useful tips
Let's look at some important tips:
- Do not apply the composition in the cold. Stain adheres very poorly to a wooden surface at low temperatures, so you will get uneven toning.
- If you are working with coniferous wood , then after removing the old paint/varnish you need to deresin the wood. Mix 100 g of acetone and 400 g of water, cover the surface of the wood with the mixture, rinse it off after 30 minutes and dry the wood.
- If you want to get a light cherry color of wood , then instead of stain you can use potassium permanganate for impregnation. Dissolve 50 g of potassium permanganate in 1 liter of water, saturate the wood with the mixture in 2 approaches.
In conclusion, I would like to note that when choosing a stain, you should not skimp. People usually buy cheap water-based compounds, but they need to remember that they are only suitable for finishing wood inside the house. If you want to tint outdoor wood structures or expensive items, be sure to buy acrylic, oil or wax stain. Let you pay an additional 600-700 rubles, but the effect of tinting will last for many years.
Wood stain video
Practitioners' opinion
Ease of application and quality of the final result are the main reasons why oil stain for wood is one of the most used in the processing of such materials.
Based on reviews from people involved in woodworking, the quality of most oil stains is very good. But there is one drawback - you should carefully select the desired shade when staining the product, since if you lack experience, repeated application of the composition can ruin the work. The main condition is that the stain must be applied “boldly” enough and carefully distributed over the surface with a brush. This process takes time, but the results are excellent. Oil compositions very beautifully emphasize the structure of wood.
However, you should take into account the type of wood before starting processing, otherwise you can not only get the wrong result, but also completely ruin the appearance of the product. For example, when processing beech, oak and other hardwoods, oil stains are applied immediately, and after processing, the excess is removed with a soft cloth. Before applying the product to soft wood (pine, spruce, linden, etc.), the surface should be coated with a transparent primer, and only then covered with stain. Excess should also be removed with a cloth. Then the surface shade turns out to be very uniform and in no way inferior to products from stores.
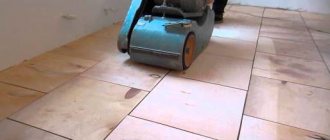
Preparation
In cases where the wood being prepared for staining is from coniferous trees, then before painting it should be deresined, that is, the surface should be freed of resin. Also, the preparation process necessarily includes thorough sanding. Even a surface that is smooth at first glance must be sanded, since after staining all the slightest irregularities and defects will appear on the wood, which will significantly spoil the aesthetic appearance of the product. The cleaned wood should be degreased - treated with a sponge previously soaked in solvent.