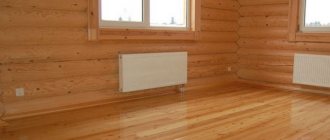
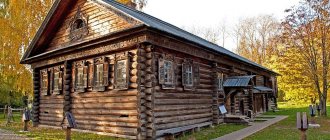
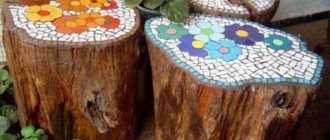
Do you remember, as a child, barefoot on the warm plank floor in your grandmother’s house? A feeling of comfort and security. And also, the nice touch of smooth boards.
The advantage of a wooden covering over others is the ability to give it smoothness and newness by scraping off the top aged layer, which cannot be done with either a modern parquet board or a laminate.
What is floor scraping
Renewal work is carried out using special equipment or tools using abrasive materials. This cleaning, carried out for plank flooring (solid wood), parquet, is called scraping.
During the process, a thin layer of top wood, remnants of old paint, and unevenness are removed, and the material takes on a new look.
Wooden floors need to be sanded once every 6-7 years.
In the past, scraping of a wooden floor was done manually using a metal or glass plate (scrapers) sharpened to 90 degrees.
It’s hard to imagine such work now, especially in large rooms. But this method is sometimes used in small, hard-to-reach areas.
Types of scraping machines
The name of the process - scraping - comes from a special tool called scraping, which was used for a long time to remove the top layer of the wooden covering. A scraper is a small handle with metal plates attached to it.
There are different types of scraping machines
Cycling was carried out until the first grinding machine was invented, which has now completely replaced the cycle.
Cycle – a tool for manual processing of parquet
Manual scraper
Such a machine can be of two types:
- drum;
- disk
The use of drum machines is advisable only in cases where a large area of wooden flooring is to be processed. The disadvantages of the machine include the unevenness of scraping, which is why even the most experienced builder will not be able to maintain the entire floor surface at the same level. For this reason, today only the old paint is removed with such a device and rough sanding of the wood is carried out.
Prices for belt sanders
belt sander
Disc grinder
Disc machines, unlike drum machines, do not have such disadvantages. Having appeared relatively recently, this equipment has already gained popularity thanks to the absolutely flat surface that remains after processing, without any stripes or differences. The cost of drum machines is quite high, so they are used mainly by professional repair teams.
Note! According to the manufacturers, scraping machines are capable of restoring a wooden floor by 90%.
Belt type sanders
Photo of a belt parquet sanding machine
Prices for manual cycles
manual scraping
Tools and materials
The second scraping method is mechanical. The following equipment is used:
- drum sander for smooth surfaces;
- for hard-to-reach areas - a scraper for curbs (you can use an angle grinder);
- surface grinder for fine sanding;
- construction vacuum cleaner;
- screwdriver;
- drill at low speed and a wire attachment to remove paint residue.
The materials are of a basic and auxiliary nature: a set of different caliber sandpaper (sizes P40, P60, P80), PVC film for insulating the room being treated, tape, and for finishing - varnish or paint.
Video - scraping a pine wooden floor:
How long will it last?
Processing frequency may vary significantly. It is advisable not to wait for the transition to radical measures. If scratches, chips, numerous stains and abrasions appeared long ago, it is not always possible to eliminate the problem with local repairs.
Cycling the surface layer will allow you to get rid of the problems that have arisen. However, the frequency of such processing may vary. The number of works performed may vary. it all depends on:
- quality of the material used;
- type of wood;
- thickness of the front layer.
The number of treatments can reach 7 times. However, in some cases only a single surface treatment is possible.
Surface scraping is a costly and time-consuming procedure. To refuse such treatment, you should take care of it in a timely manner.
Preparatory work
To carry out the work, prepare the room: completely remove the furniture, carefully dismantle the baseboards and lamps to avoid clogging with fine dust. The front door is dismantled, and the opening is covered with PVC film, securing it with tape. Opening the windows allows for ventilation.
Next, the condition of the coating is determined. For a plank floor, you need to walk in a transverse direction. If there is looseness, it must be eliminated. If there are significant gaps, planks of a suitable size are inserted between the boards using glue - they will then be leveled.
Chips and cracks are repaired with putty. For parquet floors, the presence of slack in the blocks can be determined by lightly tapping with a rubber hammer; this must also be eliminated.
The decking fasteners are inspected: nails and self-tapping screws must sit deep to avoid getting under the equipment. Old staining is removed. If it was oil paint/enamel, you can get rid of it in two ways:
- chemical - using suitable removers (solvents), they are presented in a wide range;
- mechanical - using a nozzle with wire bristles and a drill with a small number of revolutions or a grinding and grinding machine.
Mineral alcohol and a gentle mechanical cleaning method are used for parquet. After the preparatory work, the room is ventilated, and dry debris is removed with a construction vacuum cleaner. When using wet methods to remove staining, the wood should dry out within 1-2 days.
The main work on sanding a wooden floor with your own hands is done with a drum sander and coarse-grained abrasive sandpaper (P40). The process starts from the corner of the room and is carried out diagonally across the room, moving back and forth in paths. You need to make sure that each subsequent “track” overlaps with the previous one.
After going through several strips, check the condition of the sandpaper and change it. Having carried out the scraping of the room in one diagonal direction, it is repeated, but in the transverse direction.
Next, sanding is carried out with a medium-grained abrasive, moving along the room. The final stage is scraping with fine-grained sandpaper, also moving in parallel. You can use a surface grinder.
The scope of work is determined by the condition of the wooden covering. If it is relatively new, you can get by with sanding only medium- and fine-grained abrasives.
How to seal cracks in the floor and get rid of squeaks
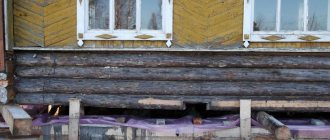
Wooden boards can dry out over time, causing cracks to form.
Over time, they begin to make an unpleasant squeak. There are ways to eliminate gaps between floorboards and eliminate squeaks from your floor. An excellent way to remove cracks and squeaky floors is to use foam and putty. Let's consider this method in more detail in sealing the gaps between the wall and the floor.
It is customary to leave a gap between these parts of the structure. It allows you to additionally ventilate the room and in case of expansion of the boards due to changes in temperature and humidity, it will get rid of unnecessary damage. But after some time, the gaps between the wall and the floor increase, which creates discomfort for the residents of the house. You can get rid of cracks as follows:
- Remove the baseboards around the perimeter of the room.
- Clean the cracks from dirt lumps and dust.
- Fill the cracks with foam. If necessary, place foam in front of the foam.
- Wait for the foam to dry completely, and then carefully cut off the excess pieces.
- The foam needs to be puttied on the outside.
- Wait for the putty to dry completely.
- Install new baseboards.
You can also get rid of cracks and squeaks in several other ways:
- using wood chips, water and wood glue;
- use of paper and starch paste;
- sealing cracks using a cord;
- use of wooden slats and wedges.
Important!
Sealants with an acrylic and silicone base have proven themselves only on the positive side in removing cracks between floorboards.
Curled boards - scraping features
If you have plank floors, they are probably pine. Pine and spruce are soft woods, and the boards made from them are called twisted.
An important rule is to never scrape across the pile. Such a defect is difficult to eliminate.
The scraping of twisted boards is carried out in a diagonal direction with a coarse-grained abrasive, and one path is passed 2-3 times. Having finished in one direction, it is repeated in the transverse direction, also moving diagonally.
After this, change the sandpaper to medium-grained and run parallel along each board. Finish the work with a fine-grained nozzle.
Putty for repairing parquet surfaces
Let's look at the types of putties that are ready for use.
Brands of such putty compositions:
- oil-adhesive - long drying time, but powerful resistance to factors that cause wear of the coating (loads).
- acrylic - seals defects efficiently, improving water resistance; large cracks are filled in several times.
- melting - for small defects (heating the mixture with a wax melter).
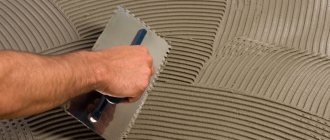
In the latter case, restoring the original condition of a large area of parquet with minor defects will take a long time. A thin layer of putty is applied to the surface using a circular motion of the spatula, filling the cracks and crevices between the parquet floors. Thus, defects are eliminated. The planks are connected with fake joints. But, do-it-yourself parquet restoration in damaged areas is indistinguishable from the rest of the flooring area.
Putty description table
| Type of putty | Product quality, composition | Type of work |
| Acrylic water universal | Positive – high strength and elasticity. Does not contain toxic substances. Wide color palette. | Easy to work with parquet. A good combination with any type of wood. |
| Restoration waxes (melt putty) | The product is based on a waxy solid mass. Plasticizers and pigments are added to it. | Repairing minor defects in the upper (outer) part of parquet tiles. Before use, the restoration wax is melted with a gas wax melter. |
| Oil-adhesive putties | The “classic” option for repairing parquet or boards. It has a maximum service life, while allowing the wood to “breathe”. | Service life is maximum. The wood under the composition has the ability to “breathe”. The disadvantage is that it takes a long time to dry. Work with the construction product strictly according to the instructions. |
For the real owner: Installation of wall panels on the sheathing
Final actions
Despite the fact that all modern grinders are equipped with reservoirs for collecting debris, after finishing work it is recommended to clean the floor with a construction vacuum cleaner. If necessary, the dust removal operation is repeated the next day.
If there are cracks, they are sealed with a putty solution, adding the remains of sawdust from sanding to it - this way you can maintain the uniform color of the wood. The surface is sanded with fine-grained sandpaper.
After this, the floors are varnished. The next layer is applied after the previous one has completely dried, in accordance with the manufacturer’s instructions. It is not recommended to apply more than three layers. The boardwalk can also be painted with oil paint (enamel), choosing a color in accordance with the interior.
How to restore parquet after flooding?
Everyone knows that wood absorbs water well and expands at the same time. And if the parquet floor is flooded with water, then before your eyes you can see two scenarios:
- a swollen parquet board torn from the base;
- deformed parquet elements that have not come off the base.
In the first case, you will have to replace damaged parquet elements - you can do this yourself, but only if small areas of the flooring are damaged. If the parquet boards are deformed, while maintaining the strength of the fastening on the base, restoration work can be carried out without replacement.
What can be done with swollen parquet:
- Thoroughly warm the area with a hair dryer - this is a long process, it will take at least an hour and a half. The smell of mastic that appears will indicate that the heating is complete.
- Now you need to quickly spread any textiles - burlap, knitwear, cotton - on the heated place.
- You need to place a weight on top of the heated section of the swollen parquet. It must be very heavy - at least 10 kg per square meter. m - these could be tube TVs (old granny’s apartments usually have such “goods”), stacks of thick books, weights, and so on.
- After a day, remove the load and see what happened to the damaged area. If the swelling has decreased, then the operation to restore the parquet must be repeated. Otherwise, the parquet is hopelessly damaged and you should prepare for a full replacement of the floor covering.
Please note: if the parquet was flooded with water not today/yesterday, but the swelling was a week ago, then it is not worth carrying out the described operation - fungal colonies have already awakened, multiplying and actively living in the thickness of the wood. Step-by-step video instructions for repairing parquet with your own hands are presented in the video review:. Step-by-step video instructions for repairing parquet with your own hands are presented in the video review:
Step-by-step video instructions for repairing parquet with your own hands are presented in the video review:
Restoring the appearance of parquet in a room with large furniture
Sanding parquet with furniture can be done in several basic ways:
large-sized products are shifted first to the center of the room, and then, when the free space is varnished, they return to their place, allowing the middle part of the room to be processed. The use of modern quick-drying paints and varnishes makes it possible not to delay the procedure for several days, but to complete it in just a day;
if it is impossible to move heavy furniture, it remains in its place. In this case, scraping is carried out in close proximity to it. The only drawback of this method is the need to restore individual areas of the coating after rearranging the house, and to select parquet according to the pattern, color and type of wood;
the use of special FLIP angle grinders, or similar machines that allow processing of coatings in hard-to-reach places.
Using any of these methods, restoration of the appearance of the coating in a large modern apartment is carried out in just a couple of days.