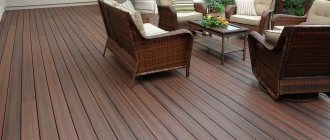
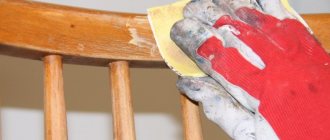
All wood stains are divided into types depending on the base on which they are made
- Water-based wood stains;
- Alcohol-based wood stains;
- Nitro stains for wood;
- Oil stains for wood;
- Wax stains for wood.
Water-based wood stains.
As the name suggests, the basis of this type of stain is water. Water-based stain can be sold either ready-made or in the form of a powder that is dissolved in water. This stain is easy to work with, it is very easy to apply and dries quickly. The only, but significant, disadvantage of water-based wood stain is its ability to lift wood fibers. This is due to the fact that wood, when saturated with water, swells and its fibers rise. This feature disrupts the appearance of the material. To avoid this phenomenon, before starting to treat the wood with stain, you should moisten it with water and leave it for a while, after which, when the fibers rise, sand the surface, and only after that start processing with stain. The color range of such stains consists of colors close to natural wood, from light tones to the color of mahogany and wenge.
Alcohol-based wood stains.
Alcohol-based wood stains consist of a dye or tinting component dissolved in alcohol. Such stains are sold, just like water-based stains, in the form of a ready-made solution or powder. If you choose powder, be careful, alcohol-based stain is only diluted with 96% alcohol. If you are not sure that the alcohol you purchased is exactly 96%, it is better to choose a stain in a ready-made solution. A feature of this type of stain is its short drying time. Alcohol stains dry out very quickly, so you need to be very careful when using them. If, while staining the surface using alcohol stain, you are distracted or make incorrect strokes, stains may remain on the surface that are quite difficult to remove or tint.
Nitro stains for wood.
This type of wood stain is made on a solvent basis. Nitro stains, like alcohol stains, dry very quickly, which makes treating large surfaces very problematic, and they also have a strong and unpleasant odor, which limits the possibility of using them indoors. Nitro stains are best used for staining small surfaces, such as doors, windows, and small decorative elements.
Oil stains for wood.
Oil stains for wood are the most versatile and frequently used type of wood stain. The composition includes oils and oil-soluble coloring components. Oil-based wood stain is easy to apply, goes on smoothly, dries quickly enough, but at the same time makes it possible to cover the surface evenly and without streaks. Oil stains for wood are environmentally friendly, odorless, and can be used both outdoors and indoors. Oil stains, unlike others, have not only a decorative, but also a protective function for wood. Oil, penetrating into the upper layers of wood, protects it from dampness, moisture and other atmospheric phenomena. The color range of oil stains is very wide, here you can choose a color and shade to suit every taste and for any interior.
Wax stains for wood.
Wax stains are one of the modern construction developments. When applying this type of stain, a protective film of wax is created on the surface, which creates effective and thorough protection from moisture.
When choosing wood stains, it is important to consider the following factors:
- Tree species. Different types of wood respond differently to staining. For example, wood species that contain resins (pine, etc.) become stained when treated with stains, since the stain does not penetrate well into the areas where the resin is concentrated.
- Specifics of wood use. If you are going to stain wooden dishes or, for example, children's toys, it is better to use oil or wax stains; they are safe for health and do not have an unpleasant odor.
What composition should I use?
The choice of varnishes is huge. The compositions are classified into several groups according to the type of base. To choose a paint coating, use the following tips:
A good option is varnish for interior work.
If there is high humidity in the room, then it is better to choose paints and varnishes for outdoor use. Pay attention to resistance to sudden temperature fluctuations. Consider the interior style. For example, matte varnish is suitable for Provence style rooms. Surface quality
When varnishing interior doors, gloss will make defects and unevenness more visible, while matte will disguise it.
Attention It is necessary to check the selected composition for compatibility with the primer. Otherwise, a combination of inharmonious materials will lead to cracking or final damage to the canvas. Next, popular paints and varnishes, their advantages, features and disadvantages will be considered
Which varnish to choose is up to the individual to decide, based on personal wishes and financial capabilities.
Next, popular paints and varnishes, their advantages, features and disadvantages will be considered. Which varnish to choose is decided by the person himself, based on personal wishes and financial capabilities.
Alkyd
The varnishes are made with solvents; interior doors will have an off-white, rather yellowish tint.
Advantages:
- strength;
- moisture resistance;
- quick drying;
- acceptable price.
Minuses:
- unpleasant pungent odor;
- rapid fading in the sun;
- contains harmful substances.
Nitrovarnishes
Acetone and nitrogen compounds act as a base. The substance is transparent and can preserve the natural shade of wood. However, nitro varnish cannot be used in living rooms.
Pros:
- low price;
- strength;
- durability;
- short drying time - up to 1 hour.
Flaws:
- toxicity;
- flammability.
Important: It is prohibited to use this composition in homes where children and pets live.
Polyurethane
The basis is polymers with long molecules. When coated, this varnish changes the shade of interior doors to a darker one.
Advantages:
- nice smell;
- no toxicity.
But polyurethane varnish is applied only to a previously prepared primer layer.
Acrylic
Manufactured on a water basis. Eco-friendly, suitable for use in living rooms.
Pros:
- quick drying due to water evaporation;
- resistance to sunlight;
- mechanical damage.
Disadvantages - fragility.
Color spectrum
Do-it-yourself - How to do it yourself How to treat a bathhouse
Today, a range of similar products for coating and painting wooden surfaces can satisfy the needs of every customer. Such products allow the craftsman to give the wood almost any color. Recently, black stain has been in demand among specialists, which gives the treated surface the appearance of a black mirror. The technology for applying the black composition requires preliminary polishing of the base.
Shades of gray will help the surface blend harmoniously into the interior of any room. However, the use of this color will be successful only if the walls and interior items in the room are bright. Gray color can cause apathy, and products painted in this color will be lost against the background of the rest of the decoration.
According to psychologists, the most optimal color for a person is green. It evokes positive emotions and is suitable for painting walls and ceilings, as well as furniture and other things.
The blue color gives expressiveness and depth to the processed product. A stain of this color will go well with white and yellow tones.
In addition to multi-colored compounds, there is a colorless impregnation on store shelves, which makes it possible to preserve the natural color of the material.
The final color of the wood depends on the number of layers applied, so experts advise making a final decision only after a test painting. The material for test painting is sanded and cleaned. Next, proceed to applying the first layer of the composition. After it has completely dried, a second layer is applied, but to a smaller area. The third layer is used to process the material on a section of wood that will be even smaller than the space allocated for the two previous layers of stain.
When all areas are completely dry, comparing the results obtained, you can choose the color you like.
Varnish for coating wooden surfaces
What varnish to cover pine floors with?
Varnishes that are used to coat wood come in several types:
Alkyd varnishes must be diluted with a solvent
. The surface treated with this product is protected from fire and water and does not fade in the sun. Thanks to acrylic varnish, a film is formed that does not allow the wood to wear off and slows down the aging of wood.
Nitrovarnishes, although they dry much faster, however, are not able to withstand the negative effects of ultraviolet radiation and moisture for too long. Polyurethane varnishes are characterized by increased wear resistance
and form a durable film on the wooden surface that dries very quickly.
Relatively recently, oil-based varnishes were very popular, but nowadays they are used most often for treating floors. Their main advantage is their low price. Such varnishes must be diluted with drying oil, and they take a very long time to dry. Such a new product as acrylic varnish, which is universal and easy to use, has proven itself well on the Russian market.
It is used for both external and internal work. This varnish should be diluted with water, and it does not have a strong odor. In its protective qualities it resembles alkyd varnishes, but is much more economical to use
. But alcohol varnishes are used only for the restoration of antique furniture.
Preparing the wooden surface
It is recommended to apply stain and varnish only to smooth and sanded surfaces. Regardless of whether the coating should be painted - new or old, it must be carefully inspected. All detected cracks, seams and knots should be processed and eliminated
If gaps are also found between the joints and seams, they are sealed with a special putty
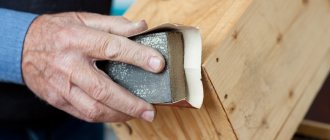
. As soon as it dries, to remove possible unevenness, the putty areas are sanded again using fine sandpaper.
One should take into account the fact that it makes no sense to putty on raw or under-dried wood, much less treat it with stain or varnish it. This tree begins to deform
and the applied layer always becomes unusable.
Selection of materials
Varnishing wood requires the use of high-quality materials and tools. Depending on the purpose of the wooden product and the conditions of its operation, it is necessary to use varnishes that have suitable characteristics.
There are several types of varnishing material:
- Oil varnishes are made on the basis of synthetic or natural oils, to which special components are added that increase the strength of the coating. Most often, oil varnishes are used indoors to treat walls and floors. The finished coating is transparent, but has a yellowish tint;
- alcohol formulations are made by dissolving natural or synthetic resins in alcohol. Alcohol varnishes create a thin coating that is unable to provide high-quality mechanical protection for wood, but at the same time they make its top layer more moisture resistant. Very often such products are used for priming wooden surfaces;
- Nitrocellulose products are prepared by dissolving nitrocellulose in organic solvents. Special additives are added to the composition to increase the strength of the varnish coating. Nitrocellulose varnishes are applied, usually in several layers;
- acrylic varnishes are made on the basis of polymer acrylic resins. They can be used to create not only transparent, but also painted surfaces. These materials are very durable and environmentally friendly, but they can only be used indoors;
- alkyd varnish materials are made from synthetic resins based on inorganic solvents. The surfaces obtained using these varnishes are highly durable and resistant to moisture. All this makes it possible to use such varnishes to cover the facades of buildings and wooden elements located on the street;
- polyurethane compositions based on polymers make it possible to obtain a thin coating that is resistant to mechanical stress. Very often, such varnishes are used for processing musical instruments.
Surfaces located outdoors or indoors can be varnished. Modern means make it possible to protect even wood submerged in water. If there is no varnish, then it is replaced with drying oil or wax mastic, after which the wooden surface becomes slightly velvety to the touch.
Defects and their elimination
Staining wooden furniture must be done extremely carefully, otherwise there is a high risk of defects forming that are quite difficult to eliminate. But if you know how to get rid of them correctly, then there shouldn’t be any problems.
The main defect is the formation of streaks. They arise as a result of applying a large amount of the mixture and its subsequent rapid drying. In this case, it is necessary to remove the layer of impregnation applied to the wood, then apply a new layer on it, which will soften it, and then remove excess impregnation with a rag.
After the wood stain has completely dried, it can be removed using paint solvents. Before this, the top layer is removed with sandpaper or a plane, since the solvent is not able to remove all the pigment.
The most difficult defect is spotting of the product. To remove it, the painted area is treated with a plane (this defect is not washed off with a solvent). In plywood, all face veneer must be removed. To avoid staining, it is better to use a gel stain or first apply a test layer on an unwanted piece of wood to see how the coating behaves on the desired surface. It is worth remembering that the impregnation must be stored in a place away from children.
Today there is such a variety of wood impregnating agents on sale that even a specialized specialist cannot clearly answer the question of what their fundamental difference is. If you read the instructions for the preparations, the conclusion suggests itself that most of them protect wood literally “from everything.” So why do you need wood stain? Is it only for toning it, as is commonly believed?
An analysis of all the properties of the preparations available on the market in this category for wood processing, and reviews on thematic sites allows us to determine exactly what can be achieved with their help. Depending on the composition and specific application, wood stains can solve the following problems:
- Wood tinting while maintaining its texture.
- Reliable protection of the material when other means are ineffective or their use is not economically feasible. Reasoning - stains are characterized by a greater depth of penetration, while being cheaper than paints, varnishes and a number of other preparations used for wood processing (at least 2.5 times).
- Imitation of another, more expensive breed.
- Wood bleaching. This is often done either during its restoration, or in preparation for painting (applying colored varnish).
- Protecting the material from rotting (antiseptic function) and destruction by wood-boring insects.
- Combining shades, creating the effect of surface finishing with different woods.
- Some stains strengthen its structure.
- Giving (partial) moisture-repellent properties to lumber.
- Any stain, regardless of composition, definitely increases the shelf life of wood.
But is it really that simple? Is it enough to buy any of the commercially available stains, and all problems with reliable wood processing are solved? A comprehensive answer can be obtained by familiarizing yourself with all the types of liquids in this group. By the way, stains are often called differently - stains - and they are used not only to protect and prepare for further use of natural wood, but also building materials based on it (plywood, MDF, fiberboard, OSB, chipboard).
Recommendations
After each grinding operation, the surface should be carefully removed from the effects of grinding. You can use a vacuum cleaner and then remove the smallest particles with a damp cloth.
Depending on the desired result and financial capabilities, several layers of varnish are applied. As a rule, they are limited to three layers, but 5-7 layers are possible.
All layers, except the finishing one, are applied with a perpendicular overlap of each layer. Even chaotic movement with a brush or roller is allowed, as long as the varnish is evenly distributed over the surface. As for the last finishing layer, here the movements should be directed from the light source deep into the room.
After applying all layers, the floor is left in this state until the varnish is completely dry. In this case, it is necessary to ensure that dust and dirt cannot enter the room.
After the period indicated on the packaging, you should check the floor for quality of painting. If it gets a little sticky, you can wash it with a mild soap solution or dishwashing detergent.
Despite this, full mechanical loads on the floor will be possible no earlier than in a week. After this time, the floor will be reliably protected from various external factors. At the same time, the attractive appearance of the wood will be preserved.
But this does not mean that you cannot do the same thing yourself, especially since it will cost much less. If you are not very picky and have a philosophical attitude towards everything, then you can varnish the floors with your own hands. The main thing is to strictly follow the technology, moving from one technological operation to another
Having a special tool is of no small importance.
If you plan to varnish one room, then you won’t need any special tools other than a hand sander. The main condition is the absence of haste, then everything will work out. This is especially true for such a technological operation as varnishing
It is very important that during these stages, each layer dries completely.
Kinds
There are 2 types of the product - aqueous and non-aqueous (oil and alcohol) stain.
Water-based stain is offered by manufacturers in a ready-to-use state or as a powder (dry mixture). This type of composition is used most often because it has a very diverse range of colors. The color of powder stain can be easily adjusted; it directly depends on the amount of granular substance, that is, the more of it, the richer and brighter the result will be.
The water-based composition has the advantage: there is no unpleasant odor, thanks to which the stain can be used indoors. The disadvantages of this type include the ability of the product to lift fibers during surface treatment. Due to this, the moisture resistance of the wood is reduced. The time required for the stain to dry completely varies between 10-14 hours, which can also be attributed to the disadvantages of the type of composition.
The technology of working with water-based stain requires first wetting the wooden surface, then sanding it. The composition is filtered before use. Only after completing such preparatory work can the wood be painted. It is not advisable to use this product on resinous woods.
Oil compositions include dyes dissolved in drying oil or oils. You can work with this type of impregnation with any tool. The product does not lift the fibers of the raw material and does not allow it to become saturated with excess moisture. Using a similar composition, you can get any color and shade, additionally using dyes. They are available in powder form; white spirit is used for dilution.
According to experts, oil stain is the simplest and most convenient to use. Oil-based impregnation is very popular among decorators and decorators due to the ability to obtain the desired color.
The advantages of oil stain include its environmental friendliness, since the most common base for it is linseed oil. It takes about 2 hours for the surface to dry completely. The composition does not leave stains.
Alcohol-based stain is a dissolved aniline dye. Impregnation is available in finished or powder form. The main task of the composition is to protect wood from the destructive effects of moisture and ultraviolet radiation.
The main advantage of alcohol stain is its ability to instantly absorb into the wood fibers. The composition dries on the surface in 30-40 minutes.
The disadvantages include the fact that it will not be possible to apply the composition to wood manually, since the alcohol will evaporate very quickly, which can lead to stains. For work it is better to use a spray gun.
Along with the above types of wood stains, fundamentally new products began to appear in the assortment of construction supermarkets. Modern technologies have allowed manufacturers to offer consumers water-based acrylic impregnation, as well as a wax composition. New products were developed to eliminate the main disadvantages of existing formulations.
Wax stain is used to restore old wood coverings; it perfectly covers up color discrepancies. In addition to the above characteristics, the positive qualities of modern compositions include their excellent moisture-proof properties. However, such products are very vulnerable to mechanical damage, so they should be varnished. Acrylic and wax liquids are available in a wide variety of colors. They highlight the wood structure well.
The disadvantages of acrylic stains include their high cost, as well as the possible formation of stains on the surface when applying two or more layers.
The main disadvantage of wax compounds is that they are not able to penetrate deep into the wood. The product only forms a protective layer on top of the material. This composition should not be used before treating wood with two-component varnishes or polyurethane.
Since the composition perfectly preserves the texture of the wood and protects it from the negative influence of many external factors, thereby extending its service life, the answer to the question of what is worth purchasing - varnish or stain - becomes obvious.
Application methods
There are four main ways to apply stain:
- Rubbing painting. The composition is applied to the surface, after which it is rubbed over the entire area. Recommended for use when processing porous wood species.
- Spraying. When staining wood by spraying, a manual or automatic sprayer is used as a tool for applying stain.
- Processing with a foam roller. This method avoids the formation of streaks and helps to distribute the mixture evenly over the entire surface.
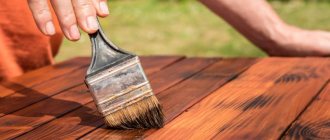
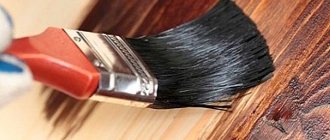
- Processing wood with a paint brush. The method allows you to obtain a deeper and richer color of wood, but is not suitable for all types of impregnation.
Next, we will consider in detail how to stain wood. To obtain a high-quality and good coating, you must follow the basic rules for treating surfaces with stain:
- Before painting a surface with stain, it is necessary to remove old coatings from it, and then degrease it better.
- The surface made of coniferous species (for example, pine) must be deresined.
- It is necessary to paint wood with stain and remove excess only in the direction of the wood structure.
- It is recommended to cover the surface with 2-3 layers, while for the first layer a small volume of the mixture should be used.
- After the first layer has dried, the surface must be sanded and the raised lint removed, and then, if necessary, apply subsequent layers (each subsequent layer is applied only after the previous one has completely dried).
The approximate drying time for oil-based impregnations is about three days, and for water-based and solvent impregnations - 2-3 hours (depending on how many layers were applied). It is recommended to divide large areas of the surface to be treated into small areas and paint them in stages. To avoid the possibility of defects forming on the surface, the composition must be diluted. A solvent is used for this.
Plywood stains perform a purely decorative function. Therefore, if you are in doubt about whether to choose stain or varnish, it is recommended to use them in combination. Before covering the surface of the plywood, it must be moistened, and it is recommended to heat the mixture itself.
After covering the wood with stain, it should be treated with varnish (layers should be very thin to avoid the possibility of smudges). The tool you can use is a brush, roller or sponge. Wood varnish will enhance the protective properties of the impregnation. By following these recommendations, you can easily stain wood at home.
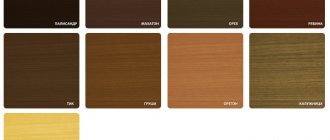
How to choose stain color
Currently, stain manufacturers offer consumers a wide range of colors. However, it is worth remembering that the same color from one manufacturer may differ by several tones from a product from another manufacturer. Therefore, if you plan to carry out work over a large area, you need to buy stain from the same manufacturer and, preferably, from the same batch.
In order to clearly see the color of wood stained with stain, sellers place so-called samples on shelves with goods. These are small boards painted using a sample. From these you can imagine what the painted surface will look like.
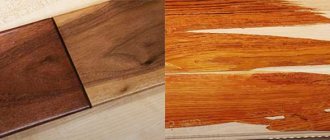
However, it is worth remembering that different wood painted with the same stain will look different. For example, oak wood has a fibrous structure, due to which stain passes through more quickly. This is why oak parquet will be a tone darker than flooring made from another type of wood. For the same reason, stains darken coniferous wood more.
One of the main techniques used when treating surfaces with stains is making a color test. It is designed to determine how many layers need to be applied to the surface to achieve the desired result, and what the final appearance of the painted surface will be. If possible, you can buy several small containers with stain from different manufacturers and make a color test, based on the results of which you can purchase the bulk of the material.
The color test is performed on a small board. It must be sanded and cleared of debris. The texture and type of wood of the prototype must exactly match the main surface. The board is divided into three equal parts. First, the first layer of stain is applied to everything. Then, after it dries, a second layer is applied to two areas, and then a third. After the stain has dried, the entire board is covered with two layers of colorless varnish. At the end of the work, it will be possible to determine how many layers are best applied to the surface.
What is the best way to apply stain?
To apply stains you can use: a spray gun (with a nozzle size of no more than 1.5 mm), a wide brush (100 mm wide), a foam swab, and rags. If you have a large area to cover, then you should definitely prefer a spray gun. It is also used when using nitro stains and alcohol stains. They dry too quickly, so when applied with brushes or swabs, stains often form on the wooden surface.
Water-based and oil-based stains can be applied well with brushes, swabs and rags. Brushes with natural bristles are more suitable for oil-based stains, while those with synthetic bristles are more suitable for water-soluble stains. The bristles should be strong and not leave behind hairs on the surface.
Fabrics and tampons used for stains can be cotton or foam rubber. They should also not “sprinkle” with lint and threads, which can remain on an already painted surface and reduce the quality of the coating.
Dealing with defects
Did the varnish stain go on incorrectly? There are several ways to eliminate defects. Master Class:
A numbness has formed
We cover the area with varnish, which will dissolve the bottom layer. Now we clean the area with a rag. Work must be carried out immediately after the defect is discovered.
If the smudge has dried, soften it with paint thinner. The seal can also be removed with sandpaper or a plane.
Stains
How long did it take to remove the solution, but stains still formed? The problem may be in the wood itself - the wood sometimes absorbs the solution unevenly. In this case, a plane will help. On plywood you will have to remove all the veneer.
A non-aqueous gel impregnation is suitable for recoating. It does not penetrate deep into the wood, lays down evenly and dries for a long time. Its consumption is reduced due to surface distribution.
A material such as wood has always been in demand, since it is a natural material and no newfangled plastics can compete with it in the ability to create an atmosphere of comfort and warmth in a room. But, like any other material, wooden products require protection and care.
For these purposes, special stains and varnishes are used. Treating wood with such means not only protects it from excessive exposure to light, moisture, scratches, and dirt, but also gives it nobility and sophistication.
To better protect the wood flooring and extend its service life, it is recommended to treat it with stain. This impregnation penetrates deeply into the pores of the wood and enters into a chemical reaction with tannins located in the growth rings, giving the wood a light- and water-resistant color.
In addition, stain protects the wood
from borer beetles, mold fungi and other infections and pests. Modern liquid stains come in the following types:
- oil;
- alcohol;
- aquatic.
Let us consider their characteristic properties in more detail.
Water stain
This impregnation comes in two types: in the form of ready-made solutions that can be used immediately, and in powder form. A solution should be prepared from it. Water stain does not require drying oil
, white spirit and other solvents.
However, it has one significant drawback: when the impregnation penetrates into the wood, it lifts its fibers
, as a result of which the tree remains unprotected from excess moisture.
But, on the other hand, with the help of such wood processing, its structure is emphasized and highlighted. Therefore, today this type of stain is considered the most common.
Alcohol stain
This impregnation is a solution of aniline dye in ethyl alcohol. It is used for decorative and antiseptic painting.
wood products. With the help of alcohol stain, pile lifting is reduced and wood swelling does not occur.
Using this type of stain, it is quite difficult to achieve uniform coloring, because the composition dries very quickly and stains can form
. This impregnation is best suited for tinting small products, but it will not be suitable for painting parquet.
Oil stain
This impregnation is a dye dissolved in flax oil. It is the most convenient to work with and can be applied in different ways. Oil stain does not lift fibers and is evenly distributed over the entire wooden surface. Products processed in this way can always be easily repainted and restored.
Treating parquet with stain
Wood stain is an impregnation used not as a protective agent, but as a tinting agent. That is, it is used when for some reason it is necessary to change the color of the coating. Parquet treated with stain is additionally varnished.
Stains are used to change the color of parquet flooring
At the moment, several varieties of stains are produced. Oil and wax are best suited for parquet. Alcohol can also be used, but they are very difficult to apply
One careless movement and unsightly stains will remain on the floor surface. Sometimes nitro stain is used to change the color of parquet
It can only be applied to the surface with a spray gun. When using a brush on the parquet, there will definitely be sloppy stripes.
If wood is treated incorrectly with stain, the color will be uneven.
Heterogeneity of the color of the coating is generally a common drawback of all stains. This is explained by the fact that wood absorbs liquid unevenly. As a result, some areas are lighter, others are darker.
One of the most interesting varieties of stains is rustic. It is used to highlight the texture of natural wood while simultaneously performing operations such as tinting.
Wood coated with a rustic stain looks very impressive
Wood staining compositions made from coffee, tea and vinegar
Natural stains are good precisely because they are absolutely safe for human health - what bad things can happen from ordinary food products?
So, to give the wood a brown tint, you can do this:
- Brew the tea, let it brew, then strain out the tea leaves. The resulting composition can be impregnated with wood, saturating it with tannins (contained in tea). Depending on the amount of impregnation and the concentration of the brew, you can get many shades of brown.
- Ground coffee beans need to be brewed, infused and strained. Treat the wood with the resulting infusion. The color will be darker than in the previous case, and it depends on the strength of the resulting drink.
- You can add a little soda to the ground coffee - in a ratio of 1:4 (1 part soda to 4 parts ground coffee) and brew it the same way.
Vinegar is useful for giving wood a dark tint. True, you will need not only vinegar, but also small nails or iron filings (stock up if you know a metal turner).
The stain is done like this:
- Nails or shavings must be degreased and filled with vinegar.
- The container should be placed in a dark place and left for up to 7 days - depending on the desired color and concentration of stain.
- Then the wood is impregnated with stain. This process is called “ebonyization” - that is, giving the material a black tint. The method allows you to obtain various shades of black, but it is especially effective when used for staining species like walnut (with a high content of a substance such as tannin).
Using vinegar stain requires caution
Preparatory stage
Let's make a reservation right away - we are now talking about carpentry made from inexpensive types of wood - pine, alder, spruce. If you have enough money for doors made of oak or ash, and you are not a wood painter, refuse to varnish yourself, do not spoil the product. Hire a professional, he will polish everything as it should. Do not touch products with decorative veneer - they can be damaged irrevocably.
First of all, you need to find a table that is large enough, durable, and at a comfortable height. If it is too low, the back from the position bent over it will soon make itself known to you. A clean, soft, thick rag is spread on the table, and a door is placed on top to avoid dents and damage to it. This is especially true for joinery made of spruce, pine or alder.
If the door has glass, and you can’t remove them (or are reluctant), they are covered with masking tape. Be careful that the tape does not cover the wood; all overlaps are carefully trimmed with a utility knife.
To identify dents, cracks and other flaws, arrange several light sources in the room, and so that they illuminate the door obliquely, and not strictly vertically. Examine the surface and panels of the door from different angles, and eliminate flaws before starting sanding. There are three main ways to do this:
- using a mixture of sawdust and glue;
- choosing a putty that matches the color scheme;
- or by caulking a crack or hole with a piece of wood placed on glue.
It is best to putty, sand and varnish the door frame in a disassembled state. This is simpler, and you can immediately check the color of its ends and casing. There is no particular problem with this - today boxes are assembled mainly with self-tapping screws, and not with dowels or nails, as before.

