When working in a home workshop, it’s rare that everything goes off without a hitch. Either you can’t unscrew the screw, or the necessary tool has disappeared somewhere.
In general, you constantly have to face various difficulties.
In today’s article we want to share with you carpentry tricks that will be useful to a novice craftsman (and a professional too) and will help you cope with certain difficulties. Let's look at 5 situations where our tips can be applied.
Self-tapping screw splits wood
Yes, this happens quite often.
Especially in cases where the self-tapping screw is screwed into the very edge of the workpiece, a crack appears not only at the top, but also at the end. This is no good.
So what's the problem? Step back and screw in calmly. That’s how it is, but sometimes you need to screw the screw into the edge of the workpiece.
In this case, there is a simple solution: use pliers to bite off the sharp tip of the self-tapping screw and screw it into the workpiece. There will be no cracks!
How to disguise the head of a screw in wood
If you are screwing in a piece of wood with a self-tapping screw, but do not want the plug to be visible, use a chisel to pry up a thin layer of wood.
A hole is drilled for the self-tapping screw and countersunk. Then we insert a self-tapping screw so that it does not protrude, and apply wood glue under the chips.
It is pressed with a clamp until it dries completely.
Then it remains to sand the area a little with fine sandpaper. The self-tapping screw and the fact that the layer of wood has been removed will not be visible at all.
The diameter of the hole is larger than the diameter of the screw
Here's another unusual situation.
For example, you need to screw a self-tapping screw into a hole that has already been drilled earlier. But it is larger than the diameter of the screw, and the fasteners simply dangle in it.
Here an ordinary match will come to our aid. We insert a match into the hole, break off the excess, and then calmly screw in the self-tapping screw.
If you approach the problem more carefully, then instead of a match it is better to make a wooden chopstick and drive it tightly into the hole. It will be more reliable this way.
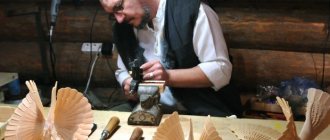
Secrets of carpentry
In my publications, I try to touch on topics that for the average person (a person far from carpentry) are sealed secrets. I hope that this time I will be able to open Pandora’s box for my readers too. So, I would like to touch on the topic of interior design, or rather wood products that are interior parts, as well as their durability. In the concept of interior details, I include, of course, furniture, as well as finishing panels, cornices, facades, doors and other large objects.
I'll start from afar. In the Contract for the production of wood products, I always include the clause “The Contractor is not responsible for the natural deformation of the wood.” Where did this wording come from? Naturally, from experience communicating with customers. Unfortunately, customers do not always understand one simple thing: wood is a living material, even though it has already been cut, sawn, dried and planed. It breathes, absorbs and releases moisture, shrinks, changes color, etc. (you never know what magical things can happen to it). The processes that can occur depend on the conditions in which the product is operated. Roughly speaking, in a simple Moscow apartment the heating is on from October to April. The humidity in the room is usually kept at 20%. During spring and summer days, the humidity in the room is approximately 50% and, in general, fluctuates greatly upward in the event of rain. In one word, my thought can be expressed as follows: six months there is a puddle, six months there is cold, the rest is summer. Wood, as a living material, cannot help but react to such changes in humidity. It dries out in winter and autumn, and swells in spring and summer. Accordingly, this affects the product. And the area next to the battery or the area above the hob are generally the areas of maximum risk. There was a case in my practice, generally funny, although more instructive, you should draw conclusions, I have already made... conclusions.
The order is for a pencil case for the kitchen, the customer can’t decide on the covering. Definitely wax, but the color is not clear to the customer, paints do not help, the customer finds a compromise option - we give the product without coating, and he himself decides what and how. We deliver, assemble, warn that it is not recommended to even breathe on the cabinet before waxing. The customer's wife comes and puts the kettle on the stove. The husband is in a panic: “Don’t do this, dear, you’ll kill the closet, it’s not covered!” The lady got the better of the situation and the kettle finally boiled. Facade with screw.
But how to ensure the durability of a wooden product? It can't all be that bad, can it? Certainly not. There are several tricks and subtleties. Firstly, no one has canceled the coating of products with varnishes, paints, oils, wax, etc. By covering, for example, wooden facades in the kitchen with wax, you will definitely extend their life. All of the coating materials listed above create a film that closes the pores of the wood and prevents moisture from penetrating and, just as importantly, leaving the wood. The second is the level of humidity in the premises. I hope that no one will argue with me that dry air has never benefited anyone, i.e. Don’t forget about room humidifiers (this is useful for you and your children). The third point is to place valuable and expensive furniture as far as possible from powerful heat sources. The fourth point is that it is normal to periodically tighten the fasteners on a wooden product. The fifth point, the most important, do not forget, when drawing up technical specifications for the manufacture of a wooden product, listen to the master carpenter. Carpenters know many subtleties and secrets that can take your product through eternity. I will share some with you. So…
Wood purchased for a wooden product that will be used indoors cannot be purchased at the construction market or in similar establishments. It’s not for nothing that the construction market is called “construction”. There you will find everything for building a bathhouse, log house, fence, etc., i.e. street products. This wood has a completely different level of humidity, close to the humidity of the environment. It is sawn and stored in ventilated, unheated areas. For the house, dried wood is used, i.e. After sawing, it was placed in a special drying chamber and kept there under certain temperature and humidity conditions. A lot has been written about drying wood, thousands of candidate and hundreds of doctoral dissertations have been defended, and millions of copyright certificates have been received. Accordingly, the moisture level of this wood is completely different; for many reasons it can range from 8% to 12%. Next, a little about pricing: a board on the market costs n rubles, and a dried board in a specialized warehouse costs n+m rubles. I will not touch upon the issue of wood quality at these two points; I think it is clear where it is lame (knots, falling knots, resin pockets in abundance, etc.). Also, I think it is obvious that the longer it was kept in the drying chamber, the more stable its properties and the higher the cost (you have to pay for quality). Dried wood is as close as possible to the microclimate of our homes. Thus, we are already trying to solve the issue of product deformation by initially choosing the right suitable material. There is no need to be offended by the carpenter if he offers you pine from the warehouse at a price twice the market price (I mean the construction market). Objectively, he wishes you well.
I would like to give an eloquent example of Indonesian furniture, which is brought to us in tons by plane. This furniture is beautiful and its price is good, but it will not last long. The climate of Indonesia is radically different from the climate of our strip. A table adapted to the Asian climate flies to our home and... after a while it is rolled into a tube. The tree simply adapted to our conditions, “got sick” and reacted. Money down the drain.
Timber trading enterprises that respect themselves and us have pre-sale aging of wood. In addition, before starting work, a normal carpenter will still soak the material for two or three days in the workshop, under processing conditions.
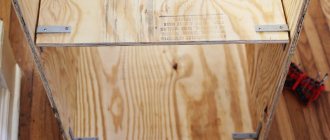
Often, in a fit of imagination, customers offer to manufacture a product that is already doomed to “failure” from the very beginning. For example, a two-meter wardrobe with a clothes rail inside made of solid wood. At the exit we get two two-meter walls of the cabinet, mostly “hanging in the air.” And here, too, there is no need to be offended by the carpenter if he offers to refine your idea and add several shelves. The client is always right, but no one has canceled physics. A two-meter shield will simply bend under its own weight, under the influence of a changing environment. As a result, your cabinet will take on a rounded shape (or maybe concave). The shelves proposed by the carpenter are elements of rigidity and the more of them there are, the more durable the structure will be. In other words, the shelves tighten the walls and prevent them from deforming. I gave a simple example; you can come up with as many similar stiffening elements as you like, depending on the architecture of the product.
Of course, the stability of the structure is also given by the special structure of the shield from which the wooden product is made. For example, the more lamellas there are in the shield, the greater resistance to deformation the product will have. For example, a shield assembled from three boards is less stable than a shield assembled from 20 boards with the same shield width. There are four main types of deformations:
- Simple longitudinal warpage along the face
- Longitudinal warping along the edge
- wingedness
- Transverse warpage
All of them are measured as a percentage of linear size. Example: let’s take a lamella with a width of 100 millimeters and a width of 10 millimeters, permissible warping is 2%. In the first case, the permissible (!) warping is 2 millimeters, which is defective for a piece of joinery; in the second, it is 0.2 mm, which cannot be measured with any tool. I don’t think there is any need to draw conclusions.
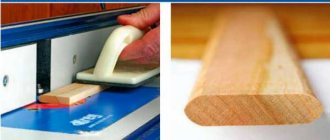
Also, do not neglect the advantages of frame structures in carpentry. Here I would like to remember about wooden doors. If you remember, they all consist not of one canvas, but of several, for example, panels, placed in a frame. The frame pulls the panels together on four sides.
I have given only a few examples that can extend the life of your wooden product, in fact there are many more, each case uses its own. But one thing I can say for sure is that a box assembled from four boards will cost less than a box assembled from panels glued together from lamellas and placed in frames. But the first option will last much less.
Durability comes at a price.
I don't have a compass at hand
And you desperately need to draw a circle. What to do?
We definitely won’t sit idly by! Even if you don’t have a compass, you can draw a circle using a square.
We hammer a couple of nails into the workpiece (the distance between them should correspond to the diameter of the circle).
Then we apply a square to them. We arm ourselves with a marker or pencil.
Moving the square along the workpiece, without lifting it from the nails, draw half a circle. A similar operation must be repeated on the opposite side.
As a result, we will get a perfectly even circle. Simply and easily. Well, the main thing is that we managed to do without a compass!
It is necessary to make coaxial holes
When connecting two workpieces using wooden dowels, it is important to drill the holes as accurately as possible - they must be coaxial to each other.
In order not to waste time marking with a ruler, you can do the following. On the first workpiece we mark the places for drilling future holes.
Then, using masking tape, we attach the nails to the workpiece so that the edge of the head is exactly in the center of the marking.
We take the second blank and place it on top of the first. Press down with your hands.
As a result, we will have precise marks for drilling holes. We drill holes on a drilling machine - everything is perfect!
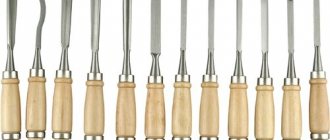
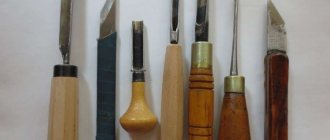
Sharpening cutting edges
Sharpening the edges of drills, chisels, and “feathers” is a responsible task and requires a keen eye and a steady hand. In the heat of work, there is no time to focus on the little things and many operations are done with the tools that are at hand. The edges are usually sharpened on a grinder cutting wheel. In this case, the following rules must be observed:
- The grinder should not play! Misalignment of the disc will not allow you to sharpen the edge evenly.
- Before working contact, try on the sharpening angle with the grinder turned off - it should repeat the factory one. If an element (drill, chisel) breaks off, create a new edge.
- Do not sharpen “little by little” and in several approaches. There should be one clamp until the plane is completely aligned.
- Do not press the element too hard - the metal will overheat and become brittle.
- When working, use glasses, a face shield, or keep your eyes at a safe distance.
- After developing the fiberglass (if using a metal blade), replace the blade with a new one to avoid tearing the weakened disk during subsequent work.
Can't unscrew the screw
It happens that the slots on the screw head are ground off, and it is not possible to unscrew the screw using the standard method.
Well, let's act outside the box.
We glue a piece of PVC electrical tape onto the head of the self-tapping screw (preferably in 2 layers). We try to unscrew it - everything works. And there is no need for any dancing with tambourines.
How to repair cracks in solid wood
Cracks in the wood can be filled with baking soda and superglue to make it look like white, durable plastic. To do this, cover the soda in thin layers and pour over it with glue. This composition is counted instantly.
It is not necessary to completely fill the crack with soda at once; it is important to precisely layer it, so that the plastic is formed throughout its entire depth. This is the fastest filling method compared to epoxy because it requires no curing time.