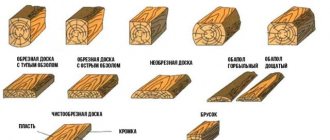
The sizes of softwood lumber are regulated by state standards and rules GOST 24454-80. This document applies to edged and unedged materials that are produced for the needs of our country and are also sent for export.
A good master will never order building materials “by eye.” A correctly drawn up estimate for the construction of a house, bathhouse, gazebo and other objects must include the exact amount of lumber. Not everyone will be able to immediately determine how many boards, 6 meters long, are contained in a cube.
A cubic meter is a standard unit of measurement used by all domestic lumber suppliers. If we talk about length, then in addition to footage, you can come across the term “molding”, but this is relevant for the purchase of piece products.
As a rule, boards are not sold in pieces, so you will have to order the required number of cubes. But we need to cover not cubic meters, but square meters, which means we will need to find out the exact number of boards. So how to determine how many pieces will be in one cube?
Helpful information.
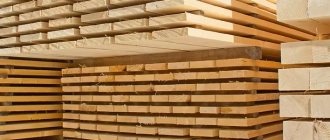
Some people ask a very reasonable question - why are boards produced mainly at 6 meters? It's not a matter of the height of the trees, but purely of logistics. Naturally, during the construction of various objects, non-standard lumber may be needed, for example, 7, 8 meters or more. But you will have to pay significantly extra for the delivery of such products, because they can only be loaded onto a road train. Therefore, 6-meter boards are the most common and affordable.
In the calculations below you can see how many lumber with a nominal section of the most popular length of 6 meters fits in 1 cube. It should be noted that the above GOST allows the production and sale of material having dimensions different from those specified in the regulatory document, and in order to calculate their quantity in 1 cubic meter, you must use a simple formula:
n=1/(a*b*c)
, Where
n
– number of boards, beams or beams, pcs;
A
– thickness, m;
b
– width, m;
With
– length, m.
Example
: Let's calculate the number of boards measuring 16x75x6000 mm in 1 m3:
N=1/(0.016*0.075*6)=138.89 pcs
This is a universal formula that is suitable for absolutely any lumber. Thus, the error is reduced to almost zero.
Helpful information.
The sequence of calculations is suitable for absolutely all lumber with flat surfaces. And it doesn’t matter what kind of wood they are made of, the main thing is to know the parameters of each board, beam and lining.
Lumber Tables
Below are detailed data that will immediately allow you to determine the required amount of lumber from 3 to 6 meters in length. It is very easy to use these tables - we find the required product sizes and see the amount of material and the volume of one element.
Helpful information.
Please note that these tables are approximate results. Doing your own calculations is more accurate. In addition, different manufacturers approach the stacking of lumber in their own way, so the density of the products can vary greatly. Therefore, make a reserve of about 10-20%, otherwise you will have to pay for delivery again.
Table 1.
Number of boards in 1 cubic meter of materials.
Table 2.
Amount of timber in 1 cubic meter of materials.
Table 3.
The amount of lining in 1 cubic meter of materials.
How many boards are in a cube | FOREST MERCHANT'S YARD
| Lumber | Size | Volume of 1 piece | Pieces per 1 m³ | m² to 1 m³ |
| Edged board | 20×100×6000 | 0.012 m³ | 83 pcs. | 50 m² |
| Edged board | 20×120×6000 | 0.0144 m³ | 69 pcs. | 50 m² |
| Edged board | 20×150×6000 | 0.018 m³ | 55 pcs. | 50 m² |
| Edged board | 20×180×6000 | 0.0216 m³ | 46 pcs. | 50 m² |
| Edged board | 20×200×6000 | 0.024 m³ | 41 pcs. | 50 m² |
| Edged board | 20×250×6000 | 0.03 m³ | 33 pcs. | 50 m² |
| Edged board | 25×100×6000 | 0.015 m³ | 67 pcs. | 40 m² |
| Edged board | 25×120×6000 | 0.018 m³ | 55 pcs. | 40 m² |
| Edged board | 25×150×6000 | 0.0225 m³ | 44 pcs. | 40 m² |
| Edged board | 25×180×6000 | 0.027 m³ | 37 pcs. | 40 m² |
| Edged board | 25×200×6000 | 0.03 m³ | 33 pcs. | 40 m² |
| Edged board | 25×250×6000 | 0.0375 m³ | 26 pcs. | 40 m² |
| Edged board | 30×100×6000 | 0.018 m³ | 55 pcs. | 33 m² |
| Edged board | 30×120×6000 | 0.0216 m³ | 46 pcs. | 33 m² |
| Edged board | 30×150×6000 | 0.027 m³ | 37 pcs. | 33 m² |
| Edged board | 30×180×6000 | 0.0324 m³ | 30 pcs. | 33 m² |
| Edged board | 30×200×6000 | 0.036 m³ | 27 pcs. | 33 m² |
| Edged board | 30×250×6000 | 0.045 m³ | 22 pcs. | 33 m² |
| Edged board | 32×100×6000 | 0.0192 m³ | 52 pcs. | 31 m² |
| Edged board | 32×120×6000 | 0.023 m³ | 43 pcs. | 31 m² |
| Edged board | 32×150×6000 | 0.0288 m³ | 34 pcs. | 31 m² |
| Edged board | 32×180×6000 | 0.0346 m³ | 28 pcs. | 31 m² |
| Edged board | 32×200×6000 | 0.0384 m³ | 26 pcs. | 31 m² |
| Edged board | 32×250×6000 | 0.048 m³ | 20 pcs. | 31 m² |
| Edged board | 40×100×6000 | 0.024 m³ | 41 pcs. | 25 m² |
| Edged board | 40×120×6000 | 0.0288 m³ | 34 pcs. | 25 m² |
| Edged board | 40×150×6000 | 0.036 m³ | 27 pcs. | 25 m² |
| Edged board | 40×180×6000 | 0.0432 m³ | 23 pcs. | 25 m² |
| Edged board | 40×200×6000 | 0.048 m³ | 20 pcs. | 25 m² |
| Edged board | 40×250×6000 | 0.06 m³ | 16 pcs. | 25 m² |
| Edged board | 50×100×6000 | 0.03 m³ | 33 pcs. | 20 m² |
| Edged board | 50×120×6000 | 0.036 m³ | 27 pcs. | 20 m² |
| Edged board | 50×150×6000 | 0.045 m³ | 22 pcs. | 20 m² |
| Edged board | 50×180×6000 | 0.054 m³ | 18 pcs. | 20 m² |
| Edged board | 50×200×6000 | 0.06 m³ | 16 pcs. | 20 m² |
| Edged board | 50×250×6000 | 0.075 m³ | 13 pcs. | 20 m² |
brus-profil.ru
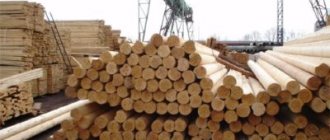
Weight of softwood lumber
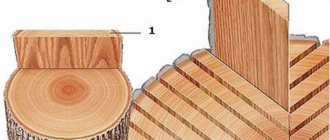
The weight of lumber is a variable quantity. It can vary significantly depending on several factors: the condition of the wood, its humidity, and the stage of processing. This indicator can even be affected by the area of the forest in which the trees were cut down, as well as the part of the trunk from which the boards or beams are made.
Table 4
.
Weight of lumber produced from coniferous and deciduous trees
Average weights are shown here. The actual value can vary between 0.7-1.3 from the average.
How much does m3 of wood weigh?
09/08/2015 The weight of one cubic meter of wood cannot be a fixed value; it depends not only on the type of wood, but also on the moisture content of the wood.
Do you know which tree is the heaviest? This is snakewood, which is also called Piratinera Guiana, Brocinum Guiana, “snake tree”, “speckled tree”. In dry form, its volumetric weight is 1300 kilograms per 1 m3.
And the lightest wood is balsa, also known as balsa, ochrome pyramidal, “cotton tree”: in dry form, one m3 of this tree is equal to 130 kg.
This table shows the weight of one m3 (cubic meter) of a wide variety of wood species at a humidity of 12%. This information will be useful in calculating the transportation of wood, the room for its storage and the total load of the finished product on the surface.
| Wood species | How many kg are in one m3? |
| Abacha | 420 |
| Apricot | 780 |
| Awodire | 690-750 |
| Azobi | 960-1120 |
| Quince | 640 |
| Ailanthus | 680 |
| Acacia | 690-750 |
| Amazaku | 850 |
| Amaranth | 800-950 |
| Anegri | 510-570 |
| Anchar | 550 |
| Afromosia | 710 |
| Bagassa | 800 |
| Lignum vitae | 1300 |
| Balau | 880-950 |
| Balsa (balsa) | 130-225 |
| Bamboo | 510 |
| Velvet | 160 |
| Belian (bitis) | 1200-1300 |
| Birch | 640 |
| Karelian birch | 600-750 |
| Bibolo | 580 |
| Bilinga | 740-810 |
| Bokote | 650 |
| Hawthorn | 760 |
| Bubingo | 800-960 |
| Beech | 650 |
| Wenge | 850-1000 |
| Faith | 1100 |
| Heather | 840 |
| Cherry | 530 |
| Elm | 650 |
| Gabon | 450 |
| Garapa | 830 |
| Hevea | 650-800 |
| Goyabao | 650 |
| Gombeira | 1150 |
| Goncalo | 850-950 |
| Hornbeam | 800 |
| Grenadill | 1200-1500 |
| Pear | 700-750 |
| Guarea | 640 |
| Dabema | 560-710 |
| Daru | 850-960 |
| Denya (okan) | 960 |
| Jelutong | 450 |
| Doxia | 650-1050 |
| Oak | 700 |
| Red oak | 650 |
| Stained oak | 950-1100 |
| Cork oak | 140 |
| Douglasia | 480-540 |
| Dussia | 800-830 |
| Spruce | 450 |
| Zebrano | 690-740 |
| Zirikote | 900 |
| Willow | 450 |
| Ipe (lapacho) | 960-1200 |
| Iroko | 660 |
| Elm | 660 |
| Cassia | 900-1300 |
| Cowrie | 380-560 |
| Chestnut | 600-720 |
| Horse chestnut | 470-580 |
| Cedar | 580 |
| Keltis | 800 |
| Kempas | 880 |
| Keruing | 640-860 |
| Kingwood | 1200 |
| Cypress | 460-485 |
| Cladrastas | 450 |
| Maple | 530-650 |
| Sugar maple | 740 |
| Cocobolo | 990 |
| Coconut | 690 |
| Kosipo | 640 |
| Koto | 580-650 |
| Kulim | 750 |
| Kumara | 1100 |
| Kumier | 1010-1150 |
| Kurupai | 1000 |
| Lacewood | 550-580 |
| Lauren | 710 |
| Limba (ofram) | 560 |
| Linden | 380 |
| Larch | 650-800 |
| Loro preto | 680 |
| Magnolia | 500-560 |
| Madrona | 620-660 |
| Maysamsa | 950 |
| Macassar | 850-900 |
| Maclura | 850 |
| Makore | 640 |
| Mansonia | 610 |
| Maraullah | 700 |
| Marfim | 850-930 |
| Mahogany | 620-650 |
| Meranti | 500-700 |
| Merbau | 830 |
| Miroxylon | 850-1050 |
| Myrtle | 950 |
| Moabi | 800 |
| Movingu | 690 |
| Juniper | 920 |
| Morado | 870 |
| Muirapiranga | 800-1060 |
| Niove | 880 |
| Olive | 850-950 |
| Alder | 420-640 |
| Nut | 600-650 |
| Black walnut | 660 |
| Ormozia | 740 |
| Aspen | 480 |
| Holly | 640 |
| Paduc | 750 |
| Rosewood | 770-830 |
| Parrotia | 900-1050 |
| Pecan (hickory) | 900 |
| Peroba | 750 |
| Pinkado | 990 |
| Fir | 450 |
| Sycamore wedge-leaved | 620-660 |
| Gonistylus macrofolia | 670-710 |
| Red gum | 500 |
| Rosewood | 860-1030 |
| Rosul | 960 |
| Mountain ash | 600 |
| Boxwood evergreen | 830-1100 |
| Sunbau | 760 |
| Santal | 660-720 |
| Sapelli | 600-650 |
| Sassafras whitish | 480 |
| Sequoia evergreen | 290 |
| Sep | 560 |
| Sitka | 430 |
| Homemade plum | 750-850 |
| Snakewood (Piratinera guianensis) | 1300 |
| Pine | 460-620 |
| Cedar pine | 450 |
| Sapupira | 990 |
| Tali | 910 |
| Tamo | 720 |
| Tauari | 620 |
| Teak | 620-750 |
| Yew berry | 620 |
| Poplar black | 380 |
| Thuja | 510 |
| Tyama | 560 |
| Tulipea | 480 |
| Ulin | 860-980 |
| Umnini | 990-1050 |
| Fernambuc | 620 |
| Pistachio | 860 |
| Framir | 480-625 |
| Hemlock | 490 |
| Persimmon | 830 |
| Zeder | 480 |
| Che | 1200-1300 |
| Bird cherry | 720 |
| Cherries | 580 |
| Mulberry | 800 |
| Eben | 1200-1300 |
| Eucalyptus | 650 |
| This | 580 |
| Apple tree | 780 |
| Sycamore | 650 |
| Yacaranda | 830 |
| Yarra | 850-1100 |
| Tall ash | 700 |
| Jatoba | 840 |
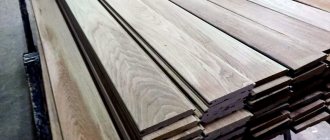
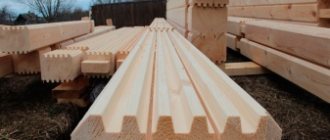
Advantages of eurolining and differences from traditional materials
Dimensions of eurolining with two grooves.
Eurolining differs from ordinary boards. Air ducts are provided that provide a longer service life, a better microclimate in the house, and no cracking of the boards, which is so typical for wooden cladding. This is a significant advantage, since there is no need for large ventilation gaps during sheathing. As a result, you can save space and construction costs. Temperature and humidity changes are not dangerous for the cladding, the walls retain their attractive appearance, and heat loss becomes minimal.
During use, thanks to the ventilation gaps, blue spots do not form. The boards are also not afraid of mold and mildew; they do not crack during natural drying or during use. Other advantages include:
Dimensions of eurolining with one groove.
- The environmental friendliness of the material is high, the panels are absolutely safe, they do not emit any harmful or toxic substances during use.
- Sound and heat insulation is high, a house with such cladding will be warm and comfortable. This will allow you to significantly save on heat insulators.
- Processing of the panels is simple, installation also does not raise any questions.
- The service life is long, the panels can be used for 15 years, without requiring any repair work.
- The microclimate in the premises becomes comfortable and cozy, humidity and temperature indicators are at the level necessary for normal life.
Installation of lining on vertical and horizontal surfaces
Installation is carried out in three stages: preparing the base (assembling the frame), attaching the lamellas, finishing (processing).
It is very difficult to achieve a flat surface, so the lining is mounted on a pre-assembled and leveled frame. This installation method is also convenient because a layer of insulation can be laid between the wall and the boards. It is possible to assemble the lamellas in both vertical and horizontal directions.
The lamellas are mounted on dowels, screws or nails. When covering the ceiling, several types of hardware are used, for example, screws and clamps. It is better to start installation from one of the corners.
When attached to clamps, they are driven into the groove of the board, and nails are driven into the hole. The next lamella is inserted into the groove of the already installed lining, then secured with a clamp. Nails or screws should enter the wood at an angle. Hardware caps require camouflage in order to be invisible on the surface.
Final finishing is the application of a layer of paint or stain in accordance with the design project of the room. The colors of wooden lining often imitate natural shades. The texture of the material will harmoniously appear both under natural colors and under a layer of bright colors.
What to use for facade finishing
If you need to do the exterior decoration of your house, you can use lining made from exotic trees. Russian producers most often use wood that grows in Africa and South America. The main advantages of such materials are resistance to moisture and rot.
The most popular materials include plastic facade lining. Its main advantage remains its long service life and preservation of its beautiful appearance. This material is characterized by high levels of moisture resistance, as a result of which it is able to provide reliable protection to the external walls of the house.
Varieties
There are three types of pine lining:
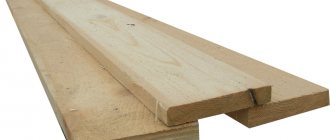
- Extra is the most expensive, high-quality and beautiful product. There are no cracks or knots on its surface, and it has a uniform color.
- Class A – knots can be found on the surface of such a product.
- Class B is the most budget option, on the surface of which you can find cracks, resin pockets and knots.
Lathing for lining: step-by-step instructions
Preparation of the bar
The material for work should be prepared in advance. The timber should be kept for several days in the room where the finishing will be done. This will allow the building materials to acclimatize, and their temperature and humidity will become similar to that in the room.
Next, the sheathing elements are treated with an antiseptic compound (if possible and, if necessary, with an insecticide). This can be done either using ordinary brushes, processing everything in order and carefully. If the volume of work is large enough, then you can build a small trough from boards and cover it with polyethylene. We pour an antiseptic composition there and dip each of the bars. This option will provide high-quality protection against mold and mildew.
Antiseptic trough
Preparing the walls
While the timber is drying, we prepare the surface of the walls. To do this, mark the width of the racks using a pencil and using a level so that all the lines are as even as possible. Such a “drawing” will allow you to clearly see how the entire structure will subsequently look, simplifying the work and controlling the correct location of the sheathing elements.
You should also determine the starting point for installing the sheathing. It can be the lowest corner available in the room (we find it using a water or laser level). After the necessary measurements, we draw out the wall and draw a horizontal line.
Marking
Lathing with timber