When repairing floors, many questions always arise. This is not surprising if you have such nuances, because the floor is a part of the house that is used almost around the clock. There are many options for making this part of the home comfortable, but you need to dwell in detail on how to build a plywood floor along the joists.
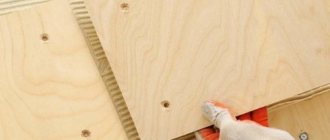
The process of laying a plywood floor at the stage of fastening to the joists.
This type of coating is perfect if you need to do insulation, but it is impossible to fill a cement-sand screed, and even if there are large uneven areas.
What is plywood
First, let's figure out what plywood is. This is a sheet construction and finishing material in which thin cuts of wood (veneer) - a millimeter or so thick - are glued together using a synthetic binder (glue). The number of veneer layers is three or more. The more layers, the greater the thickness of the sheet and the higher the strength of the material. But the strength characteristics also depend on the type of wood (deciduous or coniferous) and the type of glue used to glue the layers of wood together.
Plywood is a sheet construction and finishing material that consists of sheets of wood veneer glued together.
In wood, the fibers are arranged in a certain direction. When producing plywood, layers of wood are arranged so that the direction of the fibers in adjacent layers does not coincide. Moreover, on the outer layers the wood fibers are directed along the long side of the sheet (as a rule). The number of layers and layered structure are clearly visible on the side sections of the material.
Peculiarities
To choose plywood for leveling the floor, you need to understand the features and classification of the material on the market. Plywood varies in grade, thickness, moisture resistance and material of manufacture.
There are 4 types of plywood that can be distinguished visually:
- The fourth grade has defects on the surface, rough, there are holes from knots, since the lowest quality raw materials are used for production.
- The third grade is of better quality than the previous one and there is less defect on the surface.
- The second grade has minor cracks and is smooth.
- The highest quality and most expensive first grade is well polished, all sides are without defects.
When choosing a variety, they are guided by price and quality. For the construction of a subfloor, plywood of the second and third grades is suitable. According to the processing method, they are distinguished:
- Unsanded plywood.
- Sanded (one or both sides).
Plywood is made from deciduous and coniferous wood (usually pine and birch). Wood veneer is bonded together using natural and synthetic resins. The top layer can be treated with a varnished water-repellent composition.
Based on resistance to moisture in residential premises, the following brands are distinguished:
- FBA.
- FSF.
- FC.
In bedrooms and other living rooms with low humidity, FK and FBA brands are laid, made on the basis of urea and albumin casein glue. They are environmentally friendly and have average resistance to moisture.
The thickness of the canvas is determined by the number of layers of veneer. An odd number of them are laid perpendicular to the previous one, creating a durable building material. For laying the subfloor, use plywood with a thickness of 10 mm and above.
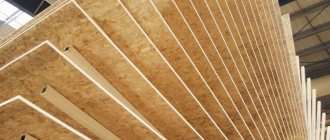
An analogue of plywood in the construction market is OSB - oriented strand board. Such materials have similar properties, but differ only in production. For plywood, the raw material is wood veneer, and for OSB, wood chips are processed with natural resins.
OSB is divided into different categories:
- The first one is suitable for minimal load and dryness.
- The second is produced for low-traffic residential premises.
- The third is characterized by high moisture resistance and strength.
- The fourth is used in the construction of walls.
- Varnished or laminated – covered with a protective layer of varnish or laminate.
- Tongue-and-groove - has a connecting groove at the joints.
The best solution for the subfloor would be OSB 3, tongue-and-groove and easy to install. Such sheets are produced with a thickness from 0.5 cm to 4 cm.
Sheet sizes and thickness, scope of application
As already mentioned, plywood is a sheet material that has a rectangular shape. The size of the plywood sheet can be height/length from 120 cm to 360 cm. Plywood thickness - from 4-5 mm to 36 mm. The most popular is 10-14 mm. The sheet size is selected so that waste is minimal. It is often more convenient to work with small-format sheets - they are easier to transport. But when installing small plywood, more fasteners are required. But such a floor is less susceptible to thermal and humidity deformations (more seams, which compensate for changes in size).
The dimensions of the plywood sheet are chosen so that it is easier to work with them and there is less waste
In general, plywood is a popular material. It is used in construction - in the construction of panel houses, for leveling floors and walls, and for constructing floors. It is also used in the production of furniture, in the construction of passenger cars, in the finishing of ships, and in aviation. Cheaper varieties are used to make containers, packaging, and removable formwork for concrete or reinforced concrete products. So the scope of application of plywood is very wide.
Laying plywood on the floor began in the last century
Although there are cheaper sheet materials available, plywood is still one of the most popular options for flooring. Moreover, there are several ways to make a plywood floor:
- laying plywood directly on the joists;
- lay on top of the subfloor made of boards;
- level the old wooden floor;
- level the concrete floor.
Laying plywood over an old plank floor is the best choice. Due to rigidity and elasticity, differences in height are compensated, which, when using other materials, must first be sealed. Repairing an old wooden floor is done this way. And it is plywood (as a base) that is recommended by almost all manufacturers of finishing floor coverings - laminate, linoleum, carpet, etc.
What kind of plywood is used on the floor?
In addition to the thickness and size of the sheet, you will also have to choose the type and grade of plywood. First, let's look at the type. If you plan to lay plywood on the floor under some kind of coating, you can use unsanded sheets. Under a hard finishing coating, such as parquet or parquet boards, grades 1 and 2 will be used. For a soft surface - such as carpet - you will have to use only the first one with a minimum number of knots.
The grade of plywood is determined by the number of knots, their condition and the presence of other defects. The best is first/highest, but some factories also produce “luxury” or “elite”. They use veneer for the outer layer(s) without any flaws at all.
If you plan to use the plywood floor as a finishing floor, that is, “for painting,” you need one sanded on one side and of the highest grade. If your budget is strictly limited, you can take a lower grade. But the defects will have to be puttied and sanded. This is an additional waste of time without guaranteeing an ideal result.
You need to choose the type of plywood depending on the planned finish coating
Types of moisture-resistant plywood
In general, it is advisable to use moisture-resistant material for the floor. There are the following types of moisture-resistant plywood:
- FC. Suitable for rooms with normal humidity. Urea glue is used in production. It is environmentally friendly, but the water resistance of the material is average.
- FKM. It is also safe, and has higher water resistance, since melamine glue is used. But the price is more expensive. It makes sense to use it when installing floors in the kitchen and hallway.
The most popular types of plywood - FSF. Cheap, waterproof. But the layers are glued together using a phenolic binder. So for use in residential premises, a hygienic certificate indicating the formaldehyde emission class is required. A material with a formaldehyde emission class no higher than E1 is considered safe. Can be used for installing floors on an open balcony or loggia, in a bathroom or toilet.
- FB. Plywood with bakelite binder. Lightweight, highly moisture resistant, safe. But darling. Used in the construction of aircraft, often called aviation.
- BS. Alcohol-soluble glue is used for gluing veneer. Plywood is moisture resistant, durable, expensive. Does not withstand exposure to some chemicals. It is used with caution when laying ceramic tiles - modern tile adhesive may contain various additives that can cause destruction of the adhesive layer.
So, when laying plywood in residential premises, the optimal choice is FC plywood. For the kitchen, bathroom and corridor in a private house, it is better to take FKM or FSF (but check its safety).
Criterias of choice
Practice has shown that the best material for this operation is plywood. However, not all plywood is suitable for subfloors. There are certain criteria for its selection.
Required moisture resistance.
It is achieved in several ways: varnishing, impregnation with drying oil, moisture-proofing primer or special hydrophobic compounds. Environmental safety. When purchasing plywood for a subfloor, you should definitely find out its composition, as well as the nature of impregnation and processing. The material must contain an acceptable amount of formaldehyde that is safe for humans.
Laying plywood on the floor on joists: sequence of actions
In general, it is quite difficult to fully describe the technology - there may be too many details. We will describe only the main steps and stages. This is the order in which you need to lay the plywood floor along the joists.
- Removing the old floor to a solid base. Removing debris, cleaning the base with a vacuum cleaner.
- Assembling the grille and leveling it.
- Attaching the joists/grids to the base.
- Installation of plywood on joists.
In general, that's all. But there can be many particulars. For example, if there are significant differences in the foundation (holes or humps), then it is better to seal them. It will be easier to set according to the log level. Second point. In high-rise buildings, it is often recommended to spread film over concrete tiles as waterproofing.
How to attach plywood to a wood floor. Through self-tapping screws, but you can also pre-apply a layer of mastic for gluing wood
This can be done, but this is not a guarantee that in the event of a flood you will not flood your neighbors below. You will have to violate the integrity of the film when attaching the sheathing. And water, as you know, will find a hole. If you are really concerned about this issue, it is better to cover the concrete slab with liquid waterproofing. But then it must be applied to the walls - exactly to the level of the finished floor. That's right - using coating waterproofing, it is better to treat the flooring in the kitchen or bathroom. It's more reliable.
Technical nuances
Sometimes laying the floor with plywood on joists is the best solution. If wood is expensive in the region, it is cheaper to lay plywood directly on the joists - without a rough wooden floor. The height of the log depends on how much the finished floor level needs/can be raised. If the floor does not need to be raised to a significant height, you can save money and use a board with a thickness of 28 mm or more as a joist. If the floor needs to be raised to a greater height (from 50-60 mm), we take a beam of a suitable cross-section.
The minimum board thickness for joists under a plywood floor is 28 mm
If 50-60 cm is not enough, a small “shortage” (5-8 cm) can be “added” using spacers - cuttings of timber of the required size. All the same, a perfectly level base is very rare, and spacers are used under the logs to bring them “to the horizon” (as in the photo above). If you need to raise the finished floor even higher, then take 150*50 mm timber (for example). If this height is not enough, a sheathing of edged boards is made on top (perpendicularly), achieving the desired height.
How to lay plywood on joists: with edged board sheathing
In any case, we use chamber-dried lumber, first or highest grade. They are usually coated with bacterial protection. It can also be impregnated with compounds that reduce flammability. Before laying, it is advisable to keep the wood indoors for a week. Then there will be a guarantee that the floor will not creak.
Chamber drying boards and timber are very expensive. To save money, you can buy regular lumber (but not raw) and keep it for about a year in a well-ventilated area (in an attic, in a shed) or in a stack outside, covered on top (but not hermetically sealed) from rain. But during the drying process, some of the material will crack, some will twist, etc. So the source material must be purchased with a reserve for rejection. The amount of the reserve depends on the initial state of the forest. The more raw lumber you use, the more waste there will be.
Lag pitch and plywood thickness
The lag laying step is calculated from the center of the beam or board. The beam width is at least 50 mm, the pitch is from 300 mm to 900 mm. The greater the distance between the supports, the thicker the flooring required. That is, the thickness of the plywood for the floor along the joists depends on the distance at which the joists are installed from each other. So when installing a plywood floor, there are options:
- Lay joists less often and use thicker plywood.
- Install the joists with a small gap, use a smaller thickness of the flooring.
Which is more profitable? You will have to count for each region. In some places the first option will be cheaper, in others the second. If you also need to raise the floor to a considerable height, you can get out of this situation by installing joists, nailing the sheathing across them across the battens, and then placing plywood sheets on them.
Table for choosing plywood thickness depending on the joist installation pitch
Laying plywood on a wooden floor under laminate, linoleum is included in the technological map. It is recommended to lay plywood under parquet and parquet boards. In this case, long-term operation of the finishing coating is guaranteed. So, covering the floor with plywood is a justified decision in many cases. It's just expensive. Currently there is cheaper sheet OSB. But plywood has a more stable quality, and with OSB - depending on your luck.
Plywood thickness for floor joists
The thickness of the plywood is selected depending on the selected floor design. The specific thickness depends on the distance between the lags:
- logs every 300 mm, plywood needed 9 mm;
- supports every 600 mm - sheet plywood is required no thinner than 12 mm;
- the logs are installed at 900 mm intervals - we put 18 mm plywood and no less.
Which plywood for the floor to choose?
Coniferous, birch or combined? Birch is better, but coniferous is optimal for the price. When laying on joists, two layers are usually laid. The total thickness should be no less than recommended. Two layers are done to get the most stable floor at minimal cost. Because the material for two layers of 12 mm will cost less than one layer of 21 mm. But when laying two layers of plywood, the installation time will increase and the consumption of fasteners will increase. This is also worth taking into account.
Thickness of plywood on old floor
When laying on any hard base (rough or old plank floor, concrete), one layer of plywood may be sufficient. Moreover, it is possible to level it in this way even on an uneven base. But in this case, two layers will be required and we take their total thickness from the table above. Due to its high degree of elasticity, such flooring can compensate for unevenness.
The thickness of plywood for floor boards is 10-12 mm
Provided there are no significant differences (only a few millimeters are acceptable), the thickness of plywood for laying on an old floor is 10-12 mm (in one layer). This will be more than enough even for coatings that require stability of the base.
How do you attach the joists to the base?
If the sheathing is attached to a concrete base, studs are used. In wood and concrete, a hole is pre-drilled with a drill whose diameter is 1.5-2 mm smaller than the fastener. The length of the fastener must be such that at least half the length of the stud/bolt enters the base.
How to attach joists under plywood to the base
If for leveling you use several shims made of materials of different thicknesses, then you need to drill the hole so that the pin/bolt catches them too. This is a guarantee that the gaskets will be secured and the floor will not sag or begin to creak.
Soundproofing and thermal insulation
In a multi-storey building, you should take care of soundproofing your floor - there will be fewer problems with your neighbors. To do this, it is better to use materials that do not conduct sounds well as leveling pads - rubber, fiberboard, pieces of linoleum. You can also install special vibration damping pads.
You can insulate a plywood floor with any of the materials
For thermal insulation, mineral wool is placed between the joists. In high-rise buildings (second floor and above) this is the best choice. The material dampens sounds and has good thermal insulation properties. Expanded clay should not be used as thermal insulation. Compared to modern materials, it is less effective (the characteristics are 4-7 times worse). You can use polystyrene foam or extruded polystyrene foam. But this choice may be justified if there is an unheated room below or the floor of the first floor in a private house. In this case, foam glass may have even better properties. 100% harmless, excellent thermal insulation characteristics, does not burn. But the price is high.
Please note that on the ground floor of a high-rise building or in a private house, waterproofing is spread over the joists. And it’s better if it’s a membrane rather than a film. The canvas is spread over the joists, the edges are placed on the walls, securing them there no lower than the level of the finished floor.
Laying plywood on the floor: rules
To prevent the plywood floor from sagging and playing underfoot, the first layer is laid so that the fibers of the outer veneer layer are perpendicular to the joists. In this case, the dimensions of the sheet and the pitch of the lag must be selected so that the joint of the sheets falls in the middle of the beam/board.
The junction of two sheets should be in the middle of the board or beam
If the lag pitch is large (50 cm or more), an additional beam is installed under the connection along the short side so that the joint does not hang in the air.
Rules for laying plywood on the floor
When laying out sheets, remember the following rules:
- A gap of 20-30 mm is left between the edge of the sheet and the wall. This way the plywood will not rest against the walls. When temperature and humidity change, it changes size. And this gap compensates for this expansion, otherwise warping will begin and the joints may rise.
- The sheets do not fit together tightly. Leave a gap of 3-5 mm. This is also to compensate for thermal and humidity expansion.
- The second layer is placed so that the seams do not coincide. This is necessary to ensure that cracks do not form in the floor. It also makes the floor more durable and stable.
With a large pitch, transverse bars are added on which the joints of the sheets will rest.
A few words about installing the fasteners. Lay out the plywood sheet and adjust it the way it should lie. Next, mark the position of the joist (middle) and jumpers on it - then it will be easier to install the fasteners.
Plywood fasteners
You can attach plywood to the joists with nails or self-tapping screws. Self-tapping screws are not hardened (they break less often). The length of the fastener is not less than three times the thickness of the sheet. That is, for fastening plywood with a thickness of 12 mm, a length of 35 mm or more is suitable. The fastener installation step when laying plywood is 15 cm.
When laying plywood, do not forget about the gaps
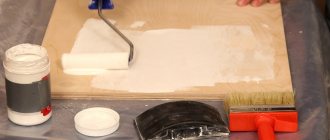
The second layer of plywood is often fixed with glue. They usually use construction PVA, but any type that can be used to glue wood is suitable. “For reliability” they also add screws. To get into the logs when attaching the sheets of the second layer, the position of the supports is marked not only on the plywood, but also on the walls. But, even if the fasteners only connect sheets, this will be enough.
The rules for laying the second layer are the same: compensation gaps are needed. And the seams should not coincide with the seams of the bottom layer. They must be offset by at least 30 cm.
Updating the screed
Even if the plywood is not in contact with the base, it is still necessary to prepare it. The joists will rest on the floor, so it must be strong, level and protected from moisture from below.
Diagram of a plywood subfloor on joists.
The primary task is to clean the surface of the old screed and remove its fragments, dust and debris. After this, all cracks, potholes and bumps must be removed from the base. Protrusions are removed, for example, with a hammer drill, and depressions and cracks are sealed with cement-sand mortar.
After the solution hardens, the base is treated with an antifungal compound and primed. It is worth noting that it is often necessary to level the floor with a new screed, since its condition does not allow for a high-quality laying of a new floor.
Please note that the leveling screed is laid on a surface that has undergone preparatory treatment.
In addition, a waterproofing membrane made of polyethylene or bitumen-based materials must be laid under the screed. Before laying the plywood and joists, the screed must harden. This process lasts 4 weeks.
Laying plywood on a wooden floor
Repairing an old wooden floor is not easy at all. It's easier to lay plywood on top. Before this, it is necessary to carry out an inspection, eliminate the creaking, and install, if necessary, additional fasteners. If there are large differences in height, it is better to eliminate them too. Cut off the humps, fill the cracks and sand them. There is no point in achieving perfect smoothness, but large differences can also cause problems in the future. How to repair differences in a wooden floor before laying plywood? There are several options:
- Use a mixture of wood chips and varnish or paint. Fill the depressions and cracks with this mixture and level it out. After drying, use sanding to bring it level with the surface. This method is good if there are depressions.
- If the boards are bent over, a different technology is needed. We need to cut off our humps. Planing paint is long and difficult. In this case, it is better to remove the old paint with a blowtorch, and then level out the differences using: a sanding machine (rent);
- electric plane;
- belt sanding machine.
You can attach plywood to a wooden floor using nails or self-tapping screws.
They also use wood mastic or wood glue. Plywood can already be laid on a relatively level floor. But in the case of a wooden floor, it is necessary to use two layers, because the first layer has some unevenness. They are several times smaller than those of wood, but they still exist. The second layer of plywood is laid with overlapping seams so that the seams of the second layer do not coincide with the joints of the first. Then the second layer is leveling. It will be almost perfectly smooth.
Laying plywood on a wooden floor under linoleum, laminate - a requirement of flooring manufacturers
When choosing materials, keep in mind that plywood thickness may have certain deviations. For the second layer, choose sheets that differ minimally in thickness. Moreover, to level out differences in the first layer, you can use linings - thin strips of fiberboard of different thicknesses, strips of plywood, etc.
Before work, be sure to remove all construction debris and dust. It is a good idea to vacuum your wooden floor. Debris can cause squeaking. So don't ignore this step.