Why are arches needed?
From the photo of garden arches you can see that this decorative element is very functional. Their shape can be anything. Most often, garden arches protrude:
- Plant support.
- A decorative decorative element that complements the style of the site.
- Support for load-bearing pillars.
- An element dividing the territory into zones.
- The basis of a swing or hammock.
Materials for making arches
When choosing materials, it is necessary to take into account the overall style of the site. The arch for the dacha should be combined with other decorative elements.
Wooden arches
Wooden arches are rightfully considered traditional. Combinations of different types of wood allow you to create very beautiful designs. They are quite easy to decorate, and the cost of the finished product is very low.
The disadvantage of wooden arches is their fragility. In addition, they are light in weight, which is why they can sway from gusts of strong wind. Measures must be taken regularly to prevent wood from rotting.
Features of wooden arches
The structure performs an exclusively decorative function and can be installed both in the garden and in the vegetable garden of any summer cottage. The product is a simple structure, which consists of beams and a crossbar. The support pillars are positioned strictly vertically and do not require foundation equipment. This is due to the low weight of the arch. The crossbar must be securely fixed in a horizontal position and can have either a straight or arched shape.
The entire construction process is quite simple, but requires compliance with certain norms and rules. The basic requirements are:
- the finished structure must withstand the weight of all the flowers that are planned to be grown on it;
- the optimal height of the arch should be 2 meters, since the flowers should be spacious;
- the minimum width is 1.2 meters (the requirement is justified by the need to create reliable support for the development of climbing plants with a strong root system and strong shoots);
- the frame must be mounted not only so that it is durable, but also in order to achieve an aesthetic appearance;
- According to design requirements, building a wooden arch for a summer house with your own hands involves selecting materials and colors in relation to the color scheme of the garden.
Products are divided into several types according to the materials used, the shape of the structure and the location.
Dimensions
Each owner of a summer cottage must determine the optimal dimensions of the arch independently. This is determined based on the number and characteristics of plants that will be grown on the structure. It is necessary to take into account the height of other buildings on the territory and the total area.
To quickly design a high-quality arch, you can use the most common examples of drawings and dimensions:
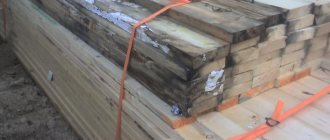
- wooden posts 3 meters long and 100 mm in diameter - 4 pcs.;
- wooden beams 0.5 meters long and 70 mm in diameter - from 16 pcs.;
- wooden rods with a diameter of at least 30 mm.
The elements will serve as the basis for creating a strong and durable structure.
Location in the garden
The next important aspect is how the wooden arch will be located on the site. The buildings can be installed in any corner of the garden. Decorative elements are used not only to decorate areas, but also to hide all kinds of outbuildings or technical equipment.
The most common location options are samples installed in the middle of the planted area, and structures in the corners of the garden. The main thing is that the support pillars are securely held in the soil and are stable enough when placing ornamental plants.
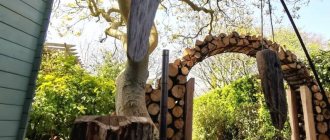
On a note! Wooden buildings look quite impressive against the backdrop of the gate. To complement the landscape, special gratings are fitted to the arches, which in gardening are called pergolas.
It is recommended to use structures where there are paths. Elements can visually increase the space around them. Less commonly, arches are used to create full-fledged gazebos. This approach can be called complex and quite expensive to implement.
Arches made of stone
Arches made of stone are the most durable. They look great in spacious areas.
You should not make stone arches in small yards with simple wooden houses, as they will look out of place. To install a durable structure, it is better to use the services of a mason.
For production, you can use natural and artificial stones or bricks. If desired, the laid out arch can be plastered.
How to make a plasterboard arch with your own hands
To carry out the installation of the arch you will need the following materials:
- plasterboard (for beginning craftsmen it is better to choose an already curved arched one (GKLA); - metal or wooden profiles, plywood; - screws, dowels; - putty, primer.
Tools you should prepare include measuring instruments (carpenter's square, tape measure), a large compass, a pencil, a drywall knife, scissors for cutting metal, a screwdriver, fine-grained sandpaper for polishing edges, a spatula, and personal protective equipment.
Stages of work
1) Design. Based on the parameters of the room and the design idea, it is necessary to accurately determine the dimensions and relief of the future structure.
2) Calculation of materials. It is better to take more drywall and consumables than required. This way, in case of accidental damage, you can safely continue installation.
3) Cutting and fastening of profiles. The result should be a kind of frame suitable in width. They must first be attached to the concrete wall with dowels, and then fixed with self-tapping screws. The optimal distance between screws is 10-15 cm.
4) Cutting out plasterboard blanks, giving them a curved shape. You can clearly see this process in the video.
5) Sheathing of the frame. The diameter and length of the screws should be selected depending on the thickness of the sheets. After screwing in, their caps should be flush with the drywall so as not to create unnecessary unevenness.
6) Strengthening the structure. To do this, a curved metal profile is attached to the outer edges of the arch.
7) Alignment. At this stage, you need to smooth out the roughness, putty the surface and prepare it for finishing.
Decorative finishing.
Arches made of plastic
These arches are modern. They are quite inexpensive and do not require special care. The colors of such arches are not very varied, but finding the most popular tones is not difficult. Using such arches is very convenient and simple.
When choosing, you should definitely check the frost resistance of the product in order to know whether the arch can be left outside in the winter.
If the arch is not frost-resistant, it will need to be brought indoors during the cold season. It is very convenient that the plastic arch can be easily moved to another place.
Combined arches
To give the design individuality and improve its characteristics, a combination of various materials is used in the manufacture of arches.
A wooden arch installed on a concrete base looks unique. This design will not be afraid of gusts of wind and adverse weather.
Arch shapes
Arches are made in different techniques in arched, straight or gable shapes.
Standard garden arches are arched. A gable arch resembles a roof in appearance, and the rectilinear upper part is absolutely straight.
To give the site a non-standard appearance, you can install round or semicircular arches in the garden. The latter option looks amazing on narrow passages and alleys.
Self-assembly of the arch
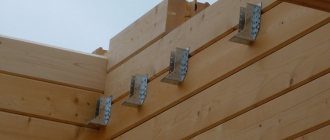
To fasten the pillars and crossbars, grooves are cut out at the tops.
It is better to start assembling the structure from the top. Semicircular nozzles are used to decorate attachment points.
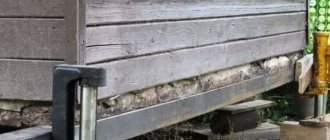
The part that will be dug into the ground should be coated with a mixture to prevent rotting and covered with a layer of resin.
Crushed stone is poured into the dug holes and the finished arch is installed. The free space is filled with crushed stone and the evenness of the structure is checked. After making sure that the installation is correct, the supports are filled with concrete mortar.
To prevent rotting, the part of the structure that is located above the ground must be treated with wood varnish or stain.
It is important that the wood used for making the arch is properly dried. Otherwise, the finished product may become warped.
Instructions on how to make a garden arch
The simplest design can be made from metal-plastic pipes used for water supply in apartments.
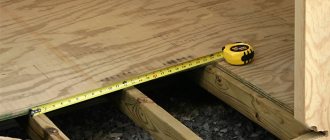
You need to prepare two identical pieces of pipe. Their length is the sum of the height of the arch multiplied by 2, plus 1 m for bending, plus 1 m for digging into the ground (50 cm at both ends).
The most difficult thing is to bend the pipes equally and insert their ends into pre-prepared holes in the ground. They can be drilled with a drill, which fishermen use in winter.
Then you need to pour concrete into the holes and fix them until it hardens. When the two arcs are securely fastened, you can decorate them with climbing plants.
Places to install the arch
It doesn’t matter where the arch will be installed, near the house, gate or somewhere on the territory, it will always be a spectacular decorative element. Having installed the arch, you can think through the entire further design of the site.
A garden arch placed on a path running through the lawn looks great. It can be done in subtle shades or bright colors that will contrast with the elements around it.
The swing can be installed under an arch entwined with greenery. In this case, you will be able to enjoy relaxing in the shade of plants even on the hottest day. You can place several arches along the path or make only one for the entire area.
A stone arch will help recreate the atmosphere of the Middle Ages.
The most traditional option is to place an arch near the gate.
Making a garden arch with your own hands
The construction of a garden arch is a fairly simple job, but, like any other, it requires careful preparation and high-quality execution.
Metal arch
Determining the dimensions of the structure and choosing the appropriate material
There are no strict restrictions or any standards other than those described just above (the arch should have a height of about 2 meters and a width of about 1.2 m). The maximum permissible width that will not violate the overall proportions of the structure can be about one and a half meters. This will be quite enough. As for height: the higher the structure, the less graceful it becomes. Most often, garden arches are made no more than 3 meters high.
Once the dimensions of the structure have been determined, you can begin to select the material. Yes, metal
A garden arch is a durable structure, it is very easy to install and is quite durable. But it has one significant drawback - susceptibility to corrosion.
As a material for wooden
Arches are suitable for both timber and untreated wood. Such structures are less reliable than arches made of metal.
Plastic
the arch has a very attractive price and is easy to install. It is not afraid of corrosion, moisture, or deformation. And to model the structure you only need a soldering iron.
Wooden arch as a garden decoration
Selecting and preparing a site for an arch
Now you should think about where to place the structure so that it decorates the area and does not violate the overall integrity of the existing picture. It can be an excellent entrance to the site or the territory of the house. Try installing an arch above so that it becomes a kind of tunnel on the way from one part of the site to another (a pergola is perfect for this).
Advice. For a small garden plot, bulky structures are not suitable, since they can simply visually reduce the area. The solution in this situation is a trellis; it will perfectly decorate the garden area and at the same time it can be used as a gazebo by adding a small bench with soft cushions to the arch.
An existing one (for example, a concrete or tiled area) can serve as a foundation for an arch; ordinary soil would not be a worse option. The most important thing is to prepare the foundation for installing the arched structure. The work site must be carefully cleaned, leveled (if we are talking about an earthen surface), the dimensions of the structure must be transferred to the site and markings must be applied.
Arched integration
It is possible to place arches not only near the entrance or paths, but also as an element delimiting individual parts of the site.
It is not at all necessary to make the entire arch from one material. In this case, you can safely experiment, implementing non-standard solutions.
A bench can be installed in an arched metal arch. This will make her more attractive and interesting. To create a romantic setting, it is recommended to add a lantern and a few pillows.
Options for using arches in the interior of different rooms
The use of this decorative detail is not limited to the living room or corridor. You can decorate the kitchen, create two zones in the bedroom, hallway, even combine the balcony with another room.
Below we will consider the design of arches and openings in the apartment.
Living room
In the hall, arches can decorate the walls, forming small niches. You can install shelves in them, hang paintings, photographs, or leave them empty.
The photo shows a classic living room. A wall with an arched opening separates the room from the rest of the space.
Kitchen
The whole family gathers in this room, so it is important to make it not only functional, but also cozy. It is more comfortable if a large kitchen is divided into two zones, separating the cooking area from the eating area.
You will get a kitchen and living room in one room.
Children's
An interior arch in a children's room can have an unusual shape and be decorated with additional elements. For example, artificial vegetation, toys and flashlights.
Bedroom
An arch can divide a bedroom into two zones. A sleeping and activity area, such as a closet, vanity or sitting area.
Hallway
You can make a beautiful passage to the living room, since that is where we usually invite guests. Instead of a regular arched opening, you can create an arch from niches, and put various decorative elements there - vases, figurines, candles, etc.
Bathroom
The option of finishing a bathroom with an arch will look appropriate in a spacious room. An arch can separate a bathtub or decorate a countertop with a sink and mirror, creating additional lighting with the help of spotlights.
Balcony and loggia
A large arch will visually separate the balcony from the room, preserving the common space. This method is suitable for rooms with combined loggias and balconies.
Arch near the entrance to the house
An arch installed near the entrance to the house looks impressive. This increases the prestige of the building. You can complement the arch with flower boxes.
In addition, such an element will give the structure additional weight, and therefore stability. In addition, the arch near the porch can be supplemented with benches or lanterns.
Trellis
Trellis can be used as decorative elements. They are placed in a flower bed and climbing plant species are planted nearby.
Arches made of thin metal are often made two-level. Such designs are extremely elegant and unique.
You can make a fence of arches to separate the garden from the rest of the area. It will give a fabulous appearance to the site.
Modern versions of arches can be made in any size and painted in the most incredible colors. They transform the entire area, making it more interesting.
Arch in the garden: materials and characteristics
How harmoniously and naturally the arch will fit into the garden depends on the appearance, dimensions, and supporting materials. Externally, these can be the most unusual solutions, from the simplest rectangular shape to an elegant openwork design.
But in order for them to fit harmoniously into the style of the palisade, it is necessary to build them of the appropriate size. There are no special rules on this matter, however, in landscape design, when decorating a medium-sized plot, an arch 1500 mm wide, 2500-3300 mm high and 500-700 mm deep is used (depending on the varieties of plants chosen for decoration).
Typically, plastic, brick, metal and wood are used to make arched structures.
Plastic
The easiest way is to buy and install a PVC arch on the site. But, even despite the economy and variety of colors and shapes, it can last a relatively short time, and its level of stability leaves much to be desired.
Such arches are used only as decorative elements, for decoration and zoning; they are not suitable as supports for benches or pergolas for relaxation. In addition, they have to be removed for the winter, since in severe frosts the plastic can burst; another problem is that they cannot be placed in close proximity to a barbecue or outdoor stove.
Brick and stone
These materials are the most durable. Of course, anyone can make a rectangular arch out of brick using drawings and facing bricks, but only a true professional can create truly unusual specimens that can be called an architectural miracle.
Brick arches can be so original in themselves that a frame of plants and flowers is not required to emphasize their beauty. For example, a stone vault over an entrance gate or central path looks very impressive. Also, such a decorative element is ideal to highlight a garden pond or flower bed.
Tree
The best way to make an arch in the garden with your own hands. A natural wood arch is the easiest to fit into any style. You can also choose a garden set for it, or create a whole ensemble of gazebos, trellises and fences.
The service life of this material is not very long, so before decorating and installing the wood must be treated with an antiseptic Stigma-D or Zobel and coated with a special paint, such as MGF Eco Fassade M690.
Metal
A steel garden arch is the most durable and reliable. It allows you to create extraordinary planting compositions that will delight the eye both in summer and winter. The simplest option is to secure a steel wire bent into an arc between the supports.
The modern design of metal arches surprises with its diversity; these can be elegant patterned structures or massive structures with wood or stone inserts. To prevent structures from corroding, their surfaces should be regularly maintained, primed with a special Biotex Effect compound and painted with at least two layers of alkyd enamel, for example, Tikkurila Miranol.
The main advantage of metal is its decorative effect. You can forge it yourself if you have specialized equipment, or order real masterpieces with chrome-plated rose petals from blacksmiths.
Arches with other elements
If you plan to integrate an arch for plants in the garden with a fountain, pond, swing, bench or other elements, you must take into account the size ratio.
It is unacceptable for one element to be very large, and the other, on the contrary, too small. The elements involved in integration must be combined with each other. Ideally, the arch should look like a frame at any distance from the composition.
The depth of the arch will depend on its purpose. If this is a regular supporting structure, then its depth will be minimal.
If the arch is supposed to be used as a roof, then it should be much larger.
Under the spacious arch you can place a relaxation area, playground or swing. It is better that such an arch is not monolithic, but carved. This will allow free air circulation.
Homemade metal arch
You will need:
- Two reinforcement rods 6 m long and 1 cm in diameter.
- Nine reinforcement rods 94 cm long and 0.5−0.7 cm in diameter.
- Ten pins 25 cm long.
- Soft but strong wire.
- Rope 1 m long.
- Paint for metal.
- Primer.
How to do:
It is necessary to draw a template for the future structure directly on the ground, using pins for this. They need to be stuck into the ground in an arc, which is what the future arch will look like, making the estimated structure more than two meters high. For convenience, you can draw a neat line in the ground from one pin to another to see the full picture. Along the finished contour, bend each of the two six-meter reinforcement rods so that they take the shape of an elongated semicircle, or, so to speak, a semi-oval. It is better to resort to the help of another person, because it is physically difficult to do it on your own
It is important to protect yourself from rods that may accidentally slip out of your hands: use a special mask and gloves, work in a durable jacket and pants.
The finished base must be driven 40-50 cm into the ground so that it holds well. It is better to mark the limit on the rods themselves using paint, tape or electrical tape
The distance between the two rods should remain approximately 31-32 cm. The bases of the frame will be connected by special rings, which are described below. For the rings you will need rods 94 cm long and approximately 5-7 mm thick. Each of the nine rods is prepared as follows: using a pipe bender, you need to bend each rod into a ring, the ends of which will fit tightly to each other. If you don’t have a pipe bender, you’ll have to perform the same maneuver using pins on the ground, placing the pins in a circle with a diameter of 30 cm. You can also not complicate your life and connect the base of the arch not with circles, but with horizontal rods, cutting them into shorter pieces: 35 each −40 cm. The next stage is connection. To do this, you need to measure 60 cm from the ground on both sides - at this mark the ring will be attached. Each next one is attached 15-20 cm from the previous one, the fifth ring is located in the center of the structure - at the top. To ensure that the rings are at the same distance, it is worth measuring the length of the rod from the first to the fifth ring, dividing by four and marking it. The ring is attached like this: you need to use a wire to tie the ring to the base at the previously made mark. It is necessary to work with gloves and tighten the wire well, otherwise the structure may fall apart. To connect, you will need another person who will hold the structure during the connection process. When the work is completed, you need to coat the product with a primer and leave to dry. After a day, paint is applied, which will also need to dry. After this, the arch is ready for use. You can plant climbing flowers nearby or install pots with such flowers.
If you make a wider acre, using more rings and twigs for the base, it can serve as a support for the grapes.
It is better to work on warm sunny days, and make sure that there is no rain, as it can damage the invention of the arch.
Landscaping of arches
To garden the arches, you can plant climbing perennials near them. Thanks to their vines, the arch will quickly be filled with fancy green curls. Plants located on arches will grow much better than on the ground.
In addition, a garden arch for climbing plants will make caring for them easier. The ideal choice for decorating arches are:
- climbing rose;
- sweet pea;
- Schisandra chinensis;
- clematis;
- hop;
- grape;
- honeysuckle.
Garden arches are a very attractive element for landscape design. With their help they decorate the garden and give it a mysterious atmosphere.
You should not deprive yourself of such decor. There are a huge number of types of arches. They can be free-standing or part of some kind of structure.
If you wish, you can always find a suitable model on sale. If there is nothing suitable there, then you can make the arch yourself or order its production from specialists.
The main thing when developing a design is not to be afraid to improvise. To get some inspiration, you can look at photos of arches in the garden.
Materials and their features
Decorative garden structures can be built from a variety of materials, modern or traditional. The choice depends on the functions assigned to the element, the overall design of the site and the house. Each of the materials has its own advantages.
Wooden
The arch made of natural wood is light and beautiful. The wooden model creates a special cozy atmosphere on the site. The material is environmentally friendly, does not harm nature, is affordable, and is therefore in great demand. In order for a tree to serve for a long time, it must be properly cared for. The material is susceptible to swelling and rotting, so it needs to be treated with an antiseptic, moisture-resistant and fire-retardant compounds. It is not difficult to change the appearance of an arch in the garden; you just need to paint it in the color you like or cover it with stain, giving it a beautiful shade. Natural wood structures coated with a transparent protective varnish look good.
Plastic
Manufacturers produce hundreds of different models of arches for flowers in the country (you can see the photo). Plastic structures are easy to install, carry and wash. Disadvantages:
- Plastic is highly flammable.
- Fragile, cannot withstand mechanical damage.
- May crack in the cold.
But plastic is inexpensive, so replacing a product that has become unusable is not difficult.
You can assemble a plastic decorative element yourself. To do this, you need to find a sufficient number of strips and pipes and purchase fasteners. Then draw a diagram and assemble the arch.
Important! Plastic arches must be installed no closer than 10 meters from a brazier, barbecue or other source of fire.
Metal
Metal structures are strong and durable. You can weld them yourself; any thin metal pipe or rod is suitable for production. Ready-made prefabricated and one-piece structures are also available for sale. Caring for such structures is simple; you just need to regularly treat them with anti-rust compounds. The metal structure is universal. For example, solid forged arches are suitable for a large garden in a country cottage, and lightweight prefabricated arches are suitable for a summer house. However, elements welded from thin rods may bend under the flower mass.
Stone structures look solid, impressive, and last a very long time. The only thing is that they can become overgrown with moss, and chips appear on the stones over time. They build monumental structures from dolomite, cobblestones, shell rock, and clay bricks. The shape and size of the arch can be any. These structures do not require additional decoration; they already create a special atmosphere on the site.
Stone can be combined with wrought iron flower arches to create an unusual architectural grouping. But in order to build a stone structure, you need to have construction skills. If they are absent, it is better to contact a professional.
Photo of a garden arch
Please repost