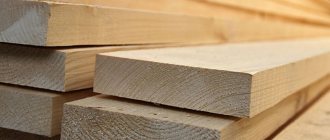
Plank floors, a traditional and long-known method of installing flooring, including finished flooring, have again begun to gain popularity. Installation is simple and does not require special skills, however, the durability of the coating and its performance properties depend not only on the quality of the floorboard, but also on the method of its fastening. Today’s material is about how to choose and use the right screws for a floorboard, as well as other ways to fix it.
Self-tapping screws for floorboards - operating principle
Preparing the base
Before laying a wooden floor, you will need to prepare the base. Preparation begins with choosing an installation method. The floorboards are laid in two ways: on logs or plywood. The best option is laying on logs. Situations when this method is not possible:
- the room has a low ceiling;
- after installing the floor on the joists, the door to the room will not open;
- it is necessary to lay a new coating on top of the old one.
In these cases, the floor made of wooden floorboards is laid on plywood.
Do not install on a wet subfloor. To check whether the concrete screed has dried, place a piece of plastic film or a rubber mat on the floor. The film is glued with tape. After 24 hours, the polyethylene or mat is lifted; there should be no condensation below.
Then, regardless of the type of base: concrete, wooden floor or old floor, check the slope level, not higher than 0.2% of the length of the room. To correct the situation, a concrete screed is made. It is enough to pour a self-leveling mixture onto the concrete floor.
With any installation method, on logs or on plywood, a waterproofing layer is created. The material used is plastic film, glassine, roofing felt or special mastic. The film strips are laid with an overlap of 15 - 20 cm and an overlap of 10 - 15 cm on the walls, glued together and to the walls with tape. The surface is coated with mastic, extending onto the walls by several centimeters. Coating waterproofing is used to prepare concrete bases.
Installation of wooden floors on joists
Application area
Currently, the main area of application for wooden floors is the construction of small private houses. Especially often, floors on logs are installed in wooden houses and log houses, in which the floors between floors are made of beams.
Especially often, floors on logs are installed in wooden houses and log buildings, in which the floors between floors are made of beams
Much less often, wooden floors are laid in city apartments with reinforced concrete floors. However, the technology is still used, especially in cases where pouring a full leveling screed is impossible for some reason.
Wooden floor in the apartment
Sometimes plank flooring is a finishing coating and part of the designer’s idea when creating a renovation concept. In this case, beautiful wood species such as oak, larch or pine are chosen for the flooring. The boards are thoroughly polished, impregnated with an antiseptic and covered with varnish or wax. The result is a very beautiful and durable coating that pleases the eye with the natural texture of wood.
Natural wood floor
Wooden floors can be used even when arranging wet rooms, such as baths and bathrooms. However, this is done infrequently, as it requires careful selection of wood, reliable waterproofing and impregnation of the boards with very expensive solutions that prevent moisture absorption.
Wooden floor in the bathroom
Devices for screeding floor boards
Do not think that devices for screeding plank floors are an invention of recent years. Our grandfathers and great-grandfathers also wanted a flat floor. Old textbooks describe ways to eliminate cracks during installation. For this purpose, metal staples were used - ordinary or of a special design. Modern devices and techniques are just variations of old methods.
You can also tighten the boards using a regular metal bracket. It's the old way
Bowrench and Special Automation
We describe these two devices together, since the Belarusian Spetsavtomatika made some changes to the Bowrench design, which is produced by the Americans. But, in essence, it is also a device.
You can tighten the boards using Bowrench
So, there is a part with two protrusions that is fixed to the joist. A metal stop and a handle are movably connected to it. By pressing the handle, we ensure that the board fits tightly and install the fasteners. The disadvantage of this device is that it blocks access to the end of the board. When laying a tongue and groove board, you will have to move it several times if you need to fix it to each support.
Logs can be of different thicknesses. To be able to “rest” against them, there are replaceable nozzles. The stop can be easily removed: you need to remove the two studs that secure the mounting bolts. However, the set consists of three or four attachments, so there are not many options.
The Belarusians have made some changes to the design: one part of the joist grip is movable and adjustable
In the device produced by Spetsavtomatika, the log grip is adjustable. There is an adjusting bolt at the end that allows you to extend or retract one of the clamps. There are more adjustment options, but there is also a higher chance of damage. In operation, both are quite convenient, although the “American” is more refined. But the difference in price decides the matter - Bowrench costs 3.5-4 times more.
How to tighten floor boards using a clamp and wedges
You can tighten the floor boards using a clamp and two wooden wedges. The clamp is fixed on the joist at some distance from the board being installed. Two wedges are made from a piece of board 40-50 cm long by sawing the piece diagonally.
A device for tightening boards from a clamp attached to a joist and wedges that press the board
The clamp is installed on the joist, turning the arc towards the board. Wedges are installed between the arc of the clamp and the board. They hit the wide side of the wedges with a hammer or sledgehammer until the gap between the two boards disappears. Then you can fix the board. If you need to install fasteners in a tenon or groove, a “window” is made in one of the wedges, which is placed above the joist and through which a self-tapping screw is screwed.
Thrust board and wedges
The previous method is good for everyone, but the board is attracted only in one place. You can, of course, install several clamps, but this is time. And there are usually not many sufficiently powerful vices on the farm. The problem can be solved using boards and similar wedges.
A support board about a meter long is nailed at some distance from those being mounted. They are nailed to the joists above which it is located. It is not necessary to drive the nails all the way to the heads, but the support should hold well. The distance for installing the support is chosen so that three or four boards can be laid without moving it.
Backing board nailed to joists and wedges are another way to hold floor boards together.
A piece of “lining” with a window through which you can tighten the self-tapping screw is attached to the board being installed. In order to be able to tighten the floorboards, scraps are inserted between the support and the wedges. First you need long pieces, then smaller ones. The entire structure is assembled so that the wedges stand in such a way that by knocking them down, the boards can be held together.
How to care for parquet at home
Insulation and waterproofing of the floor
Laying stone wool between joists
For wooden floors, film insulators are used, which effectively protect the covering elements from ground moisture. Waterproofing also provides a comfortable environment for people to avoid developing respiratory diseases due to mold and mildew. The film must be attached in accordance with the technology.
Insulation is done in several stages before attaching the floor board to the joists:
- an insulating membrane from the wind is installed on top of the subfloor, the edges of which are placed on the joists and fastened with a stapler;
- insulation is placed between the beams on top of the film;
- A vapor barrier film is placed over the insulation, and the edges are glued to the mounting tape.
Attention is paid to the membrane joints to obtain a complete coating. For insulation, polystyrene foam and polystyrene foam are used, which have zero saturation with moisture and do not violate the protection. Mineral wool requires a ventilated gap. Expanded clay gravel is placed in niches between joists and beams.
Floorboard bonding technology
The floorboard is attached to the joists - a wooden beam that is installed at a certain pitch. The installation pitch of the logs and the thickness of the flooring are selected so that the covering is stable, can withstand the planned load (with a certain margin of safety), does not sag or play underfoot
At the same time, pay attention to the cost. Sometimes it is cheaper to use thicker flooring and install joists less often, sometimes, on the contrary, it is cheaper to install joists more often and lay thinner boards
The floor board can be regular - edged, or it can be tongue and groove. The edged one has the form of a parallelepiped (straight edges); a tongue and groove is formed in the tongue and groove along the long side. And it is the second option that has been used almost everywhere over the past decades. And that's why. The presence of a tenon and groove provides a number of advantages:
Flooring with tongue and groove boards takes longer, but the results are better.
- The result is a single coating that redistributes the point load over large areas.
- There are no through gaps. So a tongue and groove floor holds heat better.
- You can attach it not to the surface, but to a tenon or a groove. That is, the fastener is invisible. From an aesthetic point of view, it is more attractive.
- Hidden fasteners allow you to plan and sand the floor without worry.
There are not many disadvantages of tongue and groove boards. The first is that due to the need to cut out additional “shapes”, the cube costs more. Secondly, you also have to track the parameters of the tenon/groove. In principle, there are no other disadvantages.
Tongue-and-groove board: fastened in a tenon or in a groove?
When laying a floor made of tongue and groove boards, there are two methods of fastening. You can install the fastener in a tenon or in a groove. Installation in a groove is simpler, but then about a third of the thickness of the board is fixed. When drying, this may not be enough, the tenon may crack. This happens quite often. See for yourself when redoing the floor.
You can fasten a tongue and groove board either in a tenon or in a groove
Fastening a tongue and groove board into a tenon is more secure. But it takes more time, since you need to find an angle at which the head of the screw or nail will sink into the wood. Otherwise, you simply won’t get the tenon into the groove. With this installation method, you cannot do without pre-drilling holes, otherwise cracks may occur. But two-thirds of the thickness of the board is “grabbed.” This is certainly more reliable than installing fasteners into a groove.
How many times will you have to tighten the floor?
So, floor bonding is the process of attracting floorboards to each other without cracks or gaps. And you will need to do this at least twice. The first one is during initial installation, the second one is during refurbishment. Why is a bulkhead needed? During use, wood dries out and decreases in size. This leads to the appearance of cracks where there were none before. To eliminate cracks, you must first disassemble the entire floor, then pull the boards together again, and add one or two floorboards at the end. This is called “refinishing a wood floor.” And one bulkhead is not always enough. Depends on the initial moisture content of the wood.
What is a tongue and groove board and why is it better?
A tongue and groove board is a board that has a groove cut along one side and a tenon along the other. When laying, the tenon fits into the groove, creating a more durable connection, eliminating “blow-in”. And this is a plus compared to edged or deck boards.
This is what a tongue and groove floor board looks like
Another advantage is related to the technological process: the tongue-and-groove board is “adjusted” to its geometry by cutting off the sidewalls, grinding the front side, and cutting longitudinal grooves on the back side for better ventilation. Then a tenon and groove are formed on the treated sidewalls using a milling cutter. After this, the tongue and groove board is ready. With such processing, there is certainly a difference (especially in low-grade goods), but not so great and sanding is needed, but not to the same extent as when using edged lumber.
A little about why it is so much more expensive. There is a lot of work, which is why this material is much more expensive, but the floor is stronger and more reliable.
The subtleties of flooring with wooden boards
Due to frequently asked questions, today we will look in more detail at the process of screeding floorboards during the installation of wooden floors. Many people have heard that there are special staples that are used specifically for these purposes and ask where they can be bought. Others use “installations” and other improvised materials to compact the boards. And so I decided to show novice craftsmen clearly how they can pull together floors without resorting to special devices, and use only available materials.
The process of laying a floor from wooden planks is described in the article: how to lay a wooden floor. And the process of compacting the boards together is carried out using ordinary wooden wedges, which can be made from any remaining board using an ax. As can be seen in the photo, the wedges are installed towards each other with sharp ends between the boards being compacted and an additional stop.
This stop is made from any board or timber and, at your discretion, is attached to the joist with nails or self-tapping screws or rests against the wall (wherever it is convenient), the main thing is that the stop is fixed firmly enough.
Then, hitting both wedges simultaneously with hammers, the boards are pulled together very well. The tenons fit tightly into the grooves, and there are no gaps left between the boards, which is one of the conditions for the quality of flooring.
This tightening must be done opposite each joist and after tightening, immediately fasten the board to the joist with nails or self-tapping screws. After fastening, we move on to the next joist and opposite it we make a screed using the described technology. This ensures a high-quality installation of the wooden floor, and with subsequent finishing coating of the boards with various varnishes or paints, it will last a long time.
Important: the tighter the boards are pulled together, the less likely it is that cracks will appear in the future, provided that the boards were dry. And good luck to you in your work! And good luck to you in your work!
And good luck to you in your work!
Now smile, construction joke: “Wife to husband: - This painter is strange! I whitewashed my kitchen in one evening, but my neighbor’s couldn’t do it in two weeks... - Don’t you understand? - the husband grins. “You are fifty years old, and your neighbor is twenty!”
Special floor slats are environmentally safe and accessible
Floor slats mean one of the types of lining, which allows you to assemble a flat floor without gaps.
Positive qualities of the floor slats
The popularity of special floor slats is due to the advantages that this floor covering has, namely:
- equipped with a stylus on one side and a cavity on the other;
- strength and reliability;
- environmental Safety;
- high thermal insulation properties;
- easy assembly of the structure thanks to special elements.
In addition, the material, made from moisture-resistant wood honeycomb, has a long service life and gives any room a solid appearance.
Manufacturing technology
The production of slats for floor coverings is carried out according to the same scheme as the production of other types of lumber. First, the wood is harvested and sawed. Next, the material is dried and planed. This lumber is sorted into three classes. To organize the finished floor, class A and B laths are used. And class C products can be used under laminate or parquet.
Durable types of wood are used in production: larch, beech and others. Thanks to its anti-slip properties and abrasion resistance, the material is advantageous for use in public and commercial interiors.
Requirements for the quality of the material
The quality of modern lumber must meet the requirements of GOST 8242-88. Deviations in plane are allowed per 1 meter of length up to 3 mm and width up to 2 mm. The material for production can be all coniferous trees, except poplar or alder. There should be no core on the front side of the material.
Preparing tools
First you need to prepare the necessary tools and materials. Under the logs you will need bars, screws and dowels, and roofing felt. To carry out the work, you need a hammer drill, a level, and wedges. You also need slats measuring 45 by 20 mm.
Next, you need to mark the floor on which the logs are installed. A waterproofing material is installed underneath them. The pitch of laying the lag depends on the thickness of the board. Heat and sound insulation materials (mineral wool) are also laid between the joists.
Material calculation
When carrying out installation yourself, you need to correctly calculate the number of boards. Ideally, the length of the board matches the length of the room. You need to calculate the area of the room and divide it by the area of one product.
Laying the floor slats
Laying the floor slats can be done on your own, provided that all installation rules are followed. Before starting work, the old floor is removed and logs are installed. Installation of the structure must begin after a week of adaptation of the wood at room temperature.
Installation of floor slats is carried out perpendicular to the direction of the lag.
Installation An important point: the installation of the first rail is carried out by screwing the board to the joist at a distance of no more than 1 cm from the walls. The board must be perfectly flat. All subsequent boards are mounted using the groove-to-groove method.
When the structure is assembled, the floor surface is sanded using a sanding machine. Now the floor can be treated with moisture-resistant impregnation and varnished.
Information about installing the first rail
As already noted, the first rail is mounted directly against the wall. Before installing the floor slats, you need to check the straightness of the walls. If necessary, stretch a horizontal line along the walls using a level along which the first board will subsequently pass.
The scheme of work is as follows:
- You can fasten the board with self-tapping screws on top and a comb on the side of the joists;
- for hidden installation, the remaining elements are mounted at an angle from the groove side;
- structural elements should fit together as tightly as possible;
- The last board is installed on top under the baseboard.
The final touch is the installation of skirting boards.
In custody
Flooring made from floorboards is considered an excellent way to organize rough and finished floors. When choosing a material, you need to take into account parameters such as the thickness and quality of the boards. And with proper installation, you can create a comfortable coating. Moreover, the cost of a floor lath is significantly less than the price of parquet or laminate. The cost of installation depends on the type of wood, complexity and volume of work. This material helps to establish an optimal microclimate in the house.
Screeding a wooden floor using homemade wooden wedges
This is one of the simplest, yet most effective methods, characterized by its absence of costs and high reliability. To bring it to life, you don’t need to purchase any expensive tools - all you need to do is use a pair of hand-made wooden wedges and a hammer.
Wedges are made using a hacksaw. A floorboard or any other board 15 cm long is sawn in half with a cutting angle of 10 degrees. Pulling together floor boards using this method is done as follows.
Step 1. 8-15 boards are laid on the joists, then the trim is applied to the last of the laid floorboards.
The floorboard cut is applied to the last of the laid floorboards
Step 2. Two wedges are laid on the joist above the previously laid cut floorboard. Wedges can also be used without cutting the floorboards, but in this case the wedge, which is called a “working” wedge, must have a ridge on one side that fits into the groove of the floorboards. The second wedge will be called “intermediate” and there are no grooves on it. It is usually 10-15 mm thicker than the working one.
Laying wedges
Step 3. Use a piece of board to close the excess gap. You can fix the thrust block between the wedges and the space not covered by the floor boards using self-tapping screws. To do this, the stop is screwed to the joists. Instead of a board closing the gap, you can use clamps or staples, which are also secured to the joist.
Fixing the thrust block
Step 4. Next, blows are applied with a hammer to the end part of the intermediate wedge. Thanks to these actions, the boards throughout the flooring are compacted together. In this case, the gap between the floorboards being joined should not be more than 1 mm.
The end part of the intermediate wedge is struck with a hammer
Step 5. After this, the boards are connected to the joists using self-tapping screws, which are screwed into the outer board at an angle of 45 degrees. Nails 75 mm long are also sometimes used.
The boards are connected to the joists using self-tapping screws
Step 6. It is easy to remove the wedges after pulling the boards together - to do this, strike the intermediate wedge from the end part again with a hammer, but from the other side. Klin safely leaves his place.
Wedges are knocked out
The procedure is performed every 8-15 boards, and it is important to ensure that the ridges of the floorboards fit into all grooves if a tongue-and-groove board is laid; 2-4 outer boards are joined together without a board closing the gap. At the floorboard closest to the wall, the lower edge of the groove is removed; a wedge is used for bonding, which is located between the outermost board and plywood, which protects the wall from deformation.
Wedges are the fastest and most convenient method of tightening foundation boards, which does not require the use of any special and expensive equipment. The method has been tested by many generations of experienced builders and is still actively used in work.
Existing fixation methods
The floor covering is constantly under heavy loads.
Therefore, it is necessary to choose the fastening method based on the performance characteristics of the material. With an irresponsible approach to resolving the issue, there is a high probability of damage to the floor within the first year of operation. The most important thing is to ensure the proper level of fixation rigidity. The first sign of poor-quality fastening is loosening of the boards. After some time, the elements begin to gradually shift, which is accompanied by a characteristic creaking sound. As a result, there are two scenarios for the development of events - either individual elements break, or the entire structure fails.
There are 4 main ways to attach floorboards:
- Nail installation.
- Glue method.
- Fastening with clamps.
- Installation using special types of screws for floor slats.
Each of the presented methods differs in severity, so each method should be considered.
Fastening boards with nails
This method allows you to properly fasten the floorboard either to a solid base or to a joist structure. The mounting principle is simple:
- First you need to fix the first row of boards. To do this, nails are driven through the ridge at an angle of 45°. The task is to attach the element to the base without damaging the part.
- When the next row is adjusted, the nails need to be hidden. Next, fixation is made through the surface of the board.
Adhesive installation method
When laying boards on a perfectly flat base made of concrete or other materials, special glue is used. The grooves in the products must be carefully coated with glue and placed on the tongues of already laid boards. Craftsmen, showing how to properly attach boards, use regular PVA glue. This composition is able to reliably hold joints for many years.
In this case, the glue should be distributed in a small layer. The tongue-and-groove edges are also treated with glue to stiffen the corners.
Fixation with clamps
Products that are sold in a set with clamps deserve special attention. The fasteners are inserted into the slot located on the inside of the tongue-and-groove board. The parts are capable of rigidly fixing the material to each other.
Stages:
- The subfloor must be covered with a layer of high-quality waterproofing. The edges of the material should be secured to the walls with tape.
- The clamps are driven into the cracks of the first row with a hammer. Be sure to follow the direction of the tongue.
- The ends of the planks should be coated with adhesive, after which the first row is installed.
- Wedges are inserted between the sheets and the wall.
- The second row is also equipped with clamps before fastening and is mounted by tapping the block with a hammer.
- After this, you can lay all the remaining rows in the described sequence.
- At the last stage, you should remove all the wedges and fix the baseboards.
Special screws, self-tapping screws for floorboards
The most popular fastening method is using self-tapping screws for fastening floorboards. This method is characterized by high speed of execution and durability of the finished structure.
The only difference from ordinary screws is the high cost of professional fasteners for floorboards. A special milling cut allows the self-tapping screw to quickly enter the wood and hold firmly in the material.
Self-tapping screws for fastening floorboards - features
A self-tapping screw for a floorboard “works” much better than a conventional nail, which tends to slip out of the timber under the influence of operational loads. The self-tapping screw is held almost tightly in the wood.
However, not all screws demonstrate such stability, but only special screws for flooring. The tip of such a hardware product is equipped with a “spatula” - a tip whose shape resembles the cutting edge of a feather drill. Thanks to this tip, the screw is screwed into wood of any density without preliminary drilling at the installation point and gets stuck in it.
Wood fibers are woven into the screw groove on the self-tapping screw and do not allow it to move under the influence of transverse or longitudinal loads. Such a screw can only be removed by turning it by turning the screwdriver in reverse.
Moreover, hardware products with a countersunk head, a core diameter of 3.5 millimeters and a length of 35 to 55 millimeters are used as “sex” self-tapping screws. Such a screw will not “split” a thin floorboard and will pierce a fairly thick coating.
Moreover, the screw thread pitch (1.8 millimeters) and the groove angle (40 degrees) were selected for the most gentle installation mode. Therefore, it is simply impossible to split even the thinnest and most fragile flooring plank with such a self-tapping screw.
The coating of such a self-tapping screw also deserves special attention. It guarantees anti-corrosion protection for both the conventionally visible part - the cap, and the rod hidden in the board. A coating based on copper and zinc is applied to the self-tapping screw with a micron layer (using the electrolysis spraying method), so every square millimeter of the product is covered with such protection.
Scheme for fastening the board with self-tapping screws
We have already figured out what screws to use to secure the floorboard, so let’s move on to a review of the flooring installation technology.
Interfloor and basement floors can be assembled using concrete slabs or beam structures sheathed with a finishing and rough layer of lumber. As the first (rough) layer, a planed board 5 centimeters thick or an oriented strand board about 2 centimeters thick is used.
An additional layer of thermal insulation (polystyrene film 1-1.5 millimeters thick) is rolled out on top of the rough coating, on which laminate, parquet, linoleum or floorboards are laid.
To fasten the finishing coating, as well as to fix the “subfloor” to the sheathing, the “floor” screws we are interested in are used. Moreover, fastening is possible both through a board, when a self-tapping screw pierces the surface of the covering at a pre-drilled point, which is then sealed with a “hatch” made of the same wood, and through the lower edge of a tongue-and-groove lock cut at the side end of the board.
However, the direct fixation method will still be more reliable, and the operation itself will be much faster.
Well, in practice the process looks like this:
- On top of the heat-resistant coating, along the walls, boards are placed, laying them on the end. This creates a gap between the first row of boards and the wall, which will then be closed with a plinth.
- Next, the first row of boards is laid along the wall, which is mounted with emphasis on the masonry located at the end. The second row is laid staggered - the transverse seam should overlap with the entire board from the previous row. And so on.
- After 3-4 rows, the boards are “knocked down” together, moving them towards the wall. After this, you can start drilling secret holes and fixing the board with a self-tapping screw, followed by sealing the fastening with veneer made of the same wood. Self-tapping screws are screwed in in increments of 30-40 centimeters, but at least two pieces per board.
After the operation is completed, the finished surface is shaded with “stain” and opened with varnish, which will fill the gaps between the boards and finally secure the veneer “hatches” over the secret holes.
Important Tips
Scheme for fastening floor boards with screws
Whatever types of fasteners are used to fix the floorboards, during the installation process it is simply necessary to take into account the following points:
- The distance between nails (screws) during fastening of boards should be 25 cm;
- The floorboards should be pulled together as much as possible, but a technological gap of 20 mm should be left between the boards and the walls in case the wood expands;
- When using non-galvanized fasteners, it is advisable to “recess” their heads into the wood, and then lubricate them with silicone or sealant.
Laying technology
Step-by-step installation
The classic version involves fastening the boards along the joists. It needs to be mounted on a beam with a cross-section of 50 x 70 mm, while the load-bearing elements are placed in increments of 70 cm.
Installation instructions:
- lay the boards forward with the protrusion and the ridge towards you;
- the first is fixed with self-tapping screws so that the attachment point is hidden behind the baseboard;
- other elements are fastened with hardware at an angle into the ridge, the joining of short boards is done on the log;
- The surfaces of the fixed strips are sanded and varnished several times.
Sand the area along, across and diagonally. There are wax-based varnishes to reduce hygroscopicity. Skirting boards are stuffed around the perimeter, and wooden or plastic products are used.
What is Bowrench?
This device can be used for arranging the floor of a car body or the base along the joists.
Bowrench is a special device for tightening floorboards with uneven edges. The tool is made from a profile pipe with a square cross-section. It consists of three main parts:
- metal handle;
- support bar;
- tightening guide.
The support bar and the tension guide are fixed at a short distance from each other. In this case, metal rods are attached perpendicularly to the support bar, thanks to which the tool is securely fastened to the joists. As the handle turns, the tension guide creates pressure on the floorboard. As a result, the board is firmly pressed against the already fixed planks.
Such a device can be used to arrange the floor of a car body or the base along the joists.
Laying options
Methods for laying floorboards are divided into the classic one - using logs, as well as the new method - on a prepared surface with glue and self-tapping screws.
Installation on joists
The installation method on logs is suitable for a room with high ceilings or for a house with wooden floors. This is due to the fact that when the coating is installed on the joists, its thickness becomes significant (at least 10 cm). In this case, the board itself must be at least 3 cm thick.
The sequence of work should be as follows:
Scheme of laying on logs
- When installing the floor on the ground floor, the base is first waterproofed. Roofing material is best suited for this. When laying, it is necessary to ensure soldering of joints, as well as overlap on the walls;
- At the next stage, logs are installed. A 60 x 60 mm beam can be attached to the base. If fastening to it is not possible, then a 100 x 100 mm beam should be used. When installing a 35 mm coniferous covering, the distance between the beams should be 6 - 7 cm;
- Adjustable joists can be installed on a rigid concrete base;
- Before laying the floorboard, you need to place soundproofing material in the cavity between the beams. Expanded clay, mineral wool, etc. are suitable for this. To completely eliminate the drum effect, it is necessary to lay a substrate - padding polyester, glassine or laminate;
Insulator between joists
- When installing, the ridge should be placed in front and the groove towards you. The baseboard should overlap the screws that secure the first board. If its length is not enough, then the joints should be placed on the joists;
- After installation, the boards are sanded and varnished. Grinding is carried out three times in different directions - perpendicular to the length, along the length and diagonally; (see also the article Peculiarities of floor scraping)
Floor sanding
Pine floor board
Adhesive installation
The technology for laying floorboards using glue is the same as laying parquet. The main difference is the additional fixation of individual boards with self-tapping screws. In this case, the holes are subsequently sealed with special plugs for the floor covering.
Installation diagram with screws and glue
The cost of laying floorboards in this way is slightly higher, however, it is most suitable for low rooms.
The main requirement for the base with this option is to ensure not only a perfectly flat surface of the base, but also the board itself, with the obligatory use of waterproofing and sheets of moisture-resistant plywood.
At the same time, the choice of glue is no less important than the choice of wood type for the floor.
To install half-meter planks, the following types of adhesives can be used:
- epoxy;
- polyurethane;
- dispersed.
It is better not to use dispersed adhesives for attaching hardwood boards. Long planks should be glued to the base with compounds based on synthetic resins, as well as various two-component adhesives (epoxy and polyurethane).
The main requirement for glue is strength and ductility. Any two-component types, as well as adhesive compositions based on polyurethane or modified synthetic rubbers, meet this requirement. When working with such substances, the instructions for use must be followed.
How to choose quality material
Installing a tongue and groove floor begins with choosing the material. First let's talk about sizes. The width of the floorboard varies from 70 mm to 200 mm. If you choose one that is too narrow, it will take a lot of time to install; if it is too wide, there is a very high probability that when it dries, the edges of the board will rise and the floor will turn out ribbed. The problem can be solved by grinding, but this requires additional time and money. Therefore, most often they take a tongue-and-groove board of medium width - 130-150 cm.
The choice of floorboard thickness depends on the distance between the joists
The thickness of the tongue and groove board is from 18 mm to 45 mm. It is not profitable to lay a thin one - so that it does not sag when laid on the joists, they (the joists) must be installed often. Therefore, lumber with a thickness of 28 mm, 36 mm, 45 mm is often used for flooring.
The tongue and groove board is sold in different lengths. The standard ones are 3 m and 6 m, but they produce 4 m and 5 m. The choice here is simple: the length of the material should be slightly greater than the length of the room in which it will be laid. Splicing in length is not very beautiful, that’s why they do it this way more often.
Choosing a wood type
The floorboard is made from pine and spruce, larch, oak or ash. Pine and spruce are not expensive, but their wood is soft. Traces remain from heels, fallen objects, and are pressed through furniture. In places of active movement, “trails” are formed over time. The situation can be saved by covering with wear-resistant varnish in several layers. If this option suits you, it’s a good choice.
Pine or spruce tongue and groove boards under varnish last a long time
A tongue and groove larch board is a more expensive material, but also more wear-resistant. The wood has a pronounced pattern and a pleasant color. Can be used uncoated or coated with oil-based formulations without creating a hard film on the surface.
Oak and ash are very beautiful hardwoods with dense, wear-resistant wood. But the price for them is completely inhumane. As in the previous version, floors made of these types of wood can be used without coating or with more gentle compositions.
Type of tongue and groove board and its characteristics
All lumber is divided into four grades:
- Class "Extra". Made from top quality material. There should be no brown or black knots, irregularities, cracks or other defects.
- Class A. Single stains are acceptable, otherwise no defects. The difference between different types of tongue and groove floorboards
- Class B (or AB). There may be brown knots, irregularities and spots.
- Class C. Irregularities, stains, black and brown knots, and a certain amount of through stains from knots are acceptable.
Grade C is used when constructing a subfloor. There are too many defects in it for a clean one. The remaining classes are suitable for fine coating, but which grade you choose depends on your financial capabilities - the difference between the classes is significant.
Humidity
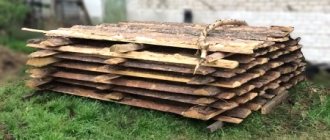
For comfortable installation of tongue and groove flooring, choose kiln-dried wood. In this case, after sawing, the raw material is kept in drying chambers, in which it is brought to a humidity of 8-14%. Such material is unlikely to dry out after installation - this is almost impossible, but the cost is approximately 50% higher compared to naturally drying material. This is due to the costs of equipment (drying chambers) and fuel for drying.
Kiln-drying tongue-and-groove board packed in polyethylene
Humidity is measured with a special device, which professionals have, and even then not everyone has. You can also try to determine by appearance. Most often, kiln-dried lumber is packaged in polyethylene so that it does not absorb moisture from the air. Naturally, the packaging must be undamaged and free of moisture (condensation on the inside). If you knock on dry wood, it makes a clear, ringing sound, while wet wood sounds dull.
What happens if you lay a floor made of tongue-and-groove boards with high humidity? The first thing you have to deal with is the formation of cracks as it shrinks. After six months or a year, the floor will have to be re-laid, removing the resulting cracks. Secondly, when drying, cracks often appear and the wood is twisted in different directions. Sometimes these curvatures can be compensated for by pressing the board harder, sometimes not. So you have to keep a couple of boards “in reserve”: to add when reassembling from shrinkage and to replace severely crumpled fragments.
Geometry
When choosing, be sure to pay attention to geometry. In addition to the fact that the thickness and width of the board must match, and there should be no significant curvature, you need to pay attention to the correct formation of the tongue and groove:
- The depth of the groove should be slightly larger than the tongue. In this case, laying a tongue-and-groove floor will be simple and you will not have to manually modify the lumber.
- Keep track of the distance from the top plane to the tongue and groove. It must match, and on all boards of the party. Then, immediately after installation, you will get an even coating that does not require additional sanding. Two tongue-and-groove boards should fit together without gaps
In normal production, this is all monitored, but in reality there is a very large spread - 5 mm is not the limit. It is clear that such a floor will have to be sanded. But the smaller the discrepancy, the smaller the amount of work will be. Therefore, try to find a manufacturer whose difference will be minimal.
Installing a board over an existing floor
Before laying, check the reliability of fastening of the elements of the old floor covering, duplicate the untrustworthy fasteners, and, if necessary, dismantle worn boards, instead of which inexpensive pine lumber can be laid.
Important. When installing boards over an old plank floor, they must be laid perpendicular to the direction of the worn coating
Installing floorboards using glue:
Finishers strongly recommend dismantling the old boards and making a screed. However, if the reliability of the base is beyond doubt, you can do without it, but with preliminary grinding. There is another way: installing sheets of plywood on old boards.
What wood is best to use?
The most durable wood for flooring is considered to be Siberian larch and oak. They steadfastly hold the line in the face of all the adversity that befalls them. Boards made from softer aspen or alder are placed in rooms with little traffic: in children's rooms, in rest rooms. Lumber from pine, fir, and spruce is rarely used for flooring. Most often they are used to construct a ramp, a rough foundation for finishing material.
The geometric parameters of lumber are selected taking into account the personal preferences of future owners. Based on strength criteria, they often prefer boards with a thickness of 40 mm. However, it should be remembered that when buying thick, rather expensive boards, you should not save money by cutting costs by purchasing raw material. A thick floorboard that has not been kiln-dried can cause the screws to “fly out.”
2nd grade lumber - boards with knots and a bright structural pattern
The choice of a certain grade of lumber depends on the purpose of the room, the goals of the owners and the intended methods of subsequent finishing. High-quality products have a smooth surface with a beautiful structural pattern, which after installation can only be opened with varnish. There are lovers of the natural beauty of wood with a pattern of knots; they will like grade 1 or 2. It makes no sense to buy material higher than grade 3 for painting.
They prefer to make floorboards from tongue-and-groove material - boards with tongue-and-groove devices for tight joining and with longitudinal ventilation vents
Non-grooved material is now rarely used. Boards with straight edges, connected end to end, will disappoint the owners with the curvature of the surface and cracks after a short period of operating time.
Floor joists: dimensions, installation
Logs are long bars of a certain cross-section and made of various materials. In construction, you can use a support made of metal, plastic, reinforced concrete or a compound containing synthetic resin. However, most often craftsmen use wood logs due to their reasonable cost and fairly good technical characteristics.
Wooden floor joists can be made from various softwoods or from more moisture-resistant larch. The latter is considered the strongest and most durable material for making timber.
Important: grade 2 or 3 timber can be used as a floor joist. This will not affect the quality of the wood floor lathing in any way.
But you need to pay special attention to the moisture content of the board. Since material with a moisture content above 20% is at risk of shrinking and drying out during its service life
Is it necessary to talk about what will happen to the floor then?
Installation requirements
The floor structure is subject to serious loads more often than others. In this regard, poor-quality fixation of the lamellas leads to their rapid loosening and the appearance of squeaking. Over time, if no measures are taken, the gaps between the boards will increase, and the gradual destruction of the structure will begin.
Wooden floor in the interior
Therefore, when installing a plank floor yourself, special attention should be paid to the choice of fastening method, taking into account the purpose of the room and the upcoming loads. To make the structure rigid, strong and durable, you need to follow some recommendations, which will be discussed below.
When making a plank floor, the following should be considered:
- The flooring is manufactured using the floating method, which means that there must be a gap of at least 1 cm between it and the perimeter walls, as well as protruding structural elements.
- Logs are an important part of the structure, affecting the evenness of the future floor, so special attention is paid to their location in space - the elements must be located in a single horizontal plane.
- When joining lamellas along the length, the joints are placed staggered (in a checkerboard pattern). Each joint should be located in the center of the joist.
- When choosing a board, first of all, take into account its humidity level - high-quality dried material will not bring unpleasant surprises.
Construction of a plank floor on joists
On what basis is it better to lay tongue and groove?
After purchasing tongue and groove boards, you can proceed to laying them. As a base you can use:
- Wooden logs fixed on top of any covering - screed, plywood, wooden floor. Also, logs can be laid on brick supports.
- Concrete floors with screed.
- Moisture-resistant plywood.
- Old wooden floor.
- Subfloor made of tongue-and-groove boards or low grade lumber.
The gold standard in construction is the laying of tongue and groove boards on pre-fixed joists. They allow you to efficiently tighten the boards during installation and prevent further floor deformations. Therefore, we recommend that you choose this option.
Features of screws with a cutter
An example of a wood screw with a drill at the end.
In the process of fixing the floorboards to the base with nails, a hole is first drilled in the wood. This way you can prevent the boards from cracking. The procedure for covering subfloors with wood can be simplified by using special screws with a cutter at the end.
Their advantages include:
- Presence of a protective layer. Fastening elements can be safely used for cladding the car body and open areas. They have a protective layer that prevents the metal from oxidizing even in direct contact with water;
- The presence of a milled tip. The screws are made with a milled edge, which allows them to be easily screwed into wood without first drilling a hole;
- Lack of threads in the area near the “cap”. Self-tapping screws do not have threaded threads near the head, which ensures a more durable tightening of floorboards with joists.
What are they needed for?
Laying wooden beams as lathing under the future floor allows you to strengthen the entire floor structure as a whole. In addition, noise and heat insulation materials are placed in the distance between the joists, which greatly improves the characteristics of the floor.
Properly installed beams and the distance between them ensure sufficient ventilation of the underground space of the house, which means that the wood will not rot over time. Especially if the building is located on an area with high groundwater. How to properly install logs and calculate the optimal distance between the sheathing beams is discussed below.
Planoplan
Instructions for laying parquet boards
Another online service for creating an interior. The catalog contains real furniture, not something created by programmers. You can create a drawing of an apartment as a background and drag and drop images onto it. The layout can be your own or standard.
In objects you can change the texture, color, add matte or gloss, change the scale, and some spatial parameters. There is a PRO account, which has wider capabilities.
There is no need to pay for use.
Disadvantages: the service only works online.
Website: https://planoplan.com/
Features of laying floors using glue
This installation method is widely used in rooms with low ceilings and can only be carried out on a solid and smooth base. The process is very similar to laying parquet, but differs in that the planks are additionally secured with self-tapping screws. To understand how to properly attach a floorboard with glue, you should consider this technology in more detail.
- First of all, the base is covered with waterproofing material, on top of which moisture-resistant plywood with a thickness of at least 18 mm is laid. It is screwed to the subfloor using screws or dowels. Before attaching the floorboards, the prepared surface is thoroughly cleaned of dirt and dust.
- Using a notched trowel, glue is applied to the base, where all the flooring elements are carefully joined.
- Additionally, screws can be screwed into the grooves of the boards to ensure their immobility.
- In some cases, for a stronger connection, the grooves are also coated with glue, after which they are placed on the tongues of the previous row.
Fastening with clamps
Some types of boards come with special clamps that fit into a slot on the inside of the board. These elements are designed to connect boards to each other. So, how to lay a floorboard using this fastening method?
To do this, you should adhere to the following technology:
- Waterproofing material is laid on the subfloor, which should be secured to the walls with construction tape.
- The clamps should be driven into the cracks of the boards laid in the first row using a hammer. This is done in the direction of the tongue.
- The ends of the planks are coated with glue, and then the first row is laid.
- Wedges about 1 cm thick should be inserted between the wall and the boards.
- Clamps are also attached to the second row of boards. The floorboards are secured in place by gently tapping a hammer through a block along the edges of the row.
- The remaining rows are laid out similarly.
- Then the wedges between the wall and the covering are removed.
- Installation of baseboards is in progress.
How to attach a floorboard
But a self-tapping screw screwed into the board will hold very well.
But there are different types of self-tapping screws, and not all of them can hold firmly in wood; flooring screws are suitable for this purpose. At the tip of such a self-tapping screw there is a special tip - a spatula; it is somewhat similar to the cutting edge of a feather drill. With the help of such a tip, the self-tapping screw is screwed into any type of wood, regardless of its density, and there is no need to drill out the wood first, it will not get stuck in it.
Wood fibers begin to weave into the helical groove, which is located on the screw shaft, and therefore it does not move when exposed to loads, both transverse and longitudinal. You can unscrew a self-tapping screw of this type only with a screwdriver installed in reverse.
For floorboards, self-tapping screws with a special hidden head are used; its diameter is three and a half millimeters, and the length ranges from thirty-five to fifty-five millimeters. This self-tapping screw will not split even a thin floorboard and will be able to pierce a fairly thick coating.
It is also worth paying attention to the coating itself. The coating guarantees against corrosion both the visible part of the cap, as well as the rod, which is hidden in the board
The screw is coated with a base of copper and zinc, and it is applied in a micron layer, resulting in every millimeter of the screw being covered.
Why is the floor secured with nails and not self-tapping screws?
Why do you use nails and not self-tapping screws for wooden floors?
It seems that everywhere it goes without saying that the joists are attached to the boards with nails. The old fashioned way IMHO. I'm going to mount it with self-tapping screws (the plank floor in the loggia). If they dry out later, you can sort them out.
sersam wrote: Why do they use nails and not self-tapping screws for wooden floors? It seems that everywhere it goes without saying that the joists are attached to the boards with nails.
Who said that? Self-tapping screws, and it is desirable that the upper part of the body is without threads, i.e. the entire threaded part went into the jog
Like who? Yes, take any book, an article on the internet) So I’m asking - it’s much more convenient to use self-tapping screws)
sersam wrote: Why do they use nails and not self-tapping screws for wooden floors? It seems that everywhere it goes without saying that the joists are attached to the boards with nails.
An old, long-used method is “sloping” nails.
VekRosK wrote: An old, long-used method is nails “at an angle.”
I. Is it better than self-tapping screws or worse? I also need it at an angle, at the end of the board. Are self-tapping screws suitable for this?
2sersam IMHO a nail is several thousand years old, but how long is a self-tapping screw (more precisely, a screw)? Nails are cheaper than self-tapping screws. It is easier to disguise the head of a nail (for example, flatten it on the sides, hammer it along the fibers and drown it with a hammer - the wood will tighten the head). You need to drill a board for a screw, but not for a nail, productivity is many times higher. But from the point of view of disassembly, screws are, of course, more convenient.
sersam wrote: It seems that everywhere it goes without saying that the joists are attached to the boards with nails.
Well, yes. Well. still understood)))
sansan21 wrote: 2sersam IMHO a nail is several thousand years old, but how long is a self-tapping screw (more precisely, a screw)? Nails are cheaper than self-tapping screws. It is easier to disguise the head of a nail (for example, flatten it on the sides, hammer it along the fibers and drown it with a hammer - the wood will tighten the head). You need to drill a board for a screw, but not for a nail, productivity is many times higher. But from the point of view of disassembly, screws are, of course, more convenient. Vice versa