To make a real Russian bathhouse, you need to know how to cut a log house. This structure retains heat well and is also environmentally friendly. When preparing for the manufacture of a log house, it is recommended to calculate the amount of material used, what to make it from, and the main methods of assembly and laying. Also, one of the important parts of a log house is insulation. You need to immediately decide on the materials, as this will help save time and money.
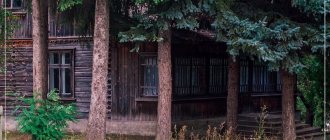
Log bathhouse Source www.kedrovdom.ru
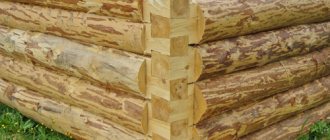
Log house in a bowl
One of the common ways to make a log house with your own hands from a log is the method of assembling it into a bowl. It is most often used in the construction of a bathhouse, since due to its design features it retains heat well. In this assembly method, special semicircular recesses are made along the edges of the log, into which the upper elements of the structure are laid.
There is a 25-30 cm protrusion outside the corner, and the cutout is made to fit the size of the log that will be placed in it. This is necessary to increase the density of the connection, which will prevent the building from falling apart, and will also reduce the likelihood of heat loss due to drafts in the cracks. Thermal insulating material is placed between the parts.
Log house in winter Source skstroyider.ru
Technology selection
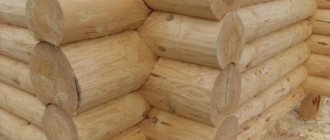
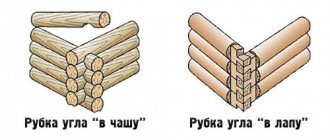
There are 2 main ways to cut a log into a bowl:
- “V oblo” (Russian cutting) is a method in which a cut is made in the lower crown. It can be smooth or with a spike (fat tail), which prevents the structure from moving.
- “In the okhlop” (Siberian felling) - in this method, a bowl is made at the bottom of the log, which is placed on top of the bottom.
The first method is used in most buildings that were made in the old days. For those who do not know how to build a bathhouse from a log with their own hands, it is recommended to use the “hollow” method, since during long-term construction moisture does not form in the bowl due to precipitation. It is also considered simpler than Russian cutting.
Types of log house in a bowl Source samdizajner.ru
Cutting log cabins from timber
The classification of types of corner joints when cutting log cabins is the same as for log cabins. A frame made of timber can be with a remainder (“in a bowl”) or without a remainder (“in a paw”), locks have the same names: “in an okhryap”, “in a fat tail”, “in a half-tree”. The only name that cannot be used is “in the oblo”: the timber has a rectangular shape and it is not possible to make a rounded (oblo) notch in it.
However, there are methods of corner notches that are unique to this type of building material - “on tenons” (root or insert).
The connection of beams in a log house (with or without a remainder) is called joining. Let's look at the main docking methods.
Joining the timber with the remainder
"Half a Tree"
Half-tree connection
This joining method (the simplest) involves cutting a rectangular groove with a depth of half the thickness of the timber - hence the name.
"In the fat tail"
Fat tail connection
An additional spike ensures a strong and reliable joining of the beams. Carpenters with a high level of skill are required to perform a quality connection of this type.
"To the brink"
Connection in okhryap
A connection in which the main task is to correctly calculate the width of the jumper. When working with timber, due to its standard geometry, cutting can be done using a template (as opposed to working with a log). Error-free sawing significantly speeds up work.
Joining the timber in the corner without leaving a trace
When building houses and bathhouses from timber without residue, the traditional types of locks are “half-wood” (with smooth parallel edges) and “paw” (with edges shaped like a trapezoid). The second type of connection is a little more complicated, but it guarantees greater protection of the corner from drafts.
Connection of timber: a - into half a tree, b - into a paw
Spiked joints (in a warm corner)
With this method of cutting timber, a tenon inserted into the groove protects the corner from freezing and blowing due to the formation of an air lock. Connecting the timber “in a warm corner” in itself guarantees the absence of cracks, and an effective addition is punching all joints with jute.
Cutting “in a warm corner” is the most commonly used method of joining beams in Russia.
Straight tenon
Connection in a warm corner - straight tenon
Straight tenon is used when constructing buildings with a wall equal to the length of the beam. When cutting a log house, it should be taken into account that the size of the groove is determined by the size of the tenon, that is, balance must be maintained. If the tenon is large, then the groove, accordingly, should also be the same. A groove that is too deep can weaken the beam, which will affect the strength of the connection, so careful calculations must be made before cutting.
A properly designed corner can withstand wind and other loads well.
The uniform shrinkage of a timber frame guarantees the preservation of the weak part of the timber in the corner.
Half swallowtail
Connection in a warm corner - half dovetail.
A distinctive feature of this type of lock is a spike up to 5 cm wide, shaped like a cone. The cone securely holds the beams, which makes the frame more durable. The limit on the size of the tenon is set so that during the shrinkage process the timber in which the groove is made does not crack.
Making a half dovetail tenon is not particularly difficult for a specialist. To speed up work, you can use a template. This connection is used when the length of the wall exceeds the length of the beam.
Corner tenon
A triangular-shaped corner tenon is used quite rarely, since the knot is less durable, although it does not have through gaps. The technology for sawing a corner tenon is no different from those mentioned above. A builder who is skilled in working with a chainsaw only needs to turn the bar slightly to obtain this type of connection.
Advantages and disadvantages of a log house in a bowl
The main advantages of the log house:
- High strength of the joints of the structure, which ensures its stability.
- Increased thermal insulation of the room, which is created due to the low thermal conductivity of wood and protection from blowing through the corners of the structure.
- Environmentally friendly material.
- Possibility of constructing a building of several floors.
- Decorative appearance.
Multi-storey log house Source pokter.ru
The disadvantages of a log house in a bowl include:
- The difficulty of manufacturing structural elements and assembling a building without experience. If a log house is made by a person without skill, then such a structure may have cracks, begin to rot, and also crack or fall apart.
- Due to the protruding corners of the structure, it is difficult to carry out external finishing.
- Wood for log houses must be treated with insect repellents, as well as antiseptics (prevent the formation of fungus) and fire retardants (reduce the flammability of the material).
- Protruding parts of the log reduce the useful length of the crown, which increases wood costs. Because of this feature, this type of log house does not require additional insulation of the corners. Therefore, the difference in price when assembling a log house into a bowl or into a claw will be unnoticeable.
The finished building has a smaller usable area due to the thickness of the walls and protruding corners. This should be taken into account when calculating the size of the foundation and the length of the logs.
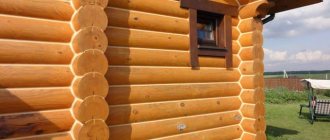
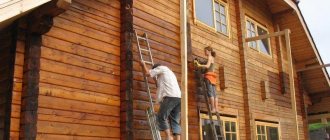
Why is it difficult to process the external part? Source royalwoods.ru
At the beginning began
Experts never tire of repeating: any construction must begin with a project. And in the case of a log house, this should not be a three-page sketch, limited only to breaking up the wall elements, but a full-fledged detailed document with calculations of expected loads, indicating the size of the crown joints and gaps in the cups, etc. It follows from this that the preparation of the project should be entrusted to an architect , specializing specifically in log buildings and well acquainted with the requirements of the relevant SNiPs.
Moreover, this also explains another important point. “Flying squads” of “broad-profile” craftsmen usually work on the basis of just sketchy “projects”, sometimes drawn by the customer himself and little reminiscent of professional construction documentation, so it is strongly recommended to order the construction of a log house only from specialized companies that have solid experience in field of wooden house construction.
Of course, it will cost more, but in this way you will save yourself from very likely and very serious problems that cannot be solved without spending a lot of money, time and nerves. Or maybe they will turn out to be unsolvable in principle. (For example, with the foundation laid as for a high-rise building, you can’t do anything and you won’t get back the money spent on it. Or if you have to put support pillars under the ceiling so that it doesn’t collapse, then goodbye to the transparent, open interior - after all, the reliability of the structures and safety is incomparably more important.)
However, the “order and forget” principle does not work even if you contact a specialized company. The responsible customer will have to master a lot of specific information and terminology (just look at the methods of cutting corners - “in the paw”, “in the head”, “in the hook”, etc.) in order to communicate with the performers knowledgeably, competently control the process and do not allow yourself to be forced into wrong decisions and unnecessary expenses.
Houses made by hand, which does not disturb the structure of the tree, will last longer and will be warmer than those made on machines. In central Russia, houses for year-round use are built from logs Ø 22–24 cm
Materials and tools
To know how to cut a log frame into a bowl with your own hands, you need to choose the right cutting tools. To mark the logs, a tape measure, a level, a chemical pencil and a carpenter's line are used. This is a tool with two rigid plates with sharpened edges and a handle with which the distance between the ends is changed. This tool is designed to draw 2 parallel lines. Also, to cut out the bowl you will need:
- Carpenter's axe.
- Wood chisel.
- Chain saw (electric or gasoline).
- Hand saw.
- Hammer.
To blacken the recess when fitting logs, you will need coal. The cutout requires chemicals to treat fungus and insects, as well as insulation.
Tools for log house Source izba.spb.ru
How to install openings for doors and windows?
Openings can be made in two ways: after the work is completed, and during construction.
In the first option, the installation of openings is carried out after completion of all work; for this, gaps are made in the crowns at the intended location. After installation is completed, these openings are cut out using a chainsaw.
In the second option, the openings are made during the process of laying logs; special bars and grooves are used for this; this method takes a lot of time and money.
Metal materials cannot be used as casing, as heat will escape through them. To install the socket on the end parts of the logs, a vertical tenon 50*50 is made on each side. A pigtail is installed on it, and there is a groove on its reverse side.
How to caulk a log house
To know how to assemble a log bathhouse from logs with your own hands, you need to understand what kind of heat-insulating material is required to fill the space between the structural elements. It will help prevent moisture from penetrating into the bowl, as well as enhance protection from wind and cold. In order to caulk cracks and cavities, the following is used:
- Moss . An environmentally friendly material that can retain heat, withstand temperature changes, and also remove excess moisture, which prevents the appearance of fungus. It is believed to have antimicrobial and healing properties, which manifest themselves when the structure is heated.
- Tow . As the log dries, it becomes damp and begins to rot. Therefore, after the structure dries, it is cleaned and re-laid.
Roof construction
First, the beams are laid on the walls.
The beams are secured and the rafter legs are installed at a distance of 1 meter. A corner cut is made near the ridge for a tight connection.
Boards are nailed to the feet of the rafters or lathing is made.
Then lay the main roof covering according to the instructions for the selected material.
The ridge is covered with galvanization to protect it from strong winds and precipitation.
After completing all the work, I begin the interior finishing, namely the construction of floors.
Types of pillars and their installation
The pillars are:
- corner;
- window;
- intermediate;
- door
They are arranged according to their names, the thickest elements are the corner ones, the thin ones are the intermediate ones.
Corner posts are placed in a pocket, the depth of which is up to 7 centimeters. The remaining pillars are installed at a depth of about 3 centimeters. Up to three edges are made on the log house; after shrinkage occurs, they begin laying the remaining pillars.
At the end, rafters are installed; for this purpose, walkways, jibs and nails are used as fastenings. The elements are laid on the walkways, the upper part is fastened with nails. The spikes of the rafter elements are placed in pockets, fixed with jibs, and the legs are secured with staples.
After all work is completed, the building is left for 1 year to shrink. To prevent the doors and windows from skewing, and to prevent the material from deforming, it is necessary to make gaps that disappear over time. While shrinkage occurs, you can construct the floor or rafters for the roof.
After shrinkage occurs, tow fills all the resulting gaps.
Video description
In this video you will see how to caulk a log house with tow:
- Jute . An environmentally friendly type of insulation that retains heat well, but has a short service life (3 years) due to the fact that it strongly absorbs moisture.
Old jute is difficult to get out of the cracks, so it is rarely used. There are also differences between types of jute. For example, tow is too hard and has low density. Because of this, it is necessary to caulk the log house in several stages to achieve the desired density.
Flax-jute contains 50% flax fibers, so it requires additional treatment to prevent insects and rot. Jute felt consists of 10% flax fibers, but has high flexibility and good density. It also requires additional insect repellent treatment.
- Lnovatin . Due to heavy treatment with insect repellent chemicals, it is not environmentally friendly. It has a service life of 3 years and is attached to the structure using a construction stapler.
Felt made of jute Source drevtorg.rf
See also: Catalog of house projects made from hand-cut logs and timber
- Synthetic compounds . They cost more than other materials, but are easier to use.
Such substances are used in combination with natural material (cord). To do this, the thread is placed in the gap and filled with sealant, which is leveled with a small spatula.
The disadvantage of this method of sealing log cracks is that when exposed to sunlight, the sealant will dry out and begin to crumble. To do this, the place of putty must be covered with planks.
Also, synthetic compounds harden and can expand and contract with temperature changes, which can lead to cracks in the wood. To avoid this, it is necessary to use elastic compounds.
The right combination of sealing materials helps avoid the formation of damage and fungus, and also increases the thermal insulation of walls. This is necessary when constructing buildings in cold regions or when assembling a bathhouse, since in such rooms rapid cooling of the air can be critical.
Synthetic sealant for log houses Source td-artemov.ru
What are they collecting for?
Logs or beams are not just stacked on top of one another, they are fastened together. It is impossible without fasteners. During the drying process, both the logs and beams “twist”. The installed fasteners hold them in place, preventing them from turning too much. If there is no fastener, the crowns fall out or in, depending on the direction of the prevailing forces. Most often this is observed on gables, in walls where there are windows and doors.
Loose crowns fall out
Fasteners can be metal or wood. It’s easier, of course, with metal ones - you don’t need to prepare them and it’s more familiar to work with them. But the metal does not change in size, and the wood dries out. As a result, the log house does not shrink during drying, but “hangs” on the studs. This leads to the formation of large gaps between the crowns. So metal pins are only permissible when assembling a log house from laminated veneer lumber: it does not dry out. Nails should not be used at all. They are not for the log house.
It is also not recommended to use pieces of reinforcement, spring units and, in general, any metal. Wood conducts steam, and it will condense on the metal with all the ensuing consequences (rapid oxidation and destruction of the metal, and wood “hangs” very well on rusty metal, another disease is the proliferation of fungi in a humid environment). So if you decide to assemble a wooden frame, it is assembled using wooden fasteners.
Nageli
Dowels and dowels are made from wood. Pins are long thin bars of round, triangular or square cross-section. More often they use round ones; holes of a slightly smaller diameter are drilled for them (1-2 mm less than the diameter of the dowel), into which the bars are hammered. For triangular or square ones, you need to select a larger drill diameter, and drilling with them will be very difficult.
Nageli
The length of the dowel is calculated depending on the cross-section of the beam: the height of the three crowns is multiplied by 0.8. If you have a beam 200*200 mm, then three rows is 600 mm, after multiplication we get 600 mm * 0.8 = 480 mm. The dowels should be of this length.
The most popular diameter/section of dowels is 25 mm or 30 mm. They are made from hard wood - birch or oak. Spruce resists torsional forces very well, so spruce can also be used. If you follow the SNiP standards, then the dowels must have a moisture content of no higher than 12%, they must not have knots or other defects, and they must be treated with antiseptics/fire retardants before use.
Drilling must be strictly vertical
Place the dowel at a distance of 200-600 mm from the edge of the log/beam, and then every 1.5-2 meters in a checkerboard pattern. They are placed strictly vertically, in the middle of the log/timber. To prevent the crowns from hanging on the fasteners when the wood dries, the holes for them are drilled 2-3 cm deeper. To make it easier to track the depth of the hole, wrap a strip of masking tape or bright electrical tape around the drill. They are used to navigate. Then, even with a significant reduction in size, the log house will sit evenly.
Assembling a log house on a dowel - installation diagram
When driving in dowels, it is important to control the effort and hit strictly from above so as not to crack the wood. To make it easier for them to “fit” into the holes, they are dipped in oil (you can use it for mining).
When assembling a log house from timber or logs, the work technology is as follows:
- The first two or three rows are fastened with dowels, spacing them at the required distance.
- Next, two more crowns are laid and fastened to the top row of the previous package. Only now you move the dowels so that they don’t end up on top of each other, but move in a checkerboard pattern.
- Next, two crowns are placed again and connected to the top beam of the previous package (also shifted).
Now a little about the prices of dowels. They are usually sold individually. The price depends on the size and type of wood, but we can definitely say that they are expensive. To save money, people buy rake handles (they have the right diameter), cut them into pieces of the required length and use them. Just note that knots and other wood defects must be cut out.
Square dowel
It’s even cheaper to buy a board of suitable wood (dry, “elite” grade, without knots or defects) and cut it into bars of the required size. For example, you can buy a 50*25 mm board, make 25*25 mm bars from it, cut it into pieces of the required length, and slightly sharpen the edges. Apart from the time investment, this approach is the least expensive.
Dowels
Assembling a log house using dowels is less popular because it takes more time. They only hold two crowns together, so there's more work involved.
Assembling the log house with dowels
You need to cut holes for each dowel in the top and bottom logs. Install the prepared fastening bars, then carefully “put on” the upper crown. The work is precise, long and hard.
What does a dowel look like when cut?
Main types of wood for felling and their processing
To know how to cut down a bathhouse, you need to select the appropriate types of wood for production. Most often, coniferous types of wood (pine, spruce, larch) are used for the manufacture of such structures. It is best to choose material from cold regions (for example, Siberia), since in winter the flow of sap along the trunk is least. This reduces the risk of cracks forming when drying the material.
Also, trees that are felled in winter have a higher resin content, which increases its resistance to rot. The diameter of the logs must be at least 21 cm (but not more than 35 cm), and the length of all elements must be approximately the same to simplify processing and assembly. All wood must be smooth and free of knots. The area from the root to the beginning of the crown of a pine tree is best suited for this.
Wood for a log house Source sm-news.ru
See also: Catalog of companies that specialize in log baths and sauna vats
When laying structural elements, it is recommended to make the first 2-3 crowns from larch, as it has high resistance to moisture. When choosing a material, it is not recommended to use crooked trunks or wood with cracks and rot. The bark should be removed with a scraper, as it hardly touches the working surface underneath. After this, you need to let the material dry for 3-4 days. Also, before cutting, the wood is treated with an antiseptic and impregnated with a fire retardant.
Processed wood for a log house Source im0-tub-ua.yandex.net
Construction of a wooden frame: requirements for materials
Finally, we would like to consider some important requirements for the wood from which the house is planned to be cut:
- Log harvesting time. The best option is considered to be logs cut down in winter (during the cold season, the movement of tree sap slows down and the wood dries quickly and efficiently).
- Condition of the logs. The cut logs should not be rotten or rotten, should not have suspicious spots, wide or deep cracks and crevices.
- Wood species. Coniferous trees, larch, and aspen are considered ideal options for constructing a log house.
- Log shape. It should be as close as possible to an ideal cylinder; the difference in log diameter should not exceed 1 mm per linear meter of material.
A wooden log house, built in compliance with all technologies and rules, will serve you for many years, protect you from the cold in winter and provide coolness in the summer heat.
Material calculation
How to make a log house and calculate the amount of money spent, if the dimensions of the proposed structure are known - this is an important point in the manufacture or ordering of a finished building. For example, for a bathhouse with dimensions of 3x4 m and a height of 2.4 m with a frame in a bowl.
Due to the fact that the corners of such a structure will protrude 25 cm on each side, when calculating the length and width of the building, 50 cm is added.
If the diameter of the log is known (for example, 24 cm), then the volume of wood can be calculated using the formula 3.5 x 4.5 x 2.4 x 0.24 = 9.072 m³. During assembly, a groove is made in each log, which differs in width from 0.5D to 0.67D. This reduces the final volume of wood, so this formula requires further refinement.
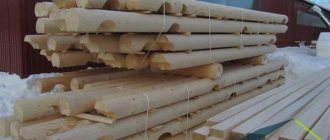
Wide logs for a log house Source promdrevo.ru
Marking and cutting logs
To know how to cut down a log house, you need to understand the method of marking logs. To do this, they need to be laid perpendicular to the lower crowns. It is recommended to use staples to secure the structure. This will prevent the log from turning around its axis. Next, using a line, you need to draw the contours of the bowl and longitudinal grooves using several rules:
- One leg of the feature should rest on only 1 log.
- The distance between its points should be half the diameter of the log, depending on the log house used: “to the edge” - the upper one, and “to the edge” - the lower one.
- It is recommended to start drawing with a bowl and end with a longitudinal groove.
- The prepared logs are placed in bowls, and after that it is necessary to process the joint: if there is a large gap, insert wedges, if it is small, remove the excess layer.
How to make a log house of a wooden house with your own hands
The first thing you need to learn is the professional language that carpenters speak and in which we will communicate with you throughout the book. So let's start with terminology.
It is known that the house must stand on a foundation, and one should start with it, but this is a slightly different topic, so the figure shows temporary linings instead of a foundation 1. When the opportunity arises (even after a few years), they will not prevent you from placing a permanent one under the frame foundation.
A log house is a log structure without a floor, sheathing or roof, i.e. the main structural part of the house. It consists of several crowns, the number of which determines the height of the log house. The crown is a rectangular structure consisting of perpendicularly laid logs, fastened together at the corners with a locking joint.
The first crown of the log house is the frame crown 2, the second and main one is the lower frame 3, into which logs 4 are cut. The logs tighten the bottom frame and carry the floor, and the frame crown serves to strengthen the bottom frame and protects it from rotting. Over time it can be replaced. The crowns from the bottom trim to the beginning of the window opening are called sill crowns 5. Next come the window crowns 6, then the above-window crowns. The first crown above the window is the closing crown 7. The structure that serves as the basis for the roof is called the top trim. It consists of two upper purlins 8 and rafters 9. What rafters 10 and corner veranda posts 11 are is clear from the figure.
Let's agree to call the logs in the crowns, lying perpendicular to the purlins, transverse, and the crowns in which there are window or door openings - split. The logs that form the openings are called “short logs.” They can be of different lengths depending on the location of windows and doors.
Traditionally, as a log house was being built in Rus', logs were processed at height. In some films, you have probably seen how a carpenter, sitting astride a log, dashingly and quickly wields an ax. Let's take a closer look at what operations it performs. First of all, he needs to drag the prepared log upstairs. Then, having made the marking, cut along it and lay the log in its designated place. Agree, such work at height requires great qualifications and skill. As a novice carpenter, you are unlikely to be able to process a log with the required accuracy the first time. You will probably have to repeatedly remove and re-lay the log, adjusting it to its location. The slightest carelessness during such manipulations leads to injury. You can make your work easier and significantly protect yourself by installing scaffolding. They must be made comfortable and reliable, supporting not only your weight, but also the weight of the log being processed. Therefore, the installation of such scaffolding requires a lot of additional building material and time. But even if all the requirements are met, working at height with an ax (including on scaffolding) without sufficient skill is dangerous!
We suggest that you build the log house in parts, each of which is the height of a person. This method is called felling followed by relaying. It consists in the fact that the individual parts of the log house, after being manufactured on the ground, are disassembled and transferred to the main frame. The transfers will allow you to carry out all work with an ax while standing on the ground, and external scaffolding will not be needed. In this case, we use two relays, since, in our opinion, this is the best option for a novice builder. Don't be embarrassed by the time spent on additional disassembly and assembly of the crowns. They are more than compensated by the convenience and safety of work, because a well-equipped workplace is the key to high labor productivity. You will learn more about how translation is carried out later, but for now we will continue to get acquainted with the terminology.
The part of the tree trunk adjacent to the root is called the butt. When starting to cut down a house, you should know that there is no such thing as a perfectly straight log. Any log has a flatness, that is, it decreases in diameter from butt 1 to top 2. Therefore, when laying logs one on top of another, it is necessary to alternate butts and tops.
When assembling a log house, in order for one crown to fit more closely to the other, a groove 3 is selected along the logs. Another frequently performed operation when processing logs is the manufacture of edging 4.
The end of the log, hewn from two parallel sides, is called a “block” 5, the resulting planes are called cheeks 6, and the untreated, convex surface is called wane 7.
The main structural elements of the log house, which serve as locking connections of the logs, are the “paw” 8 and the “dovetail” 9. For additional fastening of the logs in the crowns, a dowel 10 - pocket 11 connection is used, and the posts and rafters are securely installed using tenons 12.
You should pay special attention to the selection of tools . The most important of them is carpenter's ax 1. It should suit your weight and fit comfortably in your hand. The purpose of such tools as chisel 2, plumb line 3, hacksaw 4, two-handed saw 5, staple 6, bayonet shovel 7, as well as tape measure 8, ruler 9, square 10, colored pencils or wax crayons 11 should not raise questions. Low-stretch cord 12 and awl 13 are used for marking, and level 14 is used to check horizontality. To make a level, take an elastic rubber hose 5-8 m long, about 1 cm in diameter, the ends of which are placed on two transparent glass tubes of the same diameter, 15-20 cm long. The resulting device is filled with colored water. In addition to the level, you yourself need to make a template 15 from plexiglass 2-3 mm thick and a line 16 - the main marking tools, as well as a “babu” 17 - the main “percussion” tool, made from a birch block with two staples hammered into it.
If you have the opportunity to purchase a chainsaw, don’t miss it. A chainsaw will make your work much easier and save your energy and time.
To avoid injuries and other “troubles” during construction, we suggest that you familiarize yourself with the pages of special work practices and safety precautions.
Construction must begin with logging
. It is best to use coniferous species - pine and spruce. Aspen is good for making log houses for baths and wells - it is not afraid of water. But you cannot use birch, as it quickly begins to rot and behaves very “capriciously” when processed. Since it burns well and produces a lot of heat, save it for your fireplace. After the forest is cut down, it needs to be debarked and dried.
| Design element | Number of logs | Log length | Log diameter |
| Cover crown | 2 pcs. 3 pcs. | 820 cm 620 cm | 30-50 cm |
| Bottom harness | 2 pcs. 3 pcs. | 820 cm 620 cm | 30-50 cm |
| Lags | 5-6 pcs. | 620 cm | 20-35 cm |
| Window sills | 10-13 pcs. | 620 cm | 20-40 cm |
| Split logs (window and door) | 22-27 pcs. | 540 cm | 20-35 cm |
| Trailing and above-window crowns | 5-9 pcs. | 620 cm | 20-35 cm |
| Upper purlins | 2 pcs. | 820 cm | 20-35 cm |
| Rafters | 7-9 pcs. | 720 cm | 20-35 cm |
| Rafters | 14-18 pcs. | 520 cm | not less than 10 cm |
| Veranda pillars | at least 2 pcs. | 300 cm | not less than 20 cm |
| Note: the indicated dimensions are selected with a margin for trimming. | |||
Now let's choose a location for the construction site. On the side of the future veranda, it is necessary to provide a place for assembling the components of the log house. Then you can begin marking the plan of your future home, which is done using a low-stretch cord and pegs. Our task is to get right angles.
BASIC RULE OF THE BUILDER - MARKING DETERMINES QUALITY
We will implement it as follows. We determine point 1. Set aside 800 cm from it and get point 2. On a cord 1600 cm long, measure 600 cm and tie a knot. We fix the ends of the cord at points 1 and 2. Taking the knot, stretch the cord and get the desired point 3. Similarly, we find point 4. We mark the resulting points with pegs and use a tape measure to check all the required distances and the equality of the diagonals with an accuracy of ~3 cm.
Next, we will make and install linings for the frame (temporary foundation) . Choose wooden chocks about 1 m long and at least 30 cm in diameter. Aspen is good for lining. It is resistant to dampness if it is pre-barked.
Pads must be installed under the purlins of the frame, near the corners of the frame, in order to ensure proper distribution of the load. The installation of the linings is carried out according to the level with an accuracy of ~5 cm.
Making an edging is the most common operation when processing logs . In order to perform it, you need to trim the log to size, select a side for the edging, position the future plane of the edging approximately vertically, and secure the log with staples. Don't be alarmed if the log has a curve. This will not prevent you from using it.
Along the plumb line at the ends of the log we draw vertical lines that define the plane of the edge.
We secure the cord using awls in the plane of the edge. Then we make a visual check, looking from the end of the log, and adjust the position of the cord. Using a colored pencil, we transfer the projection of the cord onto the log. To obtain the second edging line, we repeat the same operations, turning the log over.
After this, we secure the log for hewing with staples, but not tightly, so that we don’t have to knock them out later with a crowbar. Let's position the plane of the future edging vertically, make cuts and, having hewed the log, we will get an edging.
Having a chainsaw, instead of making cuts, you can make gashes, which will significantly speed up the work.
Finally, let's proceed directly to the manufacture of the log house . We begin to make a frame with eight-meter logs (purlins) of the casing, on one side of which there is an edging about 10 cm wide. With the edging, the purlins of the casing will rest on the linings. Now we need to process the ends of the purlins.
First, we cut out “boobs” 2/3-3/4 wide of the diameter of the log. The length of the “boob” L is a constant value equal to the maximum diameter of the logs of the log house.
At the end of the “boob” we select point 1, through it, according to the template, we draw a “paw” line with an extension into the house.
Similarly, according to the template, through point 2 on the outer cheek and through point 3 on the inner cheek, draw a “paw” line.
On the cheeks of the log we draw vertical lines spaced from the end by the width of the “boob” of the counter log, and we get points 4 and 5. We make a vertical cut to line 4-5.
Next, we cut out the “paw”, aligning its plane with the eye with the 4-2-3 line.
Then you should lay the transverse logs “blocks” on the “feet” of the purlins and, securing them with brackets, check and adjust the dimensions of the log house.
Now you can tightly staple the purlins with the linings.
Drawing is the parallel transfer of points of the connecting lines of the lower log to the upper one . The line width when drawing the “foot” of the flashing crown is chosen to be minimal, but such that the line of the “foot” of the transverse log does not fall on the wane.
During the process of drawing a log, the solution of the line cannot be changed! Let's draw the lines from top to bottom, mark the top of the “paw”, and then cut it out. Let's make a medium "boob" on the runs.
To make cutting out the cheeks of the average “boob” easier, we’ll make cuts.
Along the width of the “boob” of the transverse log, we will cut out a “dovetail” in the run. Using a line, we will transfer the dovetail lines to the “boob” of the transverse log and cut it out. Let's lay the middle transverse log on the purlins of the flashing.
Now let's take care of the bottom trim . Let's make “boobs” on the purlins of the lower trim and place them above the purlins of the casing crown. Using linings and a level, it is necessary to ensure that the upper parts of the purlins are horizontal and lie in the same plane with an accuracy of ~3 cm. It should be taken into account that the butts and tops in the crowns alternate. Let's secure the purlins with brackets.
For drawing, select a line solution corresponding to the maximum gap between the logs, plus 1-1.5 cm.
Let's check the selected line solution along the ends of the log. It should be greater than a distance of 1-2 at both ends. Point 2 is the border of the wane and the inner cheek.
Next, by drawing we will obtain the connecting lines on the top log from the inside and outside of the house.
Let's mark the tops of the “paws” for the transverse logs.
For further work, we need to master the operation of selecting a groove . We will make cross-shaped notches along the entire length of the groove with the “heel” of the ax, and select the wood with the “toe” of the ax along the lines of the groove. When these two operations are combined, a groove is formed.
After this, you should cut out the “paws” and, placing the log in place, check the tightness of its fit. To do this, the stacked log should lie on the inner cheeks with a slight overhang. When tipped over, it will easily fall into place. Then we return the log to its original position and evenly lay tow (moss) on the underlying log. Now you can finally lay the top log on it.
Next, three transverse logs of the lower trim should be made and laid on the purlins. To complete the bottom trim, all that remains is to embed the logs. On the purlins of the lower trim we will mark the places where the joists will be inserted. As the zero mark (upper level of the log), we select approximately the middle of the transverse log of the lower trim. Let's move the zero mark to the corners of the log house and make notches. Let's put the finished logs in place, outline them, and then cut out their outline to the level of the insert. Let's hammer the logs with a "woman".
During your work, you may encounter typical errors.
- The log “plays” (a gap between the “legs”, a loose fit of the log in the groove): the reason is a knot on the bottom log or a poor groove; correction - cut off the knots on the lower log, tap the upper log with a “woman”, select places of wrinkles in the groove.
- The gap between the “feet”: the reason is that the line opening when drawing the “foot” was greater than the line opening when drawing the groove, or the line “collapsed”; correction - using a line with a gap equal to the width of the gap, draw a groove on both sides of the log and make a selection.
- The log “hangs” on the “feet” (the log does not fit tightly in the groove, there is no gap between the “feet”): the reason is that the line opening when drawing the groove is greater than the line opening when drawing the “foot”; correction - draw a line with a gap equal to the width of gap 1, draw “paws” 2 and trim them.
It should be said that the following gap sizes are acceptable: in the “paw” - 0.5 cm, in the groove - 1.5 cm.
Now it’s time to lay the first window sill crown . First, let's mark the doorway. It should be noted that openings (both window and door) are made 5-10 cm smaller than the design size. Split logs are secured with dowels, for which markings are applied on both sides of the logs.
To mark the center lines of the dowel on both logs, it is necessary to remove the “short” (a log in a split crown). Then, using a chisel, pockets for the dowel are selected along the center line. The total depth of the pockets should be 1 cm greater than the height of the dowel. The dowel should fit tightly into the pocket.
When laying the crowns, you should constantly check the verticality of the corners with a plumb line. The last window sill in the doorway is uncut. The continuous log of this crown is also placed on two dowels.
Tow (moss) is not placed under the logs of the last window sill crown, since this crown is removed for the first relaying. Starting the relaying, first we will set the same distance upward from the zero level and make notches at the corners of the removable crown. Then we will remove the last window sill and install it on the ground, placing pads 15-20 cm high. In this case, it is necessary to maintain the verticality of the cheeks. Using a level, we will restore the horizontality of the crown along the notches. Let's check the equality of the diagonals at the corners.
Let's start laying out the window crowns, having previously marked the window openings . Recommended height of openings: windows - 110-130 cm, doors - 180-190 cm. The “shorties” of window crowns are fastened with dowels. Let's lay the closing crown, which consists of continuous logs, and place it on the dowels, moving the zero mark to its corners. We will draw a vertical line at the corners of the frame to be repositioned, which serves as a control during assembly.
Now you can, having marked the logs, transfer them to the main frame, laying each crown with moss or tow. For convenience in work, we recommend making the simplest scaffolding inside the house at the level of the window sill, for which you install chocks in the corners of the house and fasten them together with poles (two poles along each side of the log house). To ensure the stability of the scaffolding, the poles in pairs must rest against the opposite walls of the log house.
Next, let's start making the upper part of the frame . We start by laying one of the above-window crowns on the ground (as in the previous case). Then we begin to make the top trim.
The upper trim consists of two upper purlins and rafters. At the ends of the purlins, “boobs” are made, and in the middle - only the inner cheeks. For adjustment, we will place the upper purlins (eight meters long) on the transverse logs of the last crown above the window (there is no need to make the top of the “paws” on them).
Let's check and adjust the dimensions A-B, C-D . Using linings and staples, we will achieve horizontality at the top of the purlins.
Let's transfer the lines of the inner cheeks of the purlins to the transverse logs. Having rolled back the run, we cut out a “paw” on the outer transverse log, and a “dovetail” on the middle one. Let's make cheeks in the upper purlins according to the “dovetail” of the transverse log. On the underside of the purlins we will make pockets 4 cm deep for the tenons of the veranda pillars. Let's lay out the purlins again and, having drawn them, we'll cut them into the appropriate place.
We will prepare logs for the rafters 7 m long. All of them, except one, should be cut into two parallel edges, obtaining sleepers of the same thickness (minimum 15 cm). Let's dovetail the raw end rafter into the purlin so that its top is horizontal.
Let's mark the insertion points for the remaining processed rafters on the upper purlins. Then we’ll cut in the rafters (checking the level), cutting the purlin by no more than 1/4 of the diameter.
You can also adjust the upper level of the rafter by cutting it itself, but no more than 1/4 of the thickness.
Next, we make platforms for the rafter legs and for the wind board on the outermost (first) rafter (level with the rest). If necessary, it should be precipitated by repeated drawing. Pull the cord along the ends of the outer rafters and align the rest along it.
Make marks on the sub-strings and purlins for subsequent alignment and label them.
Along the cord on all the rafters, mark pockets for the rafter legs. Cut them out with a chisel and check with a template.
Make pockets for pillars on the veranda rafter (the number is determined by the design of the veranda). To eliminate the gap between the level of the lower edge of the rafters (ceiling) and the last log of the veranda wall, draw and embed a log - a “plug”.
Now let's start making rafters . The choice of material, marking and manufacturing of rafters require special care and precision, since the strength of the roof depends on their quality. Rafter blanks are selected with the least number of knots. In no case should the knots fall on the top of the workpiece, because the tenon in this place will be significantly weakened. It is allowed that the rafters have a slight curvature in the plane of the roof slope. The length of the blanks is determined by the angle of the roof and the length of the rafters. In our case, the angle of inclination is 45°.
The prepared rafter blanks must be disassembled in pairs and numbered. On rafter blanks, the side on which the sheathing will be attached must be smooth, without protruding knots.
Let's start marking the base of the rafters. Let's make a cut along the line of the ellipse and cut out the blank for the tenon, and then, having made the end cut, cut out the tenon itself. Next, we will mark, saw and cut out the tops of the rafters. We will disassemble the finished rafters in pairs and install them for fitting and checking the quality of connections to the rafters. Adjustment is carried out by trimming the tenons or widening and deepening the pockets.
Sometimes they simplify the work of making rafters. At the tops they are connected into half logs, and the bases are fastened to the rafters with nails without making a tenon. By simplifying the task for yourself, you significantly weaken the rafters and reduce the service life of the roof in advance.
Now let's remove the rafters and proceed to the final relaying, not forgetting to lay tow (moss). Then we will lay all the rafters, except for the veranda, and fasten them with brackets staggered to prevent them from turning along the axis.
We have come to the final stage of construction - the production of pillars. In a log house, the pillars form the frame of the veranda and, according to their functional purpose, are divided into corner, door, window and intermediate. Corner posts provide support for the upper purlins; door and window frames are attached to the frames. The intermediate pillars do not carry any additional load and are only a frame for the cladding. The corner pillars should have the largest cross-sectional area, and the intermediate ones should have the smallest cross-sectional area. The distance between intermediate posts is determined depending on the length of the boards used to cover the veranda, but in any case should be no more than 1.5 m.
Making corner posts begins with determining their length and marking the pockets. For ease of marking, we will make a “fishing rod”, at the end of which we will attach a plumb line. Using such a device, we project any of the corners of the upper pocket onto the platform of the veranda transverse log of the lower trim, and in this case we obtain the distance H. Using the designed angle, we restore the counter pocket below.
Corner posts must be processed into three edges, and the distance between two parallel edges should be at least 16 cm. Next, the post should be cut to size.
Then we will make a pocket for the lower tenon with a depth of 7 cm. We will install corner pillars, placing linings 5 cm high, which should be removed six months later, after the frame has settled.
Having installed the corner posts, we will put the veranda rafters in place and secure them with brackets. The remaining pillars need to be made and installed after the frame shrinks. Door and window pillars, as well as corner ones, are processed with three edges, the rest - with two. The bottom tenon of all posts, except corner ones, should be 3 cm long.
The installation of the remaining pillars should begin from the side of the log house, securing the already installed pillars to the upper purlin (veranda rafter) with brackets.
The final operation is the installation of rafters . To carry it out, it is necessary to lay walkways from poles (boards) across the rafters, prepare jib bars from poles about 1.5 m long according to the number of rafters and nails 100 mm long. Let's lay out the rafter legs on the rafters, orienting the spikes opposite the pockets.
We will nail the tops of the rafters and install them, securing them with jibs. When installing the outer rafters, use a plumb line.
It is more convenient to install the rafters with three people. When lifting the rafters, you should simultaneously move forward, and having fixed the spikes of the rafter legs in the pockets, secure them with jibs, checking the vertical installation of the rafters.
All that remains is to fasten the rafter legs with the rafters with thin staples.
So, the log house is ready! But a log house is not yet a wooden house. Next, you will need to make a foundation, sew up the gables, cover the roof, build a stove or fireplace, lay floors, sheathe the veranda, cut in window and door blocks, etc., in general, a lot of interesting work awaits you.
The log house design we propose is universal. If its dimensions are proportionally reduced, you will get a very good log bathhouse, for example, with a size of 4x4 m. By the way, with such a building it is better to start learning carpentry, gain the necessary skills, gain self-confidence, and then you can safely offer your construction services to others gardeners.
Assembling a log house
Before assembling the log house, it is necessary to make a strip-type foundation, since the wooden structure has a large mass, and put waterproofing on its upper part.
Next, it is recommended to lay 2-3 larch crowns and level the horizontal surface of the log house using a level. During assembly, insulation is placed in the longitudinal groove, and to compact the log, the log is tapped with a wooden mallet or log. Also, after laying each crown, it is necessary to check the horizontal and vertical position of the structure.
After assembly is completed, all cracks and joints are caulked, and excess insulation is removed. After six months, it is recommended to repeat this operation, since the insulation can become saturated with moisture from the drying logs. All wooden structural elements must be treated with an antiseptic 2 times.
Log house Source metasold.com
How to install the first element of a window sill type crown
First, mark the doorway, then install the logs using a dowel. Using plumb lines, the vertical position of the corner parts is checked, and the final window sill beam is installed on two dowels.
Then the crowns of the window element are laid, keeping the opening height to 130 centimeters. After this, the strapping is performed in the upper part.
After this, the elements for the rafters are prepared, for this purpose the logs are cut off, and about two edges are made on each of them. The elements are cut into the deck, and recesses for the rafter legs are made with a chisel.
When making rafters, there should not be many small knots in the log. Near the base of the rafters, a tenon is made by sawing, and paired installation is carried out.