Articles
All photos from the article
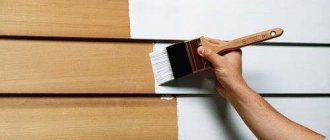
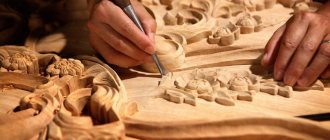
Experienced craftsmen can use even the simplest folding knives with a wooden handle to make various decorative crafts. However, a beginner should use a specialized tool for carving that will allow him to perform all basic operations without additional effort.
In our article we will tell you which knives can be used to process wood, and also provide recommendations for making and sharpening such tools yourself.
With the help of the simplest blade you can create real masterpieces
Description and types of instruments
Knives for wood carving can have a variety of shapes. As a rule, they differ from ordinary knives in having a shorter blade. This design feature is explained quite simply: when threading, the tip experiences a fairly strong load, and therefore the shorter the metal part, the less the risk of it breaking under pressure.
Typical carving tool
Depending on the type of design, there are several types of cutting knives.
| View | Peculiarities |
| Cutter | A universal knife that is used both for giving the main shape and for making small parts. The design usually features an elongated blade with a straight or curved cutting edge. The types of cutters are:
|
| Jamb | Structurally, a knife-jamb for wood carving follows the design of a cutter, however, it is characterized by a larger bevel angle of the blade. Due to this, the jamb can be subjected to heavy loads, which is actively used when carving on flat surfaces. At the same time, the technique of some craftsmen involves using a joint as the main knife due to a fairly long cutting edge. |
| Auxiliary tool | When performing carving, in addition to knives, craftsmen also use other cutting tools, such as:
In fact, all of them are not knives, but have a cutting edge. |
Profile knives for wood cutters
In addition, other tools used in mechanical woodworking are sometimes included in the classification.
These include:
- Wood milling knives are either whole cutters or removable parts of cutters.
- Jointer knives for wood lathe – used for machining elongated parts.
- Planing blades are used, as the name implies, in planing machines.
Replacement knives for wood routers used for making products of different shapes
However, these and other types of parts for carving are used only as auxiliary ones, so we will not dwell on their description in detail.
Rules for working with metal
In order for the blade to be strong and elastic, during its manufacture it is necessary to follow the rules of working with metal. They are as follows:
- The workpieces must not have visible or hidden damage. Before making a knife, the workpieces must be inspected and tapped. A solid part sounds loud, but a defective part sounds dull.
- When designing the shape of the blade, angles must be avoided. In such places the steel can break. All transitions must be smooth, without kinks. The cuts of the butt, handle and fuse must be ground at right angles.
- When sawing and sharpening, do not overheat the steel. This leads to a decrease in its strength. An overheated blade becomes brittle or soft. During processing, the workpiece must be constantly cooled by completely immersing it in a bucket of cold water.
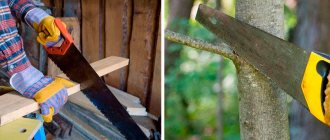
- When making a knife from a saw blade, you need to remember that this product has already gone through a hardening cycle. Factory saws are designed to work with the hardest alloys. If you do not overheat the canvas during the turning and finishing process, then you will not have to harden it.
The blade shank should not be made too thin. It is this part of the product that will bear the heaviest load.
Making a knife
Making a blade
When choosing a cutting knife, you should give preference to simple and reliable models made of high-quality steel. However, the price of such products is quite high, so beginners most often purchase cheaper models, and therefore are inevitably disappointed in the quality of the cutters.
Simple Bogorodsk knife made of tool steel
The solution in such a situation may be to make a knife with your own hands. This task is solved quite simply, so even a beginner in plumbing can quickly acquire his own tool.
First of all, we need to find a suitable material. This is not difficult since we need a fairly small piece of good steel.
The following can be used as a blank for a future knife:
- A strip of good steel about 8 - 12 cm long, up to 2.5 cm wide and 1.5 - 2.2 mm thick. The brand does not play a special role, as long as the material is strong enough and holds an edge well - R6 / R6M5, and R9, and even R3AM3F2 will do.
Saw blades with markings
- Mechanical saw blade made of hardened metal. It is better to choose the same dimensions as in the previous case - this way we will save energy on roughing.
Note! Despite the fact that, compared to a saw, the knife will be subjected to significantly less stress, you should not use rusty blades or parts with cracks (even shallow ones).
- Part of a saw for metal or wood (it is convenient to use a fragment of a split disk with one or more teeth).
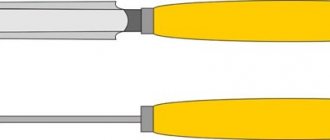
Drawing of the jamb with main dimensions
The work process itself looks like this:
- First, we make a drawing of a jamb knife for wood carving, determining the shape of the shank, the length of the blade and the bevel of the cutting part.
Note! For cutters, the bevel ranges from 15 to 450, for jambs - up to 60 -700.
- Next, we cut the workpiece to the required size, making the blade from 30 to 90 mm long and leaving a shank sufficient to secure it in the handle.
- We form the blade by cutting the front edge of the workpiece at the desired angle.
- We perform rough sharpening, making the cutting edge.
- Several holes can be drilled in the shank, which will be used for fixing in the handle.
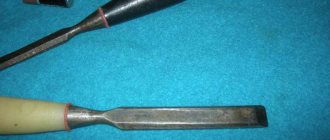
Photos of blanks
After this, we wrap the cutting part with electrical tape so as not to cut ourselves during further operations, and proceed to making the handle.
Making a handle
The knife handle is made from linden, birch or similar wood.
The main thing is that the material absorbs moisture well - then the knife will not slip out of a hand that is sweaty from exertion.
- We take a block with a diameter of about 40 mm and a length of 200-250 mm.
- We cut out the handle of the shape we need from the workpiece, thinning the rear edge of the part.
Note! We can limit ourselves to rough processing, since then we will still be “finishing” the surface of the wood.
- Carefully split the workpiece along the fibers.
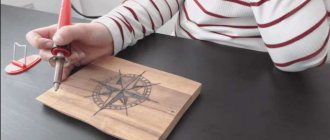
- We place the shank of the knife on one of the resulting planes, and then trace it along the contour.
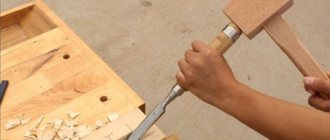
Making a handle for a cutter
- We select a recess in the workpiece that corresponds to the shape and thickness of the tail plate. At the same time, we make sure that the shank laid in it does not protrude above the plane.
- We remove the workpiece from the wooden plank, and then apply wood glue to all surfaces.
- We install the blade in place, press both parts of the handle tightly, and then clamp all the parts with clamps.
The product is ready for gluing
After the glue has dried, we perform the finishing treatment:
- If necessary, we drive rivets into the pre-drilled holes, with which we finally fix the shank in the wood of the handle.
- We put a metal ring on the front of the handle.
- We carefully sand the wood, removing all irregularities. We pay special attention to the junction of the halves.
Working tools and materials
The raw material for creating a handicraft knife can be any used or new cutting component made of hardened steel. As a semi-finished product, it is advisable to use saw wheels for metal, concrete, saw wheels for pendulum end saws and hand saws. A decent material would be a used gasoline saw. From its chain it is possible to forge and make a blade, which in its properties and appearance will be no worse than the legendary Damascus blades.
To create a knife from a circular disk with your own hands, you will need the following equipment and materials:
- angle grinder;
- emery machine;
- electric drill;
- ruler;
- hammer;
- sandpaper;
- whetstones for sharpening;
- files;
- center punch;
- epoxy;
- copper wire;
- felt-tip pen;
- container with water.
To create a handle, it is preferable to use:
- non-ferrous alloys (silver, brass, bronze, copper);
- wood (birch, alder, oak);
- plexiglass (polycarbonate, plexiglass).
The material for the handle must be solid, without cracking, rottenness or other defects.
Correct sharpening
Now, to get started, we just need to sharpen our knife.
The sharpening instructions are as follows:
- Place the blade on an abrasive block with coarse grain (pre-wet it with water) at an angle from 15 to 240. Using movements away from us, we shape the cutting edge until the sharpness can be felt under the finger.
- We switch to a medium-abrasive stone and repeat the operations, leaving a ground metal chamfer (burr) on the cutting edge.
Procedure for sharpening
- On a small (diamond) block, generously moistened with water, we finally remove the burr, forming a blade.
- We perform editing either on a leather belt or on a special block. For straightening we use GOI paste or a similar material, which allows us to get a perfectly sharp knife with mirror-like surfaces of the cutting parts.
These operations must be repeated regularly to maintain the sharpness of the knife, since only with the help of a perfectly sharpened tool can clean and high-quality wood carving be performed.
Editing on the belt
Sanding and varnishing a knife handle
Final sanding is done using sandpaper. Gradually increasing the grain size, it is necessary to remove all rough marks from paper of a larger grain size. It is enough to complete the process of sanding the knife handle with 600 grit paper. The last step in making the handle will be its impregnation.
There are several ways to impregnate a handle to better preserve it. This is oil impregnation, wax impregnation or varnish coating.
Each method has its own advantages and disadvantages. For example, wax must first be melted by heating it, and heating has a detrimental effect on the strength of the glue that glues the handle. Oils must be updated periodically. And the varnish serves only the function of surface protection.
Sheath
A traditional Kiridashi knife may not have a sheath at all. It can be carried in a tool box. But sometimes blade sheaths are made from leather or wood. Typically, knives with a mounted handle are equipped with wood products.
The sheath is made of the same material as the handle. Vinyl products are also used as a cover on inexpensive models. They are very similar to office supply cases.
Have you ever used a Kiridashi knife?
Definitely! Not yet...
Features of the Japanese joint
A Kiridashi knife is a blade with a beveled blade of small size relative to the handle. The shape of the product is reminiscent of European and Russian jamb knives. Classic models have a skeletal design. The handle is made of cord or other similar material.
A few more examples of the Kiridashi knife.