Advantages of a homemade tool
On the farm, very often there is a need to cut boards, chipboard, fiberboard, plywood and other similar materials. It is most convenient to perform such manipulations using a stationary machine, which is popularly called a circular machine. You can even cut firewood on such a machine, so you don’t have to think long about the rationality of its manufacture.
An angle grinder or grinder has gained wide popularity as it is a universal tool for cutting metal, stone, concrete, plastic and even wood. However, wood processing requires not only special skills, but also caution. After all, it is when processing wood that an effect such as a reverse blow occurs. That is why experts recommend using the tool only as a circular saw, which eliminates the possibility of a kickback and also increases the efficiency of using power tools.
Making a stationary machine from a grinder for sawing wood has a number of advantages:
- Savings on the purchase of a stationary machine, which consists of a frame and a powerful electric motor. The cost of such a machine is at least 10 thousand rubles, while a grinder can be used to make a circular saw without additional investment
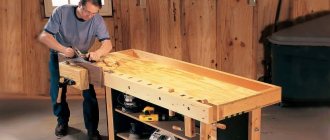
- Ease of manufacture - to create a machine you only need a power tool and a base, which can be made from a wooden workbench or boards
- High efficiency - the angle grinder develops a rotation speed of over 9000 rpm, which has a positive effect on the speed and quality of sawing material
- The ability to use an angle grinder at any time by removing it from the machine
If you came to the site, then you are probably wondering about the purpose of making a homemade circular saw from an angle grinder. There is no doubt about the rationality of such an idea, but we will find out later how to make a stationary machine for sawing wood.
Design requirements
The duration and safety of working with homemade equipment depends on the types of loads, operating modes and strength of the unit. Knowledge of the features of woodworking devices will make it possible to produce a mechanism that is reliable, but simple and durable.
High disk speeds. Without this condition, high-quality cutting of wood is impossible, but for the master it is more important to guarantee the safety of a homemade circular saw, so the protective devices that are usually equipped with purchased models are a role model
If the future author believes that it is quite possible to do without some of them, then this opinion is erroneous, since one careless movement often leads to injury. Strength of absolutely all components. Not only the ability to withstand large static loads is important, since the table may begin to vibrate due to multidirectional dynamic influences
They are not dangerous for the master, but they affect the quality of the cut: marks from the teeth remain on the surface of the lumber, and difficulties arise in maintaining linear dimensions. Fire safety is the main requirement when working with wood, so compliance with the rules when installing all electrical appliances is a must.
What you will need to convert an angle grinder into a circular saw
The principle of manufacturing a stationary machine for sawing wood from an angle grinder is that the power tool must be rigidly fixed, securing it to the base of a table or workbench. Implementing this will not be difficult, but for this you will need the following tools and consumables (depending on the scheme):
- Angle grinder or grinder. Moreover, for this it is recommended to take a powerful power tool, since the capabilities of a stationary machine will depend on this parameter. If you use a small grinder, then you can only saw thin materials with it, so this should be taken into account at the stage of manufacturing the device
- Drill - needed to make holes that will be used to fix the brackets holding the power tool
- Welding machine for joining metal plates
- Chipboards
- Clamps and fastening connections
You need to install a special disk for cutting wood on the grinder. It will not work to use a disk from a circular saw on an angle grinder, since it will not fit the outer and inner diameters. The disk installed on the grinder for cutting wood must correspond to the diameter of the mounting hole. In addition, the outer diameter must have protrusions - teeth, the number of which directly depends on the tool itself.
There will be no difficulties in choosing a suitable disc for an angle grinder, since they are sold for the corresponding models of angle grinders. In addition to an angle grinder with a circle for cutting wood, you will also need to prepare a table on which the power tool will be fixed. Even a frame or workbench is suitable as such a table, the main requirement for which is stability.
This is interesting!
An angle grinder creates vibrations during operation, so to increase safety, the base or bed must be highly stable.
If you have a ready-made table, then you only need to attach a power tool to it. If there is no table, then you can make one from available materials. You can use boards or fiberboard as a tabletop. The tabletop also acts as a stop.
To ensure the immobility of the power tool, it is necessary to make an appropriate fastening using bars, boards or metal plates. The bracket for an angle grinder can be movable or fixed, which affects the quality of use of the tool. The movable mount allows you to adjust the size of the cutting wheel. If the bracket is stationary, then it will not be possible to adjust the cutting depth. As clamps, you can use clamps, metal plates and other materials that securely and effectively secure the angle grinder to the base.
After the grinder is installed on the base, the only remaining action is to check the operation of the homemade tool in action. To do this, a short-term test run is performed, which identifies all the defects and shortcomings of the design. If there are none, then you can perform a test cut of wood.
Manufacturing stages
As an example of work, we took a case where an old table served as the basis for the machine. If this is not the case, then before the work described below, you need to make another base. Bars of the same length are used for the legs, the structure is reinforced with transverse elements. The base must be strong and stable in order to withstand active use. After this, work begins on the countertop.
Stage one
The working surface is cut out in accordance with the previously prepared dimensions. By the way, you can even use an old countertop from, for example, a kitchen table. The main thing is that the material is durable and can withstand all mechanical loads.
An important characteristic is the thickness of the tabletop. Carpenters say that it is best when the thickness is 2 cm. Such a tabletop will be durable, no matter what material it is made of, and will leave a large working surface for the saw. Simply put, the more the blade “sticks out” from the machine, the deeper it can cut.
If possible, the edges of the board should be milled and sanded.
This is important not only for the beautiful appearance of the structure, but also for its durability and operating comfort. And no one wants splinters
Stage two
A hole is made in the tabletop for a circular saw. Remember that it must match the size of the disk. Also on the surface of the tabletop you need to draw a place for installing and fastening the saw.
Stage three
Holes are made in the working surface to secure it to the base. The tabletop turns over. To firmly connect these two parts of the machine, self-tapping screws and steel angles are used. By the way, to make the process of installing the saw more convenient later, you don’t have to fasten the tabletop right away.
Stage four
The power supply and switching system of the device is being installed. The design provides that the saw will always be on, so clamps are needed to secure the corresponding button. The starting and stopping of the machine will be controlled by turning the power supply on and off. Therefore, you will need a regular switch, cable, and socket.
An outlet is installed inside, from which the power cord for the switch comes out. It is the switch that will start or stop the machine, so it should be at hand so that in the event of an emergency the master can quickly turn off the saw with one click. All this is connected to the nearest outlet in the work area.
Stage five
A frame is made for convenient work with cross cuts. You can make such a carriage from a thin base and two low walls. Wood and plywood are suitable for this. To make the structure movable, guides for the table are prepared. These can be small parts of a steel pipe with a cross-section of 2x1 cm. The pipe sections are mounted in grooves that have been previously cut with a milling cutter. This simple design will significantly increase the capabilities and comfort of the machine.
Stage six
The accuracy of the work is important, so the machine must be equipped with a marking ruler. Using a router, a small groove is made for installing a ruler. If there is no such tool, then the groove can be prepared with a chisel. The surface of the tabletop is carefully processed with a grinding machine and sandpaper. It is most convenient to fix the ruler using self-tapping bolts. This modification will allow you to cut the material with millimeter precision.
Additional design improvements
For convenient use of the machine, design improvements are being made. A container for collecting chips and a stand with a dust extraction are often installed for cleaner work. The working surface can be folding, which saves space, and even liftable, which will provide quick access to the saw.
Some craftsmen remove the casing from the tool, which makes a large working surface of the saw blade available. A special block for pushing boards is also prepared
This is important for safety. In order not to lose this block, a special stand or drawer is made for it
How to quickly and easily make a circular saw from an angle grinder
It should be noted right away that there are many options for making a homemade circular saw from an angle grinder, and it all depends on the imagination of the master, as well as the availability of consumables. Initially, we will consider the simplest option for making a circular, using a sheet of chipboard and other consumables. The principle of making such a circular is as follows:
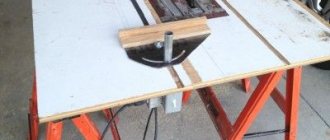
- Take a sheet of chipboard measuring 1x2 m, to which the legs are attached. The result is a table to which you need to attach the grinder. The tool must be fastened exclusively from below
- A bracket is made to secure the power tool. For this purpose, metal plates with a thickness of more than 1 mm are used.
- The plates are attached to the tabletop using threaded connections
- To be able to adjust the cutting depth, the bracket should be made of a movable type. To do this, the movable and fixed parts of the bracket should be connected using a bolt with nuts
- To fix the tool in the appropriate position, you will need to make an additional bracket. It is based on a long bolt or pin. The nuts on the stud will ensure the fixation of the angle grinder in the appropriate position, and the sleeve welded to the movable bracket is responsible for the connection
- It is necessary to make a slot in the tabletop through which the saw wheel will protrude. For this, a drill with a drill is used. You need to make holes along the edges of the future slot, and then straight-line sawing along them with thin blades
- Additionally, a stop for the table top is also made, due to which the sawed workpieces are aligned
As a result, we get a stationary machine for sawing wood, made with our own hands at home. Now, knowing how to make a circular grinder from an angle grinder, you can get down to business. Video instructions for making a homemade machine are presented below.
Why do you need a mini circular saw?
The device of a mini circular saw will be useful for quick and convenient cutting of not very hard material. For example, wood, soft plastic or metal.
A mini saw for wood allows you to work with this material both lengthwise and crosswise. You can use a circular saw at an angle of 45 degrees. The equipment is used for assembling furniture, working in private workshops, etc. With it, it is possible to replace several other tools, because when you manufacture it yourself, the necessary functions are added at the discretion of the master.
Thus, the saw is suitable for working with:
- wooden blocks;
- drywall;
- laminate;
- soft metal.
An example of making a mini circular saw is one of many options for assembling an electric tool, but it is the fastest, most economical and easiest. You can create a circular saw from an engine or an old grinder.
https://youtube.com/watch?v=OqZpyclFhl8
Manual circular grinder
When making a homemade machine, you need to take into account that they can be stationary and portable. The angle grinder is not large in size, so there are no difficulties with its transportation. However, if it is necessary to transport a homemade circular saw, then this can only be done if it is portable. If a metal or wooden workbench is used as a basis, then transporting the tool will be quite difficult. This factor must be taken into account at the design stage of the circular saw. Before you start work, you need to prepare drawings that will help you understand what exactly needs to be constructed.
So that the tool can be transported, it is recommended to make a mini-circular from a grinder. The principle of its manufacture is simple, and consists of the following steps:
- A sheet of metal 1-2 mm thick is prepared, which will be used as a base. Sheet size 80x80 cm
- A bracket of metal plates is welded on the back side of the sheet, which will serve as the basis for installing the power tool.
- You need to make a slot in the steel sheet for the protrusion of the cutting disc
- Attach the grinder and test it in action
The principle of manufacturing a machine for sawing wood is simple, and everyone can cope with the task of arranging a circular saw from an angle grinder. There are a large number of options for making homemade products, and which one to choose depends on the preferences of the master, as well as the work that is planned to be performed.
Design features of a circular machine
Circulars of any fixed type consist of main parts.
Table for connecting mechanisms. An assembly combined with higher power engines is preferable to a table made entirely of metal. The surface of the table must be made level with your own hands, for a higher quality product at the end. The engine in most cases is used from what is in stock. Electric motors designed for long-term operation from the network will be preferable to commutator drives. The shaft is the most critical component of the circular. Finished products are used most often; in other cases, the assembly is made on a lathe
It is important to calculate the mounting holes and eliminate runout.
When making a machine with your own hands, you should pay special attention to safety. The main surface of the saw blade should be covered with a protective cover
The moving parts of the drive and motors must be covered. The emergency stop button is built into the electric drive circuit and has a convenient location.
Which grinder should I use to make a circular saw?
There are no special comments here, since you can use both low-power and powerful angle grinders, which differ in size, weight and diameter of saw wheels. The greater the power and size of the blade, the higher the efficiency and productivity of the sawing machine. If you use a small and low-power angle grinder, then in the end you can use the machine exclusively for cutting chipboard, thin boards and plywood.
If a household tool is used as a drive mechanism on a sawing machine, then the features of its temporary operation must be taken into account. If a household grinder overheats, the motor will quickly fail. When planning to frequently use a sawmill for wood, it is necessary to purchase an appropriately powerful power tool.
How to make a permanent stationary circular?
Now let's move on to the simplest part. This possession does not develop in one day, but collecting it is not so easy, and it also requires a large number of elements and parts. With such a stationary workbench, you can cut everything easily: both thin and thick timber. In principle, if you are not a master of wood design, then the tabletop option will be enough for you. If robots are moving frequently and with high intensity, you may want to think about assembling a stationary saw.
Regardless of whether a tabletop or stationary circular saw is made, the table is covered with a thin ball of steel or galvanized steel, which is necessary to increase the value. In addition, without a special coating, after about an hour a small hole will appear in the center of the table, and you will no longer be able to make a deep, straight cut. Let's take a look at how to develop and select the main nodes and what is special about the installation.
How to make a power button for a circular saw
After making a stationary machine, you will need to perform one more modification - this is a push-button station. It is necessary to make a button to turn the saw on and off, as this will allow you to quickly interrupt the operation of the tool at the right time. In addition, it is almost impossible to operate a stationary circular saw by pressing a button on the body of a power tool, so you need to take care of installing a push-button station at the design or completion stage.
To make a power button, you will need to remove the wires from the body of the instrument and connect them to the switch located in the structure of the manufactured base. If you do not plan to use the grinder on the machine, then you can use a simpler method - fix the button in the pressed position using a clamp, and turn on the tool by connecting the plug to the socket.
Design elements of a self-made wood sawing machine
Creating a stationary circular saw with your own hands has a number of features that need to be taken into account.
Making a carriage for a circular saw with your own hands
The function and operation of the device may vary depending on the availability of various accessories. One of them is the carriage. To construct it you need to do the following:
- cut the plywood slightly wider than the table;
- Attach guide bars from below - the interval between them should coincide with the width of the table;
- Fix the stop bars on top.
The manufacture of the carriage has a number of features
How to make a shaft for a circular saw with your own hands
The shaft is considered an important element of the circular. It is made from round steel grade 45. In this case, the diameter of the workpiece must match the dimensions of the saw blades. The most commonly used is 32 mm. Saw blades must be installed between the flanges and clamped with a nut.
To use a saw to work with different materials, you need to provide several operating modes. Therefore, it is worth making several grooves on the shaft. This will make it possible to move the pulleys and change the speed.
What discs should you use for circular saws?
These elements have a major impact on productivity and quality of work. The discs can be designed for processing metal or wood. In the first case, the circles should have small teeth. There are also universal models.
Disks can be monolithic or carbide. The first type is made from a single piece of high-carbon steel. Such parts have an affordable price, but at the same time they have to be sharpened frequently. Carbide elements have a higher degree of wear resistance, but are much more expensive.
Do-it-yourself parallel fence for a circular saw
This is an important element that is needed for working with large workpieces. The emphasis can be made from different materials - plywood sheets or chipboard. On average, its dimensions are no more than 25 mm. The stop can be fixed with sides or self-tapping screws.
To focus, you need to do the following:
- take 3 strips of laminated chipboard and make a U-shaped profile;
- Make a guide channel from 2 slats and bolt it to the end of the table;
- make an inverted T-shaped structure from MDF - it needs to be screwed to the stop and placed in the channel.
DIY circular table
To make a table, you need the following:
- plywood;
- bars;
- several fragments of chipboard;
- bolts.
To make a tabletop circular you need to do the following:
- Assemble the top of the table from laminated chipboard sheets. It resembles a box without a bottom. The fragments need to be secured with bars. Their length should be greater than the height of the sheets.
- Turn the structure over and fasten the bars with additional jumpers.
- Cut a tabletop from a plywood sheet. Use a jigsaw to make a hole in it lengthwise and place a saw blade there.
To get a reliable stationary structure, you need to make a table
There must be a grid marking on the working surface of the device. It will help make the work more accurate. Also, the use of a protective casing should not be neglected. This element helps protect the device from mechanical influences during operation.
How to work correctly and tips for use
Using an angle grinder as a circular saw does not at all make this tool safer, which is why work must be carried out strictly in protective clothing and safety precautions must be observed. When working on a homemade circular saw, you need to consider the following recommendations:
- Work should begin only after the tool reaches the operating spindle speed
- The duration of continuous operation should not be more than 15-20 minutes to prevent the motor from overheating
- The grinder should only be used with a protective cover, even though its main part is located under the tabletop
- If the spindle speed of a power tool is higher than 10,000 rpm, then this speed will cause wood smoke in the cutting line, and as a result, damage to the appearance and even fire. To eliminate the occurrence of such a drawback, the spindle rotation speed must be reduced using a special voltage reduction device. Reducing the voltage, the number of revolutions drops
- If during the sawing process there is a decrease in speed or a complete stop of the cutting wheel, then you must quickly remove the workpiece, freeing the disc from contact. If you neglect this recommendation, the motor on the angle grinder may burn out.
Making a circular grinder with your own hands is not difficult, and to achieve the result you will need a minimum of investment and a maximum of imagination. The finished tool can be used for sawing boards, beams, logs, fiberboard, chipboard and plywood. With such a household assistant, you can quickly eliminate the need to use a hand hacksaw.
Scope of application of a homemade saw
The main task of this equipment is to make a perfect long cut in wood. In order to guarantee the quality of a cut with a circular saw, several conditions are necessary: high speed of the cutting edge, its sharpness, the rigidity of the disk-working surface system, safety, strength and convenience.
The small dimensions of the circular saw do not make it possible to use it during the construction of a house, when wood is required in large quantities, because the functionality of homemade equipment is not so wide.
But during repair work, such a machine will become a savior, an indispensable assistant. A circular saw will allow you to quickly and efficiently obtain all kinds of wooden blanks (blocks, planks, slats), and cut sheet material into slabs of the required sizes.
Possible options for small, DIY circular saws
To create a small saw, you should apply the same rules as when creating a device from a grinder. But in this case, it is worth using the frame as a stand, not the sawhorses. You need to install a small table with a fixed tool on it.
When making a tool, it is worth choosing the right height of the structure at which the material to be cut will lie. If you place it too high or too low, there is a risk of discomfort.
If you need to make a very small saw, you can use a PVC pipe. In this case, it is permissible to take the engine from a children's toy. A glue gun is suitable as a connecting material. The circular machine can be powered from the mains or from batteries.
A compact device is made for processing small workpieces
Making a benchtop tool
For comfortable work with machines, it is necessary to provide, in addition to the elements already mentioned, other tools and devices necessary for normal operation:
- on the working plate, for convenience, it is recommended to apply a centimeter jackal, “0” of which corresponds to the side of the saw blade; to protect against accidental chips and splinters, it is recommended to install a protective screen made of transparent plastic above the disk; to facilitate cutting, when additional force is needed to press the board, it is recommended to consider installation of a pressure roller or wooden pressure plates; to facilitate the work and prevent the board from falling back, it is necessary to install thrust plates.

