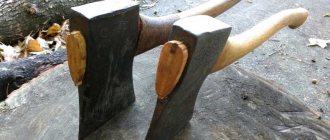
What types of axes are there?
This tool will help you perform various types of work. But specialization in one area makes it of little use in another matter. One is good at carpentry, while the other is better at chopping wood. These axes will have differences in the length of the axe, the shape of the head, and the sharpening.
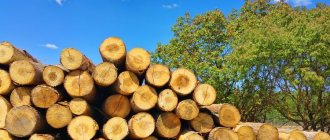
Lumberjack
This ax makes it easier to fell trees and easily cuts branches. Requires a large inertia of the slashing blow. This effect is achieved due to:
- long axe;
- heavy head;
- sharp sharpening;
- shifting the center of gravity to the blade.
All this together saves the effort of the person who works with the tool.
Lumberjack's axe.
Cleaver
Sharpening is not important to him. It splits the log using mass and inertia. A heavy butt adds efficiency to the strike. The long handle allows you to grasp the tool with both hands and make a strong swing. The cleaver has a blunt blade, with a large convergence angle and a shift in the center of gravity towards the blade. This shape allows the log to be torn apart with sufficient swing.
Cleaver ax.
Plotnitsky
This tool is used for trimming logs; it is used instead of a plane. Most often held with one hand. They do not need to chop wood, so a strong swing and great inertia are not required. But what is important is a sharply sharpened blade and a smooth blade that smoothly transitions into it.
Carpenter's axe.
Srednerus
A universal ax suitable for many types of work. It does not have a clear specialization, therefore it combines the features of several types. It is also called taiga.
On a hike, you need to chop firewood, make tent pegs, cut up the hunter's kill, trim it, and use it as a lever. It is important not to carry too much weight. All of the above are features of this ax. It is small in size, sharply sharpened, has a moderately wide blade and a small strong axe.
Taiga axe.
Combat
This is already in the category of cold steel. If you decide to do it yourself, then this weapon will need to be taken for examination and subsequent registration. These include axes, Viking axes, tomahawks, celts and others.
Battle axe.
Sturdy
Hiking handy tool. The short handle and lightweight head make it lightweight. It has a wide, sharply sharpened blade. For farming, such a hatchet is useless, but on a hike it will come in handy.
The camping ax is sturdy.
https://youtu.be/https://www.youtube.com/watch?v=8-qTftOJUy8
_
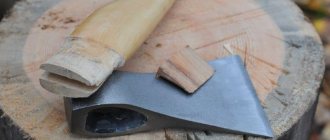
Metal hardening
This procedure also consists of several parts at once:
- Annealing. First of all, you should dull the edge of the blade by a millimeter. To do this, you need to heat it to about 760 degrees (the metal will acquire a red-burgundy hue) and then slowly cool it. Then remove the scale.
- Hardening. You need to heat the blade to 830 degrees and prepare two metal buckets - one should contain just warm water, the other should contain oil. The blade should be lowered into the water for just a couple of seconds and only about 4 cm. And then completely into the oil. It is important not to forget about safety when working with fire.
- Vacation. This stage is important for strengthening the steel. The blade must be cleaned. Vacation should be carried out for an hour at a temperature of approximately 200-300 degrees. Can be done in a regular home oven.
Details of the hardening procedure can be found in the video.
https://youtu.be/https://www.youtube.com/watch?v=eirx_Dwhg0I
_
Handle (axe)
- Plane a simple ax handle from a block.
- To decorate it, you can choose any Celtic ornament you like, transfer the drawing with a pencil to the wood and then develop it using a drill.
- To protect the handle from moisture, you need to coat the wood with varnish. As an alternative, you can use flaxseed oil.
Now you can connect the handle to the blade and drive in the pre-prepared wedge.
Braid for ax handle
When the ax itself is ready, all that remains is to make a convenient braid for the handle. It will perform not only protective, but also decorative functions.
How to make a braid:
- Cut a rectangular piece from leather (or leatherette).
- To adjust it to size, you need to wrap the material under the butt.
- It will be easier to work with a piece if you pre-treat it with flax oil - this will soften the fabric.
- Make cutouts according to the shape of the butt for the best fit.
- Make holes for seams closer to the edges of the fabric. You can use an awl or even just a nail.
- Sew the section, securing the material to the ax handle.
- The last step is to treat the braid and handle with oil.
The Scandinavian ax with a Viking Age pattern is completely ready!
Components of an ax
The ax consists of 2 main parts. Each of them is important and performs its own functions. The type of ax and whether it will be suitable for work depends on their combination.
Complete diagram of the axe.
Metal head
The head has several parts. The butt and the canvas are separated. The blade has a blade, cheeks and an eye. In some types of axes, the butt can be massive. It will give additional inertia to the tool. The length and thickness of the blade, blade width, vanishing angle, sharpening, each type has its own parameters.
Ax head.
Toporische
Much depends on its length and strength. The axe, cleaver and lumberjack are made with a long axe. Carpenter's and universal types like a handle of medium length. And for a tourist or chopping kitchen hatchet, a short ax is enough. But each ax must be made of hard wood that absorbs vibration well and fits comfortably in the hand.
Ax handle.
Wood product
A wooden hatchet cannot compare with the work of an iron one
, but sometimes it is very necessary. Thanks to its light weight, it is easy to take on a hike to chop simple branches, and it can also be used as a weapon for training or at home.
How to create this product? The ax handle and head can be made either individually or as a whole structure. The material selected is strong, dry, and fiber-free. It is worth taking oak or maple.
Hunting ax
A hunting tool must have excellent handle balance
to perform the correct shots. It is best to use an all-metal device, because it will reduce the likelihood that the ax handle will fall apart when cutting a carcass or when cutting the bones of an animal. If there is no chance to forge such a product, you can make it yourself from a blade and a wooden axe.
Then you need to harden the iron
. To create an ax handle, a special birch, rowan or elm is used. To find out the correct length of the ax, you need to take it by one end, and the particle with the attachment for the product should touch the ankle. When placing a blade on a part, its end must be wedged for better fixation. After this, an oblique cut is made and a wedge is placed.
It would be great if the wedge was made of the same material as the ax handle. It can be placed on glue, and if the inner part of the butt becomes loose, the problem will be quickly solved if you soak the device in some water. You should not use a metal wedge, as it will begin to rust and damage the wood.
Do-it-yourself ax handle
Drawings will be primarily required to create this product.
This is a very important device that is not difficult to make. In order to make it, you will need:
- Wood blank.
- Knife.
- Carpentry tools.
- Cutting device.
- Pencil.
- File.
- Hammer.
The creation process itself will be performed in a certain order:
- Create a template on paper. The ax of the finished device is placed on the cardboard and outlined with a simple pencil. They cut it out.
- A block is made from dried wood. The particle of the workpiece on which the ax part will be placed must exceed the dimensions of the metal eye by two or three mm.
- The contours of the template are transferred to a wooden blank. You should leave a margin of ten mm at the front, and ninety mm at the rear.
- Cuts are made transversely along the top and bottom of the wooden block, the depth of which is a couple of mm short of the selected contours of the ax handle.
- The fitting of a metal part is carried out using hammer blows. If everything is fine, they clean it.
- The almost finished base is sharpened everywhere with a blade. They try to smooth out the corners and transitions with a file. At the end everything is sanded with sandpaper.
- Using a small hammer, knife and chisel, the workpiece is finished to the required shape. Place a knife in place of the cut and slowly tap it with a hammer. That's it, the ax handle is done.
“Come on, give me back my stone axe” - there is probably no person in our country who has not heard this song. Yes, the first axes were made of stone. But this time passed many thousands of years ago, and now high-quality wood and steel are used to make this product.
During the development of civilization, many varieties of this tool have appeared (construction, throwing, etc.) which have not yet lost their relevance. Moreover, on the market you can find many varieties of this product, which are designed to solve certain problems, for example, those facing a hunter or tourist.
Beautiful do-it-yourself ax from a simple ax
It is important to understand what type of ax you need to make. Because not every option will come out of the head of an ordinary ax. They can have different masses and shapes. Usually they undertake to make a sturdy, middle-class or carpenter's one.
Ax handle
The handle, first of all, should be comfortable and strong. It will be good if the ax handle does not dry out, because this affects the tightness of the head. Will make her beautiful:
- correctly selected block, with a beautiful pattern;
- unusual shape;
- impregnation of the desired color;
- ferric chloride solution;
- pattern burned into wood.
You can come up with many options, it is important that they are technically feasible and leave the handle strong and comfortable.
Beautiful ax handle.
Braid for ax handle
It is made to strengthen the ax handle and protect it from destruction upon impact. Also, when doing carpentry, gripping your hand near your head will be more convenient.
Paracord is used for this. This cord is wound around the ax handle in its upper part up to the head. The winding is done tightly so that the paracord does not slip.
An ax covered in leather.
cloth
In the “Photoideas” section there are interesting options for the shape of the head canvas. Most ideas can be done without a lot of time and special equipment. If you take up forging, then any option is possible. What is important here is only an understanding of the scope of application of the ax and compliance with the requirements for this type. After choosing the type of canvas, you will need:
- make a sketch or life-size drawing;
- transfer the sketch to the workpiece;
- cut out the desired contour with a small gap;
- process initially with a grinder, machine or file;
- bring the workpiece to the desired form;
- shape the blade and sharpen it;
- if necessary, anneal, harden and temper.
- final grinding and sharpening of the tool;
- drawing the design and etching it completes the process.
There is nothing complicated, but it will require a little skill and ability to work with a tool.
The ax head can be decorated.
Making a storage case
The case is made for storing and safely carrying the instrument. He can:
- hold the entire axe;
- just cover your head;
- cover only the blade.
The sheath material protects the blade and, in some cases, the entire tool. Suitable for making genuine leather, plastic, thick fabric such as tarpaulin.
Making a case with your own hands will not be a problem, just follow a simple algorithm step by step:
- the tool is placed on cardboard or fabric;
- contours are applied to the material;
- a pattern is cut out and a mock-up of the cover is pre-assembled;
- after fitting, if necessary, correction is made;
- the pattern is transferred to the selected material;
- the cover is assembled or sewn.
Belt case for an axe.
Materials and tools for work
To create an ax similar to the one used by real Vikings, you will need the following materials:
- block (approximately 4x4 cm);
- paper;
- pencil;
- brush;
- wooden wedges;
- varnish (can be replaced with flax oil);
- a small piece of leather material or leatherette (for braiding);
- an ordinary ax (it’s okay if it’s rusty).
A properly selected handle should not subsequently become loose during the drying process if the degree of humidity in the environment changes. If such a need arises, the workpiece must be dried in warm and dry conditions.
The following breeds are best suited for making an ax handle:
- beech - has all the necessary qualities, but also has a disadvantage - it absorbs moisture from the air. Therefore, before you start making the handle, you need to further process it;
- oak is a hard, durable and very durable species;
- maple is a very elastic and durable material. The finished handle will have a beautiful texture;
- ash is the best option, since this particular species is known for its strength, durability, and most importantly, affordability. The handle will turn out very beautiful.
The following tools will be required for the job:
- welding machine;
- drill;
- Bulgarian;
- grinding machine.
Having decided on the materials and prepared the tools, you can begin to create a Viking ax.
Photo ideas
The head and its handle may have an original appearance. A drawing is made on the head and the shape of the canvas is changed. If the ax handle is aged, burned or treated with colored impregnation, the overall appearance of the product will change greatly.