If, when gluing a wooden board, you use ordinary F-shaped clamps to tighten the boards, then the board can simply be bent. And all the work done can go down the drain.
To prevent this from happening, it is necessary to use carpentry clamps.
Many novice craftsmen may not even know about the existence of such devices, but they are still often used in home workshops.
Essentially, these are the same clamps, but they are designed specifically for gluing wooden panels (including furniture).
Unlike a conventional F-shaped clamp, carpenter's clamps tighten and securely fix the wooden board being glued simultaneously in two planes, thus providing better and more reliable gluing.
In today's article we will look at how to make homemade weims with your own hands. We have specially selected several different design options for you so that you have plenty to choose from. We hope that at least one of the proposed options suits you.
To make a carpentry clamp reliable and durable, you need to use the appropriate material for its manufacture - for example, a metal corner.
However, there is one small problem. If you use a corner, the strength of the clamp will increase, but at the same time its weight will increase. Not every master is ready to carry heavy wires.
But if the heavy weight does not bother you at all, then this is an excellent option - such a wedge will serve you faithfully for many years.
You can easily find drawings and diagrams of homemade metal clamps in the public domain on the Internet: for example, on thematic websites or homemade forums.
If you need a lightweight option, but at the same time quite durable, then we recommend using a square corrugated pipe (rectangular, in principle, is also suitable). Perhaps we will stop at this option.
What materials will be needed
To build a homemade clamp, you first need to collect the necessary materials and tools. To work you will need:
- profile pipe, metal corner or channel;
- fastening elements: nuts, screws, self-tapping screws;
- stops;
- building level and squares;
- Bulgarian;
- metal welding machine;
- wooden spacers.
Do-it-yourself carpentry clamps must be strong and strong, otherwise, with great effort, you can bend or break the structure. To prevent this from happening, the stops must be resistant to heavy loads and be well fixed to the beam. It is necessary to make sure that they can easily move in the longitudinal direction. To be able to process large workpieces with your own hands, you need to fix the clamps on the clamps so that they can be moved.
Fastening elements must also have high strength. It is better to give preference to reinforced construction and nuts. Due to the high load, store materials quickly break down. In order for the carpentry clamps designed by yourself to be of high quality and effective, you should order fasteners and stops from a turning workshop.
Better quality fasteners and stops can be made using a lathe or ordered from a factory
Steel profile wedge
Making a house for a cat with your own hands
But sometimes craftsmen assemble wires no worse than factory ones. Here's one option:
The clamping screw is first unscrewed until it stops. The slats are glued and placed on the clamp, starting from the clamping unit. After the array blank is assembled, it is covered with an upper profile pipe, and a mating unit is bolted into one of the pairs of holes (depending on the width of the future array).
By rotating the clamping bolt, the workpiece is compressed from the sides. The design of the clamp is made in such a way that the upper and lower pipes are also strongly pressed against each other when the screw is tightened, which makes the future workpiece perfectly flat. This kind of webbing, made with your own hands, allows you to make any product - from cutting boards to door panels.
Wooden fixtures never lose their relevance and never go out of fashion. They are highly environmentally friendly, natural, and can be used to construct almost any piece of furniture. They serve for a long time and lend themselves well to restoration. You can make stools, doors, steps from wood with your own hands. For production, the craftsman needs numerous tools that allow him to work with the material. These are carpentry weims. They are familiar to everyone, but their size is much larger.
G-shaped
The frames of factory-produced G-clamps are cast. It is impossible to organize a steel foundry in a garage or barn, even in a forge on your own property. Since G-clamps, being the most “graspy” ones, are used mainly in metalworking and welding work with rather long and/or heavy parts, a homemade G-shaped clamp must be made of welded or solid metal.
Craftsmen often weld themselves clamps from sheet steel, pos. 1 in Fig.:
Homemade G-Clamps
Apparently, copying the profile of the frames of factory products, which in this case is incorrect. Profiles of cast frames of clamps are shown in pos. 2
Pay attention to the fairings and fillets (shown by arrows). Smoothing the profile is necessary to avoid the concentration of mechanical stress: they “love” corners and crevices, like bed bugs
But the weld does not work like a fillet! No, the clamp most likely will not break or bend. However, the recoil of the clamped part will move the frame a little, and it will be difficult to achieve precise fixation, and it is possible that the part may rotate when the clamp is tightened.
Homemade clamps made from channel sections are quite reliable (item 3). Disadvantages: labor-intensive, disproportionately heavy compared to the working width. You can cut a channel into clamp frames if you need to compress the parts very tightly. The best option for clamp frames for normal work is made from a square profile pipe, pos. 4. Depending on the size and wall thickness of the workpiece, clamps from corrugated pipe can be made for a working width of up to 1 m or more, see video:
https://youtube.com/watch?v=8R1fXWCJTds
G.E.
A type of G-clamp is a clamping one, which could roughly be called a GE-clamp. Clamps are well known to builders of small wooden boats, but they will also be very useful in small wooden construction (for example, a country or frame house, outbuilding, etc.).
Drawings of the clamping clamp and the method of their use are shown in the figure:
Drawings and procedure for using clamping clamps
For example, when sewing, say, a crossbar (truss structure) of a roof, each subsequent board is first pressed tightly against the previous one, and then attached to the rafter beams. Accordingly, the reliability and durability of the entire roofing pie are greatly increased.
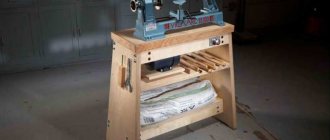
Workbench table top for carpentry work
We make a swing with our own hands from wood
Use sheets of MDF, chipboard or plywood 16–20 mm thick for the workbench cover. Glue the slabs in two layers and get a tabletop 32–40 mm thick.
Drawing and arrangement of the workbench cover: 1 – edge strips (birch, maple); 2 – working surface (hard fiberboard); 3 – load-bearing board (chipboard, plywood or MDF).
For the countertop, you can take sheets of chipboard left over from unnecessary furniture. For example, the walls of a wardrobe will do. Take them as a base and add small pieces so that the carpentry workbench lid measures 670x1940 mm.
Place narrow slabs toward the back wall and toward the center of the workbench. Place large sheets in the top layer of the countertop. Glue the cut pieces together.
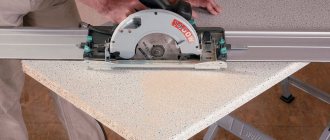
Fasten the sheets with self-tapping screws, deepening them into the countersunk holes. Trim the edges with a hand-held circular saw 20mm from the edge.
Align the tabletop with the frame and secure with screws.
Sharpen slats for edge trims. Saw off the 45° bevels and cut the planks to length. Place a piece of fiberboard on the lid of the workbench, add a flat panel on top and secure it all with clamps.
This makes it easier to attach the pads. Align the ends with the edges of the tabletop and press the rail against the panel - the top plane will be flush with the workbench lid. Holding the bar with one hand, drill pilot holes and secure the parts with screws.
Move the device to the other side and install the remaining pads. Sand the slats with a sander.
Drill a hole in the corner of the slab so that the fiberboard can be easily pushed out of its recess when replacing it.
Clean the surfaces from dust and cover the wooden parts of the frame with stain. Place the fiberboard in the recess of the lid. If you are using pieces of material, secure them with double-sided tape. Place a carpenter's vice on your workbench.
What else should you not feed wild ducks?
Harm to the waterfowl inhabitants of the city pond is caused by people throwing into the water:
- chips or popcorn;
- salty crackers and croutons;
- sweets.
Many products contain salt and spices that are dangerous to human health. And for birds, even white buns dipped in chocolate, pieces of waffles, and cookies will become poison. After eating this way, the ducks will get sick and soon die.
Products made from finely ground flour are prohibited for poultry. When the food gets wet it becomes sticky. It clogs the respiratory passages and digestive tract.
Fermented milk products are good for ducks while they are fresh. But after a few days they begin to wander. Once in the bird's intestines, sour milk mash leads to diarrhea and bacterial infection.
It is useful to dry grass for feeding ducks. But if celandine or henbane gets into the hay, the ducks will be poisoned.
Maple trees are harmful to birds, especially the leaves of the tree.
Nettle should be given carefully: fresh herb without scalding with boiling water will burn the animal’s esophagus
It is not recommended to bring waste from your home table to the pond. Smoked and salted fish, food with a lot of salt and pepper are not allowed for feeding ducks.
Carpenter's clamp
We make our own cutting machine from a grinder with a broach
Such structures used in carpentry are of the following types:
- Standard clamp, which is the most popular or simple;
- In the form of a caliper for small parts and quick fixation;
- Self-clamping clamp for milling processes and working with workpieces of various heights.
The first type is made from two pine blocks, a locking nut, rods, threaded wing nuts and thrust washers. The manufacturing process is very simple:
- We cut out the working pliers from the bars, drill holes for the studs, taking into account a small amount of play;
- We screw in the studs and lock them using appropriate methods;
- We ensure alignment with nuts made either in the form of wings or standard nuts for improved tension.
There are both portable and stationary versions of this design, where grooves are cut for movement with the fastening of fixed stops. The clamp is a furniture nut, a hairpin and a knob. Due to this, you can work with workpieces of any size.
The self-clamping design has a lever with an eccentric at the rotating end. We turn it at a certain angle, a quick clamp is automatically obtained. The height is adjusted with a pin on the workbench. It is made individually for each matrix, depending on its purpose and the purpose of the work being carried out.
What materials will be needed
To build a homemade clamp, you first need to collect the necessary materials and tools. To work you will need:
- profile pipe, metal corner or channel;
- fastening elements: nuts, screws, self-tapping screws;
- stops;
- building level and squares;
- metal welding machine;
- wooden spacers.
Do-it-yourself carpentry clamps must be strong and strong, otherwise, with great effort, you can bend or break the structure. To prevent this from happening, the stops must be resistant to heavy loads and be well fixed to the beam. It is necessary to make sure that they can easily move in the longitudinal direction. To be able to process large workpieces with your own hands, you need to fix the clamps on the clamps so that they can be moved.
Fastening elements must also have high strength. It is better to give preference to reinforced construction and nuts. Due to the high load, store materials quickly break down. In order for the carpentry clamps designed by yourself to be of high quality and effective, you should order fasteners and stops from a turning workshop.
Materials and tools
- rectangular profile pipe;
- screws;
- nuts;
- stops;
- wooden spacers;
- welding machine;
- Bulgarian;
- building level;
- squares.
The attachment of the stops to the beam must be strong and be able to quickly move in the longitudinal direction.
Furniture panels that must be clamped into the device can be of different widths. During work, it is not always possible to attach workpieces of different sizes with screws. Therefore, it is necessary to create the ability to move the clamps.
All screws must have the required strength. Nuts must be of reinforced design. They can be purchased at construction stores. You can order the production of these parts in a turning workshop. It is also necessary to order the turner to make stops for the screws of the required sizes.
If you buy ready-made screws, you will have to make a groove to install and secure the clamps.
A simple wema, assembled “on the knee”
Sometimes there are situations when some type of work needs to be done once. Suppose it is decided to arrange a table made of laminated spruce in the gazebo at the dacha. Does it make sense to buy expensive factory-made clamps? In such cases, a simple, in a sense disposable, wedge is made with your own hands. Drawings of the device are shown below.
In order to glue an array of blanks together once, you will need long self-tapping screws, a screwdriver, a hacksaw and a carpenter's hatchet.
The blanks are laid on a series of transverse beams (beams every 40...45 cm). On both sides of the workpiece, parallel to it, long longitudinal beams (equal in height to the workpiece) are laid and attached to the crossbars with self-tapping screws. On top, again, the upper transverse bars are fastened with self-tapping screws. That's all the vayma, made with your own hands.
To compress the workpiece, all that remains is, as shown in the diagram, to wedge it with specially planed wooden wedges. After the product is ready, the clamp can be disassembled and the material can be used at your discretion.
Steel profile wedge
But sometimes craftsmen assemble wires no worse than factory ones. Here's one option:
The clamping screw is first unscrewed until it stops. The slats are glued and placed on the clamp, starting from the clamping unit. After the array blank is assembled, it is covered with an upper profile pipe, and a mating unit is bolted into one of the pairs of holes (depending on the width of the future array).
By rotating the clamping bolt, the workpiece is compressed from the sides. The design of the clamp is made in such a way that the upper and lower pipes are also strongly pressed against each other when the screw is tightened, which makes the future workpiece perfectly flat. This kind of webbing, made with your own hands, allows you to make any product - from cutting boards to door panels.
Currently, the industry offers clamps or clamps of various designs. But they are too large in size and expensive. Therefore, you can make a clamp yourself for your home carpentry workshop.
The future belongs to vacuum installations
The vacuum press for gluing is, of course, a new word in the production of artificial wood materials.
In this device, the working process provides a vacuum, allowing for the maximum possible connection of components with each other. The device pumps out air from the working area and, as a result, pressing occurs. Glue, maximum compression and high temperature work together to achieve an appearance comparable to that of solid wood.
We invite you to familiarize yourself with DIY denim patchwork
This modern press has a very high degree of automation, so employee training takes a minimum of time.
Stages of work execution
Start making a clamp with your own hands. It is necessary to prepare a profile pipe of rectangular cross-section with dimensions 60x30x3 mm. The length of the pipe should be 120 cm.
These dimensions for the load-bearing beam were chosen due to the fact that it is often necessary to glue large sheets of wood or make wooden doors. Therefore, the clamp must be of such dimensions that workpieces of such large dimensions can be secured in it.
Workpieces that are too large are rarely made. In most cases, furniture panels of small sizes and intermediate platforms for stairs will be produced. It is necessary to take measures in advance to ensure that when making the shield, glue does not get on the surface of the device.
In cases where the length of the clamp does not allow for a large workpiece, you need to glue such a shield in parts. First, workpieces of such width are glued together that they can be clamped in a clamp. Then a wide blank is assembled from narrow shields. For this purpose, movable clamps are used.
Then you need to make screws and nuts. The screw is made from a hexagon 300 mm long with a cross section of 28 mm. It must have a metric thread of 2 cm. The nut is made in the form of a 32 mm hexagon, 60 mm long.
Spacers 1 cm thick are placed under the nuts. Then welding is performed. After this, a clamp is made from a 5 cm metal rod.
It is not advisable to make a clamp with a smaller diameter. Otherwise, it will push through the wooden spacers that are placed between the workpiece and the clamp. If you do not use spacers, you can deform the workpiece.
You need to drill a 1 cm hole in the end of the screw on the clamp side. 2 ball bearings are installed in this hole to reduce friction.
Then the nuts are welded. It is necessary to ensure that the screw is parallel to the profile. Otherwise, the workpiece will be pressed through.
You need to completely tighten the screw and nut. Then a clamp is put on the groove. After this, gaskets are placed under it.
Using a level, make sure that the parts are positioned strictly parallel. The parts are secured and then welded.
Welding is performed with small seams to prevent deformation of the material when the metal is heated during welding.
Then clamps are made from a corner measuring 60x60 mm. Weld the corner to the profile. The profile is welded from two corners. They are adjusted so that there is the possibility of free movement and at the same time so that there are no large gaps.
Fasten the clamps. To do this, drill holes with a diameter of 12 mm. They put pins in them. Thanks to this, you can quickly change the position of furniture parts during production.
If during work the workpiece turns out during compression, then the reason for this may be the non-perpendicular position of the stop in relation to the supporting beam. Therefore, you need to check the correct location of the parts using squares and a building level.
Then a hole is drilled, a thread is made and a screw is screwed in. The correct position of the workpiece can be adjusted using a screw.
When drilling holes, take into account that the screw with a movable stop moves 200 mm. When attaching a fixed stop, the distance between the holes should be 150 mm. Otherwise, areas may appear where the workpiece will not fit.
First, a through hole is made on the clamp. After that, install it in its place and press it with a clamp. Then the profile of the supporting beam is drilled through this hole. This way you can accurately fasten parts together.
You can make a clamp in which you can press the shield to the supporting profile. This design is more reliable, but more difficult to manufacture.
This concludes the work on making a homemade clamp.
The design of the clamp allows for high-quality gluing of furniture panels of various sizes and thicknesses.
In this article you will find detailed instructions for making weima
with your own hands.
If you are engaged in the manufacture of furniture from, then you cannot do without carpentry clamps
. You don't have to buy it for this. You can make the glue for gluing yourself
.
How to make?
Let's look at the process of making weims from various materials with our own hands.
Metal
When using a professional pipe, you must first prepare the element. Its optimal length is 1.2 m. The structures can be assembled with bolts
But sometimes parts of the clamp are welded. Assembly on corners 2.5 m long is also possible; in this case, the channels are attached at equal distances (this is very important!)
The edge of one channel and the short corner are placed at right angles to each other in the gap separating the long fragments. The nuts are placed on spacers 10 mm thick. Welding the internal joint of the smaller angle with the channel is not necessary. Otherwise, even in the simplest products, the seam will create problems later during assembly.
The next step is to get the clamps. They take a steel rod with a cross section of 50 mm for them. Its end needs to be drilled, obtaining a hole 10 mm wide. A pair of ball bearings are mounted in this hole. Without them, the friction will be too great.
The next step in obtaining homemade clamps is welding the nut. Carefully ensure that the screw is at right angles to the profile. Violation of this rule threatens to push through the pressed parts. Next comes the preparation of the clamps. To obtain them, take a corner.
Recommendations:
- monitor the parallel arrangement of all parts during the assembly process;
- check the visual assessment at the building level;
- minimize the size of welding seams;
- ensure that the profile structures are not deformed during welding heat treatment.
Clamps for making carpentry panels can be made from a profile (from a pipe). To work you will need:
- the actual pipes measuring 4x2.5 cm;
- steel plate with a cross section of 2x0.5 cm;
- threaded rod of M12 category (and the same extended nuts);
- set of M10 bolts and nuts.
The number of clamps is determined by how large the panels are planned to be assembled. The number of holes is also determined taking into account your own needs. Next you need to cut the housings for stops and for screw terminals. Workpieces 40 cm long are cut from a threaded rod. A hole must be drilled in the body of each clamp, each stop; two nuts are installed, and the second of them is scalded.
Many experts prefer to use multi-story assemblies. As a result, optimal load is ensured on all parts of the structure without reducing the free space. Single-sided and double-sided wemes are often collected into powerful collections. Vertical positioning of such systems is typical for industrial equipment. It can process very long workpieces, sometimes reaching 6 m.
Along with mechanical ones, pneumatic clamps are also quite widespread. Using such equipment you can produce:
window frames;
When creating a machine, it is necessary to consider how to configure the vertical working area. To control the pressure, it is best to install ball valves. The membrane must develop a force of at least 1 ton.
Wooden
Joiner's weims can be made from wood yourself, and it's not even too difficult
It is necessary to carefully prepare drawings or be guided by designs made elsewhere. The main component of the vima is the load-bearing beam. It doesn’t matter whether the main part of the structure is made of solid wood or timber, in any case the main support is made from the same profile pipe, angle or channel
The latter option allows you to count on high quality construction. However, you will have to put up with the heaviness of such products.
A typical wiring diagram looks like this.
The clamps can be used to work with both hard and soft wood. Such equipment is very light and therefore characterized by increased mobility. Mechanical structures are made according to:
- screw;
- lever;
- cam circuits.
In different cases, 2 or 4 frame stops are used. But all of the above applies only to full-scale wires. By the way, disposable structures can be created from wood. In this case, the blanks will be strong timber and especially reliable self-tapping screws. The prepared workpiece and wooden parts are laid out on a flat area.
Two timbers are placed on each side of the workpiece. Carefully check the parallelism of all parts to each other. After screwing in the screws, the clamps are wedged. After complete gluing of the shield, the wedge is disassembled. For industrial use, this design is of little use, but in the domestic sector and in small workshops it is quite useful.
For more information on how to make your own wedges, see the following video.
Design Features
In the process of making wooden products with your own hands, joining parts is often required. This process will allow you to obtain parts of a sufficiently large width. Such products are much less susceptible to warping than those made from solid wood.
But it is very important to ensure even and reliable gluing. In this case, it is necessary to take into account a number of factors: the thickness of the workpieces, glue, orientation and number of layers
There are many different designs of wedges for assembling wooden products, gluing bars, etc. This carpentry equipment is used for various work in the DIY workshop. The choice depends on the characteristics of the materials, the work and the final goal.
Pneumatic clamps are machines that are used to press and clamp wooden products for gluing. The pressing force is compressed air. They are often used in the woodworking industry in the manufacture of wooden objects: furniture, etc. They can be used to glue structural parts under high pressure. This is how beams and panels, multilayer beams of the required sizes are produced. Such clamps consist of clamps and special sections for vertical bilateral fixation. They can be used for wood and hard and soft species.
Mechanical clamps can be lever, screw, cam, etc. They consist of a frame with stops, of which there can be two or four. The stops are driven by screws, for rotation of which there are handles or handwheels.
How to choose?
A wide range of models of the described equipment, on the one hand, allows you to equip the workshop with the most suitable installations. At the same time, such diversity can confuse a potential buyer.
When choosing a wire, you should pay attention to the following important points:
- Type of load and pressure generation. This refers to a choice of rotary, hydraulic and pneumatic devices. The latter option will be the optimal solution for small-scale production.
- Specifications. We are talking about the dimensions of the installation, as well as the number of chambers and working cylinders.
- Indicators of created pressure.
Features of the manufacture of clamping tools of different types
There are different types of clamps; they differ in design, material, and size. Let's look at the types of clamping tools and the nuances of their manufacture.
Quick-clamping
Pistol type clamp. When the trigger is pressed, the jaws move apart. By releasing the locking screw, you can change the gap between the jaws. The clamping force is small. You can make it yourself, but it is not economically profitable. It's a lot of work, but it's inexpensive.
But such a clamp with a cam clamp is very easy to make. And she holds it tightly.
G-shaped
G-shaped clamps differ from C-shaped ones only in the presence of a molded fixed jaw. This allows you to clamp parts more clearly and firmly.
End
The end clamp can be made using C-shaped technology. The only difference is that it has three clamping screws. Its dimensions are selected based on the dimensions of the future object of work.
When making such a clamp, it is necessary to accurately maintain the size of the holes of the sliding parts.
To make such a clamp, milling work is required to make a toothed notch on the rod.
Tape
Tape clamps are used for gluing frames, boxes, and caskets. The tape tightly covers the product and prevents it from falling apart prematurely. Manufacturing requires a good drawing and precise adherence to all dimensions.
Pipe
“Pipe” clamps are basically a thick pipe. They are used when gluing panels. The thickness and length of the pipe are determined by the size of the shield: its width, plus 10 cm for the length and diameter of the pipe (from half an inch to three-quarter).
Spring
This clamp creates a clamping force due to a spring. The amount of clearance between the “heel” of the bracket and the “heel” of the clamping screw is created precisely by the rotation of this very screw. First you need to set the solution, then pull back the movable part of the clamp, compress the spring, insert the part into place and release the spring.
Presses for gluing timber
More serious equipment for gluing wooden blanks is a press for gluing timber.
These units are used for cold gluing of boards in order to obtain lumber products of a given size. In width and length, they are widely used in the production of doors, windows and other glued building elements of various sections in furniture and carpentry enterprises of medium and large production.
Presses for gluing timber are a rigid metal frame structure on which pressure cylinders are installed. Optionally, front clamps with pneumatic or manual control, as well as a monitoring and control panel can be installed. The steel structure of the presses is made with a good margin of safety, which makes it possible to achieve a maximum specific pressing force of up to 14-16 kg/cm2, which is required when gluing hard wood.
When choosing a press for gluing timber, you need to take into account the following parameters: – maximum dimensions of the resulting workpiece; – type of pressing force (pneumatic or hydraulic).
Presses for gluing timber can be: – with 1 working zone; – with 2 working zones; – for the production of large-section building structures.
In general, these devices are distinguished by their robust design, maximum ease of use and high performance, which is why the demand for them is constantly increasing.
Market leaders: Hydraulic timber presses SL250-3G, SL250-6G, SL250-9G, SL250-12G. Price: 520,000 – 1,485,000 rubles.
Using Vime
In order for a wooden product to have a beautiful appearance, proper quality and meet its purpose, in the process of working on its manufacture it is necessary to strictly comply with all requirements. When connecting parts of a wooden structure, efforts are required so that there are no cracks or gaps at the joints and that they are positioned in relation to each other perfectly accurately when gluing.
Each master can make clamp clamps with his own hands, which will be useful to him in the workshop. With their help, you can make connections between parts of unusual, unique shapes, cover flat, volumetric and relief surfaces, design framed facades, stair steps, assemble furniture, panels, etc. with your own hands. They also splice wood and fix edges for cladding.
To glue or join bars in thickness and width, horizontal or vertical wedges are used, which can be single-story or multi-story. Fan and rotary types of weims are also used. Other varieties are used to assemble various frame furniture structures from bars, door and window blocks, including with your own hands.
Sometimes the work of professional craftsmen requires the use of stops and hydraulic cylinders. For these cases, single-sided or double-sided clamps, or devices with rotors with a horizontal axis of rotation can be used.
What it is?
Regardless of the type and characteristics, any clamp is a compression mechanism. Such devices are widely used for the production of:
- various pieces of furniture;
- wooden frames;
- furniture panels;
- frames and much more.
Compressing devices are responsible for the most reliable fixation of the fastened structural elements until the adhesive compositions dry completely. It is worth noting that large-sized glued blanks, unlike their solid wood counterparts, are less susceptible to the phenomenon of warping. Moreover, all characteristics and performance indicators directly depend on the quality of gluing. In this case, the most important points will be:
- the thickness of the future workpiece and all its elements;
- features of the glue used;
- layer orientation;
- amount of elements.
Nowadays, various clamping structures are widely used in furniture production and other fields. With their help, they quickly and efficiently connect not only timber into wooden panels
If we analyze the main operational qualities that modern press wires have, then it is worth focusing on the following clear advantages of their use:
- Maximum uniform distribution of pressure over the entire surface, which ensures appropriate quality of manufactured products from any type of wood, regardless of design features.
- Minimizing the risk of gaps appearing between the parts to be joined after the glue has dried.
- Possibility of individual positioning of each element, depending on the characteristics of the future product.
- Many devices have relatively small dimensions and are also extremely mobile. Due to this, their operation does not require the allocation of a separate room.
- The vast majority of models are characterized by extreme simplicity of design and operation. This allows even novice craftsmen to use them successfully. The main thing is to take into account the manufacturer's recommendations.
What materials will be needed
To build a homemade clamp, you first need to collect the necessary materials and tools. To work you will need:
- profile pipe, metal corner or channel;
- fastening elements: nuts, screws, self-tapping screws;
- stops;
- building level and squares;
- Bulgarian;
- metal welding machine;
- wooden spacers.
Do-it-yourself carpentry clamps must be strong and strong, otherwise, with great effort, you can bend or break the structure. To prevent this from happening, the stops must be resistant to heavy loads and be well fixed to the beam. It is necessary to make sure that they can easily move in the longitudinal direction. To be able to process large workpieces with your own hands, you need to fix the clamps on the clamps so that they can be moved.
Fastening elements must also have high strength. It is better to give preference to reinforced construction and nuts. Due to the high load, store materials quickly break down. In order for the carpentry clamps designed by yourself to be of high quality and effective, you should order fasteners and stops from a turning workshop.
Better quality fasteners and stops can be made using a lathe or ordered from a factory
Changing the machine
When it is necessary to install cone-shaped holes, we attach two files so that the shape of a trapezoid is obtained. Next, we mount the device on springs for supplying the file.
To sharpen various blades, we attach a grinding wheel to the engine.
To summarize, I would like to say that assembling the machine is quite simple. It is quite possible to make a homemade lathe at home using scrap materials, which is a fairly economical undertaking.
You can adjust the size and power of the equipment yourself, as well as make the necessary modifications.
Note!
- How to make a wooden barrel with your own hands: simple step-by-step instructions for building a traditional container + 79 photos
- DIY vices: we create different types of clamping devices. 64 photo ideas for different purposes
- Do-it-yourself ax (67 photos) - we create a combat, decorative and working tool
Profile pipe
General information about profile pipes
The term “profile pipe” most often refers to a pipe having a cross-section other than round.
The most common profile pipes have the following cross-section:
Most often, the profile pipe is made from carbon or low-alloy steel (grades St3SP, 09G2S or similar). Stainless steel pipes are also available. Aluminum profile pipe can be placed in a separate category - the use of this material differs from the use of steel pipes.
Profile pipe production
Profile pipes are produced by hot or cold deformation of a round pipe blank.
- From the workpiece (the so-called “strip”), a round welded pipe of the required diameter is made by bending and welding (determined by the calculation method).
- The round pipe blank is fed into a forming machine, where it is deformed to the required shape and cross-section.
- To relieve mechanical stress, the pipe (now we can talk about a profile pipe!) is subjected to heat treatment, followed by mandatory inspection of the weld.
Thanks to the formation of stiffening ribs on the pipe, products made from a profile pipe are quite strong - their metal frame can withstand loads many times greater than a frame made from a round pipe of a similar configuration.
A do-it-yourself clamp makes the craftsman’s work easier and saves him money
A clamp is a tool that allows you to fix a part during processing. Craftsmen often use various types of clamps in their work. Whether you are a carpenter or a metalworker, there is always a need to use it.
This device is available in different versions, from universal to specialized. Relatively recently, a new modification has appeared: a quick-release clamp. Develops compression force up to 450 kg.
The task for all types is common - to fix the workpieces for processing or connecting to each other.
Angle clamp
However, most often, an angle clamp is used as a jig for welding metal parts at right angles.
For production you will need:
- steel corner 40 mm, thickness 3-4 mm;
- steel plates 40-50 mm wide;
- threaded studs, preferably hardened;
- rods for gates;
- nuts for the worm gear;
- welding machine;
- drill, taps.
We weld the corners to the steel plates at a strictly 90° angle.
We attach a worm structure to each side by welding. This is the same corner with a welded-on thrust nut or thickening, in which a thread is cut in accordance with the collar pin. The width of the working gap is selected according to the potential workpiece.
IMPORTANT! If the range of sizes of the parts being processed is too wide, it is better to make several clamps. Too much movement of the knob does not contribute to a strong fixation.
Do-it-yourself workbench - drawings, design principles
Do-it-yourself workbench - drawings, design principles
On the back side of the knob we drill a hole into which we insert a metal rod as a lever.
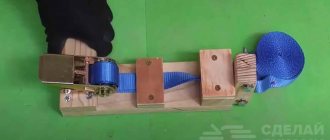
Carpentry clamp made from available materials
The simplest wooden clamp used in carpentry is made from the following materials:
- Two pieces of wood and a soft but durable material. Pine will do. Wood that is too hard will leave marks on the workpiece when clamped tightly;
- Furniture nuts with wood-look lock.
- Steel studs, not necessarily expensive hardened steel.
- The nuts are wing nuts with threads that match the studs.
- Thrust washers, you can also use ordinary, inexpensive ones.
Working pliers are cut out of the bars. Holes for the studs are drilled in them strictly parallel, with a slight backlash.
ADVICE! If you make two sets of identical clamps, the scope of application will expand. Then you can use the device like a carpenter's vice.
Carpentry clamp made of wood and plywood
For quick fixation of small parts, a clamp made in the form of a caliper is used.
The device is made of bars and thin plywood. The worm system is familiar - furniture nuts and a pin-turn. The fixed stop is firmly attached to one end of the guide rail. Recesses are cut out on the rail itself to secure the moving mechanism.
Having moved the bracket to the required distance, all that remains is to turn the knob a few turns, and the part is fixed. After releasing the stop mechanism, the carriage moves easily, releasing the workpiece.
The stationary version of this clamp has a rail design. On two guides installed in parallel, grooves are cut at the same distance.
Homemade pipe bender, how to make it at home
The clamp is carried out in the usual way - a furniture nut, a hairpin, a knob.
Carpenter's clamp option 3
Sometimes it is necessary to simply press the workpiece against the table for processing. There is a self-clamping clamp for this purpose. The illustration shows how to make metal or wooden brackets.
You can attach two clamps of this type to a movable template for mass milling of identical workpieces.
This type of quick-release clamps is made individually for each matrix, or is rearranged onto a new substrate for cutting out the next shape.
Pipe clamp
Welding metal pipes end to end is a rather complex task, requiring precise orientation of the workpieces in space. If you weld a piece of pipe to a finished system fixed indoors, the task is simplified. And welding freely lying sections requires an assistant or a special device.
A clamp for welding pipes is easily made from a metal angle and steel plates.
Screw clamp
The most unpleasant thing when using a clamp is if the washer (heel) gets stuck on the hinge and begins to rotate the part. The clamp then has to be removed and reinstalled, and the small part may break.
To avoid such a situation, the heels of factory-made clamps are placed on a ball stop, on the left in the figure:
Designs of screw clamps of clamps
Making it yourself is unrealistic: in addition to precision turning, you also need metal that combines high strength and toughness. Therefore, the clamping units of homemade clamps are most often made with cup-shaped ones under a screw with a washer (drawings on the right there). Such a clamp requires regular maintenance: the heel is rinsed in kerosene 2-3 times until the dregs of worn metal cease to stand out. Then add 2-3 drops of spindle, watch oil, etc. to the junction of the heel and the screw. liquid lubricant.
About carving
Threaded pairs of factory clamps, as you know, have a special thread - rectangular or trapezoidal with an increased pitch. A DIYer will most likely have to use a piece of threaded rod and a regular nut with a metric rolled thread. To prevent the clamp from jamming, you must, firstly, go through the nut with a second tap, respectively. standard size. If the thread is larger than M12, then use the second and third taps sequentially. The rod is similarly passed through with a die 2-3 times until the die (the die) starts to “run” freely along the thread when struck with a finger on the carrier of the driver. Secondly, the threaded pair must also be regularly wiped with a rag with kerosene and lubricated with any grease for machines and mechanisms.
In conclusion, we give a video overview of various designs of clamping washers for homemade clamps:
Video: washers for clamps
***
2012-2020 Question-Remont.ru
Display all materials with the tag:
Go to section: