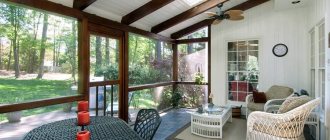
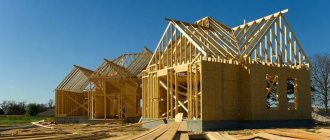
Finishing a terrace in a private house (photo) The veranda is a small room attached to the house. It can be open or glazed (closed). It is used both for agricultural needs and for recreation. How to insulate a veranda for winter living from the inside with your own hands and what materials are best to choose for these purposes? You will find out the answers to these questions below.
Mistakes that are made when insulating wooden walls
When independently carrying out facing work and pre-insulating a wooden house, mistakes are often made, which we will consider below. The result is ineffective insulation, dampness in the house, destruction of wood and loss of its performance properties. The following 7 errors can be considered typical - they occur most often.
No. 1: installation of insulation without wood preparation
Old log houses are often subject to external insulation. Over the years, the log house has undergone final shrinkage, and its parameters will no longer change, which means they will not affect the front finish
But it is important to understand that the years of wood exploitation “in the open air” could not pass without a trace
Due to the fact that the insulation and sheathing will completely cover the walls, before starting work it is necessary to inspect the enclosing structures in order to identify weak areas that need to be repaired and treated. It is necessary to treat the wood with antiseptics and anti-feathers
It is important not to leave untreated areas. The solution should be applied 2-3 times
Each layer must dry completely. Insulation should begin when the wood is dry.
In order for wood to last a long time without being subject to biological decomposition or damage, it should be treated with a special antiseptic impregnation
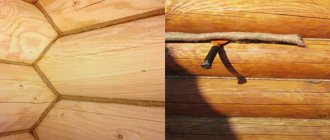
No. 2: neglecting caulk
To prevent the log house from being blown through, use caulk. At the same time, the insulation of the structure is ensured. When inspecting walls before insulation, it is necessary to carefully inspect all areas where caulk is used - whether it sticks out, how tightly it is held. It happens that protruding, loosely twisted material is pulled apart by birds.
Insulation caulk
No. 3: wrong side selected
Log houses are insulated exclusively from the outside. This is a rule that must be strictly followed. Only this method allows you to ensure the correct use of wood and thermal insulation material. If you choose the other side and fix the insulation inside the house, then both the wood and the insulation will get wet. As a result, disruption of the microclimate in residential premises and increased humidity.
Log houses are insulated exclusively from the outside
No. 4: the insulation is incorrectly selected
The construction market offers insulating materials in a wide range of prices and performance characteristics. Of all the variety, however, only a few are suitable for insulating wooden houses: mineral wool (basalt and glass), as well as extruded polystyrene foam. The latter has excellent performance, except that when melted it releases substances that are extremely dangerous to humans. Therefore, the only alternative for insulating a wooden house is mineral wool.
One of the best insulation materials is mineral wool.
No. 5: improper transportation and storage of insulation
When purchasing, it is important to check the tightness of the heat insulator packaging. It must not be damaged and the contents must be dry.
If the insulation gets wet, its thermal insulation properties will decrease significantly. It is recommended to remove the insulation from the packaging one day before installation. And after it is fixed to the wall, it is necessary to immediately continue working on the walls so that the insulation does not remain “open”.
Check the material carefully before purchasing
No. 6: using roll insulation instead of slab insulation
Mineral wool works best for insulating wooden walls. You can find slabs and rolled material on sale. Why are mats not recommended? Because, being in a vertical position, over time the insulation will inevitably sag and gaps will appear through which cold air will rush into the house. The slab insulation maintains its shape throughout its entire service life, does not deform or sag.
The slab insulation maintains its shape throughout its entire service life.
No. 7: Incorrect calculations
Too thick or thin a layer of insulation will cause disruption of the microclimate in the room. Typically, the heat insulation is laid in two layers of 5 cm. In the south, one layer is enough, and in the north, three are required.
Correct calculations will allow you to maintain the correct microclimate in the room
Tool preparation
The most reliable method of insulation is considered to be frame. This design will be strong and reliable, in comparison with the usual gluing of insulating material to the required surface. In addition, the frame will allow you to lay any type of insulation on the walls and hide it under any sheathing - no matter what you choose, drywall or lining, everything will look aesthetically pleasing. To install thermal insulation you will need various tools. The insulation you have chosen, wooden blocks and slats of various sections, a hacksaw, a screwdriver, screws, nails, a level, a tape measure, a pencil, a construction stapler with staples, polyurethane foam, a roller, a protective antiseptic and a moisture-resistant film - here is a set of tools with which you can carry out all the necessary manipulations to insulate the veranda.
Tip from InMyRoom:
The size of the timber should depend on the number of layers of material used and its thickness. If only one layer is intended, then make a wooden beam 50x50 mm - after all, the insulation itself is 50 mm thick.
Methods and methods of insulation
It is recommended to consider insulation methods for each type of structure separately.
Insulating a veranda from the inside with your own hands looks more attractive: you can work in any weather, both winter and summer. And this method is more suitable for a veranda due to the nature of the construction (no attic).
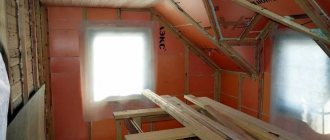
Before starting work, preparations are carried out, the walls are cleared of finishing material, and cracks are sealed. A vapor barrier film is attached to the finished wall (using a stapler).
The sheathing is installed on the film, the pitch is determined depending on the width of the insulating material. In this case we are talking about mineral wool. This material is often used for interior work, but it must be covered with an insulating film on both sides (as shown in the photo). It must be remembered that the dew point is transferred to the insulation, closer to the wall. After laying the insulation, it is covered with film
It is important that the sheathing is thicker than the insulation, so that when attaching the film it does not touch the insulation. The next step will be attaching the finishing (gypsum plasterboard, or plywood, finishing strip)
Insulating the veranda from the outside is also an option, but it has its own characteristics. The fact is that when using this option it becomes impossible to connect the wall insulation to the roof. This results in a gap that will certainly affect the quality. On a veranda insulated in this way, the upper corner will freeze. Or you will have to remove the roof, which is not advisable to do if there is no intention to change it. It won’t work with the floor either, since the distance under the floor is usually not large.
Insulating a veranda with polystyrene foam is attractive because it is a fairly simple method and does not require additional insulation with film. Before starting work, it is necessary to decide on the finishing material. In this case, the choice is large. This can be gypsum plasterboard, facing lath, plywood and plastering.
Considering that the material requires protection from direct exposure to fire, due to its properties, gypsum plasterboard and plaster are the most suitable type of finishing. Initially, there is a difference in the work carried out for different types of finishing. For gypsum plasterboards, you will need a sheathing, which must be arranged depending on the width of the gypsum plasterboard sheets. For plaster you will need a mesh for reinforcement.
Popular articles How to attach an insulated veranda to your house with your own hands
If you choose plaster, lathing will not be needed. Sheets of foam plastic are attached to the wall using self-tapping screws, which should have a large head. Each sheet has 5 screws, 4 of them in the corners and one in the center (how to correctly place the screws can be clearly seen in the video).
There may be gaps between the sheets; they are filled with polyurethane foam. After drying, the excess is cut off with a knife. After the foam is attached, the mesh is attached to it using a stapler and plaster is applied to the mesh. This method is suitable both for further painting the surface and for wallpapering. It is recommended to insulate both the floor and the ceiling at once. This will create a “cocoon”, thereby achieving the desired result.
Thermal insulation of the terrace from the outside and inside, choose the appropriate option
If desired, any owner of a private house can turn a veranda that is not used in winter into a warm room, hallway or corridor, or greenhouse. Additional space for year-round use will not hurt anyone. To do this, you just need to properly insulate the veranda in compliance with certain requirements to make it suitable for winter living. Thermal insulation of terraces is carried out from the outside or from the inside. External insulation is characterized by the following advantages:
- work is carried out outside the home, all garbage remains outside;
- repair measures do not make serious changes to the lifestyle of the inhabitants of the house;
- the area of the terrace is not reduced;
- walls finished with special materials accumulate heat well and do not become damp, which increases the service life of the veranda.
In one approach, it is quite possible to protect all surfaces of the veranda (floor, ceiling, wall) from heat loss. At the same time, the home craftsman has free access to these bases at any height. But when performing interior work, you need to immediately prepare for changes in everyday life (especially when insulation is delayed for a long time) and the existing interior. Thermal insulation of the terrace from the inside requires the mandatory dismantling of old coverings. Not every home owner is ready to tackle such large-scale tasks.
Thermal insulation system structure
In order to efficiently insulate a wooden house, prevent the appearance of condensation on the surface and inside the insulation, and also prevent the formation of dampness, the best option would be to install a ventilated facade.
Regardless of what material is used, the structure is multilayer and consists of the following elements:
- Load-bearing wooden wall.
- Wooden or metal sheathing.
- Insulation.
- Windproof membrane.
- A frame for finishing, which also allows you to form a ventilation gap between the finishing and the insulation.
- Exterior finishing.
The main layers of the insulating “pie”
We insulate a terrace or summer veranda
It is quite possible to make a living space without walls at all - that is, to insulate the terrace with your own hands, including if it is located in the form of a separate building. The main thing is to have a waterproof roof over your head. The typical sequence of actions is as follows:
- Along the perimeter of the terrace you need to install an improvised plinth - a fence made of bricks or cinder blocks with a height of at least 20 cm.
- The floor is prepared according to the procedure described above and covered with insulation - carefully gluing the seams with tape and fastening them to the base with nails, everything is as it should be. The required thickness of heat-insulating material for open verandas is at least 6 cm;
- A moisture-proofing film is laid on top, which acts as a water barrier - against accidental splashes of rain and snow drifts;
- The finishing floor covering is made of linoleum, laminate, or solid board;
- The ceiling is sheathed in exactly the same way as when working in closed verandas, only the waterproofing is laid in two layers - for reliability;
- Double-glazed windows are installed on the entire wall - you get a new terrace with French-style windows. You can, of course, board up the openings with ordinary film - but there will be no time for aesthetics, no time for comfort.
Expanding the warm space of your home yourself is easier than it seems. This work is quite doable alone, all materials are reasonable, simple tools and basic repair skills are required. You can try to assemble thermal insulation on a separate section of the floor or wall on the same summer veranda - to understand how much you can handle this task. Additional tens of square meters of living space are worth several days of summer effort - because their results are noticeable all year round.
https://youtube.com/watch?v=HsLVTIyvM6E
Video description
You can see how thermal insulation is installed on the frame in this video:
Floors
If the height of the room allows or there is no other way, then the existing flooring is used as a subfloor. Most often these are boards laid on joists. A beam is attached to them in a similar way to a frame for walls. But it must have a sufficient cross-section to withstand the loads. Insulation is laid between the new joists, covered with waterproofing and a finishing floor is installed.
Floor insulation with mineral wool Source balkoncity.ru
If the base is concrete, one of the insulation options could be a screed with expanded clay or a heated floor poured into a regular concrete screed. This method is especially relevant when you need to decide how to insulate the veranda and make a bathroom or kitchen there by tiling the floors.
When the floor is accessible from below, the insulation can be secured under the existing flooring, creating the same thermal insulation pie, protected from moisture.
If the distance from the floor to the ground is very small, you can remove the flooring, fill the cavity with expanded clay and put it back in place.
To prevent the insulation from absorbing water from the ground, install a waterproofing barrier made of roofing felt or thick film. Source ekouteplenie.ru
Ceiling
The easiest way is to insulate the ceiling, which is accessible from the attic. If it is not there, then to maintain the height of the room, remove the roof and install thermal insulation.
When the ceiling height allows it to be reduced, the insulation is attached according to the already described scheme, as on the walls.
The ceiling along the frame is hemmed with plasterboard, clapboard or other finishing materialSource pechiexpert.ru
Windows and doors
The ideal way to eliminate heat loss through openings is to install double or triple glazed windows and an insulated entrance door. If there is no money left for this, there is another way to insulate a veranda in a private house cheaply with your own hands. During the cold period, the outside of the windows is covered with transparent film, the gaps between the frame and the wall are caulked and sealed with strips of paper or self-adhesive foam.
If there are many windows, some of them can be dismantled and sewn up when insulating the walls. Source avatars.mds.yandex.net
This is a completely acceptable temporary option for maintaining heat in a room. If you arrange a vestibule in front of the front door, installing an insulated frame partition, then the problem of cutting off the cold from it will be solved.
Knowing how to insulate a veranda in a wooden house with your own hands, you can turn it into an additional bedroom, kitchen or bathroom, expanding the living space of the house. To do this, you need to block the possibility of warm air leaving the room from all sides: through the floor, ceiling, walls, windows and doors. You can insulate both from the inside and outside, choosing the method that requires less cost or will be the most effective in your case.
What is dew point
Suppose that at a given temperature the relative humidity is 60%. This means that the air contains 60% of the maximum possible amount of water vapor that the air can “hold” when fog has not yet formed and dew has not yet fallen. If the temperature drops, the relative humidity - for the same absolute amount of steam - will become higher. With a further decrease in temperature, the relative humidity will reach 100% - they say that the “dew point” has been reached. This will cause condensation to form.
If you bring a cold object from the street into a room where the relative air humidity at a temperature of 20-25° is 50-60% in winter, it will immediately fog up, since near its surface the air will cool below the “dew point” and condensation will form.
The same thing will happen if warm air from the room penetrates the thickness of the insulation (for example, mineral wool) adjacent to the cold roof. As the air cools, the relative humidity will increase until it reaches 100%, and then moisture will form in the form of droplets of condensation, which will freeze with further cooling - and the insulation will gradually turn into ice.
To prevent this from happening, two problems need to be solved:
- do not let steam from a warm room into the thickness of the insulating material;
- if steam somehow got there, then immediately take it outside.
The process of insulating the veranda
Insulating a veranda with your own hands is quite simple if you thoroughly understand all the stages of the work being carried out. Basically, the terrace is built on the same foundation as the house. Typically these are concrete slabs or a monolithically poured concrete base. In winter, 20% of the heat leaks through it, so before insulating the veranda, you need to insulate the foundation of the structure. This process is carried out without any particular difficulties. Polystyrene foam boards need to be glued to the surface of the base.
Floor
First of all, when insulating a terrace, the floor is insulated. Some people do not attach much importance to this process, limiting themselves only to the treatment of ceilings and walls, believing that it is not necessary to insulate floor surfaces and are deeply mistaken. In wooden verandas, the floor is often laid in the following way: logs are laid on the ground or concrete base, on which boards are then laid and installed. For insulation it is necessary to carry out the following steps:
- remove boards;
- between the installed joists it is necessary to secure wooden beams with screws;
- Insulation is placed in the resulting compartments - mineral wool, penoplex or foam boards;
- when settling mineral wool, additional insulation is required when using foil or film, which will eliminate the possibility of getting wet;
- the remaining empty spaces are sealed with installation foam;
- Now you can put the floorboards back.
Lining inside
Insulation of the veranda can be done both from the street and from the inside. With insulation on both sides, it will be possible to achieve an incredible level of protection for the terrace during winter frosts, retaining much more heat.
- Initially, all existing cracks are sealed.
- Then you need to build a frame from a wooden beam.
- Next, a special waterproofing film is attached to the beam. It is better to install it from the inside using a construction stapler, thanks to which the process will take less time and will be much more convenient.
- After these procedures, a frame is constructed from timber or a metal profile, which is filled with foam plastic or other similar material. It is desirable that the distance between the metal profiles correspond to the width of the insulation itself.
- Drywall is installed on top of the frame.
- The final stage is plastering, painting or installing artificial covering on the surface of the walls.
Popular articles Paniculata hydrangea hedge
Ceiling insulation
To achieve an effective level of insulation of the veranda, the ceiling of the room must also be insulated. This procedure is quite labor-intensive. For high-quality work done, you should initially decide on the insulation and application or installation technology.
Thermal insulation of the ceiling in the attic is mainly carried out during the construction of the terrace, but if it was not there initially, then it can be built some time later. Sheets of polystyrene foam or other insulating material and vapor barrier are placed into the rafter frame.
It will be a little more difficult to insulate the terrace from the inside. The thermal insulation process can be done in one of several ways.
First way:
- First, a frame of 3x3 cm beams is built on the ceiling.
- Insulation material with a similar thickness is placed into the resulting cells.
- Afterwards the ceiling is covered with plasterboard.
- The final stage is painting or plastering the surface.
Second way:
- Instead of the old ceiling covering, OSB or plywood is laid.
- Behind this is a film for waterproofing.
- A frame is constructed from beams in which mineral wool, polystyrene foam or another type of insulation is placed.
- At the end, the constructed structure of beams is covered with film, on top of which the lining is hammered.
Third way
- The third method is the easiest. Frameless insulation is carried out only using solid material.
- Sheets of foam plastic are fixed on the ceiling itself without any specially equipped structures.
- Next, a construction mesh is placed on the ceiling, which is covered with putty.
Eliminate leakage of warm air through the ceiling
It remains to figure out how to insulate the ceiling, because a significant part of the heat evaporates from the wooden veranda through it. Especially if the front door opens. The flow of cold air rushing inward instantly squeezes the warm air upward.
The best option is to place foil-coated foam polymer between the beams, which will simultaneously retain heat and prevent moisture from passing through.
You can also choose mineral wool, but then the first layer is roofing felt for vapor barrier, and insulation boards are placed on it.
Ruberoid is laid under mineral wool for waterproofing
After such careful insulation, your veranda will withstand any frost, even if it is unheated.
The issue of thermal insulation of the veranda becomes relevant when there is a desire to use this room all year round. Verandas are usually unheated, as a result of which the temperature in them can drop below zero in winter.
If you want to ensure a comfortable air temperature inside the veranda even in the coldest time of the year, you need to take care of high-quality insulation of the extension.
With comprehensive thermal insulation using proven materials, and installation of a basic heating device: a small solid fuel stove or a good electric radiator, you can ensure a constant temperature in the veranda at +18+19 degrees.
The main types of materials for wall insulation
- Glass wool
. This is an absolutely fire-safe material. Its strength and elasticity exceeds many other mineral wools in these indicators. Available for sale in the form of rolls, slabs or mats. Working with glass wool requires respiratory, eye and skin protection, namely closed clothing, gloves, goggles and a respirator. The material has low density, so over time it sags and loses its properties. This is its disadvantage. - Styrofoam
. This is the most budget option for insulation, since its cost is extremely low. Foam boards are easily attached to walls even with glue due to their low weight. However, this material is flammable and can emit toxic smoke in the event of a fire. This factor should be taken into account when installing such thermal insulation on the veranda. Most often, polystyrene foam is used for external wall insulation. - Mineral basalt wool
. It is affordable, easy to use and fire safe. True, discussions periodically arise about the carcinogenic component of this insulation, but its presence has not been confirmed by facts. Basalt wool is available in the form of slabs, mats and rolls. - Penofol
. This is a new generation heat insulator that has unique properties despite its small thickness. Its fabric is foamed polyethylene covered with a layer of aluminum foil. Thanks to this structure, the insulation combines the insulating properties of trapped air bubbles with the heat reflective ability of 99% pure aluminum. The uniqueness of penofol is manifested in the retention of heat in all paths of its movement: convection, radiation and thermal conductivity. The insulation also has vapor barrier properties. It can be used as the only insulating coating or combined with any of the above-mentioned materials. The range of penofol differs in thickness, the presence of a self-adhesive layer and perforation. The insulation is produced in rolls. - Expanded polystyrene, polyurethane foam
. These are effective, comfortable and expensive insulation materials. They are lightweight and thick, so they are most often used for thermal insulation of ceilings. Working with polyurethane foam requires a special installation, which can be obtained together with an invited master.
What types of insulation are there?
Conventionally, all insulating materials can be divided into two groups.
With a chemical component
They require protection from fire. This group includes:
- Expanded polystyrene
The material is used mainly in the construction of brick houses, as an investment in space, in the middle of the masonry.
- Polyurethane foam
Spraying technology, or you can make slabs and then lay them. Convenient, but more expensive than we would like. Related to the equipment, it is special. Otherwise a good insulator.
- Styrofoam
It is a relatively inexpensive and at the same time effective insulation material. Does not require additional insulation, operation is quite simple.
How to insulate an attic
There are two standard schemes for insulating a panel house from the roof side: a cold attic and an attic (or a combined roof).
Insulating a cold attic
In this case, there is no insulation in the roof structure. Insulation is carried out over wooden floors.
This is a standard scheme for insulating a cold attic from the company Hexa, a manufacturer of insulating materials IzospanSource neanderthals.ru
It is important to meet the following conditions:
- The vapor barrier is fixed
on the surface of the false ceiling from the room side. It must protect not only the insulation, but also the load-bearing floor beams along with the sub-ceiling. Otherwise, the wooden elements of the structure will be moistened by exposure to vapor in the warm air, and the evaporation of excess moisture from them outside the room will be blocked by a vapor-proof layer.
- Choose as a vapor barrier films with anti-condensation properties
. These are two- or three-layer polymer materials with a rough (fleecy) surface that faces the room. They are able to partially retain condensate until conditions for its weathering appear.
- The insulation is laid
on a suspended ceiling between load-bearing floor beams.
- Lay on top of the insulation waterproofing
superdiffusion membrane.
- If the height of the floor beams is not sufficient to form a ventilated gap above the insulation, then they are filled with spacer counter battens
. And the attic floor boards are already attached to them.
Attic insulation
There are two options for how to insulate a frame house for winter living by insulating the attic: this is thermal insulation of the roof or the outline of the living space.
Insulating the contour of a residential attic (attic) can also have different options. For example, as in this diagram - with roof insulation from the eaves to the top trim. Source pinterest.com
But in any case, on the side of the roof on the rafters, in front of the sheathing (or continuous flooring), a waterproofing membrane must be laid.
Popular articles Pruning hydrangea for the winter
For a metal roof, a gap is required between the waterproofing and the roof covering so that condensation can drain onto the drip line and moisture can be evaporated from the under-roof space. If the vapor permeability of the membrane is low, then a ventilation gap must remain between it and the insulation to ventilate water vapor from the mineral wool.
Roof insulation
It is easier to insulate the entire roof than to “cut out” a warm contour from the attic. Especially if the house is small.
This is what the diagram of an insulated roof looks likeSource stroyfora.ru
Insulation of the entire roof is carried out as follows:
- Between the rafters laying mats
mineral wool. If the pitch of the rafters is greater than the width of the mat, then additional sheathing is installed. If less, the mats are trimmed. But in any case, the width of the mats should be 5 cm less than the pitch of the rafters.
- On top of the insulation to the rafters (and sheathing) attach a continuous layer of vapor barrier
. These can be materials with anti-condensation or reflective properties. The strips are laid overlapping, both horizontally and when extending along the length. All joints and abutments to structural elements are secured with self-adhesive vapor-tight tape. The anti-condensation or reflective surface should face the attic.
- For creating a gap
(and fastening the sheathing) a wooden block is nailed to the rafters.
Insulation of the residential perimeter of the attic
You can only insulate the part of the roof that encloses the attic itself. The insulation is laid from the line of the attachment points of the racks to the rafters, and to prevent it from slipping, a horizontal spacer is mounted between the rafter legs. At the top, the border of the warm perimeter can run along the ridge or along the line of attachment of the upper trim. The upper trim in this case serves as load-bearing beams for the attic ceiling.
Two schemes for insulating the attic contour - without a ceiling and with a ceilingSource lateres.ru
If the attic has a ceiling, then its insulation is carried out according to the “cold attic” scheme.
The attic walls are insulated in this way:
- from the roof side to the racks fasten the casing
;
- insulation
placed between the racks;
- attached to racks vapor barrier
;
- stuffed onto racks spacer bar
(to create a gap between the vapor barrier and the inner lining), the same strip serves as a counter-lattice for lining the attic.
Step 1. Correcting the roof structure
The lower the roof, the worse the snow comes off. Therefore, to prevent melt water from flooding the under-roof space, the coating must contain a minimum of seams - only high tightness. But what to do if the roof of the house is low and was not originally intended for converting an attic into an attic? In this case, builders often suggest raising one of the parts of the roof. It's actually not difficult at all:
So, the rafters of the new slope rest on the upper transverse beam, and their opposite side is fixed directly on the ridge mauerlat - using strong metal brackets.
By raising the low roof, you will already partially solve the problem of thermal insulation.