Warm floors are one of the most popular heating methods today, used both independently and together with other systems. The laying technology has been studied and refined, but is used mainly on the first floors due to the large weight of the cement screed traditionally used for pouring the highway. In order to fearlessly lay heated floors on wooden floors, without fear that the base will “play,” the Finns came up with an original technology. And FORUMHOUSE users adapted it to their needs and capabilities. Our craftsmen willingly tell everyone how to lay heated water floors in a private house over wooden joists.
How electricity heats the floor in a wooden house
- single heating cable;
- heating mats (analogue of a cable fixed to the base in the form of a mat);
- infrared film 0.5 mm thick (carbon strips between parallel power buses);
- carbon rods (analogous to film without a film base).
Each method is designed for its own type of coating and has certain advantages and disadvantages.
If the floor covering is ceramic tiles or porcelain stoneware and similar materials, it is better to use a single heating cable or heating mats. For floors covered with carpet, laminate, parquet, etc., it is better to use carbon or film heated flooring. This coating effectively transmits infrared rays, heating the entire floor area. For all types of heated floors, it is important to determine whether this will be the main or auxiliary heating in the house.
It is more advisable to use warm electric floors based on a heating cable or mat on the first floors of the house, taking into account their installation under a cement screed, on which the flooring is then laid. However, warm electric flooring can be done without a cement-concrete screed. The snake cable or mats are laid on top of a metallized reflector lying on a base made of a layer of thermal insulation. Floorboards and flooring are laid on top.
Installation of a floor heating system
When laying a flooring system, you get a kind of multi-layer cake; let’s look at each layer in more detail.
Requirements for the foundation for the structure
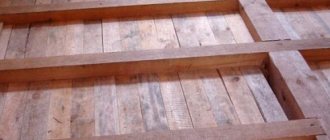
The first layer of the cake is a properly prepared base. This can be any overlap that is pre-leveled. SNiPs regulate the absence of significant differences in heights, protrusions and roughness. The wooden floor must be level, without protruding boards.
Each board should be well secured and should not bend. The maximum permissible limit of deviation from the horizontal is 2 mm, distributed over 2 m of area in any of the existing directions.
Construction of the insulating layer
To prevent heat loss, it is necessary to install an insulating layer. The material for its implementation is selected individually, based on operating conditions. It must be moisture-resistant, fire-resistant and compatible with other building materials.
It is desirable that additional sound insulation be provided. If possible, the thinnest but most effective material is selected.
Pipe fixation option
The actual flooring under the pipes is laid on top of the insulation. There are many options here. These can be polystyrene mats with special bosses for pipes. Such mats are produced single and doubled with insulation.
In the latter case, the insulating layer may be superfluous. Sheets of lumber with cut grooves for pipes can be used as flooring. They are also produced industrially. There are also homemade floorings made from slats, bars, etc.
Pipe for moving coolant
Next, the heat pipe is laid into the prepared fasteners and grooves. To ensure a tight fit and create a heat shield, the parts are placed inside a special aluminum profile.
If there is none, you can make similar elements from galvanized steel or wrap each part in thick foil. It is optimal to lay an additional layer of foil on top of the mounted pipes.
Construction of the foundation for finishing
A base must be laid on top of the pipes under the floor covering. It is selected depending on what kind of finishing coating will be laid.
If you plan to install tiles, ceramic or PVC, as well as linoleum or carpet, moisture-resistant plasterboard is laid on the metal elements of the wooden flooring. If polystyrene mats were used to construct the flooring, GVL is laid in two layers.
The decking structure is usually covered with a base for the finishing coating. It is selected depending on the material that is preferred as a coating. For example, a moisture-absorbing substrate is placed under the laminate; moisture-resistant plasterboard or chipboard is placed under the tiles.
Drywall is not laid under laminate on wooden flooring. Instead, foamed polyethylene or a cardboard backing is placed on aluminum plates to absorb excess moisture.
Instead of GVL, you can use moisture-resistant types of chipboard or plywood. A good solution is glass-magnesium sheets, which also conduct heat well, which is absolutely not superfluous when arranging a heated floor.
Subfloor on wooden joists: where to start
How to make a subfloor correctly? For the installation of the subfloor, the most dry boards from coniferous trees are selected. Humidity should be around 15–20%. Pine, fir, larch or spruce boards are already impregnated with natural resins and are practically resistant to rotting and molding. Additionally, boards for the subfloor and beams for joists will have to be impregnated with an antiseptic to resist moisture, insects, fungi, and with a fire retardant to increase fire resistance.
High-quality laying of the subfloor will ensure the absence of booms and creaks when walking
A high-quality subfloor in a wooden house ensures no noise or squeaks when walking, retains heat inside the home, and extends the life of the floor.
Installing joists under wooden floors
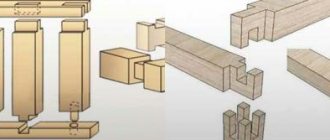
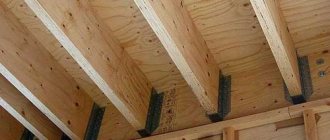
Logs are the basis of all floor layers. The supporting structure is assembled from them. Floor joists in a wooden house are placed on floor beams, on supports or directly on a reinforced concrete slab.
If the house is installed on a columnar, screw or strip foundation, then the logs can be attached directly to the load-bearing walls. But the width of the room should not exceed 4 meters. This type of fastening allows you to make a reliable and durable load-bearing structure for the floor.
Joists can be attached directly to load-bearing walls
When installing floor joists on a concrete base, they are equipped with supports that lift them above the concrete. Supports are constructed from bricks, concrete, or ready-made metal supports are used.
Sometimes logs are laid directly on a concrete base. In this case, be sure to carry out good waterproofing.
If the installation of floor joists is carried out on foundation beams, then supports are installed in the middle for greater strength of the future floor.
In some cases, support posts are installed directly on the ground. Under the supports, a cube of 40x40x40 centimeters is dug in the ground, then sand 10 cm thick is compacted to the bottom, a layer of crushed stone 10 cm thick, and the remaining 20 cm of height is filled with concrete. After hardening, a brick support is formed to the required height and waterproofing (for example, roofing felt) is laid.
Supports for logs can be made of brick, concrete or metal
To strengthen the entire floor structure around the perimeter of the room, coniferous beams with a cross-section of 150x150 cm are fixed to the plinth or grillage. The base for laying these beams (they are called the joist frame) is covered with a waterproofing material. Then the edges of the joists are laid from wall to opposite wall on this frame. This creates the bottom harness. The length of the section of the log that rests on the foundation or grillage must be 10 cm or more. The harness can be not only bottom, but also side, as well as double.
Related article:
When attaching the trim and joists, a distance of 2–3 cm from the walls must be maintained due to seasonal expansion and drying of the wood. When laying the joists, the builder must ensure that the surface formed by the upper sides of the joists is perfectly flat. It depends on this whether the wooden floor in a private house will turn out smooth along the joists. Check the evenness using a regular strip or building level.
What should be the cross-section of the logs and the step between them
The quality of the final floor directly depends on the professional installation of the wooden floor on the joists. The cross-sectional size of the logs, the distances between them and the thickness of the materials for the final coating Fire retardant, all these parameters are interrelated.
Wooden beams used for logs must be rectangular when cut
Wooden beams should be rectangular when cut. Moreover, the height of this rectangle should be 1.5-2 times greater than the width. Logs are installed on the side surface. Thanks to this arrangement and cross-sectional dimensions, the logs can withstand impressive loads, taking on part of the total load of the house.
The optimal cross-section of the joists and the pitch between them for different spans and different thicknesses of finishing boards can be found in the table:
| Finish board thickness mm | Distance between joists mm | Wall length mm | Log section mm |
| 20 | 300 | 2000 | 110x60 |
| 24 | 400 | 3000 | 150x80 |
| 30 | 500 | 4000 | 180x100 |
| 35 | 600 | 5000 | 200x150 |
| 40 | 700 | 6000 | 220x180 |
| 45 | 800 | ||
| 50 | 1000 |
If the length of the wall is not included in the table, then the distance between some lags will be less than the calculated one. In this case, the strength of the entire structure will only increase.
Before laying, joists, like all wood used, are treated with an antiseptic and fire retardant, and the underside is treated twice with an interval of 5 hours due to drying.
Thermal calculations
The higher the screed, the smaller the distance between the turns of the heating pipes in the floor needs to be. It is also worth considering such a factor as heat loss. Their magnitude depends on
- the location of the house relative to the light,
- number of windows and their size,
- insulation of load-bearing walls and roofs.
Naturally, the calculation of a warm floor should take into account the intensity of use of a wooden house (dacha option or full-fledged life) and, of course, the climatic conditions in which this house is located.
If the building is old, then before starting heating, it is better to test the house for strength, as well as cracks/drafts, and then carry out maximum insulation. If the house is being built from scratch, then energy saving issues must be addressed immediately during construction.
It depends on whether the house is old or new and you need to choose options for water floor heating.
Arrangement of the subfloor
Floors in wooden houses should not only be durable, but also well ventilated.
To do this, equip a rough foundation, which:
- creates an air gap that retains heat in the house and protects the entire structure from rotting, and the house from distortions;
- is a rigidity frame and serves as the basis for layers of heat and waterproofing materials and a finishing coating.
Thanks to this, the floor material is perfectly preserved. To arrange the rough surface, unedged boards 15-50 centimeters wide are used. Before installation, they must be impregnated with an antiseptic.
Quite often, beginners mistake the bases intended for laying flooring for subfloors. In fact, it is made using plywood, chipboard or boards mounted on joists. It is required to level the surface and lay the flooring smoothly and neatly. They also ensure uniform distribution of the load on the floor, and are used in both wooden and monolithic buildings. They make a warm floor on a wooden floor, and not on a base.
The subfloor is the bottom layer of a two-layer base. It is used when laying on floor beams or joists, if the gap between the beams or joists is large enough. In this case, the boards as a subfloor are laid diagonally in relation to the finished floor. Due to the fact that the wood fibers are located in different directions, the strength of the overlap increases. It is between these two layers that the insulation is laid. Flooring made of boards serves to fix the heat and waterproofing layer.
Video description
Video on how to make a warm floor on a wooden floor under tiles:
Recommendation! When using parquet boards as a finishing coating, the base must be strong enough. This is especially true when the distance between the joists is large and they will sag on a soft floor, but thick wooden boards will make the warm floor ineffective. Therefore, it is better to lay parquet on plywood on top of screed or frequently located supports.
Features of heated floors in a wooden house
Accordingly, all layers of the “pie” will be laid on the support beams: subfloor, vapor and waterproofing layers, finishing treatment for laying the floor covering and the cladding itself. Naturally, among all these layers there will be a heating system. The underfloor heating system is laid on top of the rough base with an emphasis on preparing various protective and insulating layers for the system elements.
To install a warm floor in a wooden house with your own hands, you can use one of the following methods:
- A combination of dry and concrete screed. This is a universal technology that involves laying two types of screed at once, which allows it to withstand heavy loads on the floor. It can be used for a wide variety of heating systems. The dry bulk part of the screed allows for increased hardness and strength to protect the heating elements of the heating system.
- Liquid screed over existing floors. This is perhaps the most difficult method, as it requires careful preparation of the wooden beams. Concrete screed is highly valued due to its thermal insulation properties and increased heating efficiency of the entire system as a whole. It is most advantageous to use such a base in rooms with high humidity, cold and heavy flooring.
- Free installation with ventilation gap. It is used exclusively for heating equipment as an auxiliary system in relation to the main heating of the house. In combination with ventilation gaps, a powerful heating system cannot be used; additional holes as air outlets will reduce the efficiency of the system.
- Application of reflective plates. This option is a compromise if you cannot do without pouring a concrete screed. The plates are used to reflect the flow of thermal energy, increasing heating efficiency.
Features of the flooring system
The traditional version of a water-type floor involves installing pipes in a screed. It is poured with a concrete solution with special additives that increase its thermal conductivity.
As a result, the concrete pad becomes a kind of heat accumulator, which makes it possible to use such heating as efficiently as possible. However, the traditional arrangement method has disadvantages.
The wooden base has low thermal inertia, which prevents the system from functioning normally. To correct this drawback, heat-reflecting plates are installed from metal with high thermal conductivity.
The most obvious is too much weight of the concrete screed. With a solution density of about 2000 kg/sq. m it gives a significant additional load on the base and load-bearing structures.
For reinforced concrete slabs, such a load is quite feasible. For wooden floors - prohibitive. For this reason, the traditional installation method is prohibited in such cases. The so-called flooring system is used here.
It is made in the form of a low flooring, inside of which pipes are located. Wood is most often used for its arrangement, but industrially produced polystyrene flooring has appeared relatively recently.
The pipes are placed in grooves where they are secured. It is known that wood conducts heat very poorly. For this reason, wooden systems cannot be an effective source of heat.
To correct this deficiency, metal heat-conducting elements are inserted into each groove. They also strengthen the structure. There are similar details in polystyrene flooring with metal inserts, the material of which is also a poor heat conductor. In this way, a reliable and durable heating system is assembled.
Its advantages over its traditional analogue can be considered:
- Light weight of the flooring, which even wooden floors can withstand.
- Relatively simple assembly, especially when it comes to industrial flooring models.
- There is no need to wait for the concrete screed to harden. Finishing work can be done immediately after installation.
- Full maintainability. To carry out repair work, it is enough to lift a fragment of the flooring to provide access to the area with the fault.
Another undeniable advantage of the flooring system is its versatility, which makes it possible to implement a variety of modifications. Most of which are homemade. The main disadvantage of the flooring scheme is rapid cooling. The floor heats up in a short time and gives off heat just as quickly.
A big plus of a water-based floor is the possibility of relatively simple repairs. To get to the damaged fragment, it is enough to remove a section of the floor covering and remove the flooring underneath it
Actually, the heat supply is limited to that which is in the coolant liquid in the pipes. Therefore, when the boiler is stopped, the room will soon cool down. For this reason, deck systems are more often used as an addition to the main heating system, especially in cold regions.
Choosing between water and electric heated floors
If you are installing a heated floor in a wooden house, then it is very important to decide on the type of installed system. This depends on a number of different conditions and factors:
This depends on a number of different conditions and factors:
- features of laying the floor “pie”;
- type of overlap;
- deterioration of the ceiling;
- features of the room in which heating will be carried out;
- purpose of the heating system: primary or additional.
In general, floor heating in private homes can be done using two main types of systems:
- electric heated floor
- based on a heating element: cable, rod, mat. Thermal energy is released through the application of electrical current. Installation can be carried out not only under a dry screed, but also under a liquid mortar, since after drying the screed will be absolutely safe for the functioning of electrical elements (more details: “Electric heated floor on a wooden floor - arrangement options”). Various reflective layers are placed under such a system, which increase the heating efficiency. A variety of floor coverings can be placed on top of it; - water heated floor
- consists of a conventional heating circuit consisting of polyethylene or metal-plastic pipelines connected to the main heating circuit of the house or a heating boiler. Such a system can be installed under a concrete screed, or you can create a dry heated floor in a wooden house by inserting special plates between the contour lines that increase the heating power.
If we consider the visual component, then naturally the wiring fits better into the interior of the room than pipelines. In the photo and during visual inspection the cable is almost invisible.
Materials and tools
Installing a heated water floor in a private house using the dry method requires the purchase of the following materials:
- solid or liquid fuel boiler, gas (an electric boiler is inferior in economics to cable heated floors and infrared film);
- circulation electric pumps - due to the internal resistance of the pipes, the movement of the coolant due to the pressure difference in the system is impossible;
- expansion tank;
- Mayevsky tap for removing air when airing the heating system;
- distribution unit (collector);
- safety valve;
- pipes with special fasteners;
- fittings for polypropylene pipes or coupling-press for metal-plastic;
- antifreeze if no one lives in the house on a permanent basis during the winter;
- roll waterproofing in case of pipe leaks;
- foil vapor-permeable heat-insulating material. When purchasing simple insulation, you need food foil;
- metal diffuser made of galvanized steel or aluminum;
Diffuser.
- polystyrene plate with bosses for laying pipes;
- set of wooden slats.
If you want to save money, a slightly different list of materials is possible. But we will talk about this in the process of reviewing the material.
You can't do installation work with your bare hands. You need tools and equipment (you can buy them, borrow them from friends and acquaintances, or rent them). According to the technology, the set includes:
- level - allows you to carry out work in one plane;
- roulette - nothing without it. You will have to measure a lot;
- wood hacksaw - useful when laying pipes on beams or on a slatted system;
- grinder - will help in cutting pipes. Here she is unrivaled;
- set of wrenches;
- adjustable wrench. Sometimes they indicate that one adjustable wrench is enough. But that's not true. Anyone who installed such a system with their own hands knows about this;
- soldering machine - required for cross-linked polyethylene pipes;
- Screwdriver Set.
Some specialists take a portable gas burner with them, which in some cases significantly speeds up the progress of work.
Calculation of the number of pipes
The number of pipes depends, first of all, on their diameter. And not because a larger amount of coolant liquid is pumped through a larger pipe, which means less is needed. The point is the size of the circuit, which is limited by the internal resistance of the pipe walls. In plain language, this means that a pump of any power cannot pump water through a pipe of infinite length.
There is always a “locked loop” effect. Thus, through a ⌀16 mm pipe, an electric pump can pump liquid over a distance of only 80-100 m (depending on the pipe material). In turn, the size of the pipe affects the laying step: a thinner pipe can be bent 360° with a smaller radius. Here the laying step will be smaller. Naturally, for a thicker pipe this step is greater.
Taking these nuances into account, heating engineers proposed the following formula for calculating the number of pipes:
N = S/L x 1.05 + (M x 2) where:
- N—number of pipes, m;
- S—heated area, m2;
- L — pipe laying pitch, m (optimal distance between pipes is 20 cm);
- M—distance from the circuit to the collector, m;
- 1.05 - safety factor for radii and connections.
The calculation can be carried out using a simplified formula: multiply the heated area by 5 - SNiP requires laying 5 m of pipes per 1 m2 of room area.
The second point taken into account when purchasing pipes is the material from which they are made.
Dry installation in a wooden house
Installation of an electric heated floor in a wooden house in the absence of a concrete base can be carried out in one of two ways: on a solid plank rough (or even finished) floor or directly on logs. The first method is much simpler, but is of little use for laying cable and rod mats due to their relatively large thickness.
Regardless of the choice of the “dry” method, without a screed installation device, it should be taken into account that the maximum permissible specific power of foil heating mats is 130 W per square meter of heated area. The power density of infrared film can be twice as high; for a resistive cable, the limitation is much stricter - no more than 10 W/m.
Finish coating
The ideal floor covering for heating cables and films is ceramic tiles. Unfortunately, laying it on a wooden base is extremely rarely practiced, since it is associated with great technological difficulties. However, modern floor heating systems work quite effectively even when laid under laminate, linoleum and even carpet - you just need to take into account the chemical composition of the coatings: some of them, even with slight heating, can emit harmful, toxic compounds.
But, given that the maximum temperature of the heating elements of a heated floor almost never exceeds 50 degrees, the main requirement for the floor covering is good thermal conductivity. Laminated boards and linoleum of the lowest price category do not meet this condition well, but with the right skills they can be used.
Advantages of an underfloor heating system
Advantages of an underfloor heating system
Traditional heating devices are not able to provide uniform heating of the air in the room; they create convection heat flows in the room that rush from the floor to the ceiling and back. In this case, the main heat goes to the ceiling, where it remains. Already cooled air comes down, and when it reaches the floor, its temperature is far from comfortable.
The main advantage of heated floors is that they distribute warm air evenly throughout the entire area of the room. The temperature difference between the ceiling and the floor is minimized, and the warmest air settles below.
Another important advantage of underfloor heating is the ability to adjust the temperature. For this purpose, the system has a thermostat; one turn of its handle allows you to set the desired temperature. Thanks to this function, the user, in addition to convenience, receives significant energy savings.
The pros and cons of each heating system will be discussed in more detail in the review. This will help you decide on the choice of heated floors for your home.
Insulation of concrete floors
Concrete floors are easier to insulate. In addition, they have many advantages compared to wooden coverings. Firstly, they are easy to create: you just need to make a cement screed with reinforcement. Secondly, concrete floors are strong, reliable and durable. Also today there are many self-leveling mixtures on the market, with which you can get a perfectly flat floor, on which you can lay not only linoleum, but also laminate, ceramic tiles, and without additional surface preparation.
Concrete can be poured in two ways: using joists or on the ground. The second method of installing a heated floor on the ground is much simpler.
After determining the required floor level, marks are made using a cord tied on pegs. This cord will serve as a kind of boundary to which the concrete base will reach. Its height should be about 10 centimeters. Then the soil is sprinkled with gravel so that it reaches the level of the pegs - they are then removed. Sand is poured on top of the gravel and compacted.
Then they do waterproofing. Thick polyethylene film is suitable for this purpose. It is laid on sand so that the edges are higher than the level of the future floor. Then the finished base is poured with concrete and leveled. Cover the top of the layer with film. The floor is periodically moistened. The base should stand for about a month - during this time the concrete will acquire sufficient strength. After this, liquid screed cement is applied to the surface.
Floor heating in a wooden house is often necessary. A modern solution is to install an electrical or water system. When constructing any of these structures, the thickness of the floor covering should not exceed 25 millimeters, otherwise the heating will not be effective enough.
Water-heated floors are made using a cement screed or a screed system. The first method is most often used.
In this case, the design of the water floor will be as follows:
- concrete base;
- thermal insulation layer 20-100 millimeters thick;
- reinforcing mesh;
- heating system pipes attached with clamps to the cells of the reinforcing mesh - they are laid at a distance of 10-30 centimeters from each other;
- underlay for flooring;
- finishing material no more than 25 millimeters thick (linoleum, ceramic tiles, etc.).
In a flooring system, a layer of polystyrene or chipboard is added. Reinforcing mesh is also present. A wooden water-heated floor system is also not complicated.
An electric floor is even easier to create. Both logs and screed are suitable for its arrangement. An electric floor is installed using a screed in the same way as a water floor. If installation is carried out along logs, then an air gap is created. The cable is laid out on a reinforcing mesh with cells no larger than 50x50 millimeters in size, fixed to the logs - gaps approximately 50 millimeters high are sawed into them, at the same distance from each other (more details: “How to make an electric heated floor in a wooden house - warnings and recommendations” ). They will then be insulated with foil. The heating cable is laid along these gaps with the intersection of the logs, just like metal reinforcing mesh.
Insulating the floor in a private house is simply necessary, because otherwise it will be unpleasant to walk on it in winter. Floor coverings in the bathroom and children's rooms especially need insulation. For insulation, it is better to use modern thermal insulation materials, for example, mineral wool. If funds allow, then it is worth installing water or electric floor heating.
Carrying out work using the example of a water heating system
You can install water heated floors in a wooden house in a variety of ways, using a variety of materials, etc. To reduce the load on the underfloor heating system, it is recommended to use polystyrene or ready-made modules. It is this method that will be discussed further.
For proper installation you will need the following materials:
- polyethylene film 0.2-0.5 millimeters thick;
- polystyrene boards with grooves (thickness 0.3-0.5 centimeters);
- aluminum distribution plates up to 0.5 millimeters thick;
- gypsum fiber sheets with beveled edges 1 centimeter thick;
- self-tapping screws 1.6 centimeters long and 3.5 millimeters in diameter;
- damper tape 5 centimeters thick;
- PVA glue.
If all materials are purchased separately, then it is very important to purchase polystyrene plates with grooves for inserting aluminum plates, and the plates themselves must have notches to simplify joining of the sheets.
All equipment for a heated floor system should be purchased from one manufacturer, in one place, and only on the recommendation of a specialist. It is worth understanding that the heating system is an individual design, depending on the characteristics of the room.
The heating circuit can be assembled from polyethylene and metal-plastic pipes. Before installation begins, the configuration of the heating system should be clearly formulated.
Laying can be done in a snake or in a spiral. Both methods have both advantages and disadvantages, but spiral laying is more practical in terms of uniform heating. It alternates between “cold” and “warm” circuits. The interval between contour lines does not exceed 30 centimeters.
Installation is carried out as follows:
- After creating the rough flooring, the entire contour of the room at the junction of the floor and walls is glued using damper tape. Fix it with PVA glue. Then the floor surface is thoroughly cleaned of dust, dirt and debris. Polyethylene is laid out on it with a 10-15 cm spacing on the walls.
- Then polyethylene mats are laid using the “joint to joint” method. If you are laying the heating circuit with a snake, then you can use a simple mat with grooves for straight installation and a bend near the wall. If the type of spiral is chosen, then you can purchase profile mats or mats with “bobs.” It is advisable to draw a laying diagram in advance in order to complete this stage much faster.
- Aluminum plates are laid according to the same pattern, taking into account the pitch between the pipeline lines. They are adjusted using special notches.
- The pipes are laid in the grooves of the plates in increments of no more than 30 centimeters so that the room is heated evenly. Near the walls, you can reduce the step by half, since this part of the room is the worst in terms of thermal energy loss.
- Then the place in the room where the distribution manifold will be located is prepared. It is advisable to connect the entire system with the help of a professional. Once the connection is completed, the system is tested at twice the standard pressure. If there are no leaks or breaks, and the heating in each section of the circuit reaches the required temperature, then the installation was completed correctly.
- The completion of the installation of the heated floor is the laying of a polypropylene backing and gypsum fiber sheets in two layers. It is desirable that the sheets have a 2-centimeter chamfer. The sheets are fixed together with PVA glue applied to the chamfer, and are also secured to the base using self-tapping screws.
- Then the base substrate is laid and the floor covering is laid on it.
In fact, laying each layer is not difficult. Professional help is required only when connecting the entire heating system to the manifold cabinet, since plumbers do not make mistakes.
Selection of thermal insulation and fasteners for water heated floors
To prevent heat from escaping downward, a layer of dense foam is placed on the base. The density of the insulation is selected to be at least 25, and preferably 35 kg/cub.m. Lighter polystyrene foam will simply collapse under the weight of the concrete layer.
Insulation and heat reflector
The optimal thickness of the insulation is 5 cm. When laying on the ground or if increased protection from the cold is needed, when the level below is an unheated room, the thickness of the thermal insulation can be increased to 10 cm. To reduce heat losses, it is recommended to lay a heat-reflecting screen made of metallized film over the insulation. It could be:
- Penofol (metalized polyethylene foam);
- Reflective foam screen glued behind radiators;
- Regular aluminum food foil.
The metallized layer is quickly destroyed by the aggressive action of concrete, so the screen itself also needs protection. Such protection is provided by polyethylene film, which is used for greenhouses and in greenhouse farming. The film thickness should be 75-100 microns.
In addition, it provides the necessary moisture for the maturing concrete screed throughout the entire period of its hardening. The pieces of film must be overlapped, and the joint must be sealed with tape.
Fastening connections for water heating pipes
Pipe fasteners are installed on the thermal insulation. Its purpose is to secure adjacent pipe branches and position it along the floor in strict accordance with the preliminary plan. The fastener holds the pipe until the concrete screed reaches the desired degree of hardness. The use of fasteners facilitates the installation of the floor and ensures correct placement of the pipe in the thickness of the concrete pad.
Fasteners can be special metal strips, metal welded mesh, plastic brackets that pin the pipe to the foam base.
- Metal strips are used when the thickness of the concrete pad is increased. They slightly raise the pipe relative to the heat insulator, due to which it is closer to the upper surface of the concrete pad. The pipe simply snaps into the shaped recesses of the strips.
- The metal mesh not only secures the pipe, but also reinforces the layer of concrete pad. The pipe is tied to the mesh with pieces of wire or plastic clamps. Fastener consumption is 2 pcs. per linear meter. Additional fasteners can be used in places where there are curves.
- Plastic brackets are installed manually. They pin the pipe to the polystyrene foam as it is laid. Do-it-yourself semi-industrial heated floors are made using a special stapler. But its purchase is justified only with intensive professional use.
In recent years, manufacturers of underfloor heating systems have begun to offer another very convenient solution. We are talking about special sheets of dense polystyrene foam with a profiled surface. Typically, the surface of such sheets consists of intersections of grooves or rows of protruding elements, between which heating pipes are easily laid.
The surface of the sheets is smooth, extruded, all pores are closed and no additional waterproofing film is required. Having a special thermal cutter, you can cut grooves in polystyrene foam yourself. But to carry out this work you need at least minimal experience.
Important!
Metal-plastic pipes are supplied in coils. When laying, the coil rolls out along the pipe placement path. Do not pull the pipe from a lying coil, as this will cause it to twist and may lead to delamination of the internal layers.
Double floors with joists
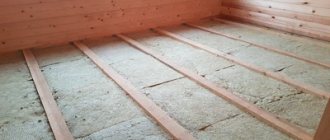
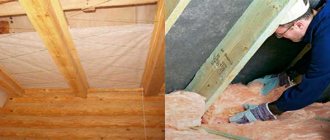
When using this method to make warm wooden floors in a private house, a rigid base is first installed, which can be a flooring made of boards or chipboard. A waterproofing layer of roofing material or polyethylene is laid on the base created in this way. After this, a frame is constructed in the form of longitudinal logs, between which thermal insulation materials are placed. Waterproofing is again laid on the thermal insulation layer and flooring is carried out.
The best thermal insulation materials used for floor insulation are mineral wool and expanded polystyrene.
• Mineral wool is an excellent sound and heat insulating material, resistant to various mechanical and chemical influences, does not burn, and also repels water well. Mineral wool is produced in the form of slabs and flexible mats (rolls). • Expanded polystyrene is a more expensive, environmentally friendly, heat-insulating material. It also has many advantages such as: durability, high strength, resistance to microorganisms, low water and vapor permeability, easy to install and process. Sometimes foam or expanded clay is used as insulation. Date: September 25, 2022
