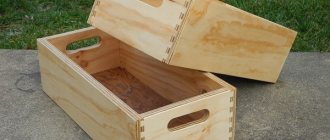
In recent years, so-called “life hacks” have become fashionable. From available materials, through simple manipulations, they construct something useful for the home. Wooden boxes are also used, from which it is easy to assemble original, multifunctional furniture. They mainly use food containers: canned food, fruits and vegetables. In bachelor apartments, military boxes that used to store weapons and ammunition will look good. Stylish, “masculine” decor is not specially painted in order to preserve the markings and natural shabby appearance. Of course, such non-standard decoration is not combined with all styles in interior design. Strict classics, uncompromising modern, laconic high-tech are difficult to combine with wooden packaging. The boxes will look cute and appropriate in homes where the concept of Provence, country, ethnic, fusion, Scandinavian, Russian, and rustic style is implemented. If you try hard with decoration, then such decoration can be organically integrated into the design composition of loft and minimalism. Let's talk about ways to use wooden boxes in the interior and how to make furniture elements from them with your own hands.
Wall shelves
Slatted boxes are most often used, but plywood “models” are also available. Both options are useful for decorating a room. A wall storage system is needed in every home. Using hanging shelves, you can save space in a cramped bathroom, living room, kitchen, and even in a pantry or loggia. Fruit or vegetable wooden boxes make an excellent organizer that will help keep things and household items in strict order. After pre-processing the container, the modules are fastened together by screwing self-tapping screws into their side walls. If you need “single” shelves with spaces between them, then the scale of work is reduced. They are painted in the desired color, decorated and attached with the bottom cover to the wall vertically or horizontally. The sides will serve as shelves. In another option, the boxes are placed “naturally”, that is, one of the sides leans against the surface. Such shelves will be more spacious, but are used more often in closets, since the contents will not be displayed. An original solution would be to make a wooden frame in which the decorated drawers will be placed as pull-out containers. By the way, you can organize hanging shelves from baskets in the same way. To make the storage system look more beautiful, it is decorated with forged support at the bottom. Metal goes well with wood. An unusual design solution would be to decorate the wall in the hallway using drawers of different sizes. The center of the composition will be a mirror in a wooden frame. Boxes of different sizes are placed around it: some are used as key holders, others are used for hats and gloves, and still others are used for indoor plants and small decor. The design is completed by securing the slats with hooks for bags.
Wooden boxes can be decorated as original shelves for storing wine bottles. Inside, they are divided into sections using crossbars, and then varnished, decorated with twine, pieces of burlap, fixed to the wall and laid with a backing of hay. The themed wine storage shelf is ready. In another version, an open cabinet is made from a box. It is placed vertically, the top cover is reinforced with a decorative table top made of boards. Shelves are installed inside for horizontal placement of bottles, as in wine cellars.
Step-by-step instructions for beginners
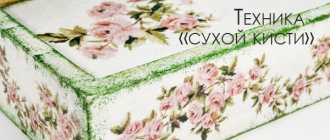
Before you begin master classes on decoupage boxes, you need to understand the essence of its implementation. This will help beginners to master the technology of such decoration at the initial stage. First of all, you need to prepare tools and materials, namely:
- Decoupage box. For beginning craftsmen, it is best to take a ready-made wooden blank (such a product can be purchased at handicraft stores).
- You also need to get decoupage cards or napkins, which are sold at retail outlets specializing in hobby goods. In general, any type of paper with a pattern is suitable for the technique (regular table napkins, wallpaper, postcards, clippings from literature, etc.), but for a beginner it is still better to use special blanks.
- Sharp scissors for cutting out pictures.
- Brushes of different sizes for glue and varnish.
- Glue (regular PVA or for decoupage).
- Glossy or matte high-quality acrylic varnish (the durability of the product depends on the quality of the varnish).
- Acrylic primer.
- Sandpaper.
Popular articles Scorpio
Surface preparation
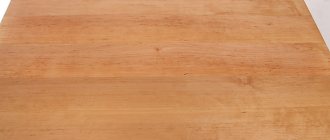
In order for the decoupage to turn out neat, the surface of the object being decorated must be perfectly smooth, so it must be properly prepared. This is done in several stages:
- Using sandpaper, you need to carefully sand the workpiece. This will help remove paint or varnish from the old product, as well as remove minor scratches and other defects.
- If the surface has very deep cracks or chips, they are first puttied, then the putty is allowed to dry for 3 to 5 hours, and then sanded again to a smooth state.
- Dust and debris remaining on the object after such treatment must be carefully removed, and then degrease the surface with acetone or an alcohol solution.
- After the workpiece is completely dry, an acrylic primer is applied.
- 30-40 minutes after the primer has dried, you can begin decoupage.
Paper thinning
The thinner the paper with the image, the more effective the decoupage will be.
Thinning the material is one of the important stages of the technique, so it must be treated with special attention, otherwise the design will look sloppy or completely deteriorate. For this reason, beginners are recommended to use special decoupage cards on rice paper, which do not require prior preparation.
In other cases, the paper is thinned using one of the following methods:
Using tape. Varnish is applied to the front side of the picture in several layers, and after it dries, tape is glued to the back side of the picture.
The adhesive tape is carefully peeled off along with the excess layers of paper. The procedure can be repeated several times until the picture becomes almost transparent. Softening in water
As in the previous method, the outer side of the image is treated with varnish, then the picture is lowered into a container with warm water for several minutes. The time it takes for the paper to soak depends on its density. The soaked drawing is carefully removed from the water and placed face down on a stationery file. Next, remove excess layers of paper, rolling them from the wrong side using careful finger movements. As a result, only a thin layer with a pattern should remain.
Decorating the product
The final stage of decoupage is the decoration process itself. This is the most enjoyable stage, because here you can give your imagination unlimited freedom. The decorating procedure can be divided into several parts:
- The object being processed is tinted with a certain color of acrylic paint (it all depends on the master’s idea).
- After the paint has completely dried, they begin to glue the prepared pictures. This is done in this way: using special glue or regular PVA, slightly diluted with water, the finished layer with the image is glued to the surface of the workpiece, where the pattern is very carefully smoothed out.
- After the picture lies perfectly flat, it is smeared with another layer of glue.
- Other images are glued in the same way.
- At the end of the work, the product is coated with two layers of transparent varnish.
- At the last stage, the product is decorated with additional decorative elements.
Shelving
Wooden boxes make excellent shelving units. They can be strictly rectangular in shape or have asymmetrical edges, which will add a special flavor to the decor of the room. This storage system is ideal for a home workshop, office or living room. The boxes are secured to each other using self-tapping screws or self-tapping screws, painted and placed against the wall. You can store whatever your heart desires on such racks: books, things, jewelry, food, towels and pillows, household chemicals, small decor. The designs look original, on the shelves of which “necessary” things are placed, alternating with flower pots. Rectangular racks can be assembled from identical boxes, which are arranged in a strict order or vertically and horizontally, but in such a way that a storage system of the correct shape is formed.
Drawers mounted on special legs with spaces between the modules will be an excellent addition to a rustic-style kitchen. They store vegetables (potatoes, onions, carrots), jars of pickles or canned food. It is important that each drawer is secured in its natural position, that is, with the bottom down. Thus, the strength of the cabinet will increase, because the container was originally designed for heavy loads.
The footwear stand
A shoe cabinet is assembled according to the same principle as a rack of drawers. The only thing worth considering: different heights of sneakers, shoes, ankle boots and winter boots. For the first two, shelves made of drawers located horizontally are suitable, and for tall shoes they are placed vertically. If you make a homemade cabinet from an old container that is unevenly painted, then such an element will complement the hallway in the Provence style.
Types of decorative paper for decorating boxes
The disadvantage of this type of raw material is its fragility. It is possible to create a beautiful floral decor from such paper fabric. The gift can be carefully wrapped in light brown material, and decorations made of natural or artificial flowers are placed in the middle.
- Corrugated paper is distinguished by its plasticity and unusual texture.
- Thanks to the volumetric base, it is possible to create convex elements.
- For example, you can create beautiful details from corrugated fabric.
Gift paper is distinguished by its availability and different designs. A smooth coating combined with an unusual ornament can emphasize refined taste.
When choosing a consumable, you need to consider its width and density. In combination with a bright braid, the gift will sparkle with new colors.
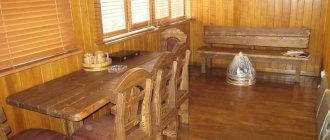
Bedside tables and tables
From the drawers you can make cabinets, coffee tables and boxes for storing small items instead of plastic or wicker baskets. In the latter case, choose containers with high sides. It is simply sanded, varnished or painted and equipped with paired handles on the sides for ease of movement. Bedside tables are assembled from two drawers connected to each other. They store photographs, watches, phones, magazines and books, and the top cover is used as a shelf for lamps or indoor plants. To create a coffee table you will need:
- Four drawers;
- Plywood sheet;
- Self-tapping screws;
- Wheels (optional).
A square-shaped pallet is cut out of plywood. The width of its edges should correspond to the sum of the length of one box and the height of the other. If desired, you can add small indents of a couple of centimeters. Wheels are first attached to the pallet, and then the boxes are attached in a spiral, that is, the side of the next one rests against the back wall of the previous one. The empty middle is decorated with a flower arrangement, a group of candles or a lamp. This coffee table can be used to decorate your living room or backyard in the summer. It is complemented by sun loungers assembled from pallets or poufs from old tires, decorated with rope.
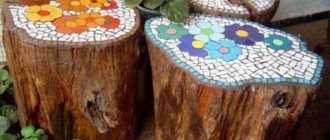
From miniature boxes you can make decorative boxes for jewelry or boxes for flowers on a holiday table.
For seedlings
The size and shape of wooden planting boxes will depend on how you grow your flowers. Bulky items take up a lot of space and spoil the overall interior of the apartment. Therefore, if you plan to grow cucumbers and tomatoes on a windowsill, it is better to limit yourself to small wooden plywood boxes.
A garden plot offers more opportunities for the DIYer. So, a large and functional box for seedlings can be made from an old pallet. In fact, a pallet initially represents a finished product. The gardener can only make the bottom and walls from pieces of multi-layer plywood. To do this you will need decorative nails and a hammer. After this, the internal space is filled with earth, the seeds are sown between the top rows of boards.
Ottoman for the hallway
To make an ottoman for the hallway or living room, you will need:
- Box;
- A sheet of durable wood for the top cover;
- Foam rubber;
- Upholstery material;
- Construction stapler;
- Wheels.
The box is sanded and varnished. Wheels are attached to its bottom, and a lid is attached to the top. If you need to use the ottoman also as a storage system, then it is placed on hinges so that the seat can be opened in the future. Then foam rubber is fixed to the lid and covered with fabric using a stapler.
Plywood structures
Here the material is selected depending on the intended use of the finished product. If the box is intended for correspondence, you can get by with thin plywood. For seedlings or flowers, multilayer sheets impregnated with a waterproof compound are more suitable.
The design is made according to the following scheme:
- make a drawing of the box with dimensions;
- the drawing is transferred to a sheet of plywood;
- parts are cut out according to the markings;
- individual elements are fastened together with self-tapping screws or nails, and the joints are treated with sealant.
Considering that plywood is easy to process, you can make more complex, non-standard country boxes. For example, the joints of the walls should be designed according to the tongue-and-groove principle. If you are making a deep box for storing children's toys, you can attach wheels from an old computer chair to the bottom. Drawers with a sliding top panel look interesting. Here a cover is cut out of a sheet of thin plywood and a groove is cut in the upper part of the walls.
Entertainment complex for cats
An entertainment complex for cats is created from boxes and metal pipes. As you know, tailed animals get bored in apartments. To prevent the animal from damaging furniture and wallpaper, you can occupy it with your own miniature cottage, where cats sleep, play and sharpen their claws. Some boxes are covered with plywood lids with round entry holes, others are left with only the bottoms, which are covered with soft foam rubber and upholstered with fabric, and on others, scratching posts are attached. The modules are connected to each other in any order. Additionally, the “house” is equipped with a ladder system to make it more convenient for the animal to move around the “floors”. Instead of a purchased bed for a cat or dog, cribs are created from a box. The box is thoroughly sanded. It is better not to coat it with varnish, as your pet may not like its smell. Then a pair of upper slats are cut off from one of the sidewalls, which will be the front one. The inside of the box is filled with foam rubber or other soft material and covered with a blanket on top. Additionally, the sleeping place is decorated with miniature hand-sewn pillows. Of course, the size of the box and the future crib is selected according to the dimensions of the pet. To make a feeder, you will need a stainless steel bowl, a wooden container and plywood. The top cover is cut out from the last sheet. Make a round hole in the center for the bowl. The plywood is then secured to the box. All that remains is to insert the bowl. You need to choose one with protruding sides, which will hold the container by the lid. The bowl can be easily removed to wash or replace with another. A double feeder is made from a large box using the same technology with paired containers for food and water.
Using boxes in the garden
The boxes make excellent flower beds. They can simply be placed on a base, creating an original composition in front of the house, or they can be combined into a vertical flowerbed with several floors. The boxes are placed on top of each other in a chaotic disorder, connected in parallel with self-tapping screws to obtain a stable structure. In more complex versions, four slats are used, fixed in pairs at an angle to each other. Instead of steps, this “ladder” contains boxes with flowers or herbs. If there is a free wall of an outbuilding or a wooden fence, then the modules are fixed on it, in the manner of shelves in which pots with plants are placed. The original option would be a composition of five boxes, four of which form the sides of the rectangle, and the fifth will become the center, touching the corners with the rest of the modules. If containers of different sizes are available, then a multi-tiered flower bed is made from it. A large box is placed at the bottom, and smaller modules are placed on top so that the smallest one becomes the top of the pyramid. The “square-rhombus” alternation will look beautiful in this composition. Garden flower beds-steam locomotives are also made from the boxes, where the modules are equipped with decorative wheels and transformed into trailers, and the front one will become the “head of the train.”
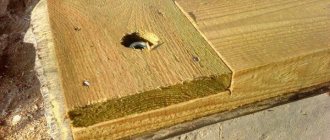
How to prepare boxes for use
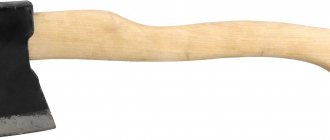
Before you build something from a wooden container, it needs to be prepared. If there is an old layer of paint left on the surface of the box, remove it with a spatula. Irregularities with numerous “splinters” must be thoroughly sanded to perfect smoothness. Then the box is coated with varnish or primer if painting is planned. In cases where the container will be used outdoors or in “wet” rooms (bath, kitchen), it must be additionally treated with special compounds that will clog the micropores in the wood and prevent moisture from entering them.
Decoupage on wood for beginners
If this is your first time trying to create work using the decoupage technique, then take an object with clear and even edges. Decorating such surfaces is much easier compared to round or distorted surfaces.
Decoupage of wooden boxes for beginners will be more accessible when using drawings on thick paper. They're easier to stick to a surface, so you're much less likely to ruin the image. The drawing must be made using water-insoluble paints. Otherwise, when processing with glue, the pattern may flow and become smeared.
Don't choose too complex compositions
Cut out the image carefully, paying attention to small elements. The more detailed you cut out the picture, the more interesting and attractive it will look in the final version.
If the picture has a suitable background, then it is better not to use scissors to create the template. It is enough just to tear the picture along the contour so that the edges remain torn. This way the image will fit better into the design of the item.