How to make planken with your own hands - a method of finishing a house
The construction market is always replenished with new materials, and it is difficult for inexperienced developers to navigate such a variety of materials on their own. In addition, companies use unclear names in order to increase sales of materials and increase its cost.
Very often, such an advertising campaign works, and the profitability of commercial activities increases without much effort. We suggest you consider how to make a planken.
"Cobra"
The fastener is intended for fixing planks with a straight profile made of soft wood (for example, larch or pine) on horizontal and vertical surfaces. Depending on the operating conditions, it is made of steel with thermal diffusion or galvanized coating.
"Cobra"
The element is a fitting with two bases located at an angle and directed in different directions. On one of them there is a spike 11 mm high, and on the other there are three holes:
- the main thing is necessary to fix the boards at an angle of 90 degrees;
- additional is used in cases where access to fittings during installation is difficult and the “cobra” needs to be fixed at a different angle, 45 degrees;
- a hole on the vertical part is required for attaching the fittings to the finishing board.
| Thickness, mm | Width, mm | Length, mm | Material | Technological gap, mm | Additional fasteners |
| 2 | 30 | 48 | Stainless steel | 6 | Screws |
Step-by-step instructions for installing the cobra fastener
Cobra fastener
Step 1. Place cobra fasteners on the sheathing at all points where it will intersect with the boards and secure with screws through the main hole.
Step 2. Place the first board on the tenons and drive it through the block until the surface touches the stopper.
Step 3. Place the horizontal ends of the fasteners into the gap between the board and the sheathing.
Step 4. Secure the structure with a screw using the hole on the vertical plate. If this is not possible, screw the screw into the additional mounting hole at an angle of 45 degrees.
Step 5. Take the next board, nail it onto the tenons of the fastener, then secure it and repeat the above steps.
Practical advice
- When designing the arrangement of planks on the facade, try not to place more than three of them in a row.
- To paint or process the ends of boards, use a small sponge rather than a brush or roller. The work will be more accurate.
- When using nails for fastening, choose ones that are resistant to corrosion, and protect the surface from it with a paint coating. Otherwise, rust stains will inevitably appear on the surfaces.
- The nails used can be made invisible, or almost invisible, by hammering each of them into the bar and depriving it of its head (cut off with wire cutters). Then it is driven deep into the wood with a small drift. The remaining small dents can be hidden with wood putty (if the final painting of the facade is planned with opaque paint).
- You can use homemade putty to hide nail indentations. Mix one part of transparent varnish (which will cover the surface later) with one part of sawdust from the wood of this plank (easy to collect when sawing off excess pieces of boards at corners, in niches). The mixture is used to cover the dents with a construction knife or an artistic palette knife.
Unique features and other advantages
Planken is famous for a number of unique characteristics and positive qualities
The material is usually divided by profile type. Today there are three types of planken, each of which is interesting in its own way.
Namely:
- There is a straight planken. Installation of this material is carried out in an open way;
- Beveled or slanted material is also common. The main advantage of using such a profile is that the edges are beveled, due to this the joining gaps are hidden without any problems. Thanks to this feature, moisture will definitely not get inside the facade; accordingly, the cladding will retain its original appearance for a long time and perform its functions.
If you compare planken with some other material, lining immediately comes to mind - although there are many interesting proposals for cladding facades. To connect it, the tongue-and-groove method is preferred. In the case of planken, everything is different - it’s more convenient to work here, there’s more choice.
All work can be done independently - especially if you have some experience in construction
The lining often swells and dries out - as a result, the material begins to warp, and elements may also twist. That is, this type of fastening does not cope well with humidity and temperature changes. Another drawback is that if you need to replace any part of the lining, it will be difficult.
Planken copes well with drying out or swelling, and if necessary, any part in the facade cladding can be easily replaced on its own.
Changing planken parts is actually very easy - there are minimal difficulties here, especially if the fastening method is open. The hidden method will also not cause problems, except that you will have to disassemble that part of the cladding that is higher than the board that needs to be replaced.
The products are ready for installation work and are waiting in the wings
From an environmental point of view, planken is completely safe. Condensation does not accumulate in the gaps, so the service life is not reduced.
The material has high waterproofing and thermal insulation properties. Installs easily. In stores there are solutions with different textures, the color palette is also rich.
Thanks to this, it will be possible to choose the desired shade even for those customers who are very demanding and are looking for something specific to implement their design ideas.
Construction of facades and installation of materials
Finishing the facade with planken is carried out in three stages:
- Arrangement of sheathing.
- Laying a heat-insulating layer.
- Installation of facing covering.
Such a system will be a ventilated facade, allowing air flows to dry the walls and their cladding.
The dimensions of the lathing for installing the planken depend on the width of the heat insulation slabs. All types of mineral wool usually have a width of 60 cm. For this size, the distance between the frame slats should be 58 cm.
General diagram of a ventilated facade for installation of façade boards
In any case, this distance is chosen so that the insulation fits tightly between the slats. The thickness of the sheathing should always exceed the thickness of the thermal insulation. If this condition was not initially met, the problem can be corrected by sewing on additional slats - thus, you will have a mandatory ventilated space of 20-30 mm in size.
After complete installation of the sheathing, insulation is installed between its slats, which is covered with a waterproofing material and a wind barrier.
Before installation, marking and fixing fasteners is most conveniently done on the ground
In principle, a fairly thick cellophane film can also play their role. After its installation, the entire “pie” is fixed with dowels directly through the insulation. These fasteners are installed by pre-drilling holes. As the drill bit penetrates the mineral wool, you may find the material wrapping around it.
To prevent winding, you will need a plastic or metal hollow tube. Its diameter should be such that the drill fits into it. This tube is threaded through the cotton wool, and drilling occurs through it.
What is the difference between planken and lining?
These two types of materials for facade finishing have several significant differences:
- Installation method
. Planken is a specially shaped board that often does not have grooves for fastening. During installation, the elements are installed close to each other or with a slight overlap. Unlike planken, lining boards are fastened together using recesses and protrusions on the end parts. - Durability
. Both types of materials are used for finishing facades, but planken has a longer service life and increased resistance to moisture. - Performance characteristics
. Due to the fact that planken boards can have a beveled shape, they remove moisture. If it is necessary to remove a separate block in the case of lining, you will have to disassemble the entire wall due to the fact that the elements are firmly attached to each other using grooves. Planken provides the ability to easily remove one board without disturbing the overall structure.
Aged board
When talking about luxurious, rich interiors, images of houses decorated with natural materials come to mind. Indeed, natural motifs never go out of fashion and are always relevant: decoration, furniture and decorative items made of wood and stone look expensive and create a feeling of representativeness and good quality. But what if you want a luxurious interior in natural wood, but your plans do not include spending money on vintage decoration and furniture? There is a solution - an aged board. We’ll tell you further about what kind of material there is and how to age a board with your own hands.
What explains the popularity of aged wood?
Aged boards are actively used in interior design and furniture production, because now this material is more relevant than ever. But unlike other methods of decoration, natural wood will not go out of fashion even after years. Interiors decorated with natural materials seem to be out of time, they are not subject to fashion trends. This is an ideal solution for those who want a high-quality renovation that will last for centuries, which will not look boring and one-sided, but, on the contrary, will begin to acquire its own “history” over the years.
Aged boards have become popular due to the fact that they can effectively fit into a number of styles. Wood, like other natural materials, always looks good in the interiors of houses and apartments.
What styles use aged wood?
You can use aged boards to decorate almost any room, because this material is complementary to a huge number of styles. Wooden panels and accessories are a mandatory attribute of finishing in the following styles:
- Scandinavian.
You can use aged wood beams, wooden shelves, window frames and sills, photo frames and decorative accessories. Also, wood or its imitation is given preference when choosing flooring. Furniture made from aged boards with a deliberately simple, slightly rough and angular design will fit well into the decor.
- Provencal.
In the Provencal style, aging wood looks organic and appropriate. Moreover, it is one of the main finishing materials used both in the manufacture of furniture and for decorative finishing. Moreover, for Provence, you need a “worn-out” board - as if it had been in direct sunlight for a long time and blown by the salty sea wind.
- Country.
Country is close to Provence in terms of the materials used, so aged boards are also actively used here. It can be smooth or embossed, natural or tinted; varnished wood coatings, in which matte varnish helps to reveal the natural wood pattern deeper and brighter, will also fit well.
- Chalet.
The chalet style is in many ways similar to Provence - they have a common idea, but different geography. Chalet-style houses can traditionally be found in the Alps, and they are decorated using natural materials characteristic of this mountain region. Wood in this style is usually rough and only lightly finished, so distressed surfaces are ideal. Floors, walls, ceilings, furniture, windows - any interior element can be finished using aged boards.
- Loft.
It’s hard to imagine an ultra-fashionable loft without massive beams, wooden furniture and other decorative items. There are many ways to give a board an old look, and those methods that give the greatest relief and reveal the texture of the wood as much as possible are suitable for loft. Tinting and opening with oil or matte varnish help enhance the effect.
- Shabby.
This light, airy and romantic style at first glance has nothing in common with aged wood, but it is not. Especially if a board painted in light colors is used for finishing, from which the coating was then partially removed to simulate natural wear. But oil-finished or lightly tinted wood furniture or shabby chic trim panels would also be appropriate.
You can read more about the use of aged boards in the interior on our blog.
What is planken
We are trying to give professional advice to site visitors, all our articles have nothing to do with manufacturers’ advertising, the performance characteristics of the materials are only objective. So what is planken?
Planken
This is an ordinary board made of various types of wood, planed on four sides, with chamfered corners. Thickness is approximately 20–24 mm, length from 2 m or more, taking into account the technological features of manufacturers. Depending on the geometry, the planken is produced in three types:
- Straight. The angle between the edge and the face is 90°. It is not recommended to use it for cladding houses for several reasons. Firstly, the wooden sheathing is visible in the small gap between the individual boards. Secondly, rainwater easily penetrates through horizontal cracks, wooden structures become damp, and as a result, rapid rotting. And that's the best case scenario. This type of plank is recommended for use in the manufacture of various decorative fences, furniture elements, etc.
- Beveled. The angle between the edge and the face is approximately 45°. This type can already be used for external finishing of facade walls; due to the parallelogram, moisture does not get into the cracks.
- Wedge-shaped. The thickness of the planken varies along the width. It has an original look and nothing more.
Now we need to say a few words about the price of the “new” material. Why do we use quotes? Because planed boards have been known to builders for many hundreds of years, but now this board is called planken and they are trying to pass it off as a new building material. For comparison, let’s take the cost of European lining and larch planks. The same price proportions remain for other types of wood.
| Lumber grade | Eurolining made of larch | Larch planken |
| Extra | 860 RUR/m2 | 1300 RUR/m2 |
| Prima | 595 RUR/m2 | 1100 RUR/m2 |
| A | 400 rub./m2 | 750 RUR/m2 |
| AB | 280 RUR/m2 | 600 rub./m2 |
One more thing. To make planken, you only need a four-sided jointer with straight cutters. Straight cutters are easy to make, sharpening requires little time, and flat cutters are much easier to set than those with a complex profile used during the manufacture of lining. In addition, electricity losses are significantly reduced due to the fact that less wood is removed. As a result, the actual cost of manufacturing planken is much cheaper than lining. How to explain the high cost? There are two reasons. The first is a lack of understanding by inexperienced developers of production technology and the pricing mechanism. The second is a successful advertising campaign. Both reasons ultimately force developers to buy material with rather low performance indicators at a very high price.
Where is beveled planken used?
Beveled plank is made from natural wood of various species; it is a completely safe material. True, to improve the appearance and protect against putrefactive processes, the surfaces are impregnated and coated with special compounds, varnishes and paints. It is not recommended to use paints - the attractive natural grain of the wood is lost. Planken can be used for:
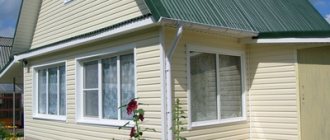
- External cladding of brick, concrete and wooden facade walls. Cladding is done both on new buildings and during major repairs or reconstruction. Due to the new type of facade, you can completely change the appearance of the house, the old building takes on a modern look. For planken cladding there is no need to restore the load-bearing characteristics of the foundations - the cost of the work is significantly reduced.
- Interior wall cladding. The interior design is reminiscent of natural country houses, which is considered a fashion trend at the moment.
- Manufacturing of furniture from natural wood, production of decorative elements.
- During the construction of fences and decorative fences. The structures have an excellent design, but the cost is not affordable for all developers.
Planken for fence
For cladding facade walls, we recommend using the overlap method for straight and wedge-shaped or beveled planks with fastening with metal elements. The profile features of the beveled plank prevent moisture from getting under the structure and make the places where the boards are fixed to the supporting frame invisible. How to sheathe walls?
Basic principles of plank installation
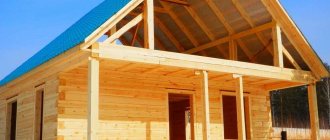
Planken cladding can be done vertically, horizontally and at an angle. The most convenient installation method is horizontal. It does not require the master to have special construction skills or special equipment, and therefore there is a chance of successfully implementing it independently. Houses sheathed with planken will retain warmth and comfort for many years, and for this it is necessary to gradually comply with the following technological points:
- Installation work, as when working with other cladding materials made of natural wood, begins with lathing the wall surfaces of the building with prepared logs or larch wood bars. In any case, such parts must be treated with a special protective antiseptic. The elements are attached to the wall frame with long screws on top of the insulation layer. The logs are finished with a final protective layer.
- For additional protection from moisture and mold, before installing the plank, it must also be opened with a layer of high-quality antiseptic. Each sawn end also needs to be covered with a protective layer.
- The length of the wooden plank depends on the size of the wall. Naturally, experts recommend refraining from cutting the boards, but if the parameters of the wall do not allow you to do without this, then you can lay no more than 3 boards in one row, taking into account the mandatory spacing. This point is taken into account before the lag fastening begins.
- The peculiarity of this technology is that the fastening of the planks begins not from the 1st row, but from the 2nd. Using a standard building level (or a laser level), the logs are marked according to the required dimensions. The block will be attached according to this marking. This will greatly facilitate the further process of installing wall sheathing.
- A board is applied to the block, and markings are made on it for future fasteners.
- The fastener is located on the back side of the planks in such a position that the hole intended for the self-tapping screw remains on top. At the bottom there remains a solid part of the fastener, which is inserted behind the bar.
- The section on top is attached to the joist using a screwdriver, and the lower part remains hooked to the block.
- All subsequent rows of planks are attached using the same principle.
- When the wall is sheathed, it is necessary to remove the block and secure the first row in its place.
- A mounting angle and a fastening element are attached to the rear plane of the 1st row of planks, which slides behind the boards of the 2nd row. At this time, the corner is screwed to the joist from below.
There is also a modern and, according to most experts, a more reliable and faster way to attach planks. There are no fundamental differences in the technology itself; the difference lies in the fastening element called “planfix”. It is an L-shaped metal plate. With its help, you can finish the facade of a house with planken up to 25 millimeters thick.
A special feature of this mount is the presence of a special spike. Planfix is a type of hidden fasteners, so the result is the most even and durable structure. Despite its novelty, planfix does not require the use of modern tools. Having a hammer and following the following steps, you can do it yourself:
- The lathing is made with wooden beams, which are located at a distance of 45-50 cm from each other.
- The first board is mounted to a wooden mounting frame using a self-tapping screw or an ordinary nail.
- Technologically correct installation involves combining the plane of the planfix with a block of wooden sheathing and the first board.
- All other planks that form the cladding are fastened in the same way, according to an understandable principle: the cladding material is tightly fixed to the wooden sheathing and placed on the planfix tenon. This procedure is performed using a hammer and a backing that will soften the blows on the planks.
There is no doubt that houses covered with plankens look especially impressive, since if you have the financial means, you can install custom-made plankens with drawings pre-applied on them. But the main thing to remember is that the success of cladding with such a unique board directly depends on the quality of the chosen materials. Therefore, when purchasing plankens, be sure to ask the seller for a certificate of quality. If this is the case, then you can safely purchase this product.
Installation technology
The planken facade board ideally replaces a block house, lining, or imitation timber. For correct and high-quality installation, the work is carried out in several stages. The first thing to do is sew on the sheathing. As a rule, the width depends on the size of the thermal insulation slabs; its standard step is 50 by 50 cm. Before using the bars for sheathing, they must be coated with an antiseptic composition. The cross-section of the block is 50 by 50 mm if the ceilings are flat. If the surface of the ceilings is uneven, then take a block measuring 50 by 40 mm. This section is selected to smooth out unevenness by turning the block and setting the required level.
After the guides are installed, the gaps between the bars are filled with insulation, then the waterproofing is hemmed. Experts do not recommend using ordinary cellophane as a waterproofing material, as it provokes condensation. Next, fastening is done with dowels, and a control sheathing is again laid on top, for which a block with a cross-section of 50 by 20 mm is used. This will provide a ventilated gap and access to fresh air. After this, finishing work with the façade board begins. Installation occurs in one of 2 ways - open or hidden.
Open way
Open fastening is considered the simplest. The lamellas are fastened using face-tapping screws. The screws must be made of stainless steel, otherwise after 1.5-2 years unsightly streaks will appear around the cap. The method is reliable, easy to perform and suitable even for inexperienced workers. However, the appearance of the finished surface leaves much to be desired, since visible screw heads spoil the visual effect.
Hidden option
The hidden version will require special fasteners - these are the so-called snakes and planfix. A snake is used for a beveled profile, a planfix is used for a straight profile. This type of fastener simplifies the installation of planks with the same gap. The hidden method is considered a reliable installation of the cladding, in which the appearance remains impeccable. Hardware for interior decoration is made of stainless steel with a thickness of 1 to 1.5 mm. The products have a curved cross-section, which increases their strength - each of them can withstand a load of up to 50 kg, and their shape provides micro-ventilation between the surface of the plank and the sheathing
This is important in cases where the plank is made of hardwood
Processing corners requires a certain algorithm: two boards are fixed at right angles, and only after that the installation takes place on site. Experts advise treating the facade board with a protective oil composition before starting fastening - this increases its service life and gives a colorful visual effect. Planken material is a modern solution for interior finishing work or cladding of building facades. The price range allows you to choose between budget and luxury options. It is possible to use inexpensive planken for the interior decoration of bathhouses, bathrooms, toilets and other rooms. At the same time, elite, expensive grades of façade board are used for finishing residential premises. In any case, planken is beautiful and prestigious.
In the next video you will see the installation of a plank on the ceiling using a pneumatic gun.
What is planken and its varieties
The unusual name hides an ordinary board made from different types of wood. It’s just processed on all sides and has a standard thickness: from 20 to 24 mm. The length starts from 2 m, it all depends on the technical and technological capabilities of the equipment used.
Planken is available in three varieties on the market:
Straight. This is a board whose cross-section is a rectangle with right angles (90°). This type of plank is not used for cladding houses. When joining the boards, gaps form between the boards, through which the sheathing is visible. Moisture also penetrates here, which negatively affects the finish, as well as dust and debris. Typically, this type of finishing material is used in the production of sandbanks or the construction of fence structures.
Direct version of plankenSource diesel.elcat.kg
Beveled. During processing, the ends of the material are cut at an angle of 45°. That is, the cross-section results in a parallelogram. During installation, the adjacent beveled planes of the two sheathing elements being connected are joined, and one part covers the other. An almost seamless cladding is obtained on the surface of the wall being finished. Therefore, this type of plank can be used for façade cladding of house walls.
Beveled variety of plankenSource sekil.yukle.mobi
Wedge-shaped, that is, the thickness of the material varies along the width of the board. Cladding a house with this type of plank has an original look. And this is where its advantages over other types end.
Wedge-type plankenSource houtweb.nl
Now about why this finishing material is more expensive than lining, although it is no different from it. As mentioned above, manufacturers, by changing the name, receive fabulous profits. For example, the price of “Extra” class Euro lining is 850-900 rubles. for 1 m². The price of planken of the same class is 1300 rubles/m². The difference is 40%.
But that's not all. It is necessary to talk about the cost of planken and the technology of its production. Let's start with the fact that this building material is made on a conventional four-sided jointer. Cutting is done with straight cutters, which are easier to install and adjust, and easier to sharpen. In the production of lining, milling cutters with complex profiles are used. That is, the cost of planken is lower than that of lining. That is, manufacturers deceive consumers twice.
Four-sided jointing (planing) machineSource remlandia.ru
Scope of application of planken
As mentioned above, direct modification is used in the production of furniture, decorative elements and fencing structures. Beveled and wedge-shaped are mainly used for finishing facades, as well as in the interior design of premises. When the task is external cladding, the plank is treated with protective impregnations, varnishes and paints. The latter are rarely used, because the pattern of the wood structure is hidden under the paint layer. But paints are often used in interior decoration.
It should be noted that any structure can be sheathed with planken. That is, it can be a stone house, a wooden log house or a frame building. This universal material, like lining, is mounted only on the sheathing, which is installed and attached to the walls of the house.
Straight plank fenceSource electric-fences.net
Scope of application
There are many areas of application for planken:
- Fencing: decorative and functional. Despite all the shortcomings of planken, we must admit that fences made from it look amazing.
- Separately, it is worth noting decorative fences, which are often installed on personal plots. Planken provides an opportunity for a landscape designer to more interestingly shape the space for specific needs, zoning the garden area.
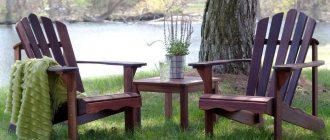
- Garden furniture is made from planken. Benches made of thick textured boards look quite impressive and at the same time calmly withstand the effects of the weather.
- Facade cladding. The most popular way to use planken.
This is interesting: Quickly assemble scaffolding with your own hands: assembly instructions
Advantages and disadvantages
The board is characterized by dimensional accuracy and flawless geometry, which is achieved through an automated manufacturing process. Naturally, this facilitates installation and allows you to obtain the most even surfaces.
In other words, buying it is economically profitable.
Among the advantages it is worth noting the following:
- high resistance to temperature changes and humidity levels;
- improved sound and thermal insulation performance;
- long operational period due to careful processing of wood, absence of knots and resin pockets on the material;
- impressive vapor barrier properties, due to which the wood “pulls” excess moisture from the room, and then from the surface of the walls;
- ease of installation, easy replacement of the damaged area;
- no warping or deformation;
- biostability;
- variety of colors and textures, exquisite and noble design;
- wide scope of application.
These advantages are achieved through short-term heat treatment of the boards. The heat-treated material withstands various environmental influences without losing its aesthetic appeal.
The presence of a finishing coating makes the planken resistant to UV rays. As you know, under the influence of such radiation, wood dries out, cracks and loses its color. Subjected to thermal treatment and then covered with a finishing layer, the boards retain their high technical characteristics and attractive appearance throughout their entire service life (20–30 years).
There is an opinion that even taking into account the use of high-quality materials, the price of the boards is too high. Some experts agree that it is due to the novelty of the material.
In addition to purchasing planken, you will have to spend money on special fasteners, as well as a special light-resistant hydro-windproof membrane; a regular waterproof film for an open type of installation will not work.
Production process
How planks are made
To make boards, special automated machines are used, which themselves cut the wood to the required sizes. To prevent cracks, chips, burrs and other defects from occurring during the pruning process, the wood is pre-dried.
Drying is carried out in special closed chambers. It allows you to get rid of excess moisture, as a result of which the board dries to the optimal size and density, which are well suited for quick cutting. Drying also kills fungi and microorganisms.
After processing, planken can be coated with various protective compounds, for example, antiseptics, oils, stains, fireproofing impregnation and a paint layer. Then the boards are hermetically packaged in plastic and delivered to sellers for sale.
About planken and cladding
Types of planken
Facade board planken straight
- The profile that has a plank for the facade can be of three types - straight, straight with grooves and beveled (oblique plank). The angle on the beveled plank can be different, from 35⁰ to 70⁰. The width of the plank ranges from 70 to 90 mm, the thickness from 15 to 22 mm, and the length of the board reaches 4 m.
- The most common wood for making planken is Siberian larch. We can say about the material that it does not rot easily, it does not deform when changing air humidity and temperature conditions, and it is also much cheaper, because the price of larch is lower than decorative tree species.
- There are two ways to install plank on a wall - open and closed. Instructions for them will be given below, as well as photo and video materials.
Ventilated façade for planken
Beam 100×60 mm
Planken is best installed on a suspended ventilated facade, so that moving air currents dry both the cladding and the wall itself
Also, ventilated facades require the installation of insulation, which is very important for the northern regions. To make a lathing for planken with your own hands, first of all, you need to find out the width of the insulation. For any mineral wool (stone wool, slag wool, glass wool) the most common width is 60 mm
If you use this exact size, then the distance between the sheathing profiles will be 58 cm - the insulation should fit tightly between the bars. For the façade ventilation subsystem you need at least 20-30 mm, so the timber must be thicker than the façade insulation. If the lathing is the same thickness as mineral wool, then after insulation you should sew additional slats to create a ventilated space.
Mushroom dowel
- After installing the beam, lay layers of insulation between it, but before securing it with dowel mushrooms, cover the wool with a wind barrier, a water barrier, or simply a thick, dense cellophane film. Install the dowels through the insulation.
- To install dowel rods, you will have to drill a hole in the main wall through the mineral wool, and it will wrap around the drill bit. To prevent this from happening, take a piece of any (metal or plastic) tube with an internal diameter that is 3-4 mm larger than the thickness of the drill. Insert this tube through the wool to the main wall and drill through it.
Closed and open methods of installing planks
Mounting strip
For closed plank fastening, special strips are used, 15 mm wide and 145 and 190 mm long. A fastening with parameters 145/15 mm is used for boards with a width of 70 to 110 mm, the same strip 190/15 mm is suitable for a wider board from 110 to 150 mm. Also, this method of fastening can be carried out in a cross manner, when the planks are installed in an X shape.
Marking the plank for attaching the snake
In order to prepare planken boards for the closed fastening method, they should be laid out on the floor (on the ground) along the height of the wall being sheathed. Then, onto the laid out field, transfer the size of the frame (sheathing) to which these boards will be attached. Moreover, it is better to draw the contours of each beam completely so that you can clearly see its width.
The facade plank is installed on the sheathing in a closed way
Place the metal strips on the facade plank so that they protrude beyond the edge of the board by at least 10 mm. Now you need to screw them on with at least two self-tapping screws each. The protruding ears of the planks will serve as clamps, and the lower one will be inserted between the beam and the board, and the upper one will be attached to the beam using a self-tapping screw.
Self-tapping screws for open mounting must be made of stainless metals
There is also an open method of installing planks, which is the fastest and cheapest, which is fastening the boards to the joists with self-tapping screws. Of course, such fixation is more reliable than the closed method, but judge for yourself, what kind of load will be required to tear off the board?! It will be impossible to destroy any of the fastenings by the wind, but only with targeted efforts.
Façade finishing with planken
When a planken façade is installed, the corners should be covered with the same material. Moreover, it is better to install not one board at a time, but two at once, having previously fastened them with screws at an angle of 90⁰.
Recommendations
You know how to make planken with your own hands, now let’s talk about practical recommendations. When covering façade walls, it is recommended to reduce the distance between vertical slats. The standard distance is 0.8 meters, and we recommend setting from 0.55 meters. Why? Let's compare planken with clapboard. Individual boards of the lining can be connected to each other “tenon and groove”, due to which the position is fixed along the entire length. You should not believe the tales of planken manufacturers that in such places the lining can crack when deformed.
It’s not all right, because it is this method of fastening that will guarantee the preservation of the plane under any operating conditions. Planken boards are not connected to each other, and the technology will also provide for the presence of mounting-type slots, individual fastening, and fixation is carried out only on supporting vertical slats. Like other lumber, planken can become deformed when humidity changes; situations arise when one board remains flat, but the one located next to it is bent by the propeller. Such actions make the upholstery process more expensive and increase the time required to complete construction work.
If you plank the baths, you should definitely ensure effective simple ventilation. Do not tightly cover the bottom edge in the first row; air vents should be left at the top near the rafter system. You should not rush to make a final decision on the method of finishing the walls of the facades, and you should weigh your wishes and possibilities, the advantages and disadvantages of building materials.
Fastening methods
Fasteners
The easiest way to attach a plank is the open method. In this case, the boards should be screwed to the sheathing from the front side with stainless steel screws. The disadvantage of this technique is that the fasteners will be visible. As a rule, when installing a plank, a hidden fastening method using a “snake” is used. It consists of metal strips with a standard length of 14.5 and 19 cm. Their width is 1.5 cm. The “snake” has several holes for screws or self-tapping screws.
If you are installing a beveled plank, first lay it out with the back side up, so that the front surface is directed at a sharp angle downwards. The height of the layout in this case will correspond to the height of the wall that you will be sheathing. Now you need to transfer the dimensions of the sheathing to this structure. You will attach the plank to it. On the details, mark the middle of each sheathing beam. Screw the metal strips along the marks of this line. Do this, sometimes on the left, sometimes on the right. Thus, the fastening forms a “snake”.
Installation using metal strips
Install fasteners at all points where the sheathing beams intersect with the plank. Install the fasteners so that the upper and lower parts of the strip protrude at least 1 cm on both sides. There should be a self-tapping hole on top. Now install the plank along the guides. Mount the first row by screwing the fastening “snake” through the bottom of the board and the top hole. To help you secure the first panel evenly, use a building level.
Scheme of a ventilated facade made of beveled plank
Place the part of the fastener that does not have a hole under the previous panel. Then set the gap and fix the plank part to the sheathing through the top of the metal strip with a self-tapping screw. Due to the fact that the gaps between the parts are visually invisible, the impression of a monolithic surface made of wood is created.
Planken successfully combines the natural beauty of wood and high protective qualities. It can be combined with other finishing materials. This façade cladding looks very original! There can be many options. The main thing here is that the flight of your imagination and financial capabilities keep up with each other.
Summarize
A finishing material such as planken will be a good solution for cladding facades or finishing interior spaces. However, you should understand that there are two options here: save now and face the need to replace the coating in a few years, or immediately purchase a quality product made of good, strong wood, and then forget about repairs for many years. The answer is obvious.
We hope that the information presented in today's article was useful to our dear reader. If you have any questions or some parts are unclear, please feel free to comment in the discussion below. The Homius.ru editors will be happy to clarify any misunderstood points as quickly as possible.
Have you worked with similar material yourself? Then please share your experience - it will be very useful for beginning home craftsmen. Write, ask, share, communicate. And finally, we bring to your attention a short but very informative video on today’s topic.
Overview of species
Well-dried planken is prepared by processing in special chambers and then polished. This is what the classic version looks like, preserving all the features of Siberian larch. The surface of the planken can be varnished or impregnated, and tinted if desired. Brushed larch plank undergoes additional processing. The material is aged artificially - in classical technology, hard metal brushes are used for this, hence the name.
On an industrial scale, brushing is carried out using sandblasting equipment and abrasive equipment. After firing and removing some of the fibers, the structure of natural larch becomes smooth, its pattern appears clearer and brighter. All that remains is to apply wax or oil to its outer part, which will highlight the beauty of the wooden plank and protect it from contamination. According to the type of edge processing, planken is also divided into oblique and straight versions. Different types of profiles have their own characteristics.
Direct
The edges of the panel are slightly rounded, at a right angle at the base. This is a universal option, well suited for interior decoration or cladding the exterior walls of a building. The material can be placed horizontally and vertically, forming an interesting finishing pattern, making it more varied.
Beveled
The slanted larch plank has cut edges on the sides. Their angle is 60 degrees. This option is optimal for cladding building facades. It is placed horizontally, maintaining an attractive finishing pattern.
Installation methods
It is easiest to install a plank when you have clear instructions at hand. Laying technology is carried out in two ways: open or hidden (closed). If we consider the installation step by step, it will look like this:
- laying of sheathing;
- laying a layer of insulation;
- installation of plank.
Open
This installation method is simple. It implies that the boards must be secured using self-tapping screws or self-tapping screws on the front side of the facade
Among the advantages, it is important to note reliability, since any natural influences will not tear off the plank attached in an open way. However, the finish will not look aesthetically pleasing enough, since the heads of the fasteners will be visible on the surface
You should also not use this method for larch, so that cracks do not appear on the tree.
Hidden
For this fastening method, it is necessary to use special fasteners, such as a snake, “crab”, key, PLANfix, bridge, “kleimer” and others. The option is selected depending on the type of plank (straight, beveled, with grooves) and the type of fastening (vertical, horizontal).
Planken is prepared for the closed method, starting with laying out the boards on a flat surface along the height of the base that will be sheathed. After this, the dimensions of the sheathing structure are applied, to which the plank will be attached. Metal strips are laid on the boards so that they protrude slightly (about 1 cm) beyond their edge. Upon completion of the installation and fitting work, the planks must be secured with self-tapping screws.
Criterias of choice
- First of all, the choice of planken should depend on the wood used. Choose only oak or larch. You need to be prepared for higher prices for these types of wood, but it is better to overpay once than to change the facade every 3 years. It is unknown what will be more expensive.
- Next comes the choice of planken shape. As mentioned earlier, this can be a beveled plank, a straight plank and a straight plank with a groove. You need to choose depending on your own taste preferences. Planken is primarily a finishing material, so you need to choose what you like.
- The choice of form may be influenced by the location of application. You can use any plank for the facade, but, for example, only a straight plank is suitable for a fence. Simply because other forms of planken will look inconspicuous in this place.
- Planken surface. The surface of the board in production can be given a rounded or wavy shape. It goes without saying that such delights will add value to the final product. But you can spend money on finishing.
- Planken processing. Not all manufacturers treat their products with an antiseptic. Some people just release boards. Therefore, you should be prepared for the fact that instead of processed planken, they will try to sell you a blank.