In the industrial production of lining, powerful woodworking machines are used to produce products of excellent quality, but not all users can afford it. Is it possible to make lining yourself and what is needed for this? We will talk about this in this article.
Do-it-yourself lining
Lining
Industrial production technology
Lining - what kind of material is it?
You will need this knowledge in order to independently make the best decisions when making lining at home. The process of industrial production of lining consists of several stages.
- Making boards. The logs are sawn on band or disk sawmills into edged boards of specified parameters. The thickness of the board is in the range of 15-25 mm, width 100-150 mm. Specific dimensions depend on the type of lining.
- Drying lumber. The process takes place in chamber drying, which reduces the amount of waste and minimizes the risks of torsion and cracking of boards.
- Sorting. Lumber is sorted depending on quality. For the manufacture of lining, boards of at least second grade are selected.
- Manufacturing of lining. The process takes place on a powerful four-sided planer. By selecting various cutters and knives, four planes are processed in one pass, and the desired profile is immediately created on them.
Lining production line
- Quality control and product storage.
Warehousing of linings
That’s all the technology is, there is nothing complicated, modern equipment allows you to automate production to the maximum. It is impossible to achieve this at home; you will have to waste much more time making the forcing.
Table. Classes of lining and their description.
| Class or variety | Description |
Extra | Free from cracks, knots and other defects. The surface is perfectly smooth and even. |
| A or 1 | The surface is smooth or slightly rough. There is 1 healthy knot per 1 linear meter (knot diameter no more than 1.5 cm). There may be cracks: hairline cracks - no more than ½ of the panel in length, non-through cracks - less than 9.5 cm in length (the exit of the cracks is directed towards the end of the panel), which appeared during drying - no more than the width of the panel. There may be tars and resin pockets of 2 pcs. at 1 m p. |
B or 2 | There are many knots, of which no more than 2 can fall out. per 1 m p. There may be through cracks up to 1 mm wide and up to 15-30 cm long, hairline cracks are allowed along the entire length of the board. The presence of wormholes (3 pieces per 1 square meter) and rot (no more than 1/10 of the panel) is allowed. Grade B lining is suitable for painting. |
C or 3 | The quality is low. Many different defects. This lining is suitable for upholstery of technical rooms or rough work. |
Classification of lining
Prices for lining
Lining
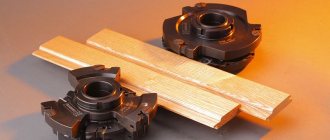
Milling cutter - appearance, application, features
It is difficult to come up with a more perfect tool for wood shaping. A milling cutter is a fairly easy-to-use tool, which is a washer (with several blades of a certain shape) with a shank that is clamped into a machine chuck. The number of blades varies from 2 to 6, depending on the area of application of the tool, the material it processes, and the power of the power plant.
A standard cutter washer has 2 knives that remove material from the board. A durable shank with a diameter of 8-12 mm ensures transmission of torque to the knives. The board processing process is quite simple, but seriously penalizes for mistakes. It is quite easy to spoil a board, not only at the stage of removing the material, but also after it: improper drying, insufficient impregnation with chemicals can put an end to the finished sheet.
List of the minimum set of tools and equipment
First of all, you must have a special separate room for work; woodworking machines create a lot of noise and dust. You will have to comply with the requirements of sanitary authorities. Another condition is that the electrical wiring must withstand additional loads, and they, depending on the brand of machines and their number, can increase significantly.
On a note! You can make both the simplest and quite complex lining with your own hands; we will consider both manufacturing options. But for all options there are several preconditions.
Making lining with your own hands
Where to begin?
First you need to find a separate room for work. Remember that machines and woodworking equipment create a lot of debris and noise during operation. You also need to consider the condition of the electronic wiring. It must be able to withstand long-term loads. Otherwise, the wiring may simply burn out.
Experts convince us that if you have the technical base, certain skills and consumables, you can make different types of lining, differing in shape, size and type of connections.
General requirements
On what machines and no matter what complexity you try to make lining, you must comply with the following requirements.
- Quality of lumber . Boards should only be edged, with the same thickness and width. Wide planes must be passed through a surface planer on at least one, and preferably on both, sides. For these purposes, it is better to have a double-sided surface planer at home, and if you don’t have one, then at least a basic jointer.
Jointer
Double-sided thicknesser
If there are no such machines, then you can work with a manual electric plane. This work is quite difficult and long, and the quality will always be much lower than when processing lumber on machines.
Practical advice! We strongly recommend that you do not plan boards with a hand-held electric planer. It is much more profitable to take the lumber to a friend who has a double-sided planer; in an hour or two of work you will pass 1-2 m3 of boards - this amount is enough to decorate a small country house. You will have to plan them manually for more than one day, and, as we have already mentioned, the quality will be poor. Such lining can only be used for finishing auxiliary premises.
- Drying. You can only work with lumber that has no more than 24% relative humidity. If the indicators are higher, then dry the boards under a canopy or in a ventilated area. The larger the gap between the stacks, the faster the lumber will get rid of excess moisture. Fold them carefully, do not allow any distortions to appear, place the spacers correctly, and be sure to press the top tier with a weight.
Drying the lining
- Job. Absolutely follow safety regulations. Statistics show that woodworking machines are considered the most dangerous equipment. Moreover, the injuries are very severe and often cause disability. This does not mean that machines should be feared, but they should be treated with respect. As for the use of mittens, this issue must be approached wisely. Mittens protect your hands from splinters, that's true. But it is also true that when the mitten gets caught under the cutting element, the hand or arm is pulled in, and injuries are much more dangerous.
Machine for making lining
We will tell you what machines and equipment you need to make lining with your own hands as the article progresses. The fact is that there are a large number of technologies, taking into account existing machines, it is impossible to describe everything in one article. Let's start with making the simplest lining - such work is accessible to most inexperienced craftsmen.
Price for the model range of jointing machines
Jointer
Choosing a wood type
For the production of lining, coniferous and deciduous wood is used. Pine, spruce, larch, cedar, and fir are used as coniferous species. Products made from deciduous trees are widely represented by products from linden, alder, oak, ash, and aspen.
Spruce
Spruce panels have increased plasticity and softness. These properties are used in the manufacture of linings and for finishing curved interior elements. The softness of the wood has a positive effect on the tightness of the panels. The surface of the spruce board is flat and smooth. The wood texture is clear, without blur.
The disadvantage of spruce products is the increased level of moisture absorption (hygroscopicity), the appearance of resin stains, and low biological resistance. Spruce is susceptible to rapid rotting and destruction by harmful insects. Spruce products require mandatory treatment with protective agents.
Pine
DIY pine lining is the most common softwood lumber. Pine is characterized by increased strength, lightness, and low cost. Pine wood has a beautiful pattern and a delicate golden hue. The most valuable varieties of pine have a red-brown color.
There are up to 200 species of pine in nature. However, the tree grows only in the Northern Hemisphere.
The presence of a large amount of resin has a beneficial effect on the environment. Essential oils contribute to the long-term preservation of a pleasant pine aroma in the room. The smell of pine wood has a calming healing effect.
The disadvantage of pine is the appearance of resin stains over a long period of time.
Larch
It is characterized by high strength, water resistance and density. Products made from this breed are excellent at resisting harmful insects and fungal parasites.
Larch lining is distinguished by long-term preservation of its physical properties. Products made from this wood have a clear wood pattern. A large number of essential substances have a beneficial effect on the nervous system.
This is interesting! The larch root system is capable of developing in a layer of sand only one centimeter thick.
The bright reddish hue distinguishes larch from other tree species.
Many positive qualities cause a significant increase in the cost of larch products.
Cedar
Cedar products have high strength and durability. The high content of essential oils causes a pleasant pine aroma. The healing qualities of cedar have been well known since ancient times.
DIY cedar lining is highly resistant to harmful insects and pathogenic bacteria. The widespread use of cedar wood is limited by the high value of cedar.
Birch
Birch blanks are easy to make lining. Birch has moderate hardness, uniform density, and is easy to process. Because of its textured surface, birch is preferable in the manufacture of lining for cladding walls indoors.
Aspen
Softwood contains a small amount of knotty inclusions. Aspen boards are resistant to deformation and retain their strength properties in a humid environment. The quality of the lining made from this material is very high.
Linden
It is characterized by high strength and water resistance. Linden wood has a beautiful pattern and a pleasant light shade. Linden products are easy to machine.
Alder
Products made from alder have increased strength, water resistance, and sound insulation properties.
This is interesting! The alder root system is capable of saturating the soil with large amounts of nitrogen. This allows the tree to grow in the most difficult conditions.
A large number of beneficial essential substances have a beneficial effect on human health.
Oak
Refers to trees with increased timber value. Do-it-yourself oak lining is distinguished by high strength, hardness, and significant weight. A large number of positive qualities affect the cost of oak products.
Making lining using a circular saw
Making lining using a circular saw
Circular saw
This is the simplest version of a circular saw; others have additional supports for fixing other woodworking mechanisms, which greatly expands their capabilities.
Universal woodworking machine
Step 1. Prepare lumber, decide on their quantity. To work, you will need boards planed on both sides, approximately 15–20 mm thick and up to 10 cm wide. There is no need to make it wider, this is due to the fact that the lining has the most basic profile, and it cannot guarantee the absence of warping during operation. The lining will be joined in a quarter, and such a lock cannot completely eliminate warping. The wider the lining, the greater the significance of warping; therefore, it is not recommended to make it larger than 8 cm.
Determining the size of the boards
Step 2 : Clean up your work area. Workpieces should be placed on one side of the saw, finished products should be stored on the other.
Important! Nothing should get in the way under your feet, all your attention will be focused on the working saw, there is no time to look at your feet - this increases the risk of injury. If the boards are longer than a meter, then do not work on your own, as it is difficult and very dangerous. In addition, the risk of serious injury increases significantly and the amount of waste increases. The fact is that you will not be able to press the board normally against the ruler as it exits the cutter; the linearity of the milling is disrupted at the ends.
Step 3. Align all boards to length and inspect their surfaces. If there are black, rotten, loose knots, discard the lumber. Such knots cannot be treated at home; they will definitely fall out.
When storing workpieces, pay attention to the location of the fibers, especially carefully monitor the location of wood development defects. Areas with curliness are very difficult to cultivate. Position the boards in such a way that the location of the twist is in the direction of rotation of the cutting tool, otherwise the surface cleanliness will be unsatisfactory. On industrial machines, such problems almost never arise; they operate at high speeds, have at least four knives on one head, and mechanical clamps eliminate the possibility of the board oscillating during processing. Due to this, cutting conditions are maintained perfectly, and the quality of processing of complex surfaces is significantly improved.
Sawing one side of the board
Important! Never remove the guard or spacer from the saw. They are not needed to keep sawdust flying into the eyes, as inexperienced carpenters think. Their main purpose is to prevent the board from flying back, which could pierce the abdominal cavity.
Unlike other safety features, the riving guard offers added convenience when sawing, so don't miss out on using it.
This is what should happen
Step 4: Align the circular saw. If the width of the boards is not the same, then first you need to align them. To do this, set the saw ruler at the required distance from the teeth and secure it firmly. Make sure that the ruler is parallel to the saw, this is very important. Factory machines have special marks; for homemade ones you will have to use a square. Checking the correct position is done experimentally. Take a small piece of board and saw through it, check the width and parallelism of the ruler. Repeat the installation if necessary.
We file the second side along the ruler
Ruler filing process
Planing of boards
It should look like this
Step 5. A simple lining has a quarter joint; it can be made using an ordinary circular saw.
Quarter connection
To do this, you need to adjust the height of the saw table and its distance to the ruler. How it's done? To make the example easier, let’s take the board thickness to be 20 mm. Accordingly, the quarter will be 10x10 mm.
For this you can use a cutter like this
- Release the ruler and move it towards the saw. The distance between them should be 10 mm, carefully monitor the parallelism of the planes. Attach the ruler and check for correct installation. To do this, use any segments, skip a few for testing.
- Adjust the position of the circular table so that the saw teeth at their maximum point are at a height of 10 mm.
After adjustment, your saw height and its distance to the ruler should be 10 mm. If the boards have different parameters, then the distances must be adjusted in accordance with them.
Step 6: Start making a quarter joint. The first pass is to lay the board flat, the side surface is pressed tightly against the ruler. Once completed, the board has a cut along its entire length.
This can be done with a milling cutter, or you can do without it. In this case, take a small saw wheel and set it at an angle. The result is a so-called “drunk saw”. This method is used when there is no cutter. It is much more difficult to set up and is used when there is no other option. It's better to buy a cutter
Important! Do not press the boards near the saw with your hand, use a wooden block. To prevent it from sliding off the end of the board, cut a recess - it should simultaneously rest against the top of the board and against the end. Never rest your stomach on the end of a long board; hold it only with your hands, and your body should be located on the side.
Step 7. Place the board on its edge, the cut should be on the side of the ruler, cut out a quarter. Immediately remove the cut strip from the table, do not litter the work area.
Step 8. Rotate the board 180° and repeat the operation on the other side. The lining must have a mirror arrangement of quarters. If on one side the recess is located at the top, then on the opposite side it should be at the bottom. During installation of the lining, the joints overlap and cover the joints.
The result is a lining like this
Step 9. If possible, it is recommended to mill the visible side edges with a hand mill. Select the cutter profile you like, firmly secure the board in a vertical position and make a pass with the tool. How to work with hand cutters is described in detail in the manufacturer's instructions. By the way, the presence of a manual milling cutter significantly expands the possibilities; it is recommended to have such a tool for everyone who does carpentry work.
Working with a hand router
If you use serviceable saws with pobedit tips, and the machine is sufficiently stable, then when making such a simple lining, you can completely do without a surface planer and a router. Correctly selected saw speeds and optimal feed speed ensure good surface finish. If necessary, the latter can be treated in some places with sandpaper or a grinding machine, and the external surfaces of the lining will be quite satisfactory in quality.
All that remains is to take the waste and cut the slats. Moreover, the slats do not have to be made as long as the linings. In other words, the boards are on their own, the slats are on their own. No one will notice the joints of the slats. The slats should be cut thinner than our grooves. The slats will still fit perfectly into the grooves due to their natural curvature. And, of course, the slats are simply sawn. They do not need to be planed, especially since this is an extremely dangerous undertaking. If you use a good saw, the rake will be quite smooth
This is what the ceiling of the cellar looks like, decorated with such clapboard
Now let's look at how you can make eurolining yourself.
Prices for the popular range of circular saws
A circular saw
Planing boards
The board becomes even and smooth after the jointing procedure. This is an extremely important stage and requires no less care and concentration. To do this, it is again necessary to reconfigure the machine. The boards are planed one after another, strictly on one side. Boards that have curled into a spiral during the planing process are immediately thrown away, because they are no longer subject to further use. To obtain even and identical boards in width, count how many times you need to pass along the machine and repeat the same number with each new board, applying the same force.
READ How to finish a plasterboard arch
When working on the other side, minor differences in thickness will not be noticeable.
The first thing you need to do is adjust the ruler by raising and lowering the table until you set the required depth for the groove. After this, cut out the grooves on both sides of the board. There is no need to cut grooves strictly in the middle of the board, making the groove a little closer to the surface - visually there is a feeling of a thinner lining than it actually is.
Manufacturing eurolining on a milling machine
This is more complex work; you will need solid experience working with woodworking machines. We will tell you about the technology, and select the dimensions of the lining and the profiles of the front surfaces yourself, taking into account the availability of tools and personal preferences.
The design of the machine is quite complex. Complete instructions must be included with such equipment.
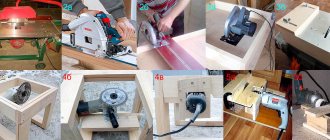
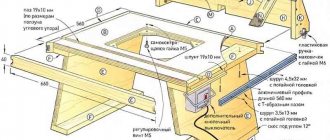
We see an example of a homemade machine for making lining, its components and details
We see another example of a homemade machine for the production of lining at home
How does eurolining differ from regular lining?
- The tongue/groove connection is deeper. Due to this, the risk of seams showing through during a significant reduction in the width of the boards is eliminated, and installation of the sheathing is simplified. It is easier to insert hardware for fastening into a deep groove.
- The reverse side has one or two slots - the wall surfaces can breathe, static forces are reduced when changing the linear dimensions of the lining. It is as a result of strong static forces that the cladding of a house can warp.
Photo - Eurolining category B
As the initial data, we assume that the boards of the required sizes have already been prepared, the material is sorted and folded in the proper place.
Step 1. Install a cutter on the machine to make a groove and a side decorative chamfer, adjust the depth. To do this, release the ruler, place the end of the board against the knife and, moving the ruler closer or further, find the desired position. Fasten the milling head and ruler with great force.
Mills used in the manufacture of lumber
In order to correctly align all the knives on the head, you need to plan a section of the board as a test. Next, place it again on the cutter and, slowly rotating the head in the opposite direction, check that all the knives are working. You can recognize this by the sound; if everything is normal, then the number of minor touches on the board should correspond to the number of cutters. For example, if the head has four knives, but you only felt three touches, then this means that one knife is not working. Find which one and adjust its position. This is quite difficult to do and will take several attempts. Make sure that the spacer wedges of the knives are pressed firmly against the head.
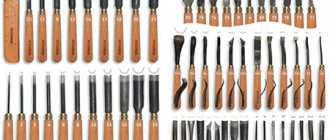
Knives
Several different knives-attachments for a homemade machine for making lining will allow you to create various wood products
Step 2. Attach the top and side clamping stops, set the desired distance. Such stops greatly facilitate the milling process, improve quality and increase labor safety. Pass all the boards on one side.
Step 3. Replace the cutter with a new one; it should cut the groove and remove the decorative chamfer. There is no need to re-adjust the clamps; the width of all boards is the same and did not change during the first pass.
Step 4. Remove the side cutter and release the ruler and clamps. Install a cutter to make recesses on the inside of the lining. The size and number of grooves do not matter; select them at your discretion.
Manufacturing eurolining on a milling machine
Practical advice! If you don’t have special knives for cutting grooves, no problem, you can use the same ones that were used for cutting the groove. Raise the head so that the groove knife is located in the middle of the board. The groove knife is longer than the chamfer knives; adjust the distance to the ruler so that only it works. The depth of the groove in this case will be approximately 3-5 mm, which is quite enough for a groove.
Prices for the popular range of milling cutters
Fraser
Is it worth buying
It is not difficult to purchase a lining. There are different types of it on sale, they differ in the type of wood used, color, texture, shape of the outer surface, so you can choose a material that is perfectly suitable for any project. With all this, the lining has a significant drawback - the highest cost.
When undertaking a major renovation, it would be useful to consider the option of producing the lining yourself. It should be noted that even the most ordinary machine of this type will have a high cost, and before deciding to purchase, you need to evaluate its profitability.
Whether you need a similar machine in your home workshop or not is up to the master to decide; you can only give a few arguments in favor of the purchase:
- creating lining in a home workshop will allow you to significantly save on building materials;
- products made with your own hands will be of a higher quality in advance than similar ones going on sale;
- the machine can become a source of additional income due to the tangible difference in cost between edged boards and finished lining.
READ To make casein glue you need 11 parts
Also, we must not forget that this machine is multifunctional. The scope of its implementation is not limited to the creation of lining. With its help, you can make a number of other profiled wooden products, among others: platbands, skirting boards, figured slats for various frames.
Horizontal cladding
Horizontal cladding
First step
Proceed to attaching the lining. Start sheathing the walls from the ceiling to the floor. At the same time, try to direct the grooves downward - thanks to this, various debris will not get into them in the future, which will help to significantly increase the service life of the skin.
Horizontal cladding
Second step
Fix the clapboard sheet onto the sheathing bars. Use convenient fasteners. Insert the tenon of the next sheathing element into the groove of the fixed board. Secure it. Cover the entire planned space in this order.
Every 5-10 sheathing elements, be sure to check the evenness of the surface using a plumb line or level.
Cladding
Third step
Having reached the last board of the lining, adjust it to the width with a regular hacksaw or other suitable tool. Nail the board and hide the gap under the decorative baseboard.
Fourth step
Clean the finishing surface from dust using a damp sponge. If you wish, you can finish painting the lining, but this is not necessary - the wood already has an attractive appearance and a beautiful shade.
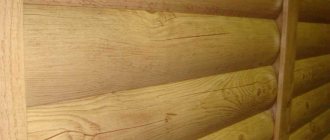
If a special lining will be used for the cladding, which outwardly imitates a rounded log, start finishing with the groove facing up - this way you will hide the joints.
Horizontal cladding
Additionally, the panels can be adjusted using a hammer, placing a piece of board under it - this way the finish will be fixed without gaps.
To fasten the “rounded” lining, use self-tapping screws. Twist the fasteners at 45 degrees. Place treated timber between the panels of such sheathing. This will create a beautiful finish without gaps.
Installing the first ceiling strip
Connecting operations
Board - lining is processed on 4 sides.
To do this, it first goes through a circular saw, obtaining smooth edges, then it is calibrated on a surface planer, and finally, the tenon/groove profile joints are cut out with a milling cutter. Single work on different machines will take a lot of time and will leave individual characteristics for each part. A machine for making lining allows you to combine operations, obtaining the result on one table for a single pass of the workpiece. By adjusting the knives, they make linings of different sections and types. By changing cutters, you can make other types of wood products.
Lining drawing
Constructive solution
Simultaneous cutting from different sides is possible thanks to the installation of at least 4 (up to 7) spindles on one bed in the direction of movement of the workpiece. The specified parameters for lining production are achieved by selecting a set of appropriate cutters.
Small mobile models of the machine can produce small-section linings. Flow production is established on stationary units with high feed rates and programmable control. The table of such machines can reach a length of 12 m. The bed has a large mass, which dampens vibration and has a positive effect on the accuracy of parameters during repeated operations.
Types of eurolining
Mounting methods
We will look at how to properly fasten the lining to a wooden frame in different ways. Each of them has its pros and cons, so please read all the information below carefully.
Option 1 - using finishing nails
This fastener for lining is traditional and has been used for several decades; for this work we will need special nails with a reduced head. The length should be such that 2/3 of the nail fits into the bar; most often, products with a length of 30 to 40 mm are used. The price of 100 grams is 40-50 rubles, so this is also the cheapest method of fastening.
Finishing nails - the most budget-friendly solution
Let's figure out how the lining is attached in this case:
The first installation option is fastening into a groove, that is, into a recess on one of the sides; in this case, the nail is driven in at an angle of 45 degrees and covered with the next element. Below is a diagram of this technology;
This is what the groove mount looks like
You can also fix elements through a tenon; below we show how to properly fasten the lining with nails in this case. Here the nail is also covered by the next element, ensuring the perfect appearance of the finish;
This method is even simpler, but it is suitable for materials with a wide tenon
- Having chosen the option that you will use, you can get to work. Before attaching the lining to the wall, it is necessary to cut the elements to the required length so that there are gaps of several mm to compensate for deformations of the material due to temperature changes;
- The first element in the corner on one side is fixed through the top; anyway, the corner is covered with a plinth or other decorative element. On the other side, a nail is driven into the tenon or groove; this is done very carefully so as not to split the material or damage it. This way you can finish walls and ceilings quickly and reliably.
Remember that when fastening into a groove, the nails are located at an angle
Option 2 – use of clamps
It is impossible to discuss the question of how to fasten a wooden paneling without mentioning the clamps, which are special staples that are placed on the tenon of the elements and secured with nails. For lining, option No. 4 is used, and for block house and imitation timber - No. 5. The products are sold in packs of 100 pieces and cost about 50 rubles per pack; carnations are included.
The photo clearly shows how fastening is done using clamps
Instructions for doing the work yourself include the following steps:
- First, the number of fasteners is calculated, they are located on each edge of the frame, you need to multiply the number of structure edges by the number of lining panels;
- The location of the clamps when the elements are arranged vertically does not matter, but if the finishing is located horizontally, then they should be at the bottom;
It is important to position the fasteners correctly
The working process is very simple: the lining is put in place, fits well with the previous element, after which clamps are placed and secured with small nails. To make it easier to hammer them in, use a spacer.
Clamps can also be screwed on with self-tapping screws
Option 3 - use self-tapping screws
If you are thinking about how to fix the lining to the wall as securely as possible, then self-tapping screws are best suited
Their use is associated with some difficulties, but the fixation strength will be maximum, and if necessary, the finish can be disassembled without damaging it, which is also important
For work, fasteners of small thickness are selected
The workflow in this case looks like this:
- In the groove connection of the lining, holes are drilled at an angle of 45 degrees with a 3 mm thick drill;
- The element is attached to the sheathing, tightly joined, after which a self-tapping screw is screwed into it. The work should be done very carefully: the cap should sink into the material so as not to interfere with the joining, but at the same time you should not press too hard so that the wood does not crack.
In this case, accuracy is important
The question is often asked about what to attach PVC lining to; in this case, all of the above options are suitable. In addition, you can use a simpler option - a construction stapler, it is perfect for plastic.
Before attaching PVC lining, stock up on a stapler and staples
Area calculation
The sequence for calculating the area of the surface to be covered is best calculated using the example of a house measuring 6x10, where the ceiling and walls will be sheathed.
Then we calculate the quadrature of the first room. Let's say the length is 6 m, width - 5 and height - 2.5 meters.
Then everything is extremely simple, as taught in school:
- Long side - multiply the height by the length 6x2.5 = 15 m2;
- The wall opposite has the same dimensions, for this reason we multiply the result by two 15x2 = 30 m2;
- Using the same principle, we calculate the square footage of the wall, which is smaller than 5x2.5 = 12.5 m2, multiplying the resulting result again by two 12.5x2 = 23 m2;
- To calculate the ceiling area, multiply the width by the length of the room 5x6 = 30 m2;
- We add up the data obtained and get the coverage area of this room 30+23+30=83 m2;
In the same way, we calculate the area of the remaining rooms, add the result together, and we will know the total quadrature of the entire surface.
We calculate the square footage of the balcony in the same way, except that in this case it is most convenient to divide each side into its constituent figures.
