The vast majority of floors in both private and apartment buildings are made of wood. The support for a multi-layer, pie-like wood structure is most often logs. Logs are long bars made of wood (less often metal and reinforced concrete) laid transversely to the finishing flooring, serving as its solid foundation. This structure is installed both on a monolithic concrete floor and on supporting posts and beams. Installing floors on wooden joists is very profitable due to the relatively low price of materials and ease of installation.
Briefly about lags
Logs are transverse or longitudinal beams laid on concrete. Floorboards are attached to them, resulting in a floor that is level on a horizontal plane, which can differ only in the way the beams are fixed.
Laying joists on a concrete floor allows you to:
- create a flat surface for a wooden floor.
- transfer the load evenly to the load-bearing elements of the building (walls or foundation).
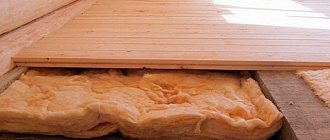
- leave a void between the base and the floor covering. Thanks to this, it is possible to well insulate the floor, protect the room from noise and lay various communications in the floor.
Advantages and disadvantages of wooden structures
Wooden structures are used in private houses made of wood and stone of all types. This versatility is not inherent in concrete structures. In addition, wooden structures have other advantageous properties:
- the construction of wooden structures is much cheaper than concrete ones;
- To install monolithic concrete floors, special equipment and complex engineering work are required. And in the case of wooden beams, you can do without the help of professional builders. The minimum required skills are to work with a hammer and saw.
- Concrete floors are heavy. Their heavy weight puts a lot of pressure on the foundation, which cannot be said about the light weight of wooden structures.
- with low density, they have sufficient load-bearing capacity to support heavy furniture.
- higher rates of sound insulation and thermal insulation compared to concrete structures;
There are also disadvantages that also need to be addressed:
- wood has a shorter service life than concrete. Therefore, to increase their service life, beams are treated with antiseptic agents. Even so, under normal operating conditions, they can last more than 50 years.
- has the lowest fire resistance;
- the floor structure based on wooden beams is susceptible to moisture and rots under its influence.
But these shortcomings are indirectly related to the matter, because if properly used under normal conditions, the wooden floor structures of the first floor can last a good time.
What material is used for joists?
Logs are made from a variety of materials (reinforced concrete, iron, plastic), but the most popular of them for many centuries has been wood. Iron channels and reinforced concrete elements are rarely used. High-strength logs can significantly increase the load-bearing capacity of the floor. More often, such elements are installed in industrial buildings. Wooden logs are the most common, so you need to disassemble them in detail.
They come in the form:
- square or rectangular beams;
- stacked and tied boards;
- adjustable lags.
Floor coverings in rooms with high humidity
The time has come to consider the installation of floors in rooms such as the bathroom. High humidity levels require a special approach to construction and repair work. This is why there is a need for moisture-resistant floor coverings.
In this case, ceramic tiles and marble chips are perfect. They respond well to humid environments and retain their aesthetic appearance for many years. The same materials can be used for the hallway, kitchen and even balcony.
By the way, about balconies. Clinker tiles have also proven themselves excellent as flooring on balconies.
What should the cross section of the log be?
The strength of this part of the floor depends on the material of manufacture and the accuracy of load calculations. When choosing the size of the timber, the maximum permissible load on the floor is taken as a basis. For living rooms, this figure is 300 kg per 1 m2. For non-residential premises it is individual in each specific case, so before purchasing the material you need to calculate this indicator.
Basically, timber with a profile aspect ratio of 1.5 x 2 is laid under the floorboard.
The height of the beams must also be selected taking into account the thickness of the insulation. If iron and concrete elements are installed, their cross-section may be smaller. This is due to the fact that these materials are able to withstand high loads for a long time.
Features of the foundation structure
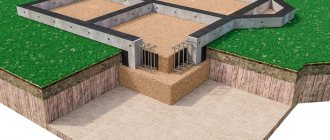
Construction of the floor and foundation of a house on the ground
The advantage of floors that rest directly on the underlying soil layers is that they do not carry additional load on the foundation of a private house. The floors of the first floor, which are not in contact with the soil, provide for the construction of a kind of floor slab that rests on the foundation. Therefore, the second option requires taking these features into account when designing and calculating the required width of the base.
If the base of the floor of the first floor is a reinforced concrete slab, you should definitely take care of waterproofing the foundation itself and the place of its contact with the overlapping structure, especially if this option is chosen due to high soil moisture. A slab that is not insulated with a water barrier will draw moisture from the foundation, which will lead to its premature destruction and loss of strength, as well as the penetration of dampness into the house. In addition, care should be taken to ventilate the space between the ceiling and the soil, thereby reducing the level of humidity here.
Step width between joists
The pitch between the joists is selected taking into account the thickness of the floorboard. The thicker it is, the larger the step between the bars is allowed. In addition, a thick board sag less under loads.
The table below allows you to quickly select the distances between the bars.
You can also resort to the following rule: when the width of the logs increases by 5 mm, their pitch increases by 10 cm.
When installing plywood, the cross-section of the joist is calculated differently. This is due to the fact that it has great bending strength. With a thickness of sheet material of 1.5-1.8 cm, it is fashionable to place logs against each other at a distance of up to 40 cm. It is necessary to install the beams so that the sheets are fixed at the edges and in the middle. Moreover, the edges of the sheets should fit half the width of the beam.
Installation of columns under logs
After the soil is compacted and leveled, they begin to install columns under the logs. But first you need to mark the installation locations of the supporting pillars. In practice, cords are used for this, which determine the location of the lags. At the intersection of these cords, places are designated for the foundation for the columns, which are laid out from ceramic bricks or concrete blocks. The cords are then removed, and the locations of the posts are fixed with wooden pegs driven into the ground.
Next, at the locations of the pegs, holes are dug for the foundation for the posts. The depth of the holes depends on the density of the soil and the depth of groundwater. If the soil is sandy or rocky, a depth of 25–30 cm will be sufficient, however, and if the soil is clayey, then the depth of the foundation should be 40–50 cm, since crushed stone will have to be poured into the bottom, which must be thoroughly compacted.
Pouring concrete for the foundation must be taken very seriously, observing the required proportions of concrete, sand and water. You should not skimp on cement, but prepare the mixture in the following proportions: one part cement + three parts sand + three parts fine crushed stone (10–15 mm). Before pouring the solution, it is recommended to lay plastic film at the bottom of the hole so that the “milk” does not go into the ground. And one more thing: below the level of the middle of the pit it would be more rational to attach a metal mesh made of wire Ø 4–5 mm, which will act as reinforcement for the concrete.
After the concrete has hardened, the surface under the brickwork of the columns must be protected with waterproofing made of roofing felt or other material with an allowance of 10–15 cm on each side. Then you can begin laying brick columns, which, for reliability, it is advisable to lay from two rows of bricks. The height of the brick columns must be calculated so that the top bricks are perpendicular to the laid logs.
Tools
To install the beams, the following tools are required:
- electric drill or hammer drill;
- screwdrivers or screwdriver;
- electric circular saw or simple hacksaw for wood;
- plane;
- hammer;
- tape measure and level;
- fasteners.
Other tools may be required.
Installation of adjustable subfloors
When installing a subfloor, you also need to take into account several features
Be sure to pay attention to whether your screed requires repair. Assess what kind of repairs need to be made
If the soil under the screed has subsided and it is skewed, it is accordingly necessary to install logs that will be adjustable.
You can also make a plywood floor as a rough flooring, which can also be used to adjust the level. These methods are used in old buildings where it is not possible to pour a screed, since the floors are not reliable and may not withstand heavy loads.
Base made of concrete and reinforced concrete (laying on an uneven base)
Before installing the logs, the uneven concrete floor is leveled with a cement screed. This technology allows you to make a smooth and reliable base for parquet, laminate or floor tiles, as well as well insulate the floor and protect the room from external noise.
For most floor coverings, a spacing between joists of 60 cm is suitable, but floor tiles require cells measuring 30x30 cm because they are very fragile.
Reinforcing mesh in the screed and spacers between the beams increase the rigidity of the floor. Thermal insulation material can be placed in the resulting cells.
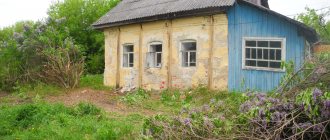
As for the "Stalin" rifles...
Stalinka buildings are quite old houses that were actively erected during the USSR period until approximately the beginning of the 60s. The apartments have very high ceilings, spacious rooms, and large windows. And there is another interesting feature - wooden floors. And this aspect greatly complicates the possibility of repairing the floor. While the floor covering itself is easy to replace, problems may arise with the floors. By the way, at one time some Stalin buildings were restored, and therefore they may have reinforced concrete floors. But there are still those in which they can be made of wood. If we talk specifically about Stalinist buildings, then before imagining all the horrors of replacing wooden floors, it’s worth finding the house’s passport and seeing if it states that the floors have not been changed. Much depends on the year of construction - houses from the 30s may have wooden floors, and houses from the 50s may have reinforced concrete.
Wooden floors
It is also important to understand that not all ceilings could fail even after so many years of operation. Much depends on how the house was built. It is important to take into account that when repairing a floor in a Stalin building with wooden floors, you cannot make a heavy new foundation. It should be as strong as possible, but light so as not to create unnecessary stress.
Important! Wooden floors, even now, are extremely rarely completely replaced, since this is a very expensive procedure that requires the participation of not only the apartment residents, but also the neighbors below. Often, even if the condition of the subfloor is quite poor, a decision is made to simply strengthen it rather than completely change it.
Repairing a wooden floor - photo
Fixation methods
Basically, four fastening methods are used to fix joists on a concrete floor. Therefore, if you do not know how to attach joists to a concrete floor, then after studying all these methods you will understand this issue.
Fixation with self-tapping screws
This method is considered simple, but it is not suitable for all cases.
- First you need to prepare the concrete surface. To do this, it is cleared of debris (it is allowed to use a vacuum cleaner). Then they repair cracks, chips and other defects with cement mortar or polyurethane foam.
- Next, in the logs (treated with antiseptics) you need to drill holes with a drill to install plastic dowels. Then you need to drill counter holes in the concrete using a hammer drill.
- Then the dowels are driven into the concrete with hammer blows, and then self-tapping screws are screwed into them with a screwdriver. Moreover, the head of the screw is driven into the hole 2-3 cm.
Fixation with anchors
Anchors securely fix the beams to the concrete, so this method is the most reliable. In addition, such fasteners help to restrain the deformation of wooden logs if they are not dried well. But the boards laid on them can sag, so it is necessary to install spacers more often.
- First, you also need to prepare the concrete floor (remove debris from it and repair all defects with mortar).
- After which it is necessary to make through holes in the timber (treated with antiseptics) with an electric drill.
- Next, you need to drill holes in the concrete opposite each hole with a hammer drill.
- Then the anchors are mounted on a concrete base and tightened with keys. The main thing here is not to overtighten the bolt, because this will cause the beam to bend. This is especially true for those places where there is a gap.
Before installing the anchors, trenches (small recesses) are made in the joists to hide the bolt heads.
Anchors need to be installed every 600-1000 mm. This distance is selected taking into account the partial immersion of the anchors in concrete (approximately 60 mm). Many people fix the beams to the concrete with 4-5 anchors ⌀ 10 mm.
What should the floorboard be like?
Most often, planed pine boards are used for floors. They have good strength, resistance to rotting, an affordable price, and can be easily processed and decorated using paints and varnishes. The board can be:
- regular edged;
- tongue and groove;
- and a quarter.
Floorboards with a quarter Source garantwood.ru
The most popular option is tongue-and-groove boards equipped with a groove and a tongue on the opposite long end edges. Sometimes tongues are also present at short ends for joining boards along the length. This profile provides the highest quality coating without cracks and with minimal risk of deformation.
Thickness
Before laying a wooden floor, a base is prepared for it in the form of a frame made of logs. The thickness of the floorboards is selected taking into account the distance between the joists: the larger it is, the thicker the boards should be.
Table for determining the thickness of boards Source stroimzanovo.ru
It is important! Do not forget that after leveling and sanding the flooring, its thickness may decrease by several millimeters.
Variety
The higher the grade of products, the fewer knots, chips, scratches, resin bags and other defects they have. The best and highest quality, and therefore more expensive, is the “Extra” variety.
See also: Catalog of companies that specialize in doors, windows and related work
Humidity
Floorboards can be sold raw, immediately after leaving the sawmill. It can warp and become deformed during the drying process, especially if stored improperly.
It is better to buy natural or chamber-dried lumber. The latter have a humidity of 8-10%, they can be used immediately without fear that the flooring will dry out. Boards with a moisture content of 12-20% must be dried in a dry room, stacked using spacers. In utility rooms, on terraces, and verandas, floors can be laid from planks of natural moisture.
Storage conditions
It is advisable to select floor boards personally, inspecting each one for defects and distortions and of the same thickness. It is important to pay attention to the conditions in which they are stored. The storage location should be dry, ventilated, and the boards should not be in bulk, but in stacks.
Lumber storage warehouse Source tildacdn.com
Fixation with iron corners
It is difficult to work with high logs (100 mm and above), so they are fixed to the concrete with iron corners. One shelf is attached to the beams with self-tapping screws, and the other is fixed to the concrete with dowels and nails. The main thing is that the entire load goes to the spacers, and not to the corners, since their main function is to fix the position of the beam.
- First, screw the corner to the joists with self-tapping screws, which need to be deepened into the wood by 3 cm.
- Next, it should be fixed in concrete with dowels.
Adjustable joists
This fastening of the joists to the concrete floor involves the installation of rectangular supports under the beams, which are secured to the base with the help of four dowels. In the center of this fastener there is a pin that secures the joist to the concrete. The nuts placed under the beams allow you to accurately set the height of the logs, and the nuts located on top allow you to reliably fix their position. The pitch of supports installed under the beams depends on the size of the profile of the beams, but experts advise not to make it longer than 1 m. This type of floor sheathing fastening is not in demand due to its high cost.
Diagnostics: when is repair needed?
Without a thorough examination and identification of the condition of the floor, it will not be possible to understand whether it needs to be repaired. So before you decide on a major or cosmetic repair of the foundation, you need to diagnose it. The presence of certain signs will help make a decision about the need for repair work, as well as what generally needs to be done to revive the foundation under your feet.
Before repairs, the floor must be inspected
Table. Basic parameters for assessing the condition of the floor.
| Parameter | Characteristic |
| Sound during floor examination | You need to tap the floors with a hammer and listen to how the wood sounds. If the sound is dull, then the wood is already beginning to rot or is rotten and needs to be replaced. |
| Condition of nails | Nails can show where boards have rotted. In places affected by rot, the metal will be rusty; it becomes so due to the processes of ongoing decay occurring next to it. |
| Lag condition | It is assessed by probing these elements with an awl. It is recommended to walk along the entire length of each joist. The tool should not easily enter the wood, but if the situation is the opposite, it means the logs have rotted. Most often, the softest wood is found in the area of the ends of the beams. |
| Smell | If an unpleasant odor seeps between the floor boards, then the likelihood of the boards and joists rotting is very high. In any case, if there is an unpleasant odor, it is advisable to disassemble the floors to understand the reason. |
| Condition of the floorboards | If the floorboards sag and squeak, are severely curved, or crumble, then the floors definitely need to be repaired. |
On a note! Wooden floor elements can also be damaged by wood-boring beetles. In this case, the boards will also have to be changed. Most often, insects attack wood that has not been treated with a protective compound.
These logs definitely need to be repaired.
By the way, despite the fact that the floorboards themselves may be in perfect condition, it is still recommended to check the joists. The floor itself could have been re-laid at one time, but the joists were unlikely to be completely changed. It is especially important to spend enough time checking the floors if we are talking about a secondary home or an old house.
Repairs may also be required if the floor is very cold. Perhaps the insulation under it either served its purpose, or it was not there at all. Laying new insulation will help make your stay at home more comfortable. This is true for apartments on the first floors.
Gaps in the floor - what to do?
Fixation to concrete pillars
This method involves fixing beams to concrete pillars, using similar fasteners, but designed specifically for pillars.
- The pillars must be covered in advance with a waterproofing layer (bitumen or mastic is used). Their upper part can be protected from moisture with roofing felt. You need to pre-drill holes in the posts and beams.
- Next, you need to drive dowels or anchor spacers into them.
- Then the beam is attached to the post with self-tapping screws 2-3 times longer than the width of the spacer.
- The timber is attached to the posts using iron plates with screws. They are fixed to the posts with dowels-nails, and to the beams with screws.
Thanks to the study of all these fastening methods, the question of how to install joists on a concrete floor disappears by itself.
How to care for linoleum?
To increase the service life of linoleum coating, you must not neglect taking care of it. You should not use active cleaning substances for cleaning - they cause the surface of the material to crack and dull. To clean, use either special compounds, or take care of the floor “classically” - wash it with a simple damp cloth.
You can protect linoleum from premature aging using mastics and polishes. To avoid scratches and breaks in the coating, it is advisable to put special “caps” made of soft material on furniture legs.
Laying laminate flooring yourself? Nothing could be easier! In our complete guide you will find all the most necessary instructions, videos, pictures and recommendations that will help you do all the necessary work yourself quickly and efficiently. Our step-by-step instructions will allow you to do without the expensive services of professionals and at the same time do all the work yourself so that your new flooring lasts as long as possible.
We will reveal all the secrets and features of laying laminate flooring on various types of bases: on a concrete screed, on a wooden floor, on linoleum, etc.
You will learn what you can and cannot save on when buying laminate flooring. Why is a substrate needed and how its type affects the quality of the future coating.
In what cases is polyethylene film required? What tools are needed for the job? How to install diagonally, in doorways and, of course, about ways to eliminate joints between different types of coatings (for example, joints between tiles and laminate).
Installation process and features
Properly selected building materials are the key to successful floor installation. Logs are mainly made from wood of various species, with a moisture content of no more than 18%. After purchasing the bars, you need to let them acclimatize to room temperature for several days. The logs bent during this time are rejected. Before laying, they are treated with an antiseptic composition to prevent mold and pests from appearing on them.
- Preparing the concrete base. It is cleared of debris, cracks are sealed and irregularities are removed.
- The tree must be protected from moisture. Therefore, the beams are covered with rolled waterproofing materials, mastics and treated with impregnating compounds.
- It is necessary to prepare all the fasteners and substrates required for installation of the joists on the concrete floor. They must have high rigidity so that they do not sag under loads and gaps do not appear between the joists and the base. Thin boards, plywood and plastic substrates, which are sold in specialized stores, are suitable for this. They are slipped under the joists and securely fixed.
- The logs must be placed across the light coming from the windows. Wood often becomes deformed due to temperature changes, but thanks to this installation it heats up evenly. In rooms without windows, the bars must be placed across the direction of movement.
- The pitch of the beams is selected based on the thickness of the floorboard. In this case, the rule is used: the thicker the board, the larger the step between the lags can be chosen. On average, it varies in the range of 40-50 cm. The logs located near the walls are installed 20-30 mm from the wall, and the rest, taking into account the dimensions of the room.
- After assembling the grating under the floor, it must be accurately installed horizontally. The support for the floor must be perfectly level, so many experts level the floor with a screed if the height of the room is sufficient for this. The underlay for the joists also allows you to level the floor.
- For good shock absorption and increased protection from moisture, logs are placed on roofing felt and other similar materials. These materials should not be soft, because they will sag under the influence of loads, which will lead to the formation of gaps. As a result, the floor will creak while walking.
Features of floor repair
Major floor repairs are not an easy task, but it is quite doable if you have the time, desire and some skills. If there is no “fighting spirit”, then it is better to immediately look for a team of good craftsmen who can be entrusted with this task, and it is better to refuse to carry out the work yourself. Floor repair will involve the following work:
- thorough inspection of the base;
- identifying problem areas;
- dismantling the finishing coating;
- inspection of logs;
- removal of old insulation, if any;
- complete or partial dismantling of logs;
- complete cleaning of the surface of the floors and their inspection, assessment of their condition;
- installation of a new lag system or installation of a dry light screed;
- installation of finished floor covering.
Replacing the floor in a Stalin building
It is important to remember that, in addition to materials for the floor construction, you will also need to purchase waterproofing material and insulation, especially if the apartment is on the ground floor. If the logs will not be completely removed, then it is important to evaluate the distance between them - in old houses it can be very large, and then it is recommended to make intermediate logs between the main ones.
To carry out a major overhaul of floors, dismantling must be carried out completely, that is, not only remove decorative coverings such as linoleum or parquet, but also remove old floorboards and, in many cases, even logs. The dismantling procedure is quite difficult and difficult; you have to make a lot of effort to dismantle the old floors. You will need to remove a lot of debris that is generated during the dismantling process, and you also need to be prepared for this.
Parquet dismantling
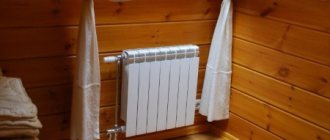
Insulation and sound insulation
Soundproofing and insulating floors on beams is quite simple. For example, you can cut TECHNONICOL into strips and lay it between the beams. In this case, the self-adhesive side section that overlaps the beam must be rolled with a roller. For additional insulation of the floor, you can place mineral wool on top of the TECHNONICOL. This sound insulation allows you to protect your living space from noisy neighbors downstairs.
The height should not exceed the bars. In those places where it is higher than the log, its thickness must be reduced. To do this, the cotton wool needs to be cut lengthwise with a knife. If the result is rags, this will not affect the properties of the material.
Floors, soils and foundations
Ground floors are not connected to the foundation and rest directly on the ground under the house. If the soil on the site is heaving, then the floor in winter and spring can “go on a spree” under the influence of the forces of frost heaving of the soil. To prevent this from happening, the heaving soil under the house must be made not to heave. The easiest way to do this is to insulate the base and underground part of the strip foundation.
The design of pile foundations on bored (including TISE) and screw piles involves the installation of a cold base. Insulating the soil under a house with such foundations is a rather problematic and expensive task. Floors on the ground in a house on a pile foundation can only be recommended for non-heaving or slightly heaving soils on the site.
When building a house on heaving soils, it is necessary to insulate the base and underground part of the foundation to a depth of 0.5 - 1 m.
| In a house with external multilayer walls with insulation on the outside, a cold bridge is formed through the base and load-bearing part of the wall, bypassing the insulation of the wall and floor. |
In addition, insulating the base will help eliminate the cold bridge, and will also reduce the thickness of the floor insulation. You can find out how to determine the required thickness of vertical thermal insulation of the base and underground part of the foundation here.
How to make a wooden floor on joists warm, with water heating, read here.
Next article:
Prefabricated dry floor screed from gypsum fiber board sheets.
Previous article:
Further floor arrangement
Further installation of the floor along the joists involves two more stages of work.
The first stage is laying the finished floor
After installing the logs, thermal insulation, waterproofing and sound insulation, the finished floor is laid. They begin to lay it from the corner of the room. The first row of boards is placed tongue-and-groove against the wall, with a gap of 10 mm between the wall and the boards. This will compensate for the deformation of wood that appears from temperature changes and changes in humidity levels.
The next row is placed offset to the previous one by approximately 2 lags. To lay the boards tightly, apply a piece of wood to the ends of the board being attached and hit it with a hammer.
The boards are fastened to the joists with screws, the heads of which are driven into the boards.
After laying the boards, the expansion joints are covered with plinths.
Expert advice:
- lay the floor on a concrete base after leveling all the joists along the horizontal plane;
- boards must be attached to all beams;
- their size is chosen so that the joints between them are in the middle of the lag.
- To prevent them from cracking, it is necessary to make small-diameter holes in them for self-tapping screws. For the screw head it is necessary to make a countersunk hole, for drilling which you need to use a drill of a larger diameter.
- Instead of a plinth, you can install profiled strips - fillets.
- holes for pipes need to be made 8-10 mm larger.
To increase the accuracy of installation, experts advise that before fastening the boards, tighten them together with the staples of a construction stapler.
The second stage is the final finishing of the floor
This is the most critical stage of work on arranging a floor on a concrete base on joists. The appearance of the floor and room depends on the choice of finishing material. Listed below are the main types of final floor finishing.
Parquet
Parquet consists of solid wooden planks from which the floor covering is laid. It makes the floor very attractive. This flooring has a long service life - more than 30 years. In addition, part of the parquet can be replaced at any time.
Laying parquet requires a lot of experience, so it is difficult for an ordinary person to lay it falsely, since the technology for laying parquet is complex and labor-intensive. In addition, this coating is expensive. During operation, parquet requires careful handling, as it is scratched and afraid of moisture. To keep this floor always beautiful, it must be regularly polished and varnished.
Linoleum
This floor finish is very popular today. This is due to the low cost, practicality and ease of installation of this flooring material. You can lay linoleum indoors yourself, because this does not require special knowledge and skills. A floor covered with linoleum is resistant to moisture and aggressive liquids, while it looks beautiful.
Linoleum is easy to clean and sweep. Thanks to the wide variety of textures and colors, it can be matched to almost any color of furniture and wallpaper.
Linoleum can be laid on top of boards, plywood or concrete. Thick linoleum with a base of more than 3 mm can hide small unevenness in the floor and seams of sheet materials.
The disadvantage of linoleum is its low maintainability. If a hole appears on it, then it will not be possible to seal it and make this place invisible.
Laminate
This flooring is quite expensive. In appearance and performance characteristics, this material is similar to parquet. It is easy to install and does not require special care. The choice of laminate on the finishing materials market is quite extensive, so everyone can choose the option that suits them.
Laminate is very susceptible to moisture. In terms of price, it is comparable to the cost of high-quality linoleum, but it can be 3 to 7 times more expensive. Laminate floors look elegant.
Fiberboard
Fiberboard is rarely used today for finishing floors. This material is mainly used to level the floor for the installation of other floor coverings. The sheets are secured to the floor with small nails or self-tapping screws. After fixing, the fiberboard is painted in 2–3 layers. This material is also afraid of moisture, because it swells under its influence.
Carpet
This floor covering looks beautiful and additionally insulates the floor. At the same time, carpet quickly loses its attractiveness (the pile wears out and gets worn out), which is why it is used only in bedrooms and children's rooms, where people rarely walk.
It is difficult to clean and quickly absorbs moisture. Drying the carpet without dismantling it is extremely difficult. In terms of installation, the material is convenient; it is simply rolled out on the floor and trimmed where needed.
Vapor and thermal insulation with penofol
| Attach penofol with a stapler to the sides of the sheathing bars or joists. |
Instead of the top layer of insulation and vapor barrier film, it is more profitable to lay penofol - a foamed polymer covered with aluminum foil, 10 mm thick.
(also available under other trade names).
Penofol must be laid with the aluminized side up, towards the ventilated gap, across the sheathing bars and lowered on both sides of each bar. After this, penofol is nailed with a stapler to each side of all the bars so that a gap of 3-4 cm is formed between the aluminized surface and the floor covering slabs. The joints of the penofol panels are sealed with aluminized adhesive tape. The penofol layer will provide heat transfer resistance equivalent to a 40 mm thick layer of mineral wool and the necessary vapor permeability.
Subfloor boards are attached to the sheathing bars on top of a vapor-proof film or penofol. Instead of boards, slabs are more often used: cement-bonded particle boards (> 22 mm thick), plywood (> 18 mm), etc. Sheets and slabs are placed with the long side on the sheathing bars. Spacers are secured under the short side between the sheathing bars. All edges of the laid sheet must be supported - a block or spacer.
The use of polystyrene foam and polystyrene foam boards as insulation is not recommended. Such slabs serve as a barrier to moisture, which is always contained in the wood of the floor. By preventing moisture from escaping from the wood, foam insulation shortens the service life of the wooden floor parts. In addition, mineral wool insulation, due to its better elasticity, adheres more tightly to the joists than polystyrene foam.
To protect the underground space from ground moisture, it is advisable to cover the entire surface of the soil with a waterproofing film (and not just under the posts, as in the figure). The joints of the covering panels are sealed. The junction of the film to the walls must be connected to the waterproofing of the walls and also sealed. The floor posts lie directly on the film.
As a result, we obtain a ventilated underground space, limited by sealed shells - on top (vapor barrier) and below (waterproofing).
Household products
⇆
Such an underground space protects the house not only from moisture and cold, but also from the penetration of radioactive soil gas radon
.
What to putty and paint with?
After the floor is mounted on the joists, it needs final processing. Having finished fastening, you need to saturate the boards with fire and bioprotective compounds and dry thoroughly.
If cracks appear during installation, they need to be filled with putty, as well as the screw heads must be hidden. Acrylic putty is preferred for this, as it is more fluid and fills all small irregularities. You can also use oil-glue or oil putty, but you need to take into account that it takes a little longer to dry and after drying it becomes a little more fragile than acrylic.
After puttying, the new floor needs to be painted. The final coating, in addition to aesthetics, also performs two practical functions - it increases abrasion resistance and increases the moisture resistance of wood.
Today, the choice of flooring compositions is quite wide, each has its own application features, advantages and disadvantages.
They can be roughly divided into three categories – paints, enamels and varnishes.
- Enamel is presented on the market in the greatest variety of colors and shades. It lays on the wood in an even thin layer and dries quickly enough. Due to its rather liquid consistency, it is very fluid and in some cases requires three layers.
- Varnish – alkyd or water-soluble. It has the lowest wear resistance and low hiding power. At the same time, it can advantageously emphasize the natural beauty of natural wood.
In each case, you need to take into account that even paints from the same manufacturer from different batches may differ in shades, so it is best to mix the coating from different cans in one container. Depending on the color composition, mineral-based color additives can be used.
This completes the arrangement of the wooden floor on the joists.
For information on the features of laying a wooden floor on joists, see the following video.
Construction of a standard bath floor
In the steam room, the floor should rise slightly compared to the zero level. You can make it higher by only 8-10 cm, and the desired effect will already be achieved - maintaining a high temperature in the room is ensured. In the washing department the floor is made below the finishing level. This improvement will help prevent excess water from entering the remaining compartments of the bath.
Installation of plank floors
The most common floor design in a bathhouse (layers from top to bottom).
- Finish coating.
- Wood or concrete (final row).
- Small air space.
- Lining (small layer).
- Insulating layers (hydro- and thermal insulation is required, sometimes noise insulation is added separately if there are industries, clubs, or other establishments that are a source of noise near the bathhouse).
- Lathing.
- Insulating layers (in cold winters to protect the floor structure from cold or moisture).
- Rough floor.
- Wooden beams for sheathing.
- Waterproofing (laid on the ground).
Application
As already mentioned, the installation of wooden logs is possible in buildings of any type. However, in reinforced concrete buildings they are used relatively rarely, since it is easier to arrange a rough screed. This installation option is most convenient in:
- wooden houses (wild or rounded logs, beams, boards). In this case, the logs are laid on top of wooden (less often metal) floor beams, forming a strong support for the floor. When covering the ceiling in the lower room, it is appropriate to fill the gaps between the floor beams and joists with insulating and soundproofing material;
- frame buildings. It is permissible to install wooden logs on top of metal or wooden floor beams. Typically, wooden joists are used in houses with a timber frame;
- buildings of any design made of “heavy” building materials (brick, concrete, reinforced concrete, stone) for the purpose of leveling and insulating the floor. This option is optimal if it is undesirable to increase the load on the floors and load-bearing walls (columns) that the concrete screed provides.
If the building does not have basements and there is soil under the finished floor, laying wooden logs is the best option to ensure warmth and dryness in the room.
Each option for using floors on joists has its own installation and further use nuances.
Detailed step-by-step instructions
Few people know that before assembling the lower flooring, you need to take care of the ventilation of the subfloor. To do this, experts recommend drilling several large holes in the corners of the building. They can then be covered with a grill. Then the entire subfloor is treated with an antiseptic.
Stage No. 1 – preparing the logs
What are lags? These are bars that are used to assemble the finished floor in a wooden house. Wood of the second and even third grade can be used as them. Since such logs often do not have a very smooth surface, it is worth modifying them a little. To do this, the side on which the floor covering will be attached is leveled with an ax.
You don’t need to try too hard, but you will have to try to make the log even in this area. The horizontality of the future floor will depend on this. After engraving, the logs are completely covered with an antiseptic. They can be installed in two ways - on the ceiling and on the base.
By overlap
Long logs must be properly installed and secured. To do this on the ceiling, you must first make grooves in the lower frame of the walls, the depth of which is equal to the width of the bars. Planed logs should lie flat in them. But first, it is advisable to put a rubber gasket on the ends. It will dampen unnecessary noise.
A heavy beam will not be supported on some grooves, so it needs to be supported with reliable support. Brick pillars will serve as it. They are assembled as follows. At the same distance from each other along the line of the logs, holes are dug (20x20x40). A layer of gravel is poured onto their bottom and compacted. The next layer is made of sand, which also needs to be compacted well. A square of reinforcing mesh is laid out on the bottom.
The pit is filled with cement-sand mortar. To prepare it you will need cement, sand and water (proportions 1x3x0.5 liters). After the concrete has dried, a layer of roofing material is laid on top, and only then a brick pillar is built on it.
The distance between the joists depends on what boards are used for the finishing flooring. The principle of arrangement is this: the thinner the board, the more often the logs are installed. It is impossible to lay the timber directly on the erected supports; waterproofing material must be laid again between them.
Based on
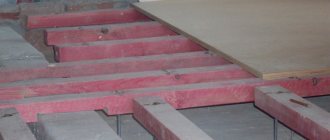
Construction of rough floors
It is also possible to construct a subfloor on joists along the base. To do this, the top loose layer of soil is cut off, leveled and covered with crushed stone. The fine-grained material is carefully compacted. And only then the location of the logs is marked. You can’t put them on crushed stone; you need reliable supports. They most often use a grillage wrapped in roofing material or bottom trim beams.
In this case, the support pillars are also installed on the foundation. It is built using the same technology as for brick supports. A layer of waterproofing is laid on top of it, and only then the logs are installed. It is attached to the post with dowels, corners and self-tapping screws. You can lay logs in this way in a brick house.
Stage No. 3 – fasten the timber
After installing the logs, installation of the lower flooring begins. To do this, the support is first assembled. It uses timber with a section of 50×40. It is attached to the bottom of the joists on both sides. For these purposes, experts recommend purchasing not ready-made bars, but a board (150×40), which can then be cut into three parts. This will save you a lot of money when assembling subfloors. Three shards will be obtained from one such board.
Next, you need to decide what to make the floors of the house from, what to use as a subfloor. It is much easier for a beginner to work with ready-made sheet materials - plywood, OSB sheets or chipboard. It is better to choose 12 mm thick sheets for these purposes and lay them in two layers.
To securely fasten them, a sheathing is assembled, which is formed from additional transverse bars and attached to the lower base of the support beam. The joints of the sheets in this case should lie on the central axis of the transverse jumpers.
Experienced craftsmen recommend using low-quality material to assemble a rough foundation in a private home. A waste board, slab or picket fence is best suited for these purposes. Why? The lower base actively reacts to changes in temperature and humidity. The listed material easily changes its shape, so it performs very well in such aggressive environments.
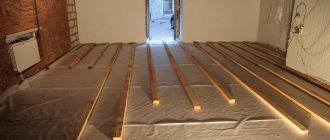
Having completed the described work, you can begin laying the insulation. But first, a layer of waterproofing is laid on the lower base. This can be an ordinary polyethylene film, which covers the entire base, forming niches for laying the heat-insulating layer.
Preparatory work
When choosing materials and methods of floor installation, you should first pay attention to the average soil moisture under the house. In some residential areas, logs are laid on the ground, with cut-off waterproofing laid under them. Such floors reliably last for several decades, but such dehydrated soils are quite rare.
Below we will consider a method of preparing the foundation, which is used almost everywhere in our area. The whole point of this method is to install a concrete screed on a waterproofing pad. In a country house, a concrete screed will serve two functions at once: to insulate the floor from moisture and to serve as a rigid foundation for a wooden floor.
When starting to lay out a concrete base for a wooden floor, you must make a small pit in the house and carefully compact its bottom. A layer of sand 20 mm thick or more must be poured into the hole. You can also add an additional layer of crushed stone under the sand, but this step is often skipped. After you have made the sand cushion, cover it with a cut-off waterproofing material, which can be used as cellophane film or roofing felt. It makes no sense to use vapor-permeable waterproofing, because its properties are not needed at this stage, and the overpayment will be significant.
Concrete floor in a wooden house
A concrete foundation for a timber house is erected in the following cases:
- When installing a monolithic slab on unstable ground. Plank flooring can be made with a rough underlay or laid directly on concrete. In the absence of an earthen subfloor, it is not necessary to make a three-dimensional structure.
- When constructing a strip foundation, where the floor of the first floor is the ceiling for the basement or cellar. Such slabs are thinner and can freeze from the cold coming from the ground. They can be used for any type of wood flooring.
The advantage of a concrete base is its strength and durability, provided it is properly constructed. There is no need to erect support columns or install a ventilation system. The stove reliably protects the living space from dampness, plants and insects.
Preparatory work
Regardless of how you decide to lay a wooden floor, mandatory preparatory work is carried out before laying it.
The following activities are carried out:
- arrangement of vents in the walls;
- leveling the top of the basement level or the edge of the slab;
- removing bark from the boards, under which there may be parasites;
- sorting of lumber, treating wood with anti-rot and fungus agents;
- leveling the earthen base, clearing plant roots;
- covering the soil with geotextile fabric to prevent the growth of grass and bushes.
Waterproofing
Waterproofing is designed to protect concrete from moisture, salts contained in the soil and other aggressive compounds. To create an insulating layer, thick cellophane or roofing felt is used. Strips of material are laid out on the ground with an overlay of 10-15 cm. The joints are glued with aluminum tape, which is resistant to dampness and mechanical stress. The edges of the material are brought out beyond the edges of the pit in such a way that they can be wrapped onto the surface of the finished slab. This technique will protect its edges from contact with the ground, melt and storm water.
Pouring the subfloor
To fill the base, a solution is prepared from a mixture of cement, sand and crushed stone of the middle fraction in a ratio of 1: 3: 3. If the volume is small, this work can be done manually. If the slab is bulky, it is better to use a concrete mixer.
Filling consists of the following steps:
- Filling the cushion with a mixture of sand and crushed stone.
- Production of formwork. The panels are assembled from boards, plywood, chipboard or slate. The walls of the formwork are treated with machine oil or covered with cellophane.
- Installation of a steel frame made of reinforcement, 10-12 mm in diameter. It is better to connect the rods with wire or plastic ties.
- Pouring concrete. Removing air bubbles with a steel rod. Leveling the surface.
It takes 28 days for concrete to gain full strength.
Vapor barrier and insulation
A vapor barrier is necessary to remove moisture from the room and block dampness that forms in the subfloor. To create such a barrier, a fabric membrane is used that allows steam to pass in only one direction.
Depending on the floor design, a heat-insulating layer is laid before laying the front covering.
You can use materials such as:
- Styrofoam;
- ecowool;
- polyurethane foam;
- basalt wool;
- expanded clay
Final screed
The final floor screed is done to completely level the surface before laying the finishing coating. For this purpose, a cement mortar is prepared to which plasticizers are added. These substances make the coating stronger, more resistant to moisture, and prevent the formation of cracks during hardening. The solution is applied with a spatula in a layer of 2-3 cm, after which it is carefully leveled.
Procedure for laying tongue and groove floor boards
- The first board is installed at a distance of 1-1.5 cm from the wall.
- The board is attached to the joist with a self-tapping screw. The self-tapping screw is screwed at 45° angles into the tongue of the board, with the head recessed.
- The first board is also fastened with another screw perpendicular to the floor at a distance of 1-1.5 cm from the edge of the board. This row of screws will subsequently be covered with a plinth.
- The very first self-tapping screw is attached in the middle of the board to the central joist, not into the tongue, but into the edge.
- Next, apply a long building level or rule to the end of the board. The board is evenly aligned along the wall and secured with a second screw into the tongue and groove. The first board is the standard for subsequent boards, so its even laying is the most important stage of work, affecting the overall quality.
Recommendation! It is better to place a special rubberized gasket between the board and the joist for additional shock absorption and increased sound absorption of the wooden floor.
- The boards are attached to all the joists. For better joining of tongues, the boards are tapped. To avoid damaging the tongue and groove when tamping, use a piece of the same tongue-and-groove board. It serves as a tamping block, and the hammer strikes on it, and not on the board being laid.
- The seams between the boards of the rows should be offset in relation to each other. This displacement is called staggered or waddling. The camber must be at least 10 cm.
- The width of the last board should not be less than 9-10 cm. If this does not work during the initial marking, then the first board should be sawed to width.
Wood selection
Choosing a floorboard
Here are the basic principles according to which you should approach the choice of material:
- wooden boards must be well dried, not damp. Otherwise, the wooden floor will deform over time;
- the boards should be free of scratches, cracks and dents;
- the optimal length of wooden floorboards is 2 meters;
- give preference to edged or tongue-and-groove boards, as they no longer require sanding;
- when choosing wood, take into account the characteristics of the rooms in which it will be placed (for the bathroom or kitchen, purchase only moisture-resistant wood species).
Floor board, thermobook
If you have already thought about everything and are starting the purchasing process itself, then purchase 15% more wood than the planned quantity. It will be used to cover the trimmed footage on ledges, corners and other recesses of the floor. The third, most important stage begins - laying the wooden floor.
Wooden floor in the kitchen
Branded formulations
They are divided into fire-protective and bioprotective agents, as well as non-washable antiseptics.
Fire-retardant substances
This method of protection is one of the most effective, since it allows you to protect wooden materials not only from microorganisms and putrefactive processes, but also protects against fire. The latter quality, due to the fire hazard of wood, is of considerable importance.
Fire-retardant substances preserve the structure of the logs for many years: fire protection is provided for 3 years, and biological protection of the material is provided for 25 years. Although, if a wooden product is not used under extreme conditions, the actual lifespan of the drugs will be longer.
Fire-retardant compounds are environmentally friendly, lack unpleasant odors and are completely safe to use. The environmental friendliness of the drugs is ensured by their composition: there are no components dangerous to humans, including allergens.
Any legally sold drug must have a conclusion from a sanitary-epidemiological station, fire regulations and a quality certificate.
Bioprotective compounds
Preparations in this group improve only the bioprotective qualities of wooden materials. Bioprotective compounds protect wood from blueing, mold, rotting, fungi and wood-boring beetles that destroy the material. The drugs provide bioprotection for 25-30 years.
Most often, antiseptic drugs are sold in the form of concentrates. In some cases, pigmenting substances are added to the formulations. The pigment allows you to visually control the quality of the coating on a wooden surface.
Bioprotective products have a low odor, are environmentally friendly, and do not contain allergens. They are easy to prepare - just dilute them in water. Surface treatment can be done in a variety of ways, including roller, brush, spray, and dipping.
Used to protect structures operated in conditions of high humidity. For example, non-washable antiseptics are relevant at high levels of precipitation, temperature changes, as well as in buildings where wood is often moistened due to operating conditions (baths, saunas).
Working with non-washable antiseptics is not difficult, but it is time consuming. The approximate consumption of the substance per square meter is 350-400 grams. Surface application is achieved after 3-4 layers. If we are talking about dipping, you will need to soak the material for 20-30 minutes.
This group of antiseptics gains adhesive properties after final drying. The color of the wood usually becomes pistachio due to pigments added to the composition.
Installing joists for laying wooden floors from boards with your own hands.
The logs should be made of durable wood, but not poplar or linden. Under the logs, either 50x50 mm timber is used. or boards 50×100 or 50×150 mm.
The lags are laid on concrete floor slabs, brick or monolithic columns (columns) according to the level. If necessary, to maintain the level, planks and bars of the required thickness are placed under them for leveling. You can use the corners for leveling, attaching them on both sides to the joists in increments of no more than 50 cm. You will get a kind of adjustable floors.
The logs are attached in different ways, using special anchors measuring 8x200 or 10x250 mm, with corners, on threaded studs and nuts (adjustable floors). In some cases, the logs are not secured at all, they are simply placed on the base.
Laying the floor boards is done across the joists, so when installing the joists on the base, they need to be laid so that when laying the floor boards, they are long enough to cover the entire width of the room.
If the length of the flooring boards is not sufficient, then they are laid in a “running motion”. First long, then short, the next one from the same edge short, then long. The logs are also laid with a “running start”
If the logs rest on pillars, then they must be laid on edge. This way they will hardly sag under heavy weight. When laying wooden logs on a flat concrete base without using leveling pads, you can lay them lying down or on their edges.
Before installing logs for a wooden floor made of boards with your own hands, it is recommended to apply a layer of waterproofing to a concrete or brick base; you can use roofing felt.
The distance between the lags is 50-60 cm - this is the best option, in this case the structure will not sag. If in the future it is planned to insulate wooden floors from planks, then the logs are usually installed to match the width of the insulation, for example mineral wool.