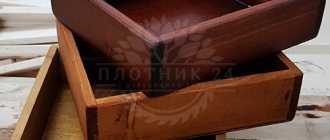
Woodpile
How often, when walking through a forest or park, we see thick dry branches broken by the wind, snags or pieces of rhizomes. It's a shame to pass by such material. A person with imagination immediately imagines a beautiful, functional thing. Crafts made from tree branches can decorate the yard of a house or the interior of a room.
Man instinctively associates himself with nature and considers himself a part of it. Therefore, any natural material - stone, wood - brings comfort and tranquility to your home. Wood is a warm material. It absorbs moisture and creates a healthy microclimate. It’s not for nothing that in a log house you can breathe so easily and sleep well. The best bathhouse is also wooden. You can put unusual furniture made of branches in it - a bench, a hanger, stools. It smells of pine resin and birch broom. This adds vigor and strength.
What can be made from driftwood and branches? You can make pieces of furniture and decor from different parts of wood.
You can’t put furniture made from stumps in your house or on your veranda. But such an armchair or stool is well suited for a yard or summer cottage
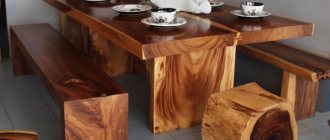
An original solution for a table and seat made of stumps and thick branches will attract the attention of your neighbors and guests. In order to make such items, you need to have artistic taste, woodworking tools, time and patience. The main advantage of furniture made from stumps is the lack of costs for materials
Everything can be done even without nails using a hacksaw
The main advantage of stump furniture is the lack of materials costs. Everything can be done even without nails using a hacksaw.
Furniture made from stumps and driftwood will harmonize with the rustic style of the site. A real or decorative well made from a log house, a wattle fence made from willow twigs or a fence made from thick branches will look good.
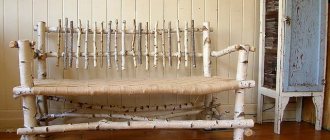
The simplest solution is a bench made of two stumps with a thick board placed on them. You can leave it without a back, or you can equip it with a back made of sanded thick branches. It will be beautiful and unusual. This will be a combination of furniture made from branches and stumps.
Even the marks of time that inevitably appear on the tree do not spoil the appearance of garden items and look natural.
Furniture made from roots and stumps is massive and durable. From a solid tall stump you can use an ax to cut out a chair or a chair with a backrest. The root can be planted on the armrest of such a product.
The most difficult thing is to deliver the forest material to the site and load massive logs or stumps onto the truck.
Stumps are used to make stable stools. They are also sanded and varnished. You can decorate the body of the stump with carvings. The top is colorfully decorated with colored glass or flat stones. They are glued to liquid nails or epoxy resin.
Furniture made from driftwood and thick curved branches are real fairy-tale creations. Product parts are fastened together with self-tapping screws and wood glue, depending on the configuration of the items. Furniture made from branches gives room for imagination. From this material you can build something like a small gazebo. It is good to plant wild grapes near it, which will eventually entwine the tree.
The material for a garden chair, sofa or chair is cleaned of soil and dirt, the bark and top layer of the rhizome are scraped off to light wood, and impregnated with stain and varnish.
Furniture made from branches creates the feeling of openwork weaving.
The garden plot of creative owners is inhabited by fairy-tale characters - goblins or birds - products made from driftwood, gnomes made from tree roots and other forest inhabitants. Logs turn into bears, frogs - princesses and other figures.
To make furniture from branches or furniture from stumps, the wood must be well dried so that it does not rot. To protect against bark beetles, it is treated with antiseptic compounds. DIY crafts made from branches add a romantic style to the interior. You can make an exclusive thing with your own hands.
Where to get raw materials
You can find natural material in the forest, on the shore, in your own garden after pruning trees, or pulled out of the water. Depending on the location of detection, the pre-treatment of raw materials varies. Anything found on land is sanded, cleaned of rotten fragments, and rotten layers are removed down to the hard wood. What is taken out of the water is cleaned of contaminants and dried.
The jackpot is considered to be the discovery of bog oak. Furniture made from it is considered elite, and dark wood is recognized as the most durable. However, other tree species are quite resistant.
Top 13 DIY stump products - only the best ideas
Unnecessary tree stumps are an excellent material for creativity and earning money. And imagination, as you know, has no limits or boundaries. With certain treatment, objects made from a stump will last a very long time. We have prepared a selection of the top 13 DIY stump products. Enjoy watching! These will be only the best ideas.
You can make glowing seats from a tree stump. Having painted them with luminescent paint, they are good to use in the garden.
Candlesticks made from a stump are a creative idea for the home.
If you carefully work with the tools, the stump can turn into a stand and a shelf for books: two in one.
A lamp made from a stump is an ordinary accessory made of an unusual material.
From a stump you can make a bar counter for several bottles of wine.
A coffee table made of stump and glass will fit well into the interior of the living room.
You can make a bird feeder from a small stump.
Mini - waterfall from a stump. But the stump is made from healthy dried wood, carefully treated with impregnations.
Crafts from a stump in garden design are a great idea.
A garden table made from a stump will decorate a terrace or winter garden.
Flower stands and flowerpots are made from stumps of different sizes.
The stump of an old tree will make a beautiful flower garden.
Stump figures can be placed in a garden, park, or playground.
Read in full (link)
Bed of branches
"Anatomy of Sleep" is a magazine about stylish living in the bedroom and healthy sleep. Every day you will find an interesting story, important advice and useful interview here. Together with the authors, you will figure out how to choose mattresses and pillows from thousands of products, what accessories are ideal for the bedroom, how to assemble your own bed or sew a canopy, see the “filling” of orthopedic sleep products, and meet experts and craftsmen. The magazine "Anatomy of Sleep" is a branded media of the online store "Anatomy of Sleep". One of the largest markets of popular domestic and foreign manufacturers of mattresses, beds, furniture and sleep accessories in Russia.
Processing methods
A stump (stump, log) is a tree. Wood is a natural material and is susceptible to rotting. When it dries, it shrinks; when it gets wet, it swells. They process and protect hemp or logs to create crafts in several ways that can be combined with each other:
- Chainsaw cutting. Shaped cutting with a chainsaw to create crafts from stumps and logs for the garden and home is used to create tables, chairs, stools, and armchairs. Cutting with a gas or electric saw requires certain skills and compliance with safety precautions. You can learn how to operate a chainsaw on our website. Before cutting, it is better to make markings, outlining the contours of the future craft, for which you can use a regular pencil. And then, as with sculptors: we take a log and cut off all that is unnecessary from it.
- Firing with a burner. It will delay the rotting of hemp and give it a beautiful, aged appearance. To do this, after firing, it is necessary to clean the burned surface from excess charred wood using sandpaper, a metal brush or an angle grinder (“grinder”) with a brush or grinding disc.
- Protection. To protect wood before painting, it is necessary to use wood antiseptics, the simplest and most inexpensive of which is iron sulfate.
- Grinding. For grinding, an angle grinder with a brush or grinding disc is most often used. A brush with metal bristles, less often sandpaper. Various grinding machines are also used.
- Painting, varnishing or waxing. It will also delay rotting and give a beautiful appearance, especially when using varnishes and waxes. The varnish must be applied in at least 2 layers, allowing the previous one to dry, or even better, after applying a layer of varnish and drying it, sand the surface before applying the next layer.
Processing hemp and logs with your own hands
Preparing driftwood
First, high-quality raw materials are selected for crafts. It should not be badly damaged, rotten or rotten. Suitable wood is processed in several stages.
Cleaning from dirt
The easiest way is to wash the driftwood in the basin using a soapy sponge. If the dirt is difficult to clean off, you can use washing powder. Remove dirt from cracks and small depressions with water from a shower head or using a high-pressure washer. If necessary, use a soft brush for cleaning.
Cleaning the bark
Loose bark must be removed using a non-sharp chisel. Act carefully so as not to damage the wood. You can also use a grinder with a suitable attachment or a sandblaster to get rid of bark.
Drying
If the moisture content of the wood is not reduced, the process of rotting and destruction will continue. After cleaning, the driftwood must be dried naturally or forcibly.
In the first case, the workpieces are left in a ventilated area for 10-30 months. Forced drying in a dryer or oven is much faster and lasts only 10-50 hours.
Removing the loose part
The boundaries of rotten, rotten, loose wood are marked with a pencil. Afterwards, the middle of the rotten area is broken off by hand or cut out with a jigsaw or an ax, and the remains are ground off with a brush. The dust is removed with a large rasp or brushed off with a metal brush.
Changing shape
To give the workpiece the desired shape, it is cut with a hacksaw, electric saw, jigsaw or grinder. The cut surface is leveled with a plane and jointer, and slots and holes are made with any suitable tools.
Puttying
The cracks are covered with ready-made wood putties or you can independently mix a composition based on fine sawdust and PVA. If desired, add color to the putty.
Grinding
Small irregularities and excess putty are removed by sanding. For rough sanding, use coarse sandpaper or a sander. Soft wood is sanded manually with medium and fine sandpaper.
Burning
After heat treatment, the wood darkens and becomes more noble in appearance. You can burn either individual parts of the driftwood or the entire piece. For firing, use a blowtorch or gas torch.
Impregnation with reagents
If the product will be used where there is high humidity, be sure to impregnate it with the following substances:
- antiseptics;
- water repellents;
- flame retardants.
Important! It is better to purchase a ready-made composition with all the necessary components and apply it according to the instructions.
Painting and varnishing
If you plan to paint the driftwood with water-based paint, carry out “wet sanding” in advance - it will help remove excess lint. Polymer products are applied only after the wood has been thoroughly dried. Instead of paint, you can use varnish or stain - they will enhance and emphasize the color.
Polishing and finishing
The driftwood is polished with any mastic for parquet and wooden floors. If necessary, auxiliary parts, fasteners, and additional elements are attached to it. For this purpose, glue, locks, threads, nails, etc. are used.
Driftwood and branches in the garden
Any wood is a material for creativity. A board with a greeting is laid out from thin branches.
The decor on the welcome board is attached with glue
Thick ones are used to make unique garden furniture.
A stylish chair will last longer if you remove the bark from the branches
Interestingly shaped driftwood will give your garden a picturesque look if you simply place it among the plants.
Don't pass by beautiful driftwood - it's very rare
And with the help of glue and screws, various animal figures are made from pieces of wood. But first, the bark is removed from the branches and they are lightened.
Step-by-step instruction:
- Soak the material in a solution of soda ash: 2 cups per 7 liters of hot water. Place a weight on top.
- After 3 days, remove the bark using a wire brush.
- Then immerse the branches in a bleach solution for 2 days: 1 glass per 7 liters of water.
- Dry in the sun for 3 days.
- Sand with fine-grit sandpaper.
Selecting material for drawing up figures is a long but exciting task.
Gallery: crafts from driftwood and branches
A wreath of bleached branches will decorate a door or gate. Place a strange mushroom made of driftwood and branches under a tree.
To create a Christmas tree, branches drilled in the middle are placed on an iron pin. It is better to make large figures from driftwood. From curved branches and driftwood, fancy stands for pots are created. Before installing the seat on the bench, it is carefully sanded
You can make any door decoration from small twigs. A funny pig made from driftwood looks great on a green lawn.
A lamp made from branches is an exquisite decoration for a gazebo or veranda
Style for the creative
An interior containing furniture made from driftwood and branches is called rustic. Some consider it a rough, even brutal variety of country style.
The classic design features wood floors and paneling and dark beamed ceilings. All this visually reduces the size of the room, so it is rarely used for apartments. But in country houses, in the country, in a bar, sauna or as garden furniture, this is the best option. And one hundred percent exclusive that you can be proud of. Fans of everything non-standard will appreciate it. In a modern interior, such things or a wall panel with imitation of living trees claim to be conceptual.
And even a stump
If a stump has formed on the site, you can use it as the center of the composition, surrounding it with logs. The main thing is that the hemp furniture has an even cut - the table and chairs will be stable. If desired, they are supplemented with backrests made of branches and pillows are placed.
You can even use an old rotten stump as a flower pot. They are placed in the rotten middle only in a pot so that the wood does not completely collapse, and if there is moss and other vegetation on the stump, this is only a plus: they will add decorativeness.
The quirkiness of roots, branches or driftwood creates endless scope for implementing the most unexpected solutions. They are fabulously beautiful and at the same time look cozy, but most importantly: they exist in a single copy.
Features of furniture made from cut wood
The fashion for natural wood is gaining momentum every year. Lovers of original interiors are willing to pay considerable sums for such products.
The reason for this is the features that distinguish such furniture from all the rest.
- Individuality . This is the main property of cut furniture that people are willing to pay for. In truth, this is not “consumer goods, but custom-made.” Each cut with its own tree ring texture is unique. His drawing was created by nature itself; it contains the life story of a tree.
- Environmental friendliness of the material . Unlike most modern furniture, which is made using artificial materials (for example, formaldehyde compounds).
- Calm warm natural shades . They give the room a special warm atmosphere and emotional background, filling it with natural energy.
- Practicality . Furniture made from sections, produced by professionals, lasts for centuries and is passed on from generation to generation. This distinguishes it from composite furniture.
- Availability . You can even make such furniture yourself. After all, materials and tools are available and inexpensive. It's all about your desire and imagination.
- Matching the interior . Despite the versatility of wood, such products will not fit every style concept. Furniture made from saw cuts is ideal for eco-style, country style, Provence. You can play with such items in a classic, oriental, or even loft style. But they are not suitable for high-tech style.
Review of the simplest product options
As noted above, making your own furniture from logs is very simple, since minimal processing is required. The most important working tool is a chainsaw; if you don’t have one, it’s better to invite a specialist, the work will be inexpensive and you won’t incur large expenses.
Benches
There are many options here, but we will look at the simplest ones, which almost anyone can do; if you master them, you will be able to make more complex designs.
Let's start with the simplest solution:
A log of sufficiently thick thickness is taken, in which a neat flat cut is made on both sides. One will serve as a support, the second as a seat; despite their simplicity, the products look very interesting and fit perfectly into an ensemble with a table or used independently.
The simplest solution for a bench, the most important thing is the presence of a large diameter log
The second option is made as follows - the log is cut in half or less, the main thing is that the cut width is sufficient for comfortable sitting. Next, take two blocks with a height approximately equal to the width of the cut element, in which one side is cut off to obtain support, and in the second a semicircular recess is made for the previously prepared element,
This solution is perfect for any area
An improved type of the above-described design is the version with a backrest, the lower part is made in the same way, and as for the upper part, two thinner logs are attached to which the backrest is screwed; grooves can be made in the seat under the backrest supports, or you can simply nail them on top.
This product is much more convenient
A more complex option is to cut a bench with a back from a single log; this is a labor-intensive process, but the result will be excellent. All you have to do is attach legs of any configuration - from classic supports to pads.
The one-piece bench is very reliable and comfortable
Finally, if you put the log on its end, you get a finished stool. And if you work with a chainsaw, you can make a chair with a back or even a real chair, the main thing is that the diameter of the wooden blank allows you to realize your idea.
This is the kind of chair you can make from a block
Tables
Everything here is quite simple, and if you have mastered benches, then you can build a table without any problems, let’s consider a couple of options:
- The simplest option is an even block; the larger its diameter, the better.
- A more complex and more interesting type is a low-height block on legs; the supports are best made from thinner logs and fastened with self-tapping screws, this is more reliable.
Garden furniture made from logs is made quickly, but lasts a long time
If you need a full-fledged table, then you can implement this option: 2-3 logs with a thickness of 20-30 cm are cut in half, after which they are placed with the smooth side on a flat base, and grooves are cut on the reverse side for the crossbars, which will connect the elements and create a solid tabletop . The supports are made from logs, after which the structure can be covered with a decorative composition.
This table will become an original element in any environment
Manufacturing
As in any business, to begin with it makes sense to practice on simple products: small sculptures, lampshades, photo frames, mirror framing. Once the skill has been mastered, you can begin creating more impressive furniture with your own hands.
Preparatory stage
First, the layout of the product is well thought out in order to clearly understand what the output should be. It will take not only precise calculation, but also imagination to connect disparate fragments by texture or pattern. For example, the backs of chairs, armrests, footboards or headboards of a bed, legs made of curved branches will look more interesting than straight ones.
Then the material is selected. Wood of different thicknesses is used for furniture made from branches or roots: graceful thin knots for a lampshade, thicker ones for a chair or bed. You can use dry or fresh raw materials.
The wood is dried slowly under a canopy, and at the final stage - in a room without heating.
Assembly according to all rules
In order for furniture to serve for a long time and be aesthetically pleasing, when making it yourself, compliance with the rules is required.
The ends of the roots are processed clockwise without pressure: first with a coarse brush, then with a drill, then with a finer brush. After drying, assembly begins.
Furniture made from branches is connected piece by piece in several ways:
- gluing;
- wedge-spike;
- mounting on self-tapping screws or screws.
The joints are sealed with wood glue.
Final finishing
You can make furniture from branches or roots even if they have cracks - this gives the product uniqueness and charm.
However, if such defects do not inspire confidence, they can be easily repaired with dark-colored epoxy resin, and then the product can be sanded.
The most interesting stage - decorating - begins after sanding, assembling and removing excess glue. The product is covered with several layers of stain until the desired shade is obtained.
Driftwood photo frame
Do you want to make your interior unique and capture the best moments of your life forever? Why not make a photo frame from driftwood? All you need for this is a couple of small branches and good glue. The branches must be carefully prepared in accordance with the first master class, and then proceed to the main part of the work.
- First, the canvas itself is made. This is a block of wood 2 cm thick. The length and width are determined by the dimensions of the photograph (9*13, 10*15 cm and so on). Please note that these indicators should have a margin of 2-3 cm, so in fact you will need a beam of 12*16 cm or 13*18 cm, respectively.
- The canvas is processed with sandpaper and coated with compounds against rotting and deterioration. Then the photo is placed face up on it, and small branches are placed around the perimeter in an indentation of 2-3 cm and fixed with glue.
1 5
- If you want to diversify your picture, you can put not just twigs, but driftwood, painted in different colors. The order of publication is determined by the author.
As a result, you will get an original, stylish photo frame that will be a wonderful gift for family and friends.
A combination of elements or what can be made from a stump or log
If you take a stump or log as a base and attach another piece of wood or a part from another material to it, you can achieve truly masterpiece designs.
- Assembly of several parts. What can be made from a stump or log if you connect several parts together? Yes, basically anything. Wooden parts can be fastened with glue, self-tapping screws and various ties.
- A combination of different materials. Wood can be combined with other materials, such as metal, to make table legs or a beautiful forged frame. Glass, using it as a tabletop.
- Decoration with various materials. Here the imagination for DIY crafts from stumps and logs is limitless. You can use various combinations of materials, giving our craft a unique appearance.
- Tree slices. A wide cut of wood can be used as a tabletop. You can saw it off yourself, or purchase a ready-made one if you need a wide cut and don’t have a chain saw with a long blade.
Beautiful crafts from hemp with decoration
Rustic - rustic style of furniture, interior and household utensils made from branches and unedged boards
What is Rustic style? This is furniture, interior design, and household utensils in a rustic style made from branches, unedged boards (slabs), wood cuts and other natural materials. Rustic - means simple, unprocessed, rough (rusticus - “rustic”; rus - village; “simple”, “rough”, “uncouth”).
In essence, the Rustic style is a return to the roots. Plunge into the world of Rustic at our craft family camp Kedrosad!
WHAT IS THE INTERESTING COURSE “RUSTIC STYLE”
Furniture + interior + housewares
when working with raw materials
Furniture + interior + housewares
when working with raw materials
DIY stump table: 10 stunning photos
A table is an important attribute of any home. The most important action takes place at the table - the meal. Scientists advise using wooden tables - they do not emit toxins like plastic ones. Glass tables are more dangerous and can be fragile. Good wooden tables cost a lot of money, and many people decide to make a table with their own hands. The cheapest and easiest way is to make a table from hemp.
It looks very beautiful and beautiful, but this is an ordinary stump.
They simply nailed the tabletop to the stump, and it turned out to be a good table.
This type of work will require significant time and carpentry experience, but it will be worth it.
A table can be made from small stumps and varnished.
It's not particularly easy to find such a large stump, but the coffee table turned out great.
To create such a small table, we took a small stump and an ordinary round timber from a tree.
You can also put a glass top on top, which will add even more attractiveness to your table.
You can also screw wheels to the stumps and the table will be movable.
A table with lighting can also be made from hemp.
The coffee table in the shape of a month is a beautiful piece of work.
Read in full (link)
The children asked for a tree house, but they got...
When the children asked their father for bunk beds, the man decided to use his imagination to make the dream a reality. He began collecting suitable material in the forest. It was great luck that the family’s house was located next to such a place.
The children actively helped their dad select suitable logs. And he began to build a bunk bed that they probably won’t be able to forget for the rest of their lives. At the next stage, the man polished the pieces of logs and made them perfectly smooth.
The material must be as durable as possible. To do this, he used bolts when assembling the beds to ensure that the structure was strong.
Slowly but surely the man moved towards his goal, collecting all the elements together. He did a great job, it took a lot of time. He used staples for security, which turned out to be very unusual. In the end, the beds turned out to be amazingly beautiful, as if nature itself had created them. They were made from a variety of pieces of logs, that was the designer's idea.
In the photographs you see finished products that cannot be called ordinary. They are amazing and the kids look really happy in them.
Other ideas
A properly cut and processed stump can become a chic decoration or a functional component of a garden or vegetable garden. If you want to beautify your plot, you can use hemp to make an original border for flower beds or flowers in pots, or make interesting animal figures (hares and owls are often made).
If you want to build from stumps not just a fence for a garden bed, but a more complex figure, for example, it could be an originally designed goblin, an owl, mushrooms and other “forest” objects, then for this the master must be able to work competently with wood. This is especially true when it is necessary to cut through small and detailed parts in a stump.
If you don’t have the proper knowledge and work experience, you can make an extremely simple, but very cute figurine from a stump. It could be a charming fly agaric. To make it, you only need to prepare an enamel basin or bowl, as well as an aerosol. The bowl should be cleaned and then painted with rich red paint in a spray can. When the paint layer dries, you will need to paint snow-white circles on the red background, like on the cap of a real fly agaric.
The stump itself should be painted white. To make the figure more original, you can draw a smiling face on the stump. After this, all that remains is to put a painted hat on top of the beautiful mushroom. After this, the homemade product will be ready!
You can also build a fairy-tale tower from a stump, which will certainly become a bright accent of the local area. To make such a decoration, you need to prepare a dry oak stump, for example. It will play the role of a basis for a hut or tower, decorated with various kinds of decorative elements. Decorative components for the tower can be cut from plywood or a piece of fiberboard. The decoration should be attached to the tower using self-tapping screws. The wooden components of the homemade product will definitely need to be treated with antiseptic compounds so that they do not begin to rot in the open air.
Often, in the trunk of dry trees, very close to the surface of the earth, there are small hollows or growths. These are elements of natural origin, but they can be safely used to create an effective composition. For example, from a hollow you can lower miniature toy ladders with cute gnomes holding on to them. On the growth that is on the stump, you can place various interesting figures.
There is another unusual option for crafts made from a stump. Otherwise known as the “green monster”. For such a solution, you should prepare a stump of enormous size and with a very powerful root system. If you have one in your garden plot, that's very cool. You just need to buy a variety of moss that suits your climate at a garden store. Then he is planted on a stump. It will need to be sprayed with water periodically
It is important to ensure that the moss grows well. Once this happens, it will be possible to fully appreciate the enormity of this natural craft.
Tree trunk stairs
Trunk as a winder post for a round timber staircase
Source: oregonloghomes.com/log.htm
Staircase with railings made of tree trunks
Source: pinterest.ru/pin/121737996167265921/
Spiral staircase around a tree trunk
Source: instagram.com/p/CTD5UkTpjF-/
Natural wood steps
Source: pinterest.ru/pin/495747871483048552/
Slab staircase
Source: creativehouses.tumblr.com/post/107314282968/beautiful-use-of-wood-for-stairs-and-handrails-via
DIY stump table: 10 stunning photos
A table is an important attribute of any home. The most important action takes place at the table - the meal. Scientists advise using wooden tables - they do not emit toxins like plastic ones. Glass tables are more dangerous and can be fragile. Good wooden tables cost a lot of money, and many people decide to make a table with their own hands. The cheapest and easiest way is to make a table from hemp.
It looks very beautiful and beautiful, but this is an ordinary stump.
They simply nailed the tabletop to the stump, and it turned out to be a good table.
This type of work will require significant time and carpentry experience, but it will be worth it.
A table can be made from small stumps and varnished.
It's not particularly easy to find such a large stump, but the coffee table turned out great.
To create such a small table, we took a small stump and an ordinary round timber from a tree.
You can also put a glass top on top, which will add even more attractiveness to your table.
You can also screw wheels to the stumps and the table will be movable.
A table with lighting can also be made from hemp.
The coffee table in the shape of a month is a beautiful piece of work.
Read in full (link)
Types of tables
There are several popular types of hemp tables. Here are the main types of structures in terms of material processing features:
- Natural looking product. This is the easiest design to manufacture; it involves the use of a stump in its original form. The only processing that needs to be done is sanding. It is necessary to ensure that table users do not get splinters.
- Painted furniture. If desired, the stump can be painted in any color or patterns can be applied to it using a stencil or brush. Painting the product allows you to adapt it to the interior, made in a certain color scheme.
From the point of view of the design features of the finished product, the following types of tables can be distinguished:
- Furniture with glass. If the master plans to make a coffee or coffee table, then he can use a stump as a stand to which a glass table top is attached. The parts of the structure are connected to each other using screws or special glue.
- Product with legs. The table can be equipped with legs of any length. New wooden or chrome-plated legs, as well as legs from old furniture, are suitable for work. Forged racks of openwork shapes allow you to make the table more elegant and unusual. Legs not only improve the appearance of the furniture, but also reduce the likelihood of scratches on the floor when moving the product from place to place. In addition, the legs raise the stump above the floor and allow air to circulate underneath it. All this allows you to extend the life of the structure.
- Table on wheels. Instead of legs, you can attach wheels to the bottom of the furniture. This will significantly increase the mobility of the structure.
- A product made from bars connected to each other. If the master has several thin wooden blocks instead of one large stump, then they can be connected to each other using glue or fasteners. The result is a table with an unusual shape. It can be equipped with a glass or wooden tabletop.
- A “one on top of the other” type structure. There is an easy way to make an original coffee table. To do this, you need to take several slices of wood of different thicknesses and place them one on top of the other with a slight offset.
- A table made from a cut trunk. If the furniture maker has a whole tree trunk at his disposal, then it can be cut into two halves or carved into a rectangle and used as furniture for the home or garden.
Other design options are possible, it all depends on the imagination of the master.
Driftwood photo frame
Do you want to make your interior unique and capture the best moments of your life forever? Why not make a photo frame from driftwood? All you need for this is a couple of small branches and good glue. The branches must be carefully prepared in accordance with the first master class, and then proceed to the main part of the work.
- First, the canvas itself is made. This is a block of wood 2 cm thick. The length and width are determined by the dimensions of the photograph (9*13, 10*15 cm and so on). Please note that these indicators should have a margin of 2-3 cm, so in fact you will need a beam of 12*16 cm or 13*18 cm, respectively.
- The canvas is processed with sandpaper and coated with compounds against rotting and deterioration. Then the photo is placed face up on it, and small branches are placed around the perimeter in an indentation of 2-3 cm and fixed with glue.
- If you want to diversify your picture, you can put not just twigs, but driftwood, painted in different colors. The order of publication is determined by the author.
As a result, you will get an original, stylish photo frame that will be a wonderful gift for family and friends.
Design selection
The design of the entire table can be divided into two components: the choice of tabletop and legs.
When choosing a countertop design, it is important to consider some features of your room and your imagination:
- If you want a round or oval shape, then you should have enough space, because... it has impressive dimensions. Ideal for a large living room or hall, and also harmonizes with the gazebo;
- A small tabletop is a beautiful addition to a small living room;
- The rectangle shape is suitable for all occasions.
When choosing legs, rely solely on your taste. You can make a table with one, two, three or traditionally four legs.
What do you want the final version to look like? This is a purely personal question and depends on your taste and preferences. If you want something unusual, but nothing comes to mind, you can look at photographs of tables made from cut wood and make everything according to the sample.
Decorative tree
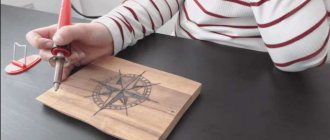
In Western countries, it has long been customary to decorate your home for one holiday or another. For example, on Christmas Eve you can see themed wreaths on almost every door. It really looks very beautiful, so we suggest making an original version from branches with your own hands.
To work we need the following:
- willow branches;
- cones;
- floral wire;
- twigs of St. John's wort and lotus seed pods;
- twine;
- gardening scissors;
- scissors;
- decorative ribbon.
We cut off the decorative floral wire and wrap several branches in a dense layer.
We connect two blanks into a longer bundle.
For more reliable fixation, we use another piece of floral wire.
We bend the workpiece and give it the shape of a wreath, as shown in the photo.
We fix it with wire, but very carefully so that it does not stand out too much against the general background.
We prepare the cones and attach them to the workpiece using wire.
For a more secure fixation, you can use a glue gun.
We attach several branches of St. John's wort to the junction of willow branches.
Cut the ribbon to the required length.
Wrap ribbon around the wreath and tie a knot. Cut off the ends so they hang down a little.
Cut another piece of ribbon and tie it around the same place. If desired, you can make a small bow for decoration.
A beautiful wreath for Christmas is ready! It looks great as a decor for a door or window.
Stylish candlestick in 5 minutes
In order to make a candlestick from twigs, we need:
- Dry twigs.
- A small glass cup.
- Hot glue gun.
- Candle.
Take a small glass cup and a hot glue gun. Apply glue to each branch with a glue gun and glue it to the cup. Thus, glue each next branch next to each other.
Take a candle of the required size and insert it inside the glass. The candlestick is ready for use.
50 DIY wooden candlesticks
Another option for making a candle holder is to simply take a thick candle and glue the twigs around the candle with a glue gun. Also, if the branches are painted gold, the effect will be more glamorous.
The branches are painted gold
Golden candlestick
You can make unusual photo frames from dry branches with your own hands.
To do this we need:
- Dry twigs.
- Wooden base for frame.
- Hot glue gun.
- Decor (moss).
Then take a decorative material, in our case moss, and stick it in the corner of the frame. The result will be a wonderful composition.
To decorate the interior of your home, we suggest making a decorative tree with flowers.
You need:
- Twigs.
- Decorative flowers (can be made from paper).
- Sea pebbles.
- A piece of foam.
- Moss.
- Hot glue gun.
- An unusually shaped flowerpot (in our case, square).
Step-by-step production of decorative wood
- Take sea pebbles and add them to the bottom of the flowerpot.
- Then place the foam on the pebbles in the flowerpot and insert the prepared twig into this foam.
- Fill it with sea pebbles again to make the branch more stable. Place the moss on top.
- Now let's start decorating the branch. Take decorative flowers and glue them with a glue gun to the branch in a chaotic manner.
- When you glue all the flowers, then your decorative tree will be ready to decorate your apartment or house.
Decorative tree painted gold
Decorative tree white
This is the easiest master class that could be shown. Let's make a decorative wreath on the door from twigs. To start and finish our craft we need:
- Twigs.
- Copper wire.
Base blank for a Christmas wreath
Take copper wire and make a circle with a hook out of it (see picture).
make a circle out of wire
We tie the branches into small bundles
Then we screw bunches of twigs to a pre-prepared circle of copper wire. And so on until the end. Your wreath is ready. You can also decorate it with spray paint, giving it your favorite color.
We attach “bundles” of branches to the base
The wreath can be decorated as you wish. And make it either New Year’s or for another occasion
How to make a Christmas wreath - 5 ways from spruce and pine in this article!
We invite you to familiarize yourself with Soup with frozen mushrooms and vermicelli
Idea #5 – garden sculptures
Anyone can create garden figurines from stumps, but real artists end up with wonderful works of art that amaze with their realism. If you are driven by the desire to simply decorate your area, then you can create a simple image that does not require special skills.
Of course, this magnificent deer calling out in the spring forest was skillfully carved from an ordinary stump by a high-level professional
Making a simple figurine from a stump is not at all difficult. Those who made snowmen in childhood can apply their accumulated experience in this case. The role of hands will be played by twigs, instead of the nose and mouth we will attach twigs, Eyes can be made from brown bottoms from plastic bottles. The role of the pupil will be played by the cork from the same bottles.
All this is attached to the stump with self-tapping screws. On the horizontal surface of the cut, you can simply lay out pine cones, which will imitate hair. This garden guard, which we whipped up, is ready.
But any schoolchild can make such a funny guard for a dacha, and this is precisely why such a garden sculpture is valued
If it happened that you had to cut down a whole row of country trees, do not be sad. This situation also has its positive side. But you now have a large number of stumps located close to each other. And this is not bad at all. Make them into a fairyland for your children, putting into practice all the information that you have already received in this article.
It will be just a wonderful place to play. First you have to clear each stump of bark. For this you will need a chisel and a hammer. The chisel must be inserted between the bark and the tree trunk, then gently tap it with a hammer. The bark will move away from the trunk and soon the stump will completely lose it. Now it can be thoroughly sanded using medium-grit sandpaper for this purpose.
Such an owl could easily become the companion of Baba Yaga herself and settle in her hut, flying out from time to time to hunt
Be sure to remove wood dust formed during work with a damp cloth. The wood prepared in this way should be treated with an antiseptic, which will protect it from rotting.
Now you can start decorating the stump. Let's choose a large stump to turn it into Baba Yaga's real house. Let's take chalk and outline the location of the future windows and doors of the grandmother's hut. Recesses in wood for doors and windows can be made using a chisel and hammer.
We will need pieces of boards from which we will make doors and window shutters. These parts of the future structure can be painted right now, while they are not yet nailed into place. Doors and shutters should be nailed to the places marked on the stump using nails whose heads have been bitten off. When finishing decorating the hut, you can collect branches and driftwood of unusual shapes from the area to stick them around Baba Yaga’s house. Let them portray dense years.
On smaller stumps you can depict heroes of a variety of folk tales or funny cartoon characters. You can decorate these stumps and draw your intended characters on them using paints for outdoor work. The images outside will wonderfully complement the flowers planted directly inside the stumps. How to do this was described in detail at the beginning of the article. You can limit yourself to pots with plants.
Another wonderful composition, made by a professional artist and sculptor, creates a great mood inherent in a small fairy-tale corner of your garden
We'll turn a couple more stumps into children's chairs. To do this, we won’t even cut out the massive back. If you have old chairs, use their backs for this job. They should be carefully freed from varnish, and then, using ordinary nails, nailed to the stump seats. All that remains is to paint the finished chairs in bright colors that children will definitely like.
Simply turn the small remaining stumps into a flock of fly agarics, using bowls or basins of the appropriate size as their caps. Now you know exactly how such fly agarics can be made. That's it, the improvisation on the theme of the fairy tale is ready.
Advantages and disadvantages
Landscape design lovers are always asked the same question - why build a flower bed in a stump, if you can buy and install an ordinary pot or flowerpot for a full-fledged flower garden. There are many answers, but the main advantage is that the flowerbed looks completely different. A plastic or concrete container does not improve the design of the site in any way, while small flower beds on stumps enliven the landscape no worse than garden gnomes and elves.
There are, of course, negative sides, for example, stumps remain in place, instead of uprooting and clearing the area. In winter or autumn, when the flowers in the flower beds have long been forgotten, such a “gift” can cause garden tools to fall or break.
Advice! They try not only to plant flower beds with plants, but also to make an additional fence for the flower bed from stumps.
The result is a complete composition, especially since there is plenty of material, old trunks and logs left over from cutting the tree.
Hemp flowerbed
You will need: a dry stump, a chainsaw, an axe, a piece of polystyrene foam, a ruler, an antiseptic, paint, soil, sand, flowers (which ones are best to use are described in the master class in paragraph 7).
Master Class
- Trim the bottom edge with a chainsaw to create a level base.
- Draw contours on the surface of the stump, retreating at least 5 cm.
- Make 10-20 cm indentations in the stump using a chainsaw and an axe.
- Treat the inner walls of the stump with an antiseptic or paint it. This way the stump will last longer.
- Using a chainsaw, drill a hole for drainage to prevent moisture from accumulating, then insert a piece of foam.
- Mix store-bought soil with garden soil and add sand, then pour it into the stump.
- Plant flowers. Flowers with a small root system are best suited, such as: tulips, begonia, petunia, geranium, daffodils, oxalis, purslane, pansies, primroses, marigolds...
- Water your flowers regularly and take care of your flower bed.
The hemp flower bed is ready! I recommend watching this video!
I recommend viewing a photo gallery of ideas for creating flower beds on a stump!
And even a stump
If a stump has formed on the site, you can use it as the center of the composition, surrounding it with logs. The main thing is that the hemp furniture has an even cut - the table and chairs will be stable. If desired, they are supplemented with backrests made of branches and pillows are placed.
You can even use an old rotten stump as a flower pot. They are placed in the rotten middle only in a pot so that the wood does not completely collapse, and if there is moss and other vegetation on the stump, this is only a plus: they will add decorativeness.
The quirkiness of roots, branches or driftwood creates endless scope for implementing the most unexpected solutions. They are fabulously beautiful and at the same time look cozy, but most importantly: they exist in a single copy.
Can be found under your feet
Much of what can be successfully used for the interior can be found in the forest or even on the street. We have already talked about how saw cuts can be used; but this is not all that can be “borrowed” from nature.
Stump
This “good” can be found both in the forest belt and on the plot. By subjecting it to minimal processing (grinding and varnishing), you can get a table, bedside table, lamp stand or chair. The natural pattern characteristic of wood will highlight your taste.
Branches and brushwood
To understand how to use them in the interior, it is better to familiarize yourself with the numerous photos published on the World Wide Web. So, you can find a photo of a table made in the form of an armful of branches, intercepted with twine in several places.
All you have to do is find a large tree branch and paint it in bright colors. Then you need to secure it to the wall as securely as possible. If the side branches are strong enough, you can hang small toys or colorful patches on them. The child will be delighted with such a bright detail, and most importantly, he will be able to help create it with his own hands.
driftwood
Often in nature you can find driftwood that resembles various shapes. They can also be used in the interior of an apartment.
Picturesque little things
Wood in the interior can be present unobtrusively, but expressively. Decor made from this material will highlight the individual style of the apartment.
This list may include:
- floor vases;
- candlesticks for walls;
- figurines;
- caskets;
- spoons and utensils;
- masks for wall decoration.
Full length
Modern designers offer truly imaginative solutions to the most daring clients. For example, a real tree in a tub. Standard apartments are not suitable for this, but a country house with a large area is just what you need. For example, in Europe, a real fashion trend in recent years is a live spruce in a pot.
The combination of wood and stone in the interior looks natural. Therefore, it is logical to use a small stone if you need to somehow decorate the space inside a tub with a tree.
Pleasant trifles
A stylish frame of small branches will radically transform a familiar attribute of your home decor:
- vase;
- watch;
- photo frame;
- mirror;
- candelabra;
- shade.
In the last two options, it is worth considering fire safety rules.
And even a stump
If a stump has formed on the site, you can use it as the center of the composition, surrounding it with logs. The main thing is that the hemp furniture has an even cut - the table and chairs will be stable. If desired, they are supplemented with backrests made of branches and pillows are placed.
You can even use an old rotten stump as a flower pot. They are placed in the rotten middle only in a pot so that the wood does not completely collapse, and if there is moss and other vegetation on the stump, this is only a plus: they will add decorativeness.
The quirkiness of roots, branches or driftwood creates endless scope for implementing the most unexpected solutions. They are fabulously beautiful and at the same time look cozy, but most importantly: they exist in a single copy.
Bed with you
- tent
- sleeping bag
- travel mat
Some even take an inflatable pillow.
For hikes during periods of sub-zero temperatures, many people use special stoves to heat tents.
The tent is designed to protect from wind and precipitation. At a basic level, it also retains heat. Sleeping bags can have a different range of optimal temperatures, even seriously negative ones. An inflatable mat or foam is spread under the sleeping bag to block the effects of cold from the ground.
This is what a hike looks like when there is no plan to simulate severe trials. But in reality, many people come with only a sleeping mat and a light sleeping bag. All other functions of protection from bad weather and cold are assigned to available means. Those who find themselves in the wild without any equipment at all are forced to get out in even more radical ways. We'll talk about this further.